Rethinking Your Landscape Editing Order in ON1 Photo RAW 2019

Rethinking Your Landscape Editing Order in ON1 Photo RAW 2019

I have a spreadsheet that tracks every hour I’ve recovered through better workflow systems. It’s embarrassing how much of that time was lost not to bad tools, but to doing things in the wrong order. Sequence matters enormously in post-production, whether you’re batch-processing 500 product shots or sitting down with a single landscape file you actually care about. That’s why I keep coming back to tutorials from photographers who think systematically, not just creatively.

How to Paint Realistic Splatter Effects Using a Custom Brush in Photoshop

How to Paint Realistic Splatter Effects Using a Custom Brush in Photoshop

There’s a specific category of retouching request I get from ad agency clients that used to slow me down every single time: adding painterly, organic-looking elements to an otherwise clean photograph. Powder bursts, ink splashes, paint splatters. The kind of thing that looks effortless in the final comp but eats up an hour if you’re doing it by hand with a generic round brush. What I eventually figured out, and what this tutorial nails cleanly, is that the real solution lives inside Photoshop’s Brush Settings panel, a place most people open once, get confused by, and never return to.

One-Click Consistency: How the Phil Chester Lightroom Presets Actually Hold Up Across Real Shoots

One-Click Consistency: How the Phil Chester Lightroom Presets Actually Hold Up Across Real Shoots

I’ve spent fifteen years in commercial photography studios watching editors burn hours on color work that should take minutes. The problem is rarely skill. It’s the absence of a reliable starting point. You can be an excellent retoucher and still waste forty-five minutes per image just trying to land on a baseline look that feels consistent with the last shoot. That inconsistency is what clients notice, even when they can’t articulate why a gallery feels “off.

Fake Light Rays That Actually Look Real: A Lightroom Brush Technique Worth Stealing

Fake Light Rays That Actually Look Real: A Lightroom Brush Technique Worth Stealing

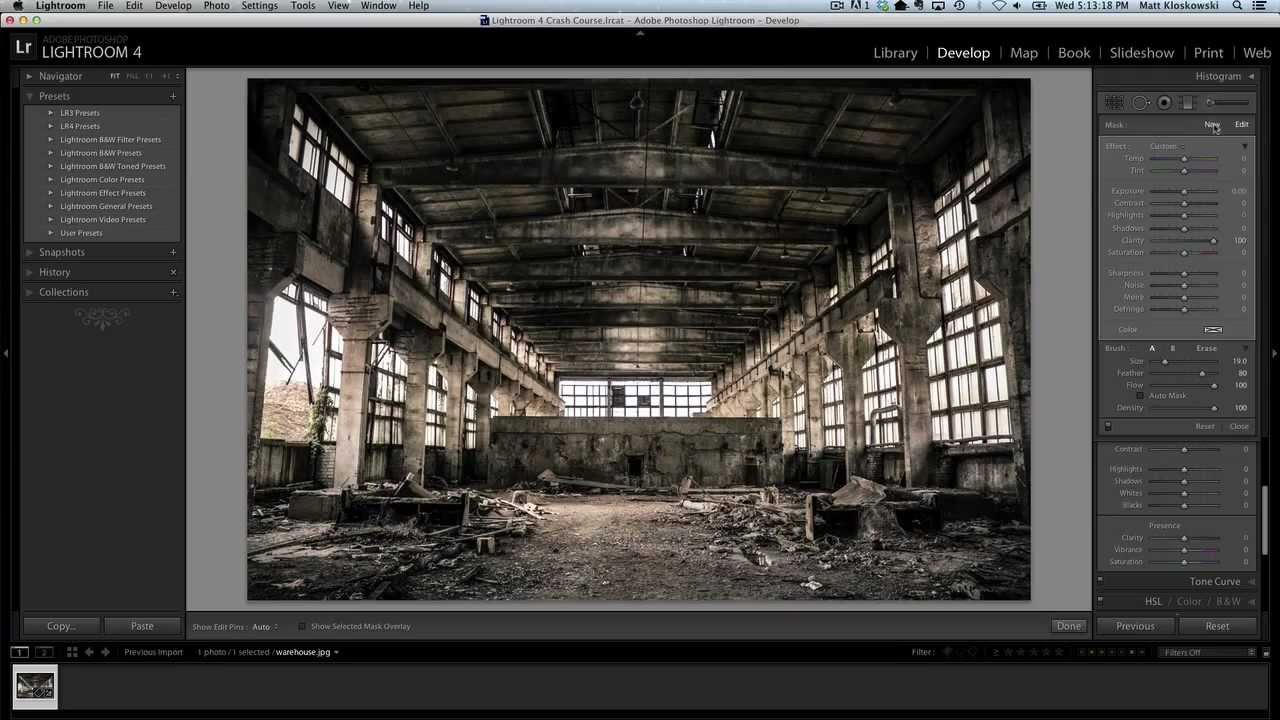
Most of my work lands in front of art directors who’ve seen every Photoshop trick in the book. When I show them a before-and-after with added light rays, the question is never “did you add that?” It’s “how did you do it so fast?” That’s the bar I care about: techniques that look intentional and take almost no time to execute. I came across this one in a Matt Kloskowski tutorial on painting light with Lightroom’s adjustment brush, and it earned a permanent spot in my toolkit within about ten minutes of watching it.

Generative Fill vs. Content-Aware Fill: A Working Photographer's Guide to Removing Distractions in Photoshop

Generative Fill vs. Content-Aware Fill: A Working Photographer's Guide to Removing Distractions in Photoshop

Distraction removal is one of those tasks that sounds simple until you’re staring at a client’s hero shot with a rogue piece of equipment cutting through an otherwise clean frame. I’ve been in that position more times than I can count, and the solution has changed dramatically over the last few years. What used to require careful cloning, patch work, and a lot of crossed fingers has become something closer to a creative decision than a technical grind.

Freeze the Moment: How to Use Flash Duration and Shutter Speed Together for Sharp Action Shots

Freeze the Moment: How to Use Flash Duration and Shutter Speed Together for Sharp Action Shots

Action photography on location has a way of exposing every gap in your lighting knowledge. I’ve spent fifteen years in commercial studios where we had the luxury of controlling nearly every variable, but the moment a client wants something kinetic, something with real movement and energy, the comfortable math of a controlled environment goes sideways fast. Freezing motion with strobes sounds simple until you’re watching your subject blur against a background you actually want to see, and you realize your shutter speed and your flash are working against each other instead of together.

Presets Aren't Shortcuts — They're a Thinking Tool (Here's How to Use Them That Way)

Presets Aren't Shortcuts — They're a Thinking Tool (Here's How to Use Them That Way)

I’ll be honest with you. Early in my commercial work, I treated presets the way a lot of people do: click, hope, move on. I bought packs, applied them wholesale to client images, and wondered why the results felt borrowed rather than intentional. It took a few years of production pressure, and eventually watching people who actually knew what they were doing, to understand that presets are a diagnostic tool first and a finishing tool second.

Three Photoshop Tools That Finally Make Product Compositing Look Real

Three Photoshop Tools That Finally Make Product Compositing Look Real

Perspective has always been the thing that gives product composites away. You can nail the cutout, match the color grade, even add a convincing shadow, and the image still looks wrong because the object is sitting at an angle that nothing else in the scene shares. In commercial post-production, I’ve spent more hours than I care to count nudging Free Transform handles, eyeballing vanishing points, and making judgment calls that my clients’ art directors would later second-guess.

Three Variables That Actually Freeze Action with Strobes (No High-Speed Sync Required)

Three Variables That Actually Freeze Action with Strobes (No High-Speed Sync Required)

Most of the photographers I work with in commercial studios assume you need high-speed sync to freeze a moving subject. It’s an understandable assumption. HSS is the obvious tool, it’s what the gear manufacturers push, and it sounds technically correct. But HSS comes with a real cost: it cuts your effective flash power significantly, which means you’re fighting for exposure before you’ve even started solving the motion problem. There’s a cleaner approach, and Jay P.

Work Smarter With Lightroom's Adjustment Brush: The Auto Mask Shortcut That Changes Everything

Work Smarter With Lightroom's Adjustment Brush: The Auto Mask Shortcut That Changes Everything

If you shoot anything that requires selective exposure adjustments — portraits, architecture, product work, anything with a foreground subject you want to separate from a background — you already know the adjustment brush is one of the most powerful tools in Lightroom and Camera Raw. You probably also know the frustration of painting too far, blowing past an edge, and having to redo a mask you spent five minutes building. That specific pain is what pulled me into Watch the full tutorial on YouTube from Matt Kloskowski, a photographer and educator whose approach to Lightroom workflow I’ve respected for years.

A Focused Lightroom Landscape Workflow That Respects Your Time

A Focused Lightroom Landscape Workflow That Respects Your Time

I have a bad habit of over-engineering things. Fifteen years in commercial studios will do that to you. I’ve built Photoshop action sets with 40 steps, color-coded folder structures across four backup drives, and batch pipelines that could process half a year’s worth of product shots before lunch. So when I come across a landscape photographer who strips a complex editing process down to only what actually matters, I pay attention.

Kill the Post-Processing Paralysis: A Landscape Editor's Minimal Workflow That Actually Works

Kill the Post-Processing Paralysis: A Landscape Editor's Minimal Workflow That Actually Works

There’s a specific kind of discouragement that hits landscape photographers and I’ve watched it happen to clients of mine for years. You nail the shot in the field, drive home buzzing, load the RAWs onto the computer, and then just… stall. The files look flat. The shadows are a mess. The sky is blown or the foreground is a muddy void. And because you don’t have a clear entry point into the edit, you close the application and tell yourself you’ll come back to it.