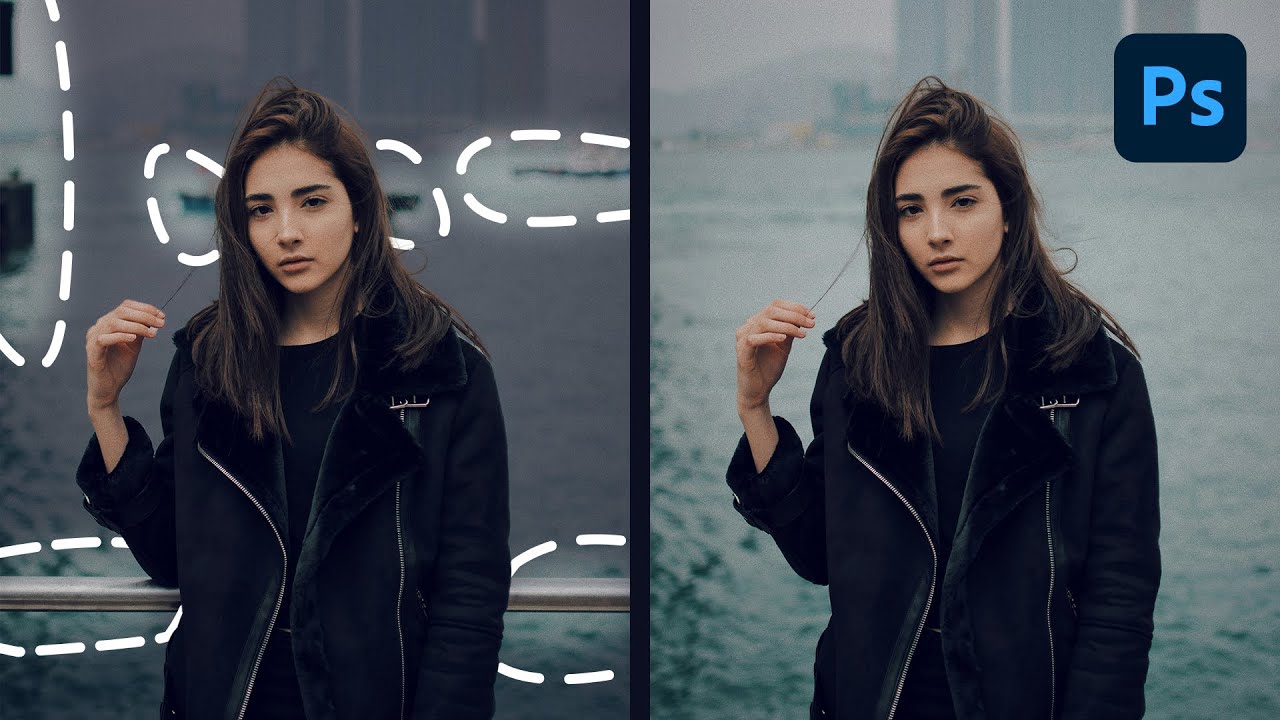
Every portrait photographer knows the feeling. You nail the light, the expression is perfect, the client is thrilled with the shoot — and then you open the RAW files and spot the lawn chair in the lower left corner. Or the exit sign bleeding in behind your subject’s shoulder. Or the boats and dock railing cutting across an otherwise clean waterfront background. These aren’t disasters, but they eat time. In my years running post-production for ad agencies and e-commerce brands, I’ve watched small distractions like these turn a one-hour retouch into a three-hour one.
In this Aaron Nace (PHLEARN) tutorial, the fix takes under two minutes per distraction. Watch the full tutorial on YouTube — but if you want a written breakdown you can follow step by step at your own pace, here’s exactly what Aaron does and why it works.
The core tool is Photoshop’s Generative Fill, powered by Adobe Firefly. What makes this workflow genuinely fast isn’t just the AI quality — it’s how few decisions you have to make. No clone stamp source point. No content-aware fill direction settings. No healing brush blending mode juggling. You select, you generate, you pick the best result. That’s the whole loop.
Step 1: Open Your Image and Set Up Your Workspace
 Three portrait images open in Photoshop workspace
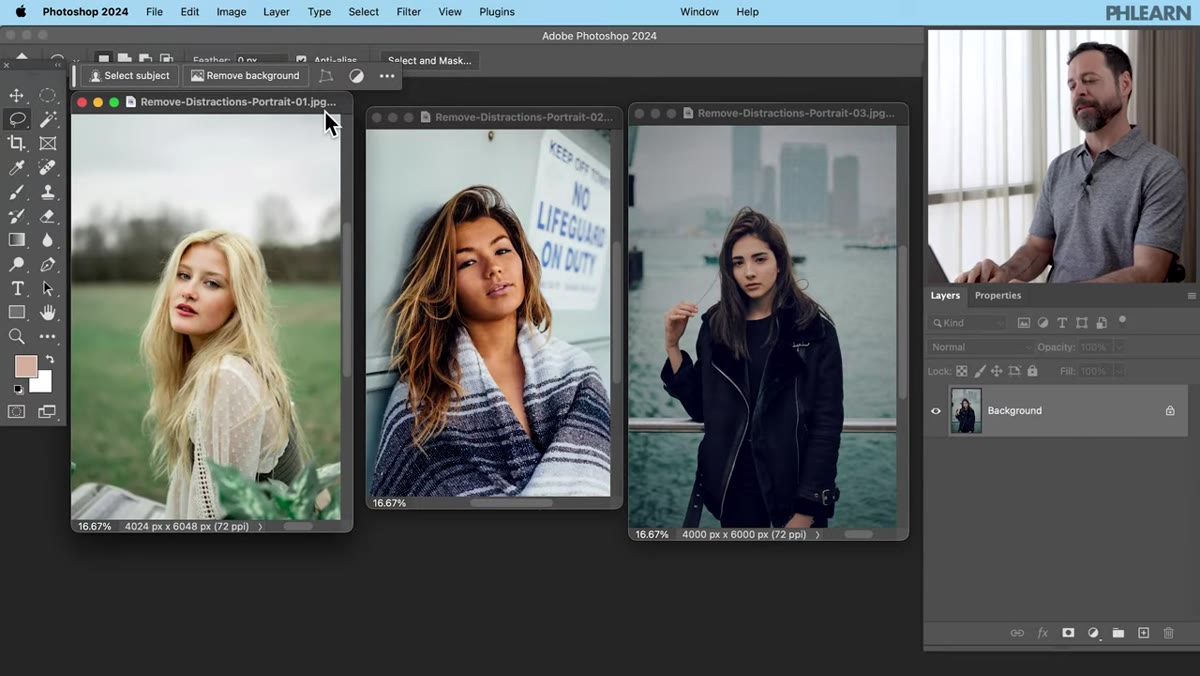
Start with your portrait open in Photoshop. Aaron works with three different example images to show the technique applies whether your distraction is in the foreground, background, or both. Press F to enter full-screen mode so you can see the full composition without panels eating into your view. This matters more than it sounds — you want to see how the distraction reads in context before you decide how tightly to select it.
Three portrait images open in Photoshop workspace
Start with your portrait open in Photoshop. Aaron works with three different example images to show the technique applies whether your distraction is in the foreground, background, or both. Press F to enter full-screen mode so you can see the full composition without panels eating into your view. This matters more than it sounds — you want to see how the distraction reads in context before you decide how tightly to select it.
Step 2: Grab the Lasso Tool
 Lasso tool selected in Photoshop toolbar
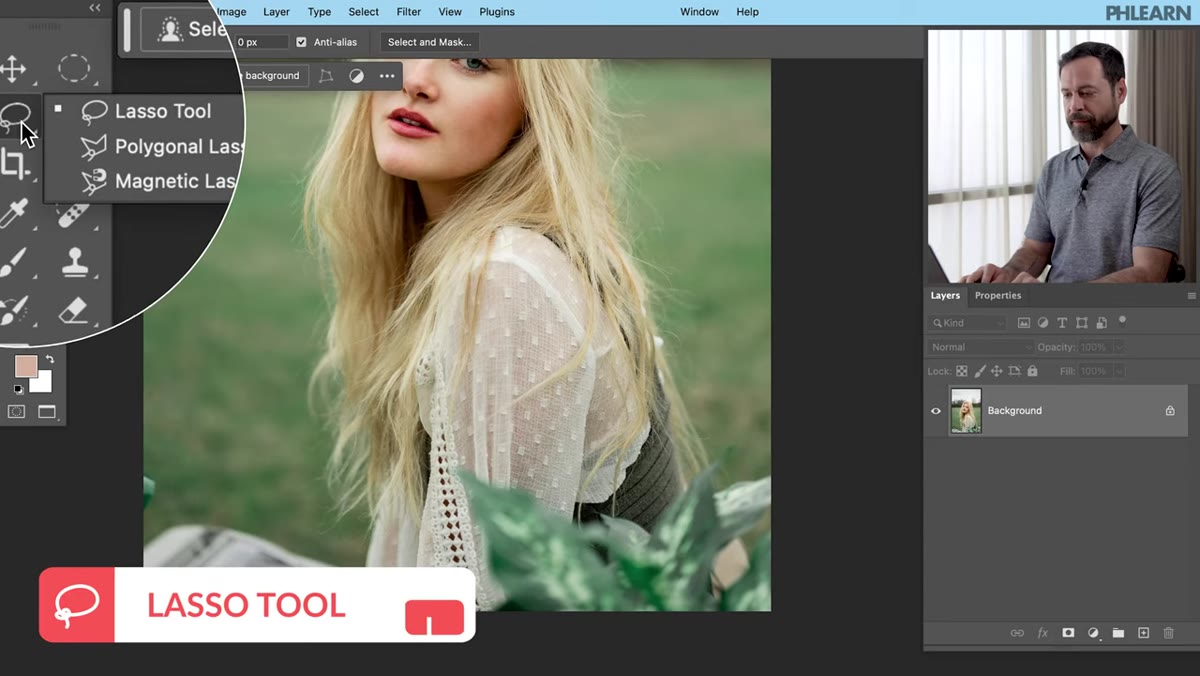
Press L to activate the Lasso tool, or click it in the toolbar. Aaron is deliberate about this choice. You don’t want the Polygonal Lasso or the Magnetic Lasso here — the freehand Lasso keeps you moving quickly and reinforces the point that your selection doesn’t need to be precise. Pixel-perfect edges are irrelevant when Generative Fill is doing the reasoning about what belongs in the scene.
Lasso tool selected in Photoshop toolbar
Press L to activate the Lasso tool, or click it in the toolbar. Aaron is deliberate about this choice. You don’t want the Polygonal Lasso or the Magnetic Lasso here — the freehand Lasso keeps you moving quickly and reinforces the point that your selection doesn’t need to be precise. Pixel-perfect edges are irrelevant when Generative Fill is doing the reasoning about what belongs in the scene.
Step 3: Draw a Rough Selection Around the Distraction
 Loose lasso selection drawn around foreground plant
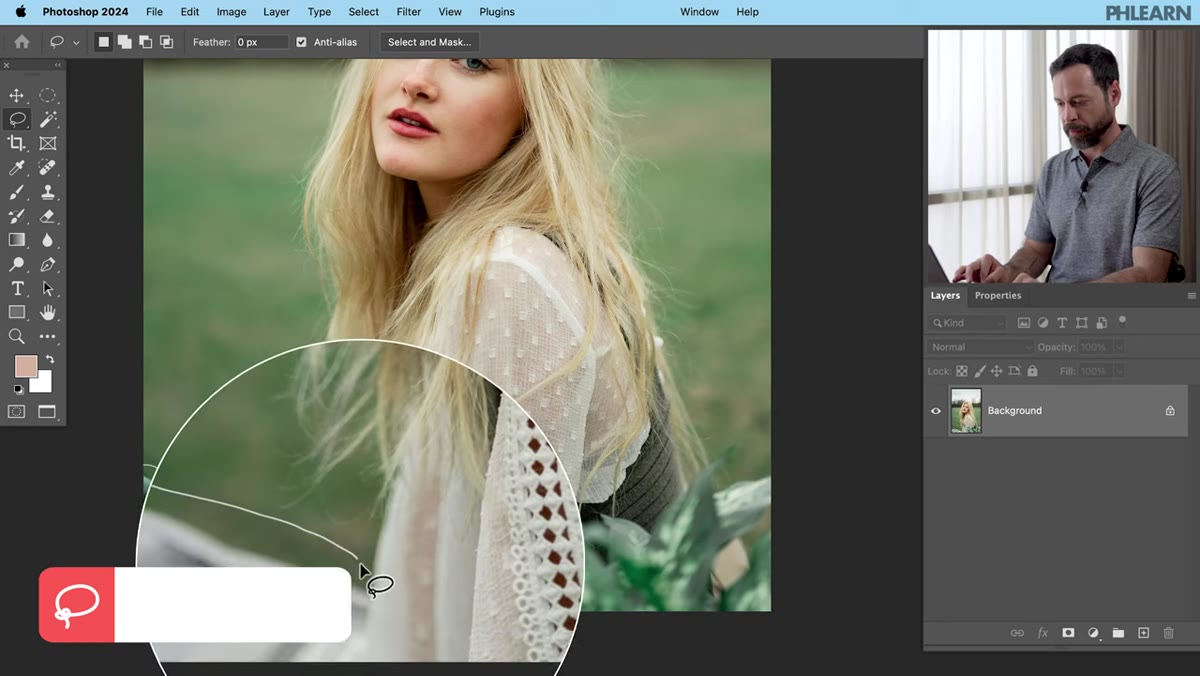
Click and drag to loosely encircle the object you want to remove. Aaron actually emphasizes making the selection slightly larger than the object itself, not tighter. Give it some breathing room into the surrounding background. If you accidentally release the mouse and close your selection early, hold Shift and draw a new lasso segment to add to the existing selection. You can build a complete selection from multiple strokes this way, which is useful when a distraction wraps around a subject’s hair or clothing edge.
Loose lasso selection drawn around foreground plant
Click and drag to loosely encircle the object you want to remove. Aaron actually emphasizes making the selection slightly larger than the object itself, not tighter. Give it some breathing room into the surrounding background. If you accidentally release the mouse and close your selection early, hold Shift and draw a new lasso segment to add to the existing selection. You can build a complete selection from multiple strokes this way, which is useful when a distraction wraps around a subject’s hair or clothing edge.
Step 4: Open Generative Fill from the Contextual Taskbar
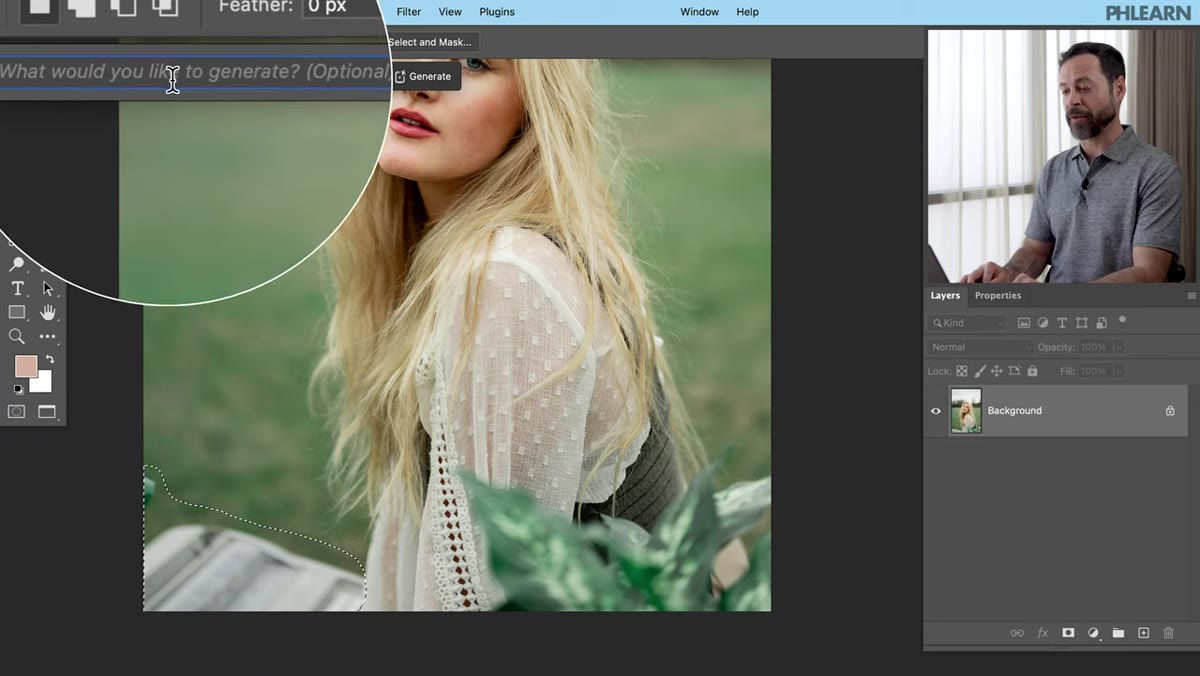 Contextual taskbar showing Generative Fill button
With your selection active, look at the contextual taskbar that floats near the bottom of your canvas. Click “Generative Fill.” A text prompt field will appear. Here’s the key behavior to understand: leave the prompt field empty. When you submit with no text, Photoshop interprets that as a removal instruction — it analyzes the surrounding pixels and fills the selected area as if the object was never there. If you type something instead, it will try to replace the selection with whatever you describe. For distraction removal, blank is the right move.
Contextual taskbar showing Generative Fill button
With your selection active, look at the contextual taskbar that floats near the bottom of your canvas. Click “Generative Fill.” A text prompt field will appear. Here’s the key behavior to understand: leave the prompt field empty. When you submit with no text, Photoshop interprets that as a removal instruction — it analyzes the surrounding pixels and fills the selected area as if the object was never there. If you type something instead, it will try to replace the selection with whatever you describe. For distraction removal, blank is the right move.
Step 5: Click Generate and Wait for the Cloud
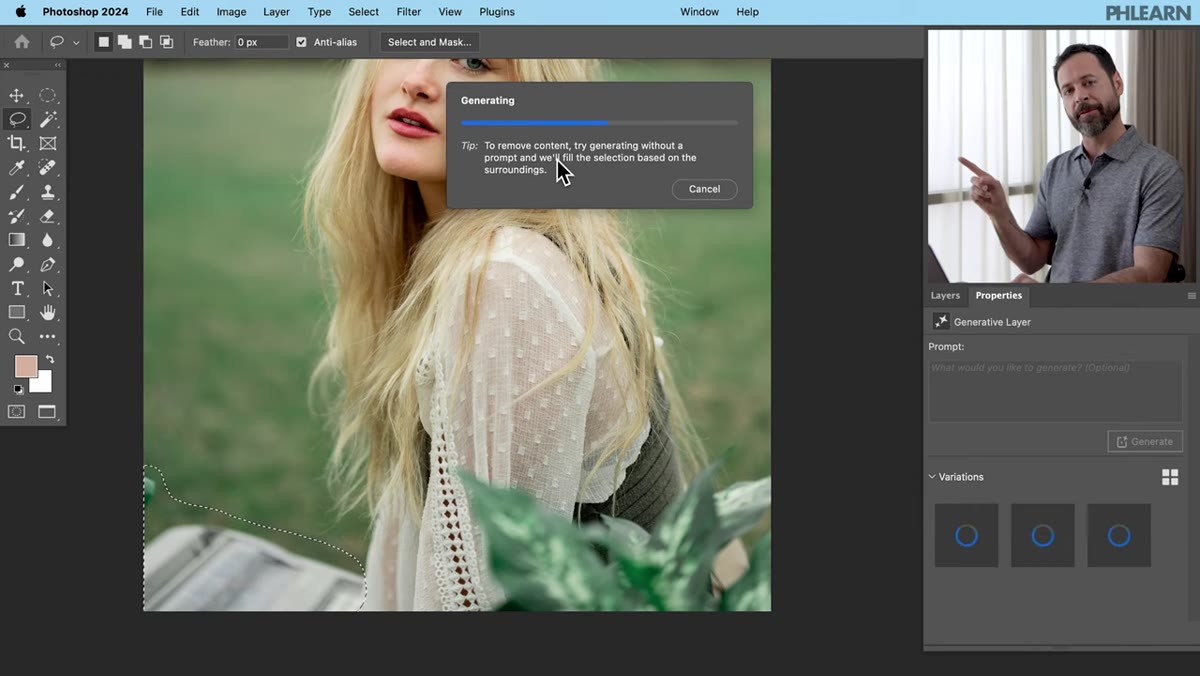 Generate button clicked, processing indicator active
Hit Generate. Photoshop sends your selection and surrounding context to Adobe’s cloud servers, processes it through Firefly, and returns three variations. The turnaround is typically a few seconds to about half a minute depending on complexity and your connection. Each variation sits in the Properties panel as a numbered option. The generated content lands on its own Generative Layer above your original, which means your source image is untouched — a non-destructive workflow by default.
Generate button clicked, processing indicator active
Hit Generate. Photoshop sends your selection and surrounding context to Adobe’s cloud servers, processes it through Firefly, and returns three variations. The turnaround is typically a few seconds to about half a minute depending on complexity and your connection. Each variation sits in the Properties panel as a numbered option. The generated content lands on its own Generative Layer above your original, which means your source image is untouched — a non-destructive workflow by default.
Step 6: Review the Three Variations and Pick the Best One
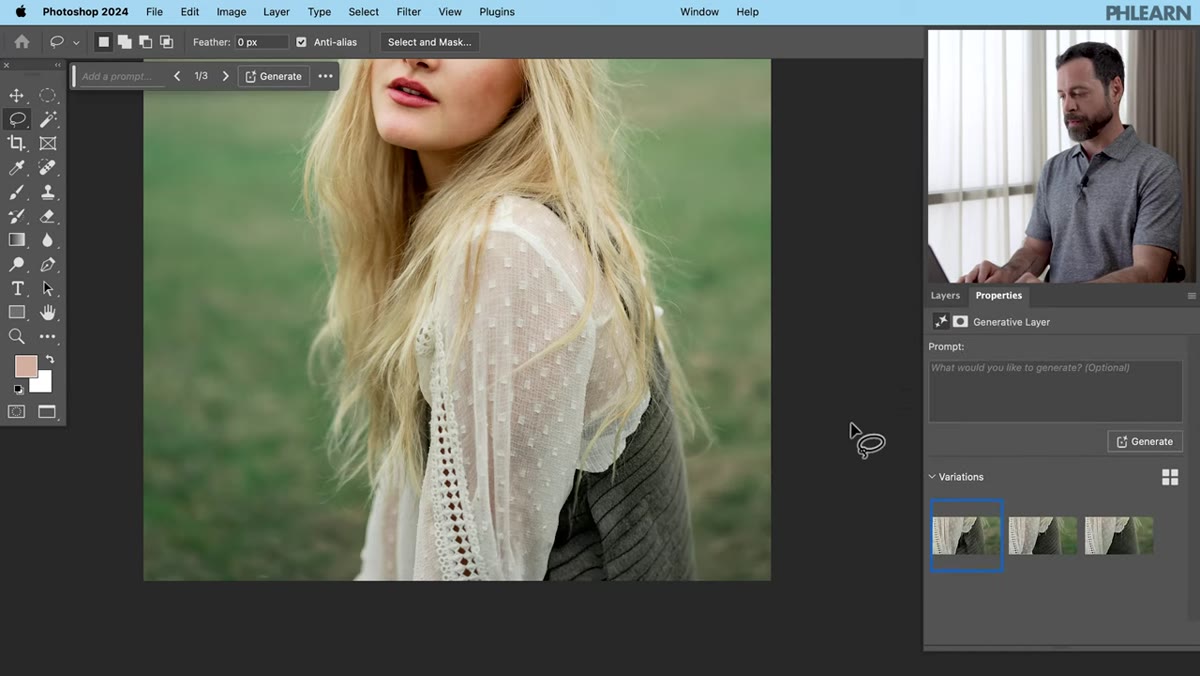 Properties panel showing three generative fill variation options
In the Properties panel, you’ll see three thumbnail variations of the fill. Click through them. Aaron often finds the first or second option is solid, but the third occasionally handles complex textures like foliage or sky gradients better. If none of the three nail it, you can click Generate again for three fresh options. For most clean backgrounds, one round is enough. For busier scenes with a lot of competing texture, two rounds gives you more options to evaluate.
Properties panel showing three generative fill variation options
In the Properties panel, you’ll see three thumbnail variations of the fill. Click through them. Aaron often finds the first or second option is solid, but the third occasionally handles complex textures like foliage or sky gradients better. If none of the three nail it, you can click Generate again for three fresh options. For most clean backgrounds, one round is enough. For busier scenes with a lot of competing texture, two rounds gives you more options to evaluate.
Step 7: Repeat for Each Remaining Distraction
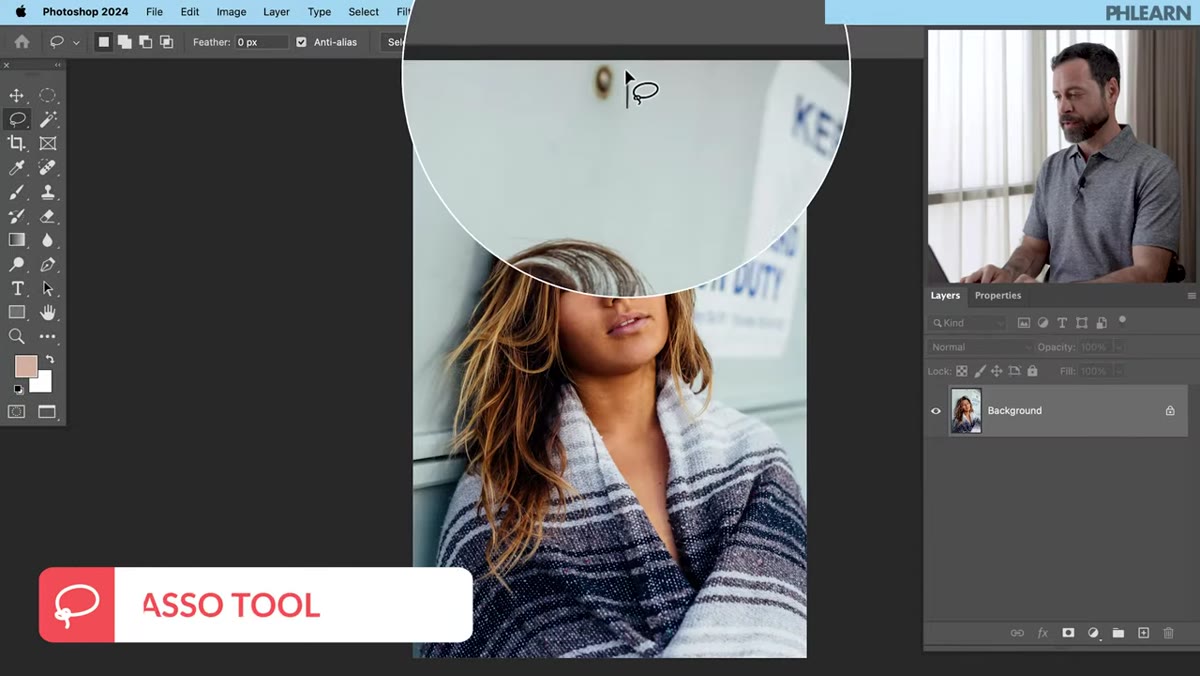 Second lasso selection drawn around background sign
Go back to the Lasso tool and repeat the process for any remaining distractions. Aaron works through each object separately rather than trying to select everything at once — at least for objects in different parts of the frame. The AI does better work when it has clean surrounding context to sample from. Once you’ve cleared a nearby distraction, that cleaned area becomes usable context for the next selection. Work from the most isolated objects inward toward the subject.
Second lasso selection drawn around background sign
Go back to the Lasso tool and repeat the process for any remaining distractions. Aaron works through each object separately rather than trying to select everything at once — at least for objects in different parts of the frame. The AI does better work when it has clean surrounding context to sample from. Once you’ve cleared a nearby distraction, that cleaned area becomes usable context for the next selection. Work from the most isolated objects inward toward the subject.
What I’d Add From My Own Workflow
One thing Aaron doesn’t mention in the tutorial but that I’ve built into my own process: after you accept a Generative Fill result, immediately rename the layer. Something like “Remove - lawn chair” or “Remove - exit sign.” It takes three seconds and it saves a lot of confusion later when a client asks for a revision and you’re looking at a stack of layers all named “Generative Fill.”
I’d also note that Generative Fill handles foreground distractions with soft, out-of-focus bokeh better than it handles crisp-focus background objects. If your distraction is in the sharp focal plane, inspect the result carefully at 100% zoom before calling it done. The AI occasionally introduces subtle pattern repetition on hard-edged architectural elements that reads as artificial at full resolution even when it looks fine at fit-to-screen. A quick spot-check at 100% adds maybe thirty seconds and catches the edge cases before they get to the client.
The real value of this workflow isn’t just speed — it’s that it lowers the psychological barrier to shooting in imperfect locations. When you know you can clean a background in two minutes instead of forty, you stop avoiding the slightly messier spots and start finding the best light regardless of what’s in the frame. That shift in thinking has changed how I direct on-location shoots.
Watch the full tutorial on YouTube to see Aaron work through all three portrait examples with live commentary — the pacing makes it easy to follow along in Photoshop at the same time.
Comments (2)
Wow, I had no idea you could do this. Mind blown.
This is going in my reference folder. Incredibly useful.
Leave a Comment