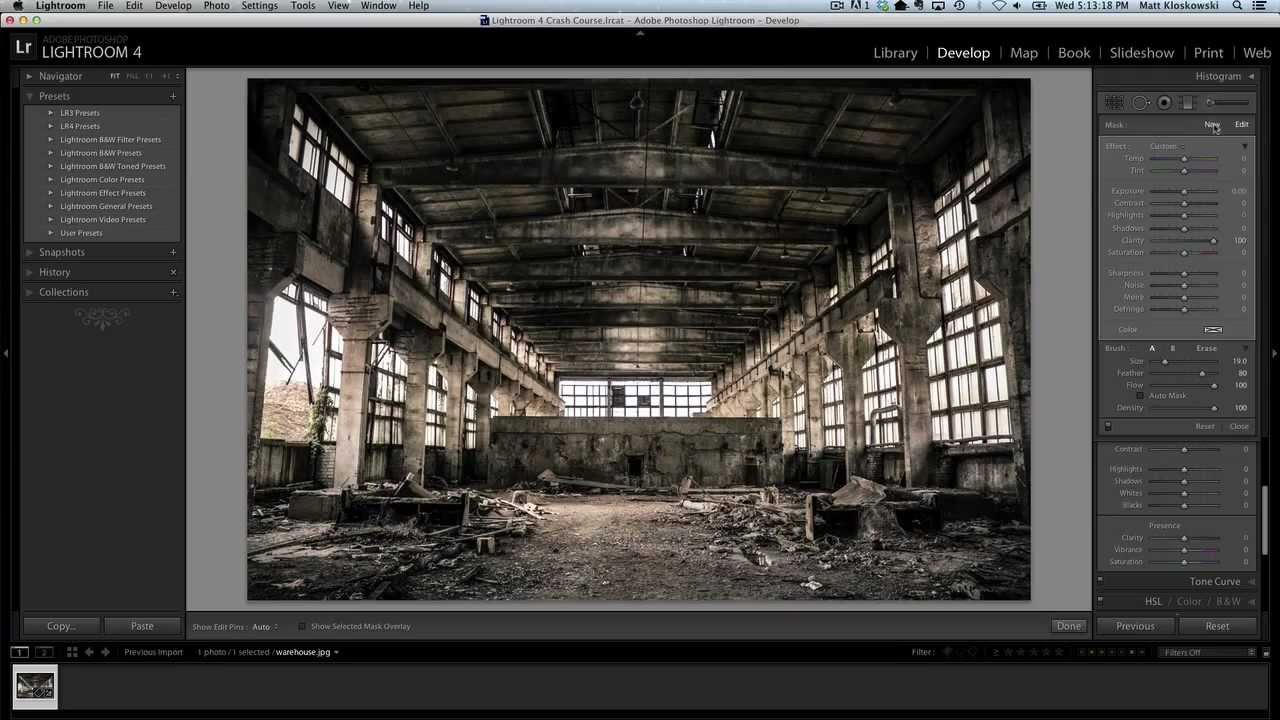
There’s a specific kind of frustration that comes from building a look you love inside Lightroom, knowing you’re going to want it again, and then realizing you can’t save it the way you’d expect. I’ve been doing post-production work for fifteen years, and I still run into this. You develop a multi-step technique, something that takes four or five minutes to apply manually, and your brain immediately starts calculating how many times you’ll have to repeat that process across a shoot. That’s not paranoia. That’s workflow math.
The specific problem that surfaced for me recently came from a KelbyOne tutorial by Matt Kloskowski, Watch the full tutorial on YouTube, where he walks through a technique for stacking Clarity using the adjustment brush to get a grungy, textured, HDR-style look without any plugins or round-trips to Photoshop. The technique works beautifully. The catch is that Lightroom won’t let you save adjustment brush settings inside a preset. Matt’s workaround is clever, practical, and something I immediately tested on a batch of industrial product shots I was editing that same afternoon.
Here’s the full breakdown so you can follow along without pausing the video every thirty seconds.
Step 1: Understand Why Stacked Clarity Works
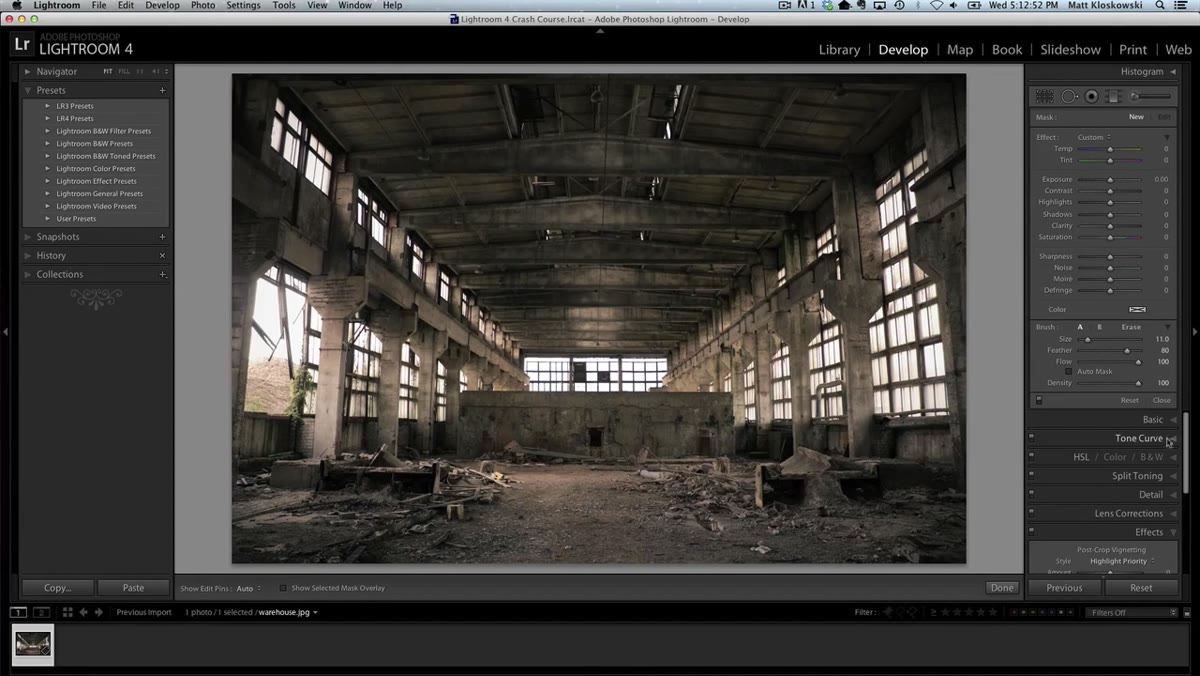 Basic panel with Clarity slider maxed at 100
The Clarity slider in Lightroom’s Basic panel tops out at 100. For most portraits or clean commercial work, that ceiling is fine. But for gritty textures, architectural details, or anything where you want that punchy, almost tactile feel, 100 isn’t always enough. The adjustment brush has its own Clarity slider, also maxed at 100, but because each brush stroke is its own independent layer of adjustment, you can apply multiple passes. Paint the whole image at plus 100, create a new brush, paint the whole image again, and you’ve effectively doubled the intensity. Keep stacking and the effect compounds.
Basic panel with Clarity slider maxed at 100
The Clarity slider in Lightroom’s Basic panel tops out at 100. For most portraits or clean commercial work, that ceiling is fine. But for gritty textures, architectural details, or anything where you want that punchy, almost tactile feel, 100 isn’t always enough. The adjustment brush has its own Clarity slider, also maxed at 100, but because each brush stroke is its own independent layer of adjustment, you can apply multiple passes. Paint the whole image at plus 100, create a new brush, paint the whole image again, and you’ve effectively doubled the intensity. Keep stacking and the effect compounds.
This is the core of the technique. It’s not a hack or a bug exploit. It’s just using Lightroom’s local adjustment architecture the way it was designed, just pushed further than most people bother to go.
Step 2: Apply Multiple Adjustment Brush Passes
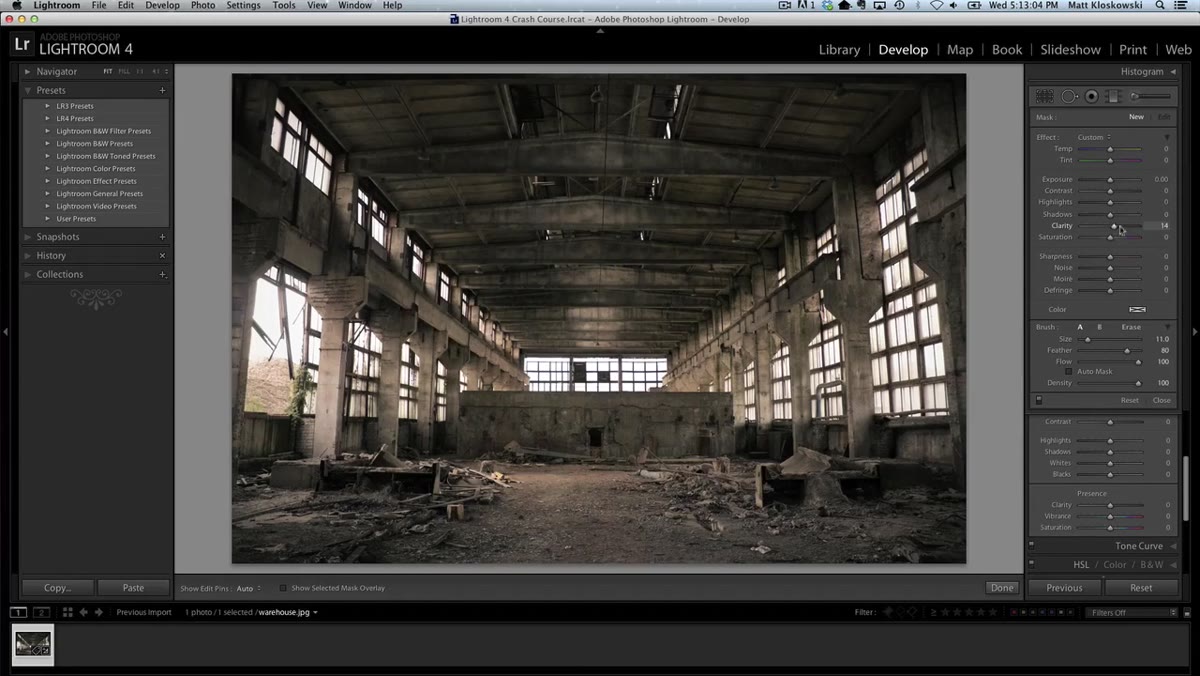 Adjustment brush panel with Clarity set to 100
Go to the Develop module and select the Adjustment Brush (keyboard shortcut: K). Set Clarity to plus 100 and everything else to zero. Make your brush large enough to cover the image in a few strokes, then paint over the entire photo. Once you’ve covered it, click “New” in the brush panel header rather than continuing to paint. This creates a second, independent adjustment pin. Set Clarity to plus 100 again and paint over the entire image a second time.
Adjustment brush panel with Clarity set to 100
Go to the Develop module and select the Adjustment Brush (keyboard shortcut: K). Set Clarity to plus 100 and everything else to zero. Make your brush large enough to cover the image in a few strokes, then paint over the entire photo. Once you’ve covered it, click “New” in the brush panel header rather than continuing to paint. This creates a second, independent adjustment pin. Set Clarity to plus 100 again and paint over the entire image a second time.
Repeat that process a third time if you want maximum intensity. Three passes at plus 100 gives you a result that no single slider in the Basic panel can match. On rough textures, stone, weathered metal, brick, the effect is aggressive in the best possible way. On portraits it’s usually too much, but on the right subject it earns its place.
Step 3: Discover the Preset Problem
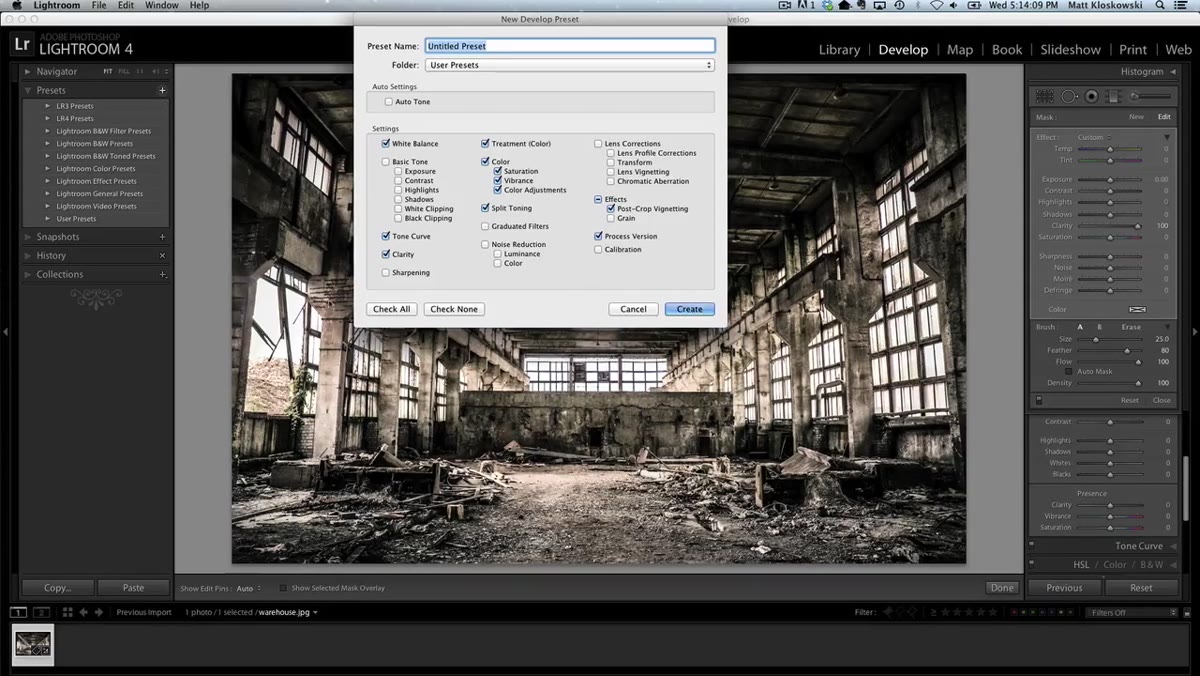 Create Preset dialog with no Adjustment Brush option visible
Here’s where things get annoying. Click the plus icon in the Presets panel to open the New Develop Preset dialog. Scroll through the checkboxes. You’ll find options for Tone Curve, HSL, Split Toning, Lens Corrections, and more. What you won’t find is any option to save Adjustment Brush settings. It’s simply not there. Adobe hasn’t added it, despite requests from instructors and working photographers for years.
Create Preset dialog with no Adjustment Brush option visible
Here’s where things get annoying. Click the plus icon in the Presets panel to open the New Develop Preset dialog. Scroll through the checkboxes. You’ll find options for Tone Curve, HSL, Split Toning, Lens Corrections, and more. What you won’t find is any option to save Adjustment Brush settings. It’s simply not there. Adobe hasn’t added it, despite requests from instructors and working photographers for years.
If you’ve spent time building a multi-pass brush technique and wanted to package it as a one-click preset, this is a dead end. The preset will save everything else about your edit, but the brush strokes don’t come along for the ride. You’d have to rebuild them manually every time.
Step 4: Switch to the Graduated Filter Instead
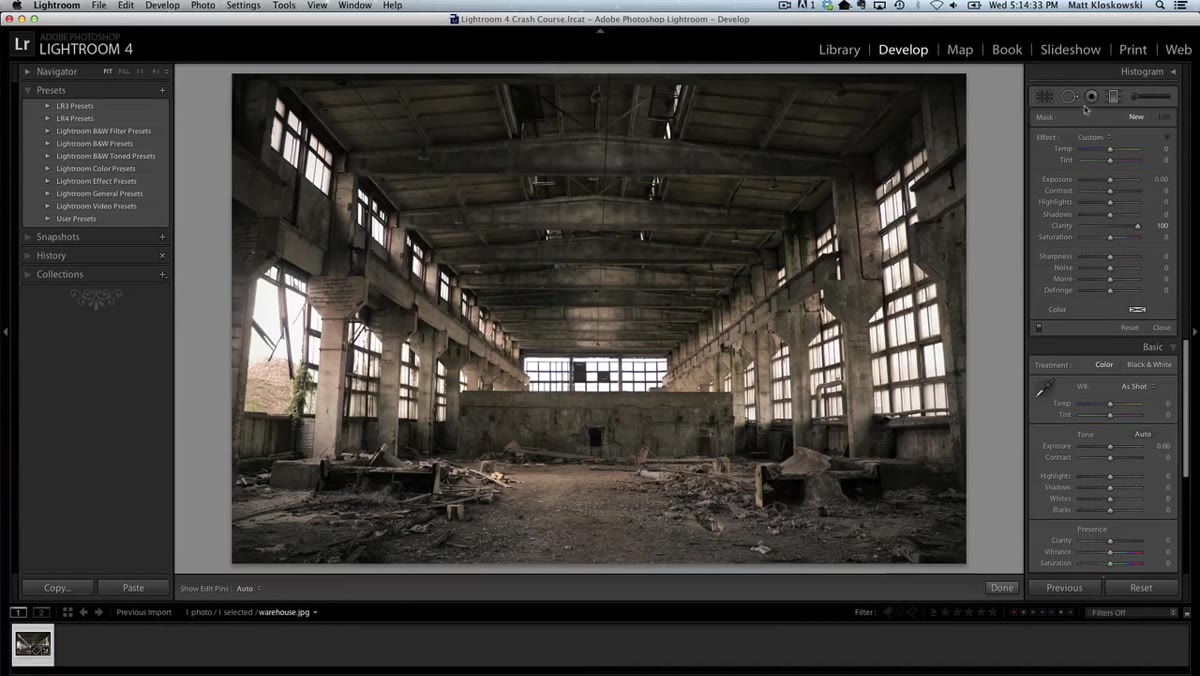 Graduated Filter panel with Clarity at plus 100
This is the actual workaround. Hit Reset to clear your adjustments and close the Adjustment Brush. Open the Graduated Filter (keyboard shortcut: M) and set Clarity to plus 100. Now, instead of dragging a gradient across the photo normally, click just outside the image boundary and drag only a tiny amount before releasing. Because the graduated filter transitions from full effect to zero effect across its range, placing the entire gradient range outside or at the very edge of the frame means the whole image receives the effect at full strength, with no visible graduation.
Graduated Filter panel with Clarity at plus 100
This is the actual workaround. Hit Reset to clear your adjustments and close the Adjustment Brush. Open the Graduated Filter (keyboard shortcut: M) and set Clarity to plus 100. Now, instead of dragging a gradient across the photo normally, click just outside the image boundary and drag only a tiny amount before releasing. Because the graduated filter transitions from full effect to zero effect across its range, placing the entire gradient range outside or at the very edge of the frame means the whole image receives the effect at full strength, with no visible graduation.
The result is visually identical to a single adjustment brush pass at plus 100 Clarity. The image can’t tell the difference. But Lightroom internally treats these as graduated filters, not brush strokes.
Step 5: Stack Multiple Graduated Filters
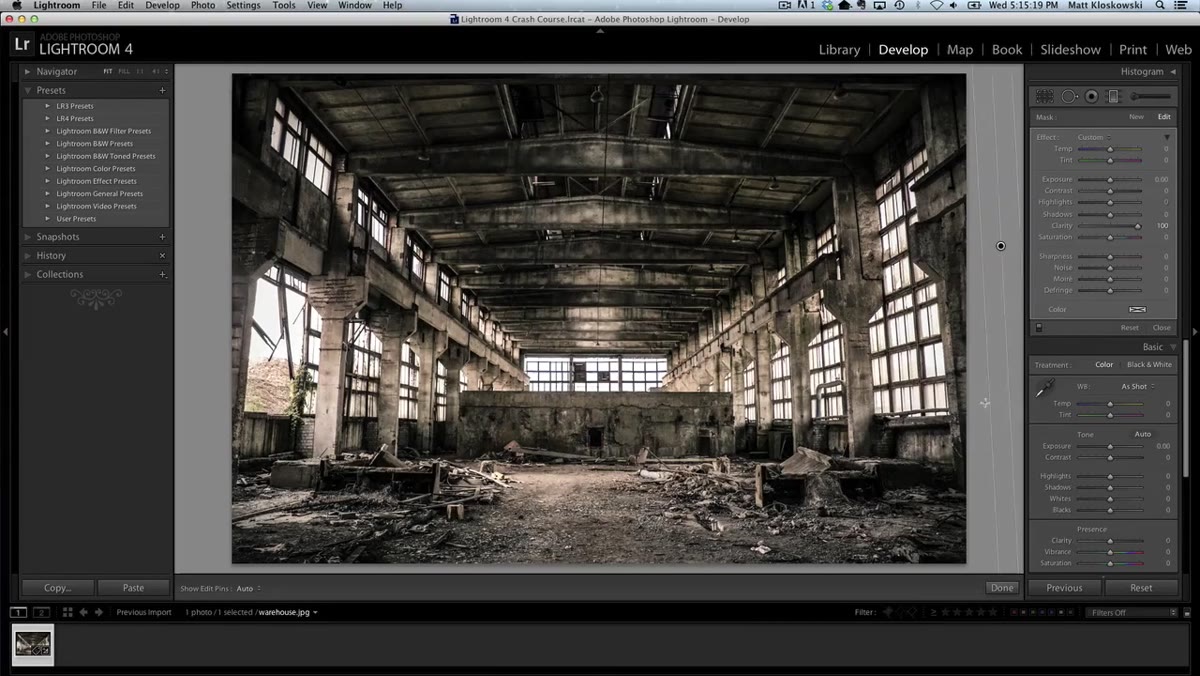 Multiple graduated filter pins stacked on the image
Just like with the adjustment brush, you can stack these. After applying the first graduated filter, go back to the Graduated Filter tool, set Clarity to plus 100 again, and apply a second pass the same way, clicked off the edge of the frame. Do it a third time if needed. Each filter is its own independent adjustment, and they compound exactly the way the brush passes did.
Multiple graduated filter pins stacked on the image
Just like with the adjustment brush, you can stack these. After applying the first graduated filter, go back to the Graduated Filter tool, set Clarity to plus 100 again, and apply a second pass the same way, clicked off the edge of the frame. Do it a third time if needed. Each filter is its own independent adjustment, and they compound exactly the way the brush passes did.
The visual outcome is the same grungy, high-clarity texture effect. But because you built it with graduated filters instead of the adjustment brush, Lightroom recognizes those settings as something it can store in a preset.
Step 6: Save It as a Preset
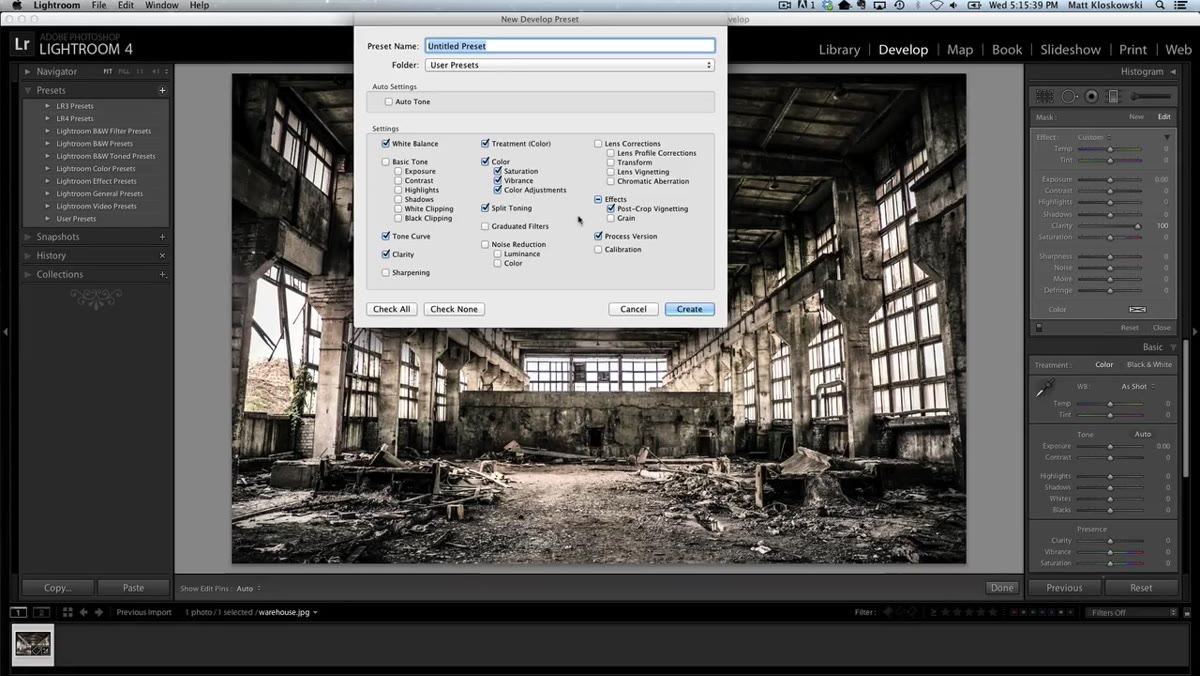 Create Preset dialog with Graduated Filters checkbox checked
Now when you click the plus icon to create a new preset, look for “Graduated Filters” in the checkbox list. Check it. Name your preset something descriptive, “Stacked Clarity x3” works fine, and save it. From this point forward, applying that look to any image is a single click. No rebuilding, no multi-step brush process, just select the preset and move on.
Create Preset dialog with Graduated Filters checkbox checked
Now when you click the plus icon to create a new preset, look for “Graduated Filters” in the checkbox list. Check it. Name your preset something descriptive, “Stacked Clarity x3” works fine, and save it. From this point forward, applying that look to any image is a single click. No rebuilding, no multi-step brush process, just select the preset and move on.
This also means the preset travels with you across machines if you export and import your preset library, which the adjustment brush approach never could.
What I’d Add From My Own Experience
Matt mentions using a similar adjustment brush technique to build a custom vignette, painting exposure down over the whole frame and then erasing the center to create a spotlight effect. You can approximate this with graduated filters too, applying one from each side at reduced exposure, though it won’t be as precise as a brush-based vignette for complex shapes.
Where I’ve found this workaround most useful is in e-commerce work. When I’m processing product shots on textured surfaces, backgrounds with deliberate grain or fabric weave, stacking three graduated filters at high Clarity and saving that as a preset cuts what would be a five-minute manual process down to a single click. Multiplied across a large batch, that’s time that actually matters. I track this kind of thing obsessively, and techniques like this are exactly why the numbers in my workflow log keep climbing.
The single biggest lesson from this tutorial is that Lightroom’s preset system has real gaps, but the architecture of its tools is flexible enough to route around them if you know where to look. Graduated filters and adjustment brushes produce nearly identical results in many situations. One of them gets saved in presets. Use that one.
Watch the full tutorial on YouTube to see Matt walk through the technique in real time, including his vignette approach and a few other scenarios where this swap pays off.
Comments (1)
My workflow just got 10x faster. Not even kidding.
Leave a Comment