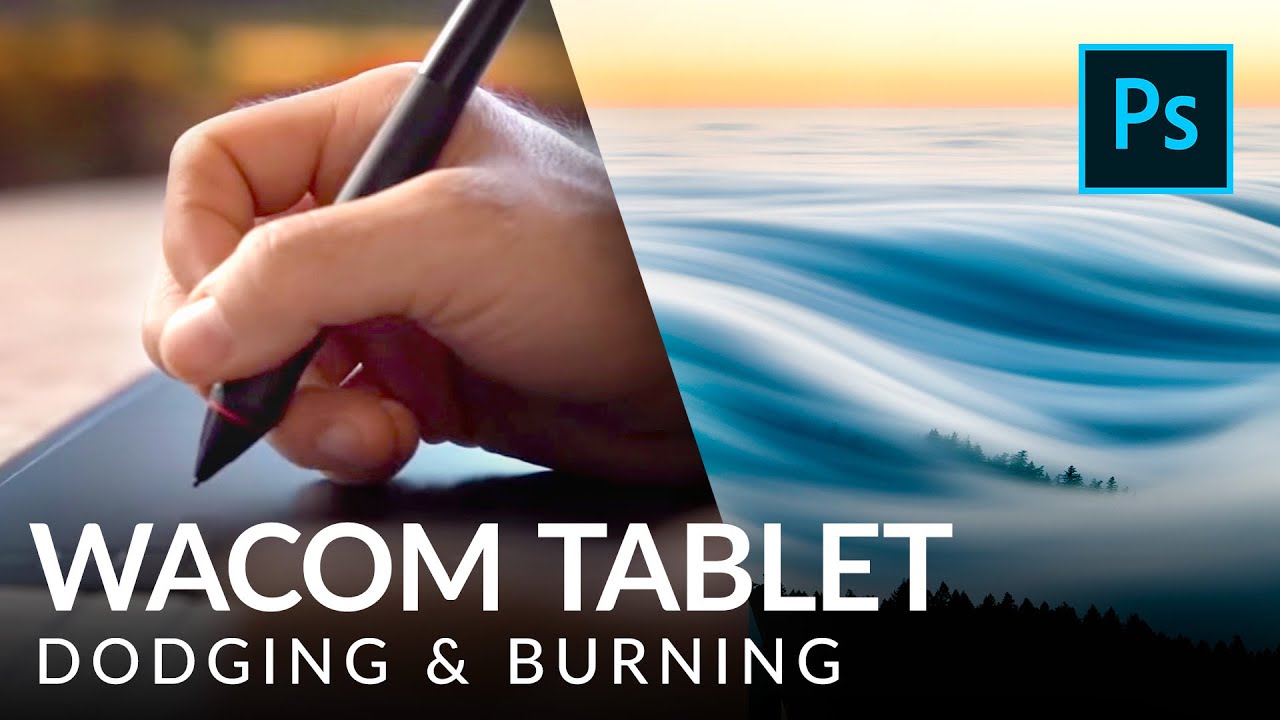
Fifteen years of studio work taught me that dodging and burning separates the retouchers from the photo editors. Anyone can pull a Curves adjustment. Shaping light on a face, a product surface, or a landscape so it reads as three-dimensional and intentional – that takes control. Real, granular, stroke-by-stroke control. For most of my career I was doing it with a mouse, convincing myself that lowering brush flow to 5% was “good enough.” It wasn’t. In this Aaron Nace (PHLEARN) tutorial, Watch the full tutorial on YouTube, Aaron walks through building a custom pressure-sensitive brush for dodging and burning with a Wacom tablet, and the difference between his method and the mouse-based workaround is not subtle.
What struck me rewatching this is how cleanly Aaron isolates the actual problem: a mouse delivers a fixed output. You compensate by hammering flow settings, painting over areas repeatedly, hoping for a gradual buildup. It works, but it’s mechanical. A pressure-sensitive tablet lets you vary brush size and opacity mid-stroke, which is how actual painters work, and how light actually behaves. The fog-and-mountain landscape he uses as a demo image is a perfect teaching canvas – soft gradients, directional light, areas that need either pulling forward or pushing back without hard edges anywhere.
Step 1: Compare Mouse vs. Tablet Output
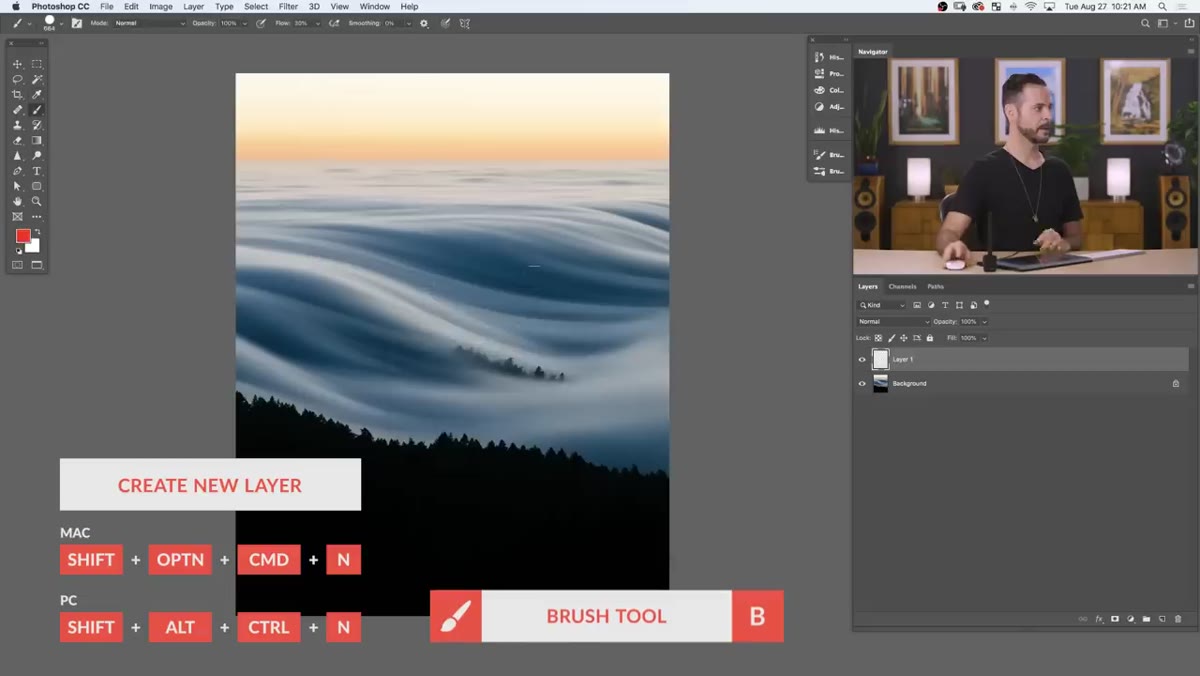 caption: Mouse brush stroke at 100% flow, flat and uniform
Before building anything, Aaron paints a few strokes on a blank layer to illustrate the core limitation. With a standard soft-edge brush at full flow, the mouse lays down an even, uniform stroke from start to finish. There’s no variation in weight, no taper, no response to pressure. He then drops flow to around 5%, which does allow for gradual buildup through repeated passes – but you lose responsiveness and speed. If you’re doing serious retouching with a mouse, low flow is your only real lever, and it’s a blunt one.
caption: Mouse brush stroke at 100% flow, flat and uniform
Before building anything, Aaron paints a few strokes on a blank layer to illustrate the core limitation. With a standard soft-edge brush at full flow, the mouse lays down an even, uniform stroke from start to finish. There’s no variation in weight, no taper, no response to pressure. He then drops flow to around 5%, which does allow for gradual buildup through repeated passes – but you lose responsiveness and speed. If you’re doing serious retouching with a mouse, low flow is your only real lever, and it’s a blunt one.
Step 2: Create a New Layer for Your Brush Test
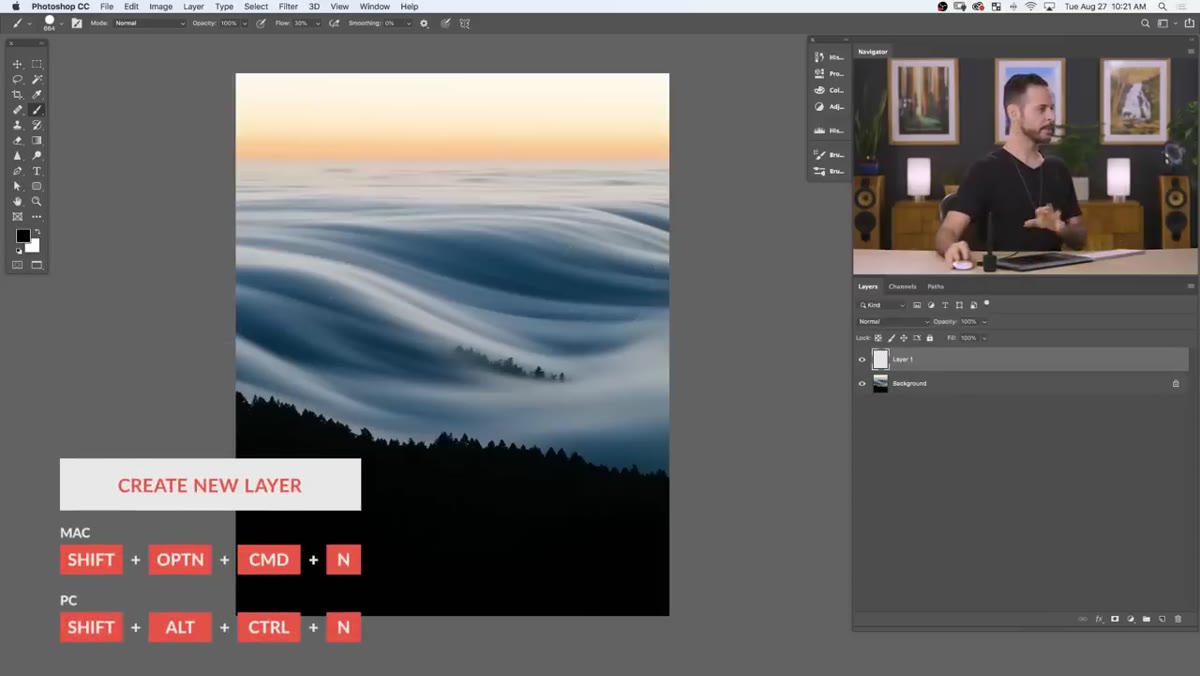 caption: New blank layer added above the landscape image
Work non-destructively from the start. Aaron creates a new empty layer above the image before painting anything. This keeps your source file intact and gives you a place to test brush behavior without committing changes to the actual photo. It’s a small habit, but it’s the difference between a recoverable experiment and a ctrl-Z spiral. For dodge and burn work specifically, I use a neutral gray layer set to Soft Light blending mode – more on that in the extension section below.
caption: New blank layer added above the landscape image
Work non-destructively from the start. Aaron creates a new empty layer above the image before painting anything. This keeps your source file intact and gives you a place to test brush behavior without committing changes to the actual photo. It’s a small habit, but it’s the difference between a recoverable experiment and a ctrl-Z spiral. For dodge and burn work specifically, I use a neutral gray layer set to Soft Light blending mode – more on that in the extension section below.
Step 3: Open Brush Settings and Enable Shape Dynamics
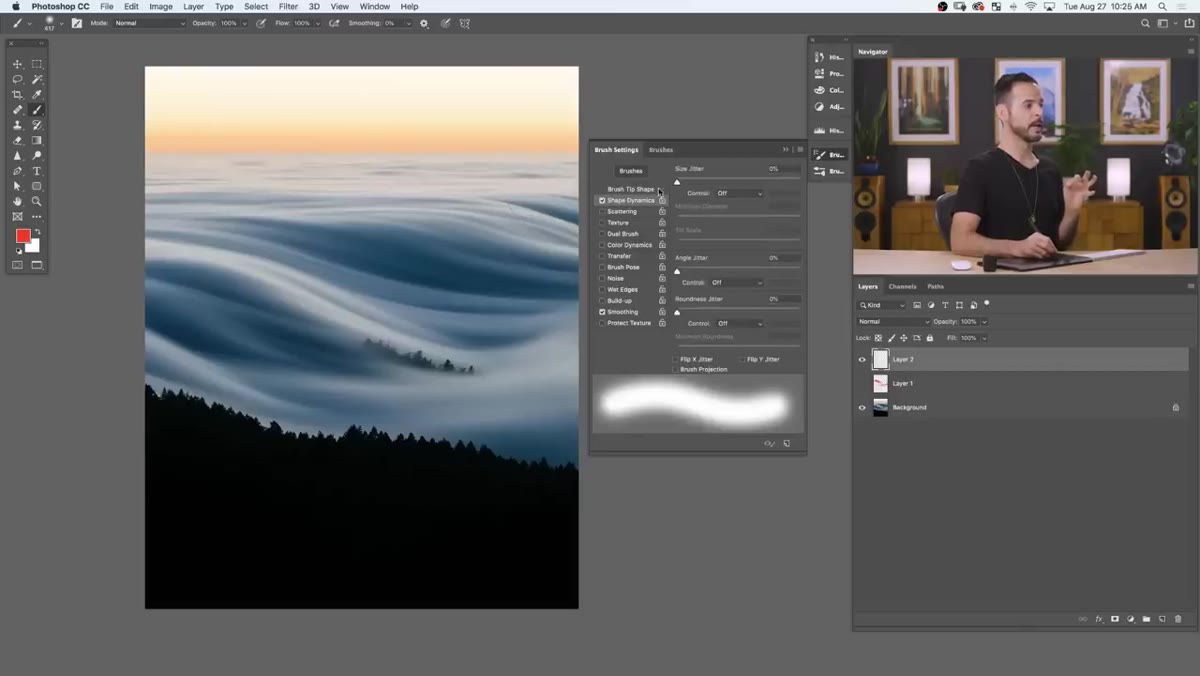 caption: Brush Settings panel with Shape Dynamics selected
This is where the real build begins. Open the Brush Settings panel (Window > Brush Settings, or F5) and click on “Shape Dynamics” in the left column – make sure you click the label itself, not just the checkbox, so the options panel opens on the right. At the top you’ll see “Size Jitter” with a Control dropdown. Change that dropdown from “Off” to “Pen Pressure.” The preview at the bottom of the panel will immediately show you the effect: light pressure produces a thin, tapered line, firm pressure expands the stroke, and you can vary between them continuously within a single brushstroke without lifting the pen.
caption: Brush Settings panel with Shape Dynamics selected
This is where the real build begins. Open the Brush Settings panel (Window > Brush Settings, or F5) and click on “Shape Dynamics” in the left column – make sure you click the label itself, not just the checkbox, so the options panel opens on the right. At the top you’ll see “Size Jitter” with a Control dropdown. Change that dropdown from “Off” to “Pen Pressure.” The preview at the bottom of the panel will immediately show you the effect: light pressure produces a thin, tapered line, firm pressure expands the stroke, and you can vary between them continuously within a single brushstroke without lifting the pen.
Step 4: Adjust Minimum Diameter to Constrain the Size Range
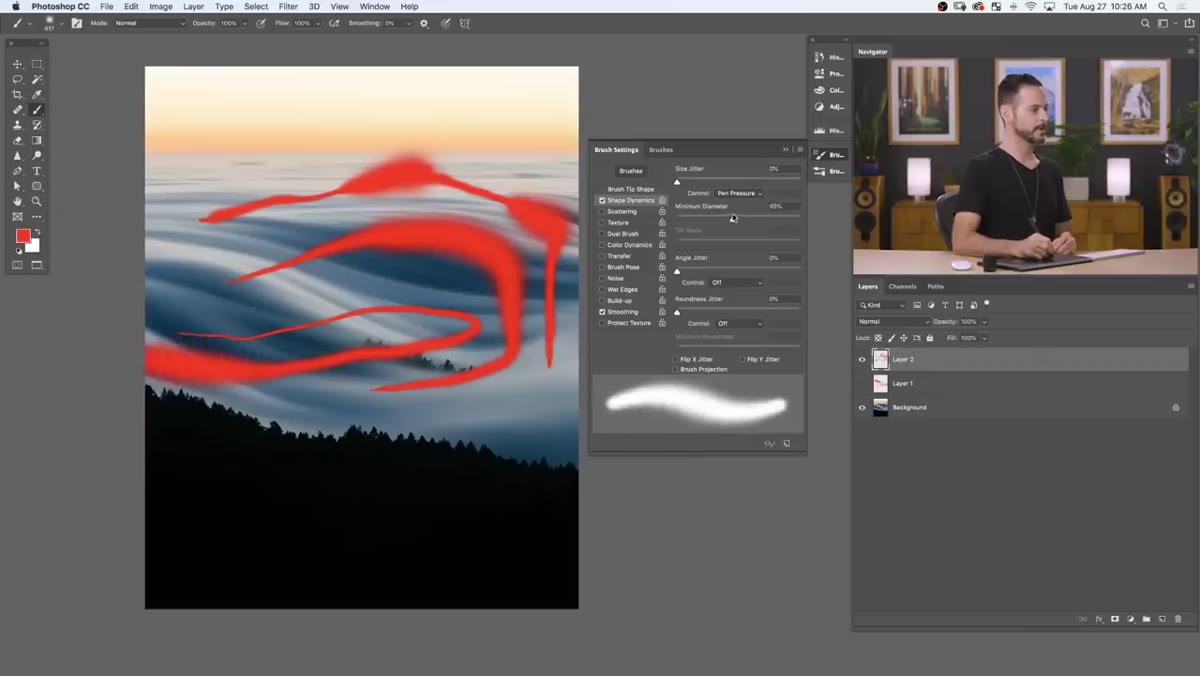 caption: Minimum Diameter slider being raised in Shape Dynamics
With pen pressure controlling size, the default range goes from nearly invisible to full brush diameter. For dodging and burning, you generally don’t want strokes that thin out to nothing – that creates accidental bright or dark pinpoints in your image. Aaron raises the Minimum Diameter slider until the thinnest part of the stroke is still substantial enough to be useful. The exact value depends on your brush size and the scale of the areas you’re working on, but somewhere in the 20-40% range is a reasonable starting point. Test it by painting a few strokes with intentionally light and heavy pressure and see where the thin end bottoms out.
caption: Minimum Diameter slider being raised in Shape Dynamics
With pen pressure controlling size, the default range goes from nearly invisible to full brush diameter. For dodging and burning, you generally don’t want strokes that thin out to nothing – that creates accidental bright or dark pinpoints in your image. Aaron raises the Minimum Diameter slider until the thinnest part of the stroke is still substantial enough to be useful. The exact value depends on your brush size and the scale of the areas you’re working on, but somewhere in the 20-40% range is a reasonable starting point. Test it by painting a few strokes with intentionally light and heavy pressure and see where the thin end bottoms out.
Step 5: Add Transfer Settings to Control Opacity with Pressure
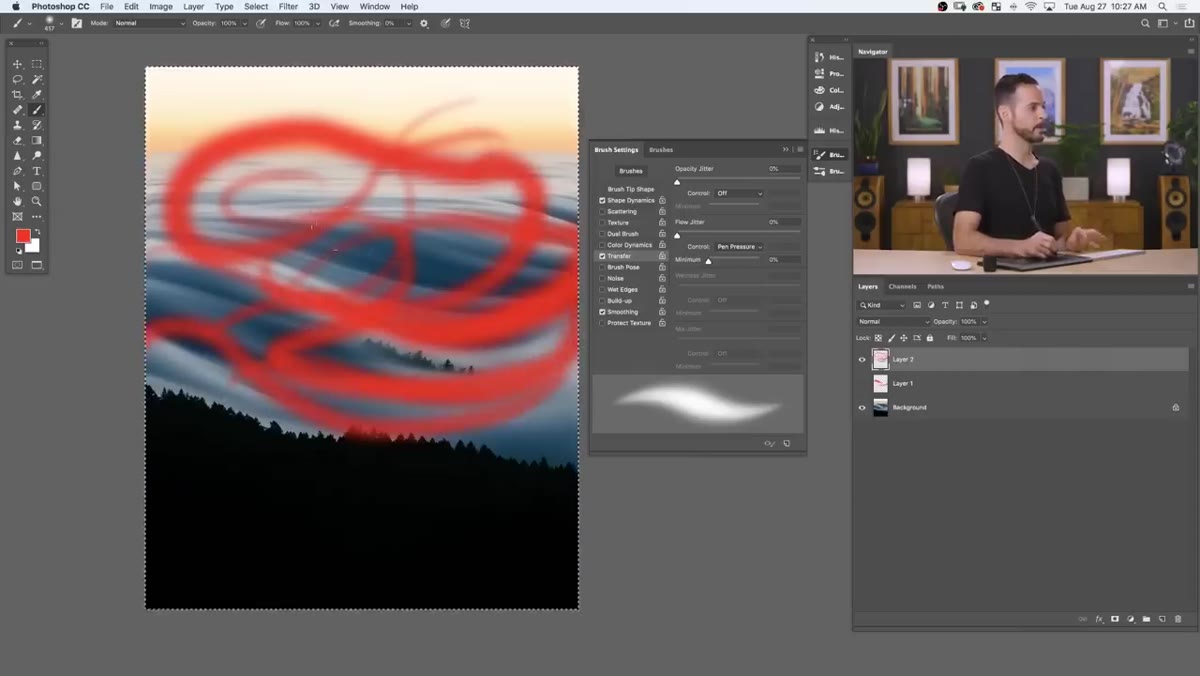
 caption: Transfer section in Brush Settings, Opacity Jitter set to Pen Pressure
Size variation alone makes the brush feel more natural, but opacity variation is what gives you real tonal control. In the Brush Settings panel, click “Transfer” in the left column. Set the Opacity Jitter control to “Pen Pressure” as well. Now a light touch lays down a barely visible stroke, and pressing harder builds up density. Combined with the size variation from Shape Dynamics, you have a brush that behaves like a physical tool – responsive, graduated, and fast. No more painting over the same area five times to get a gentle highlight.
caption: Transfer section in Brush Settings, Opacity Jitter set to Pen Pressure
Size variation alone makes the brush feel more natural, but opacity variation is what gives you real tonal control. In the Brush Settings panel, click “Transfer” in the left column. Set the Opacity Jitter control to “Pen Pressure” as well. Now a light touch lays down a barely visible stroke, and pressing harder builds up density. Combined with the size variation from Shape Dynamics, you have a brush that behaves like a physical tool – responsive, graduated, and fast. No more painting over the same area five times to get a gentle highlight.
Step 6: Save the Brush as a Preset
 caption: New Brush Preset dialog box with naming field visible
Once the settings are dialed in, save the brush so you don’t rebuild it every session. Click the menu icon in the top right of the Brush Settings panel and choose “New Brush Preset.” Give it a name you’ll actually recognize six months from now – something like “D&B Pressure Sensitive Soft” rather than “Brush 47.” This preset will now appear in your brush picker and survive Photoshop restarts. Aaron also made his version available as a free download through PHLEARN, which is worth grabbing as a baseline even if you adjust it later.
caption: New Brush Preset dialog box with naming field visible
Once the settings are dialed in, save the brush so you don’t rebuild it every session. Click the menu icon in the top right of the Brush Settings panel and choose “New Brush Preset.” Give it a name you’ll actually recognize six months from now – something like “D&B Pressure Sensitive Soft” rather than “Brush 47.” This preset will now appear in your brush picker and survive Photoshop restarts. Aaron also made his version available as a free download through PHLEARN, which is worth grabbing as a baseline even if you adjust it later.
Step 7: Apply the Brush for Dodge and Burn on the Image
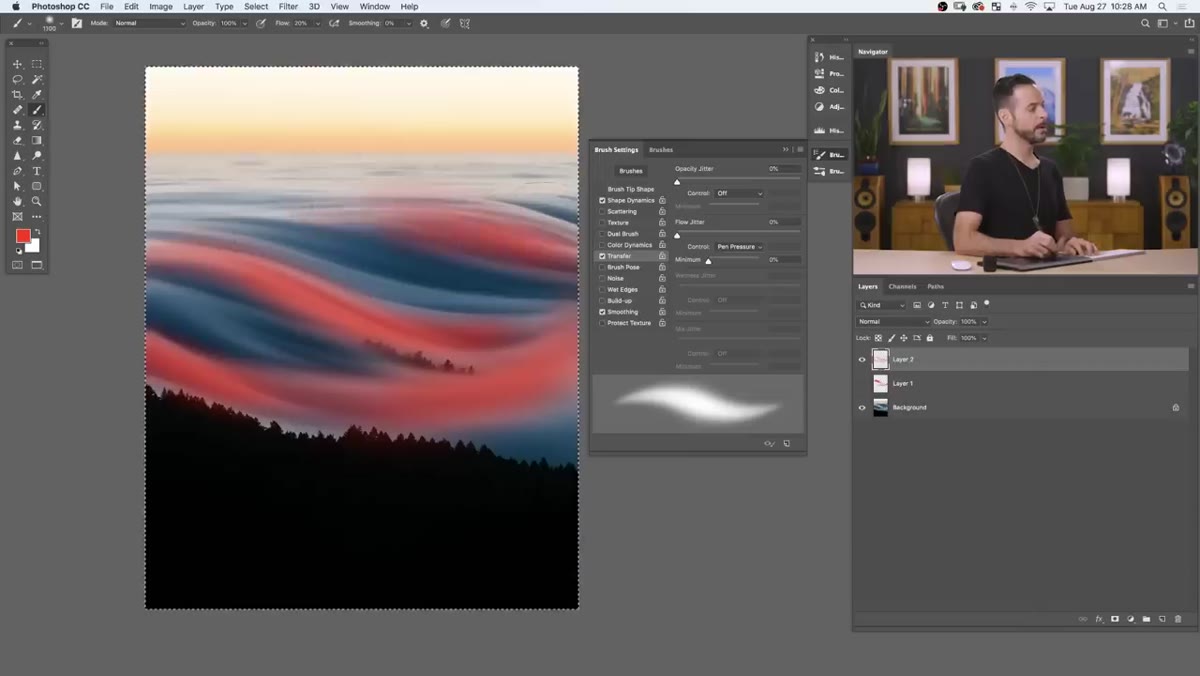 caption: Painting light strokes over mountain fog with custom brush
With the brush built and saved, Aaron demonstrates it directly on the landscape. He paints into the fog layers with white to lift highlights and dark strokes to deepen shadows, following the natural motion and direction of the clouds. The pressure sensitivity lets him taper strokes as they reach edges, matching the soft gradients already in the image. What would take a dozen careful mouse passes now happens in two or three confident strokes. The brush follows your intent rather than fighting it.
caption: Painting light strokes over mountain fog with custom brush
With the brush built and saved, Aaron demonstrates it directly on the landscape. He paints into the fog layers with white to lift highlights and dark strokes to deepen shadows, following the natural motion and direction of the clouds. The pressure sensitivity lets him taper strokes as they reach edges, matching the soft gradients already in the image. What would take a dozen careful mouse passes now happens in two or three confident strokes. The brush follows your intent rather than fighting it.
How I’d Extend This in a Commercial Retouching Context
The workflow Aaron demonstrates works beautifully as shown, and I’d add one structural layer to it for anyone doing this on client work. Instead of painting directly on a blank layer, create a new layer, fill it with 50% gray (Edit > Fill > 50% Gray), and set the blending mode to Soft Light. On a 50% gray Soft Light layer, gray is invisible – it’s the neutral point. Painting white lifts the underlying image, painting black darkens it, and because the gray fill is preserved, you can always see exactly where you’ve painted by temporarily switching the layer to Normal mode. It’s essentially a dodge and burn map that’s fully non-destructive and easy to hand off to a client or a colleague. I’ve had this setup saved as a Photoshop action for years, and it’s one of those small workflow decisions that pays back every single day.
The core lesson here is about the right tool for the job. Photoshop’s dodge and burn capabilities have always been capable enough. What most tutorials skip is the input side – what you’re using to actually drive those tools. A pressure-sensitive tablet doesn’t just make retouching more comfortable. It changes the quality of what’s possible, because you can finally work at the speed and nuance of your own judgment.
Watch the full tutorial on YouTube to see Aaron’s brush in motion and download the free preset he provides.
Comments (2)
The before and after really sells it. Incredible difference.
Never thought of approaching it this way. Really creative.
Leave a Comment