There’s a specific kind of frustration that hits when you’ve developed a technique you genuinely love, used it a dozen times, and then six weeks later you’re staring at a blank canvas trying to reconstruct it from memory. That used to happen to me constantly in my early studio years. I’d nail a color treatment on a campaign, close the file, and by the next job, half the steps were gone. The solution, once I actually committed to it, was Photoshop Actions. Not because they’re flashy, but because they’re the simplest way to make your own brain irrelevant to the process.
In this CreativeLive tutorial, instructor Ben Willmore walks through exactly how to build an action from scratch using a vintage color effect as the example. It’s a tight, practical walkthrough. Watch the full tutorial on YouTube if you want to follow along with the video alongside these notes. What I’ve done below is expand each step with the context Willmore assumes you already have, so you can follow this cold even if you’ve never opened the Actions panel before.
Step 1: Open the Actions Panel
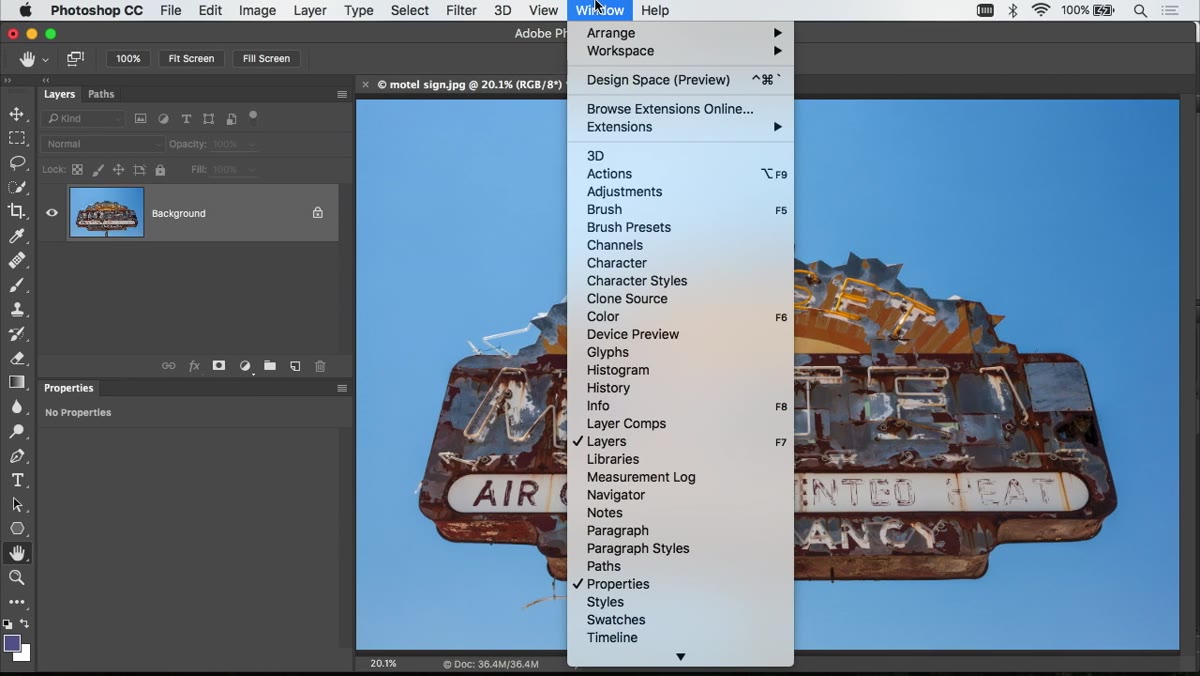 Actions panel open in Photoshop showing default actions folder
Go to the Window menu at the top of the screen and select Actions. The panel that opens will show you whatever actions are already installed on your machine. Fresh installs will have a single folder called Default Actions. The actions are organized into sets, which display as folder icons. Click the arrow next to any folder to expand it and see the individual actions inside. Don’t be intimidated by what’s already there. You won’t break anything by looking around.
Actions panel open in Photoshop showing default actions folder
Go to the Window menu at the top of the screen and select Actions. The panel that opens will show you whatever actions are already installed on your machine. Fresh installs will have a single folder called Default Actions. The actions are organized into sets, which display as folder icons. Click the arrow next to any folder to expand it and see the individual actions inside. Don’t be intimidated by what’s already there. You won’t break anything by looking around.
Step 2: Create a New Actions Set (Folder)
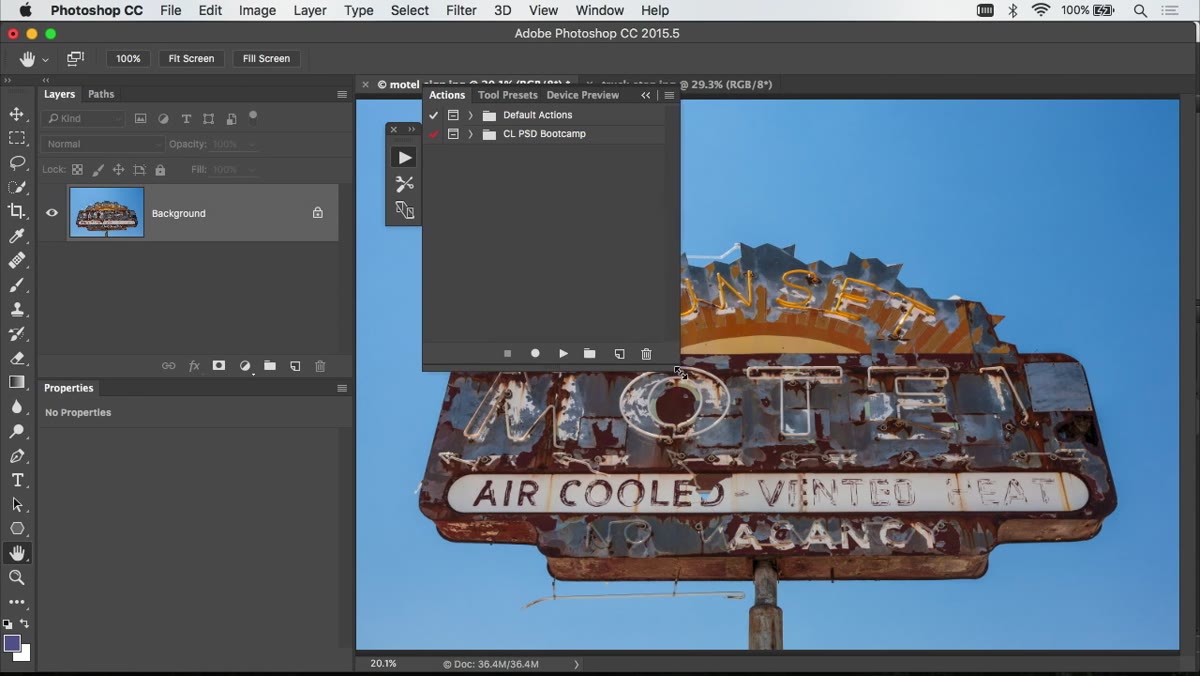 Bottom of Actions panel with folder icon highlighted
Before you record anything, create a dedicated folder to keep your custom actions organized. At the bottom of the Actions panel, you’ll see a row of small icons. Click the folder icon, which is the one that looks like a manila folder. A dialog will appear asking for a name. Give it something meaningful, something you’d recognize six months from now. I use naming conventions like “Product-Retouch” or “Color-Vintage” so I can find the right set without opening everything. This is a minor step that pays off the moment you have more than three or four actions saved.
Bottom of Actions panel with folder icon highlighted
Before you record anything, create a dedicated folder to keep your custom actions organized. At the bottom of the Actions panel, you’ll see a row of small icons. Click the folder icon, which is the one that looks like a manila folder. A dialog will appear asking for a name. Give it something meaningful, something you’d recognize six months from now. I use naming conventions like “Product-Retouch” or “Color-Vintage” so I can find the right set without opening everything. This is a minor step that pays off the moment you have more than three or four actions saved.
Step 3: Create and Name Your New Action
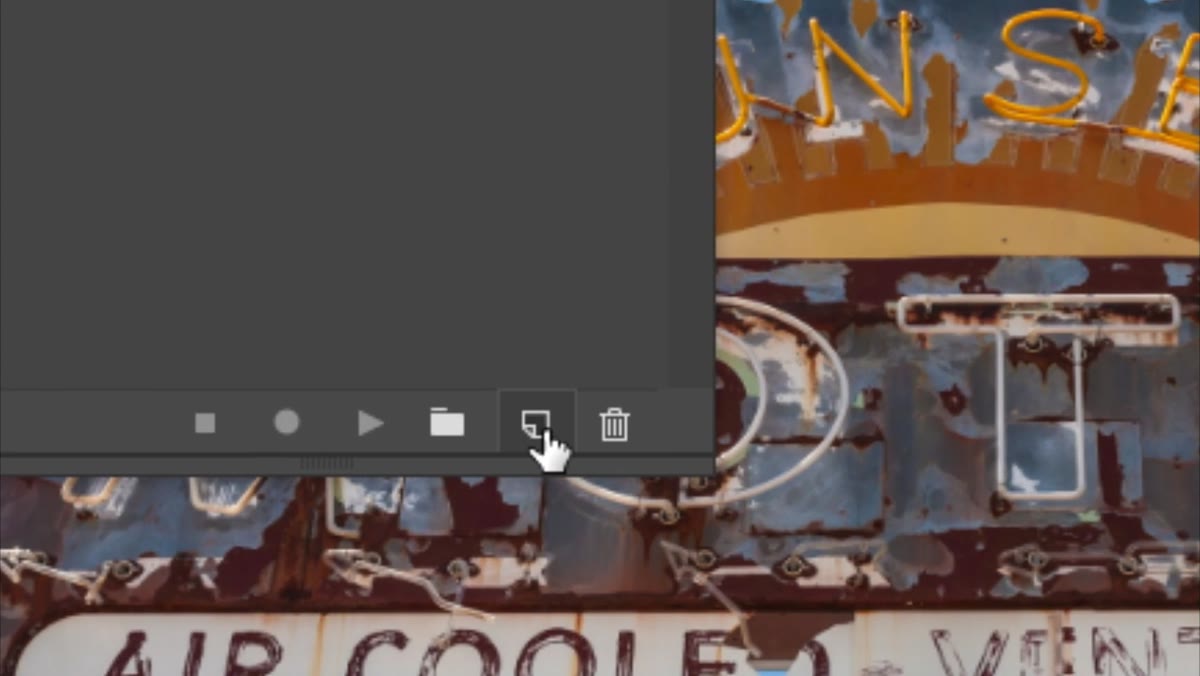 New Action dialog box with name field and Record button
With your new set selected, click the new action icon at the bottom of the panel. It looks like a turned-down page corner, the same icon used for new layers. A dialog appears asking for a name. Name it specifically. Willmore calls his “Antique Color,” which tells you exactly what it does. Vague names like “Effect 1” become useless clutter within a week. Once you click Record, Photoshop starts logging every step you take. The record button at the bottom of the panel will turn red. That’s your signal that the session is live.
New Action dialog box with name field and Record button
With your new set selected, click the new action icon at the bottom of the panel. It looks like a turned-down page corner, the same icon used for new layers. A dialog appears asking for a name. Name it specifically. Willmore calls his “Antique Color,” which tells you exactly what it does. Vague names like “Effect 1” become useless clutter within a week. Once you click Record, Photoshop starts logging every step you take. The record button at the bottom of the panel will turn red. That’s your signal that the session is live.
Step 4: Apply a Black and White Adjustment Layer
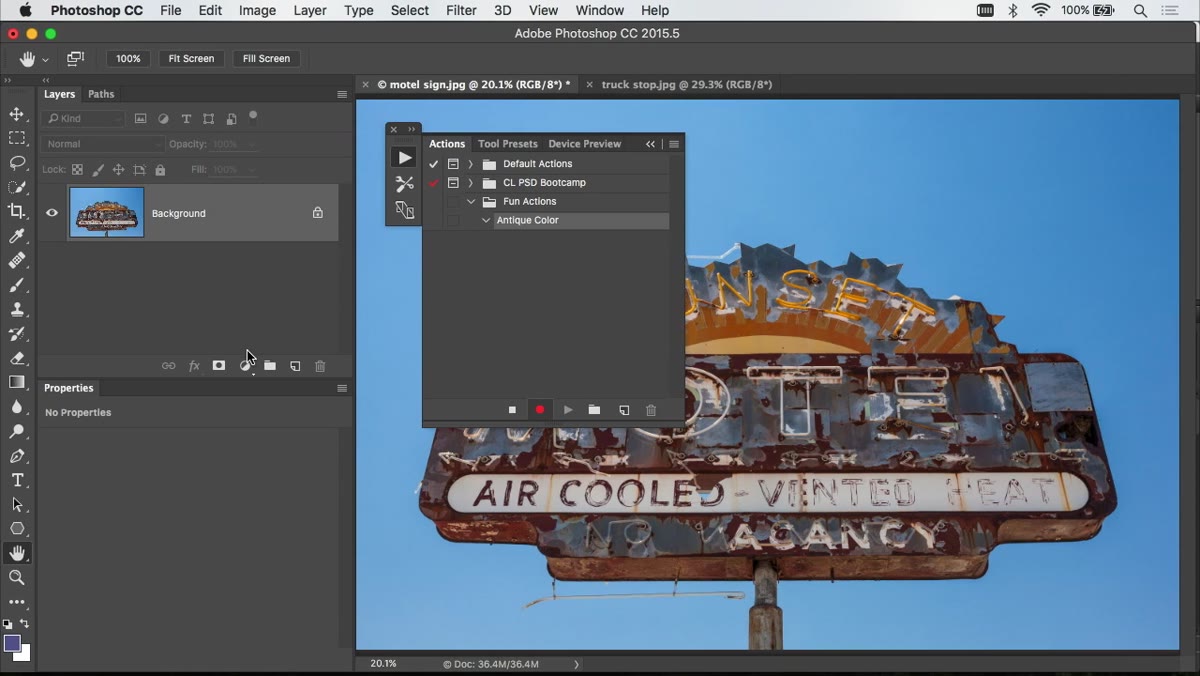 Layers panel showing Black and White adjustment layer added
Now you execute the technique you want to capture. In Willmore’s example, the first step is stripping the color from the image using an adjustment layer rather than a destructive conversion. At the bottom of the Layers panel, click the half-black, half-white circle icon to bring up the adjustment layer menu. Choose Black and White. This drops a non-destructive adjustment layer onto the image that desaturates it completely. You don’t need to adjust any sliders for this particular effect. The default settings work. The key here is using an adjustment layer rather than Image > Desaturate. That distinction matters for keeping the original color data intact in the layer below.
Layers panel showing Black and White adjustment layer added
Now you execute the technique you want to capture. In Willmore’s example, the first step is stripping the color from the image using an adjustment layer rather than a destructive conversion. At the bottom of the Layers panel, click the half-black, half-white circle icon to bring up the adjustment layer menu. Choose Black and White. This drops a non-destructive adjustment layer onto the image that desaturates it completely. You don’t need to adjust any sliders for this particular effect. The default settings work. The key here is using an adjustment layer rather than Image > Desaturate. That distinction matters for keeping the original color data intact in the layer below.
Step 5: Duplicate the Original Color Layer and Move It to the Top
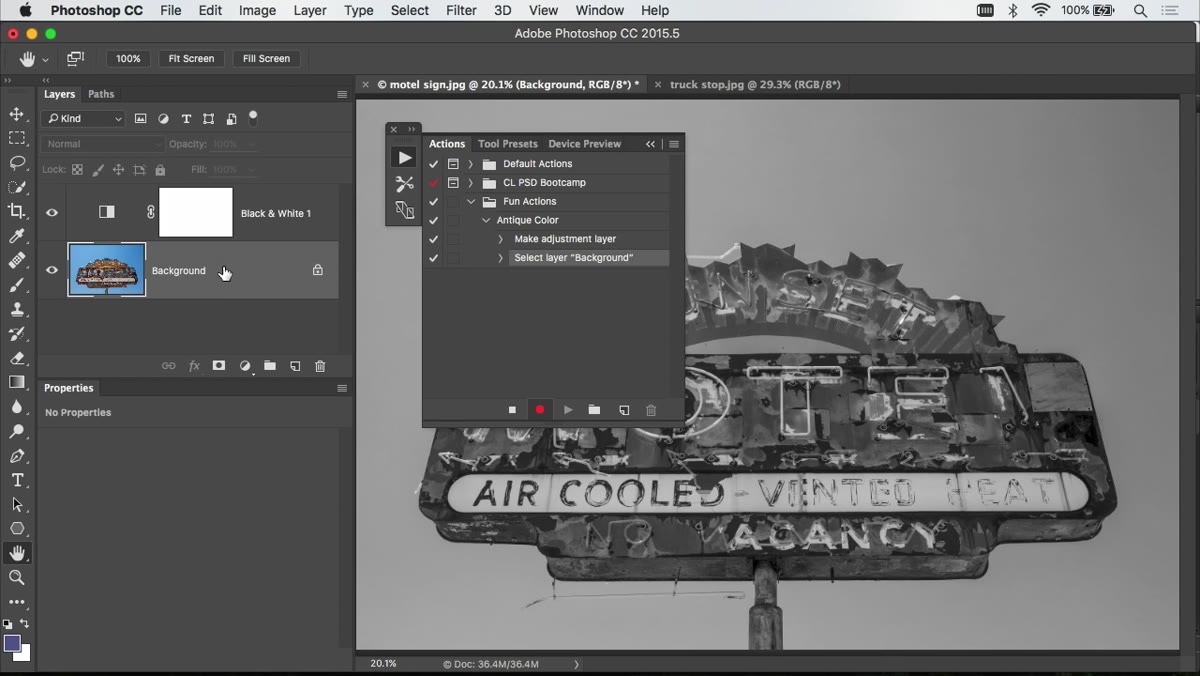 Layers panel showing duplicated layer being dragged above adjustment layer
Click back on the original background layer, the one with the full color photograph. Drag it down to the new layer icon to duplicate it. You’ll now have a copy sitting directly above the original. Click and drag that duplicate up above the Black and White adjustment layer. Your layer stack should now read, from top to bottom: color copy, black and white adjustment, original color layer. This positioning matters. The color copy needs to sit above the adjustment layer so it interacts with what’s below it visually.
Layers panel showing duplicated layer being dragged above adjustment layer
Click back on the original background layer, the one with the full color photograph. Drag it down to the new layer icon to duplicate it. You’ll now have a copy sitting directly above the original. Click and drag that duplicate up above the Black and White adjustment layer. Your layer stack should now read, from top to bottom: color copy, black and white adjustment, original color layer. This positioning matters. The color copy needs to sit above the adjustment layer so it interacts with what’s below it visually.
Step 6: Set the Duplicate Layer to Overlay Blend Mode
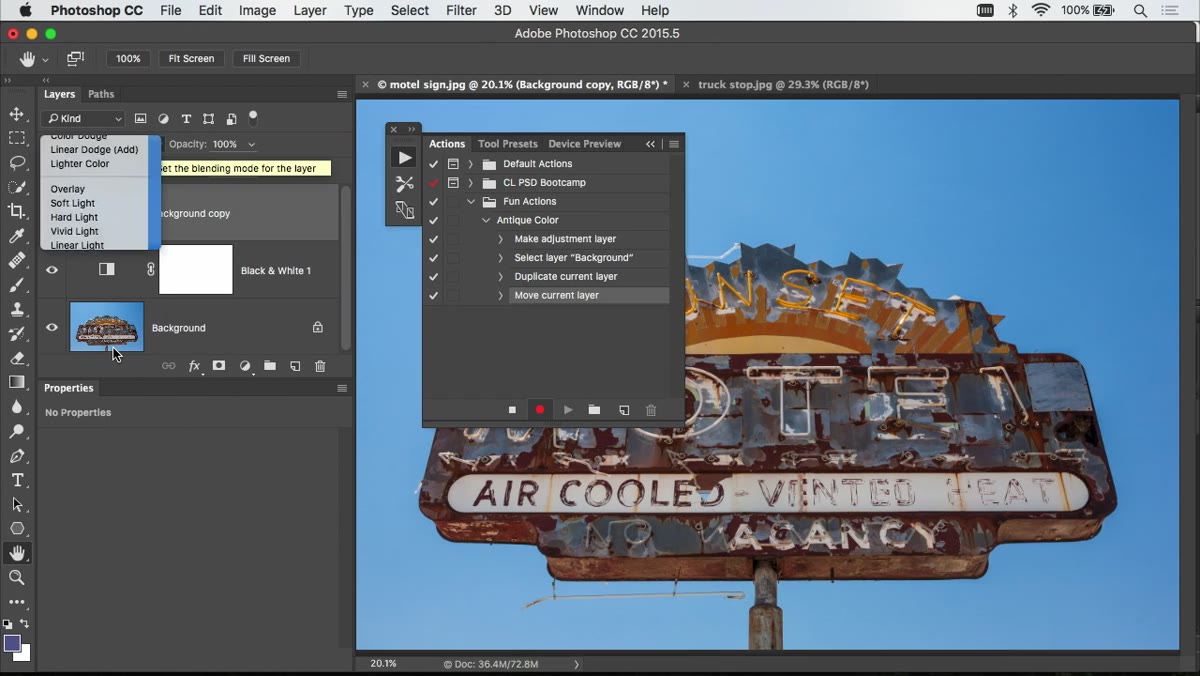 Blend mode dropdown showing Overlay selected on duplicate layer
With the duplicate color layer selected, open the blend mode dropdown at the top of the Layers panel. It defaults to Normal. Change it to Overlay. The image will shift immediately. What you’re seeing is the original color being reintroduced through a blend mode that boosts contrast while letting the desaturated layer beneath soften and mute the tones. It’s a different quality of color than the original. More faded, more film-like. If the effect is too strong, lower the layer opacity. Somewhere between 70 and 85 percent tends to give a natural result, but this is subjective. Once you’re happy, stop here.
Blend mode dropdown showing Overlay selected on duplicate layer
With the duplicate color layer selected, open the blend mode dropdown at the top of the Layers panel. It defaults to Normal. Change it to Overlay. The image will shift immediately. What you’re seeing is the original color being reintroduced through a blend mode that boosts contrast while letting the desaturated layer beneath soften and mute the tones. It’s a different quality of color than the original. More faded, more film-like. If the effect is too strong, lower the layer opacity. Somewhere between 70 and 85 percent tends to give a natural result, but this is subjective. Once you’re happy, stop here.
Step 7: Stop Recording and Test the Action
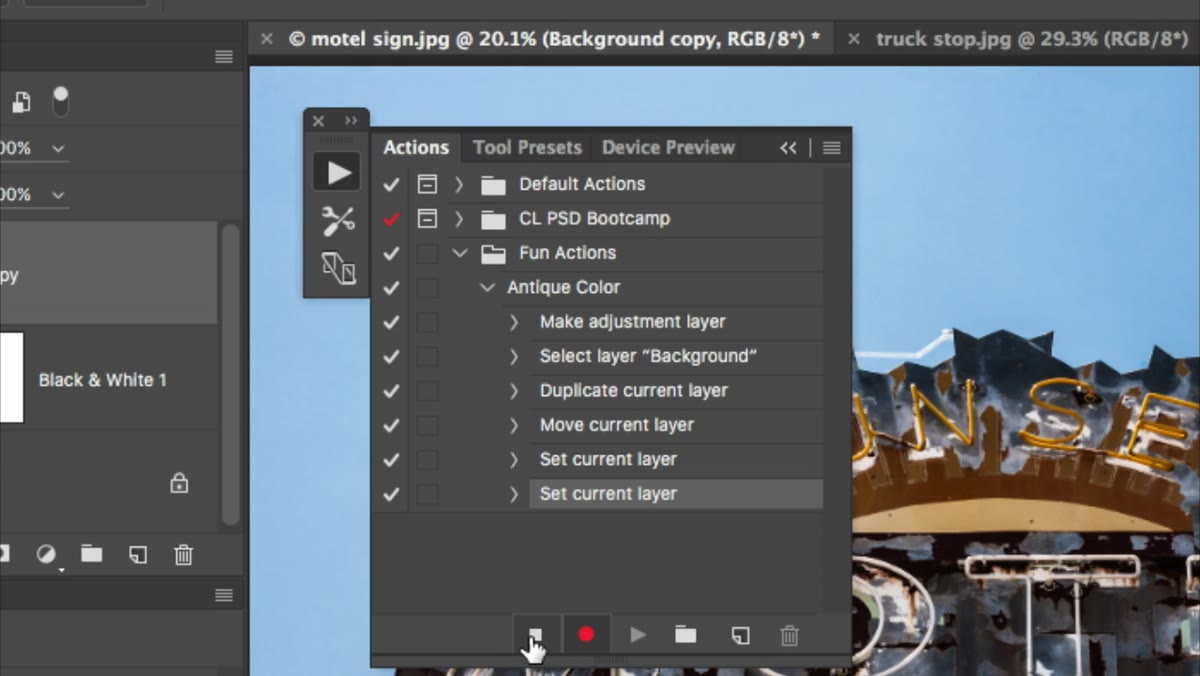 Actions panel with Stop button highlighted, action steps visible below
Go back to the Actions panel and click the square Stop button on the left side of the panel controls. Recording ends. You’ll now see the action listed under your set with each step expandable via a small triangle. Before you do anything else, test it. Go to File > Revert to reset the image back to its original state. Then click the name of your new action in the Actions panel and press the triangular Play button at the bottom. Watch it run. Every step should execute automatically and reproduce the same result you built by hand. If something is off, you can delete individual steps within the action or re-record from scratch. It takes about 90 seconds to re-record something this simple.
Actions panel with Stop button highlighted, action steps visible below
Go back to the Actions panel and click the square Stop button on the left side of the panel controls. Recording ends. You’ll now see the action listed under your set with each step expandable via a small triangle. Before you do anything else, test it. Go to File > Revert to reset the image back to its original state. Then click the name of your new action in the Actions panel and press the triangular Play button at the bottom. Watch it run. Every step should execute automatically and reproduce the same result you built by hand. If something is off, you can delete individual steps within the action or re-record from scratch. It takes about 90 seconds to re-record something this simple.
What I Do Differently After Years of Running These at Scale
The technique Willmore demonstrates is solid. Where I’d push it further is in building actions that are self-contained enough to run as batch processes. When I record an action that I plan to use on more than a handful of files, I always add a final Save and Close step while recording. That way, when I run it through File > Automate > Batch on a folder of 200 product shots, each file processes and saves without me babysitting the queue. I’ve also learned to leave the opacity adjustment out of the recorded action entirely and handle that manually afterward. Opacity is subjective and changes by image. Let the action do the structural work, then make the judgment calls yourself.
One more note on organization: after recording, I export my action sets regularly as .atn files and store them with my project backups. Actions live in Photoshop’s preferences, and if you ever do a clean install or migrate machines without exporting them, they’re gone. I learned that the hard way on a studio computer refresh back in 2014.
The single most important idea in this tutorial is also the simplest one: if you’ve done a sequence of steps more than twice, it belongs in an action. Your time is the only resource in this work that doesn’t scale. Automating the repeatable parts is how you protect it.
Watch the full tutorial on YouTube to see Ben Willmore walk through this live, including a second action he starts building at the end that’s worth watching for additional context on how to handle different image types.
Comments
Leave a Comment