How to Install Custom Brushes in Photoshop (And Actually Use Them Well)

How to Install Custom Brushes in Photoshop (And Actually Use Them Well)

Every time I onboard a new retoucher at my consultancy, the same conversation happens within the first week. They’ve downloaded a beautiful custom brush pack, they open Photoshop, and then they stare at it like it’s a locked door with no handle. Brush installation is one of those things that feels like it should be obvious but genuinely isn’t the first time. And if you get it wrong, you end up with a brush that loads but doesn’t appear where you expect, or duplicates stacking up invisibly in your panel while you wonder why nothing looks right.

Dodge & Burn Like a Painter: Building a Pressure-Sensitive Brush in Photoshop

Dodge & Burn Like a Painter: Building a Pressure-Sensitive Brush in Photoshop

Fifteen years of studio work taught me that dodging and burning separates the retouchers from the photo editors. Anyone can pull a Curves adjustment. Shaping light on a face, a product surface, or a landscape so it reads as three-dimensional and intentional – that takes control. Real, granular, stroke-by-stroke control. For most of my career I was doing it with a mouse, convincing myself that lowering brush flow to 5% was “good enough.

Stop Painting with Generic Brushes: How to Build Free, High-Quality Custom Brushes in Photoshop

Stop Painting with Generic Brushes: How to Build Free, High-Quality Custom Brushes in Photoshop

Every so often I’ll be retouching a composite for a client and I hit the same wall: the default Photoshop brush set just doesn’t have what I need. The standard round brushes are fine for blocking in masks, but the moment a project calls for realistic texture, organic edges, or painterly detail, they fall flat fast. I’ve bought brush packs over the years, and some of them are excellent, but there’s a constant nagging feeling that a pre-made pack is always someone else’s creative fingerprint, not mine.

How to Turn Any Stock Image Into Custom Photoshop Brushes (Spatter Effects the Smart Way)

How to Turn Any Stock Image Into Custom Photoshop Brushes (Spatter Effects the Smart Way)

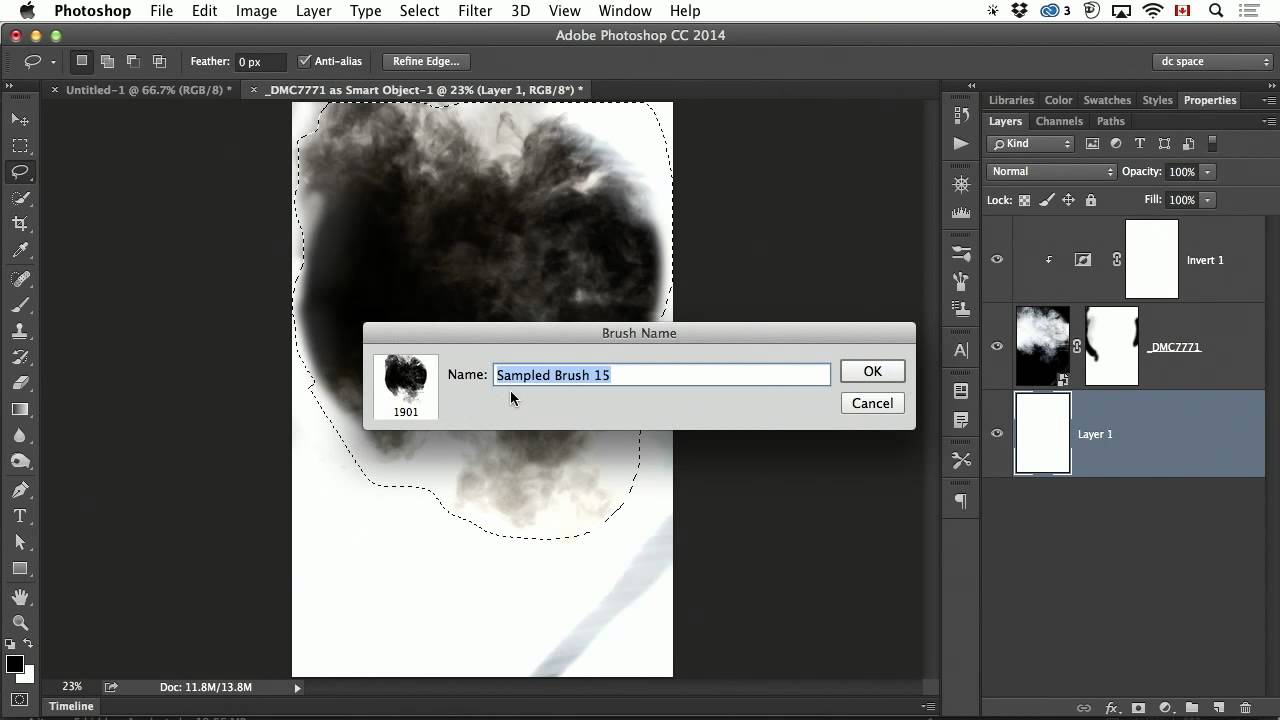
Every studio I’ve worked in over the past 15 years has had the same gap in its toolkit: people spending money on individual texture assets when a smarter approach to sourcing and defining custom brushes would give them ten times the mileage for the same cost. I hit this wall myself early on in my consultancy work, particularly when clients started asking for grunge and ink-spatter treatments on ad campaigns. I was grabbing one-off stock images, masking them out manually, and dragging them around as smart objects.

How I Build Custom Photoshop Brushes That Actually Work Inside Actions

How I Build Custom Photoshop Brushes That Actually Work Inside Actions

Last year I was building a retouching action for a mid-sized e-commerce client who needed consistent skin softening applied across several thousand product shots. The action worked beautifully in testing. Then I handed it off to a junior editor on their team, opened the results two days later, and found that the softening brush strokes were painting at 40 pixels on their machine instead of the 400 pixels I’d set on mine.

How to Build a Cloud Brush in Photoshop That Actually Works (And Why Most People Get It Backwards)

How to Build a Cloud Brush in Photoshop That Actually Works (And Why Most People Get It Backwards)

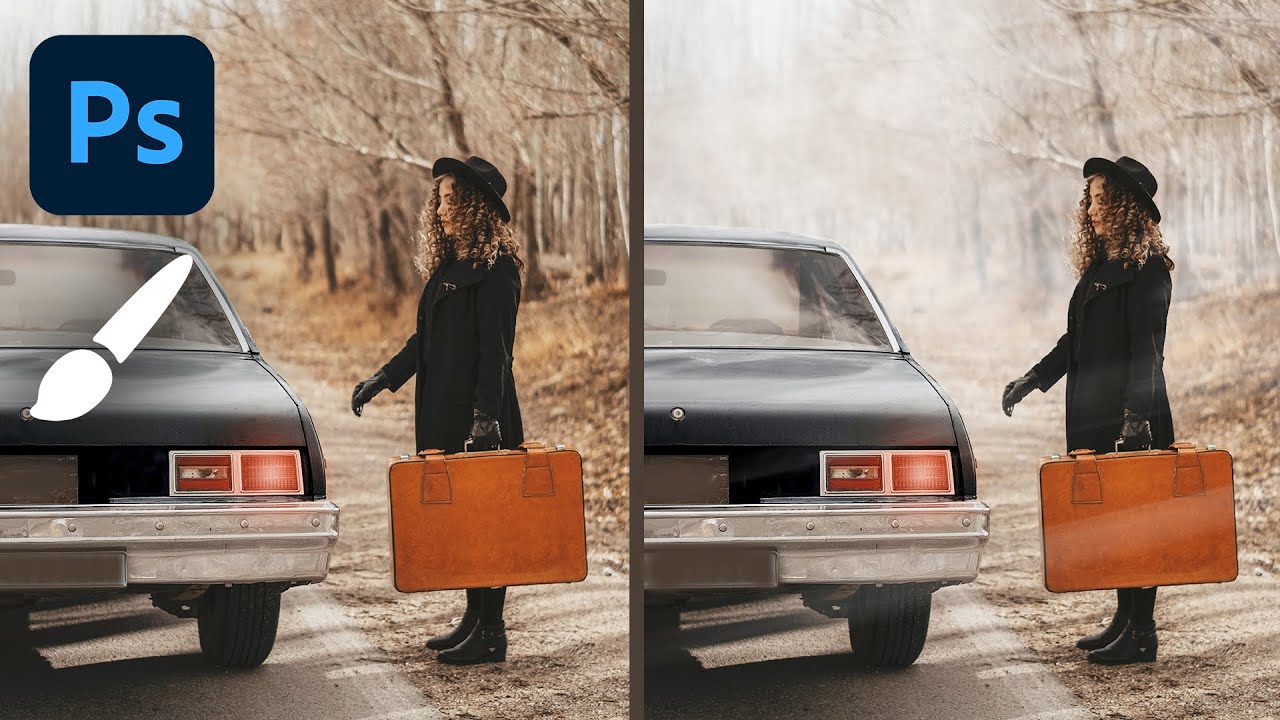
Compositing is where my commercial work lives. Whether I’m dropping a product into a lifestyle scene or building a full environmental composite for an ad agency client, the sky is almost always the first thing that needs fixing. Stock skies are fine, but a brush-based cloud you can paint, scale, and reposition in seconds? That becomes a reusable asset that earns its keep across dozens of projects. The problem is that most people who try to build a cloud brush in Photoshop hit an immediate wall and don’t understand why it’s not working.

Build a Star Field Brush in Photoshop That Actually Looks Real (Not Clip Art)

Build a Star Field Brush in Photoshop That Actually Looks Real (Not Clip Art)

Client sends over a panoramic cityscape. Beautiful shot, golden hour fading into deep blue. The brief says “add stars.” If you’ve been doing this long enough, you already know what the wrong approach looks like: grab a tiny round brush, set it to white, and start clicking. Two hundred clicks later, you’ve got a sky that looks like someone flicked a paintbrush at the monitor. Every star is identical. Every star is boring.

Build a Snow Brush in Photoshop from Scratch (And Actually Understand Why It Works)

Build a Snow Brush in Photoshop from Scratch (And Actually Understand Why It Works)

Every December, at least one client asks me to add snow to a product shot or lifestyle image that was photographed in July. For years I licensed stock snow overlays, and they were fine, right up until they weren’t. The wrong flake size, the wrong density, a pattern that tiled visibly if you looked closely. The overlay approach is a patch, not a solution. What I actually needed was a brush I could resize, rescatter, and repaint non-destructively depending on the image.

How to Build Custom Photoshop Brushes That Actually Work Inside Actions

How to Build Custom Photoshop Brushes That Actually Work Inside Actions

Last spring I was setting up a new dodging-and-burning action for a cosmetics client, one of those workflows where consistency really matters because the same action runs across 300 product shots in a single batch. The action broke on the third image. Not a layer issue, not a color mode conflict. The brush I had defined for the Healing Brush step had a texture applied that referenced a pattern the client’s machine didn’t have loaded.

How to Paint Realistic Splatter Effects Using a Custom Brush in Photoshop

How to Paint Realistic Splatter Effects Using a Custom Brush in Photoshop

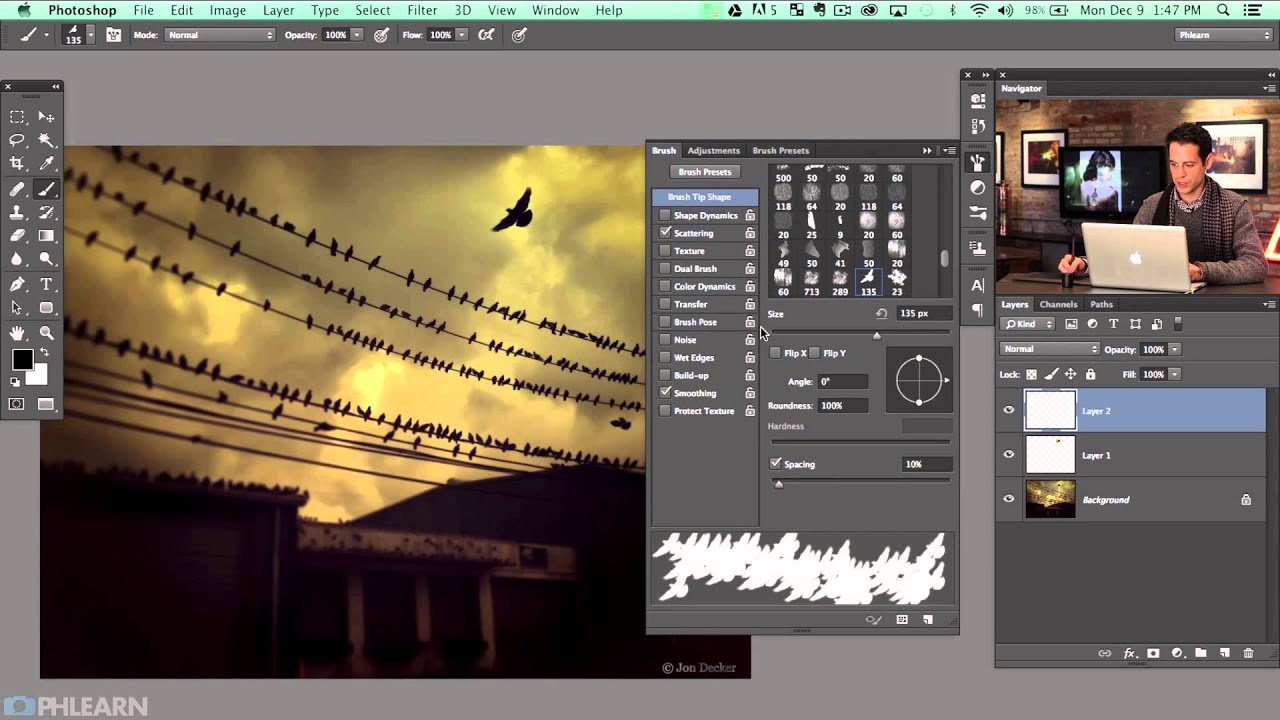
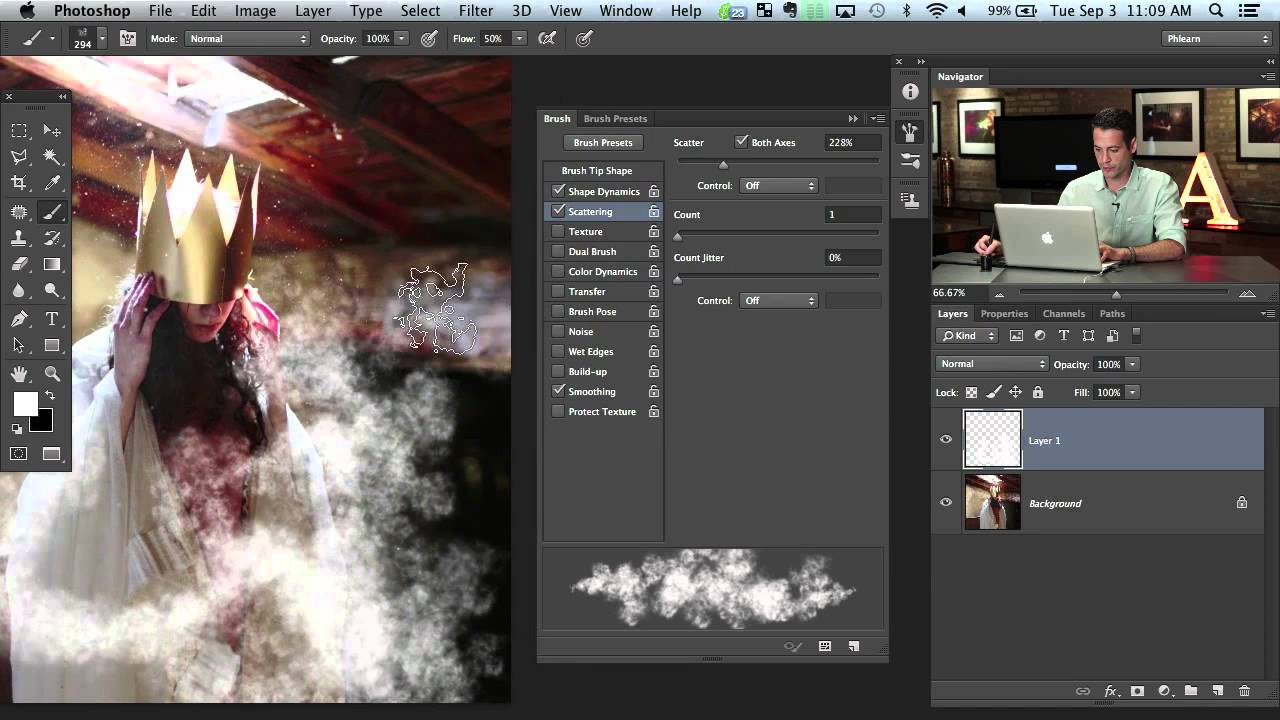
There’s a specific category of retouching request I get from ad agency clients that used to slow me down every single time: adding painterly, organic-looking elements to an otherwise clean photograph. Powder bursts, ink splashes, paint splatters. The kind of thing that looks effortless in the final comp but eats up an hour if you’re doing it by hand with a generic round brush. What I eventually figured out, and what this tutorial nails cleanly, is that the real solution lives inside Photoshop’s Brush Settings panel, a place most people open once, get confused by, and never return to.

Creating Custom Brushes for Photoshop: The Foundation of Efficient Workflows

Creating Custom Brushes for Photoshop: The Foundation of Efficient Workflows

Creating Custom Brushes for Photoshop: The Foundation of Efficient Workflows I’ve spent the last decade building Photoshop workflows, and I can tell you with absolute certainty: the fastest designers aren’t using Adobe’s default brushes. They’re building custom brush sets that anticipate exactly what they need, when they need it. Custom brushes are more than aesthetic preferences—they’re the scaffolding of repeatable, automated work. When you combine them with actions and presets, they become incredibly powerful.