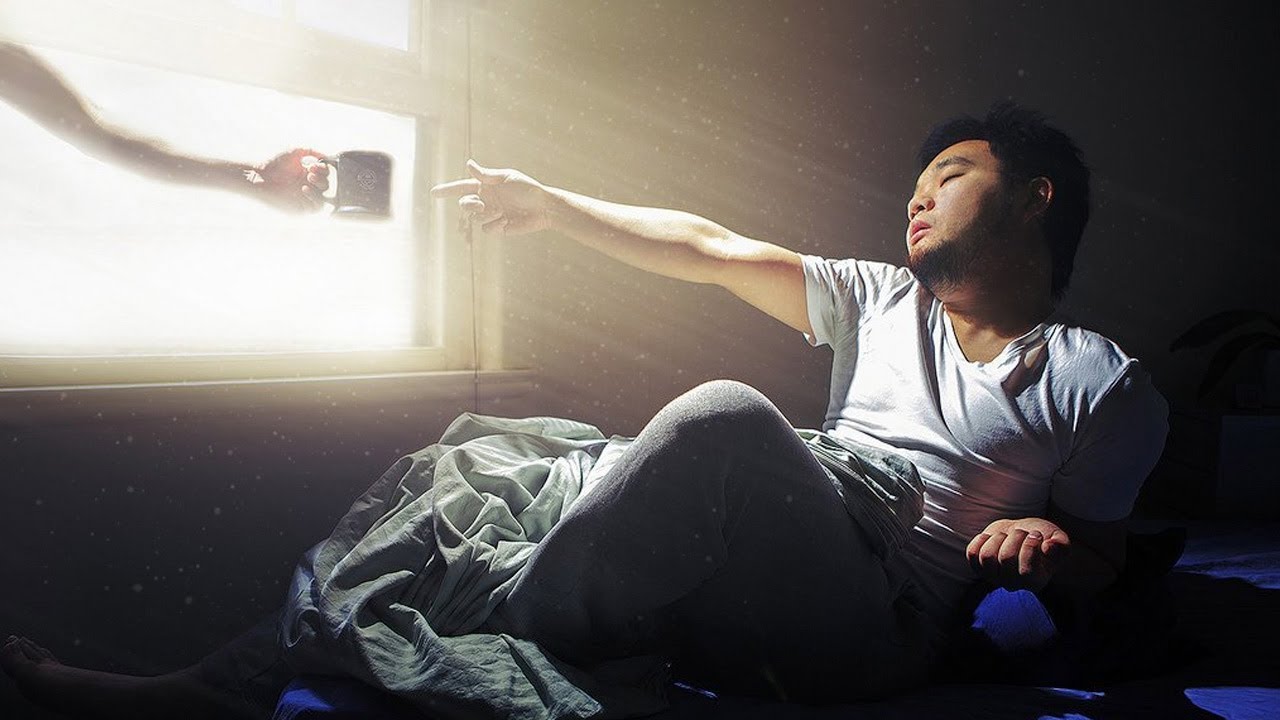
There’s a specific kind of client image that used to cost me real time: a shot with beautiful directional window light, the kind of light that practically begs for visible rays and floating dust motes, but nothing in-camera to show for it. The scene looked flat next to what my eye remembered. I’d tried painting particles by hand, one dot at a time, which is exactly as painful as it sounds. What I needed was a smarter brush setup that could scatter organically across a wide area without me micromanaging every speck. In this Aaron Nace (PHLEARN) tutorial, Watch the full tutorial on YouTube, Aaron walks through building exactly that kind of brush from scratch, then using it alongside a blur technique to add light beams that feel like they belong in the photo.
The core insight here is deceptively simple: Photoshop’s built-in scatter settings are constrained by brush size. If your brush tip is small, your scatter radius is small, and your particles cluster together instead of drifting freely through a scene. Aaron’s fix is to build a large-canvas brush document, paint a few dots across that wide space, and save the whole thing as a brush preset. That wide starting geometry gives the scatter engine real room to work with. It’s the kind of thing that seems obvious once someone explains it, and that I would have spent an embarrassing amount of time troubleshooting on my own.
Step 1: Understand Why the Default Brush Fails for Particles
 Scattered brush strokes clustered too tightly on canvas
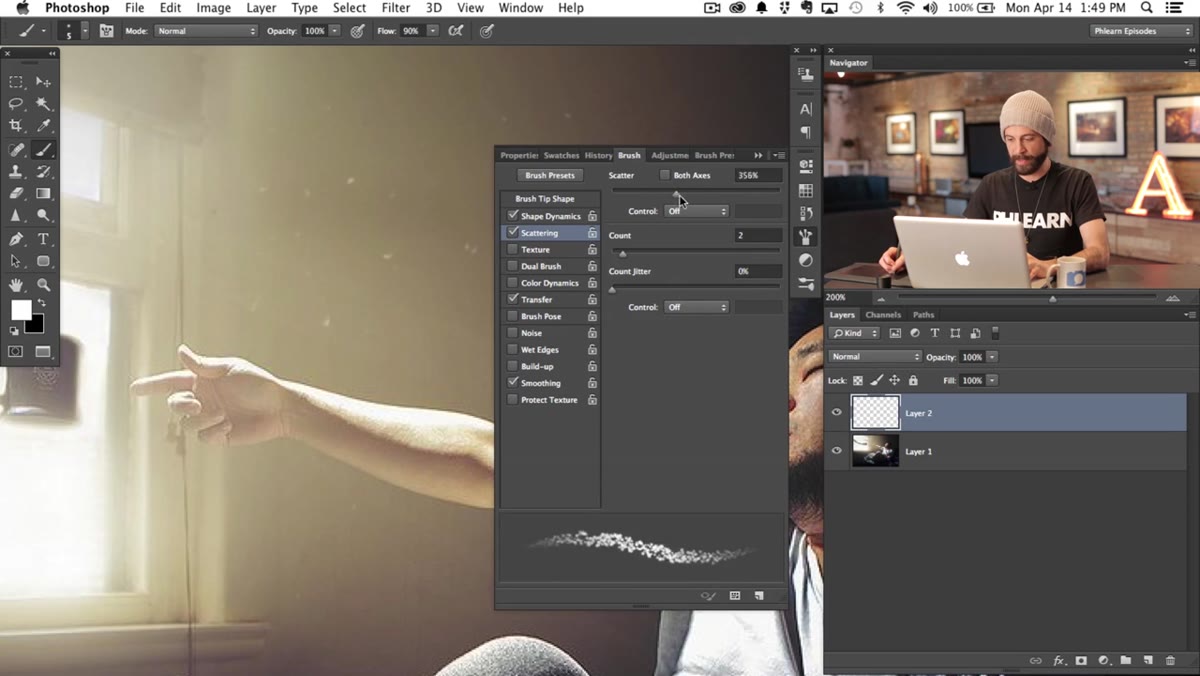
Before building anything, it’s worth watching Aaron demonstrate the limitation of a standard round brush with scatter applied. He opens the Brush Settings panel (Window > Brush Settings), cranks up Size Jitter under Shape Dynamics, and then pushes the Scatter slider. The result looks plausible at a glance, but when you actually paint a stroke, the dots pile up within a narrow band. They follow the cursor too faithfully. For fairy dust, maybe. For atmospheric particles drifting through a beam of afternoon light, not convincing. Seeing the failure case first makes the custom brush solution make much more sense.
Scattered brush strokes clustered too tightly on canvas
Before building anything, it’s worth watching Aaron demonstrate the limitation of a standard round brush with scatter applied. He opens the Brush Settings panel (Window > Brush Settings), cranks up Size Jitter under Shape Dynamics, and then pushes the Scatter slider. The result looks plausible at a glance, but when you actually paint a stroke, the dots pile up within a narrow band. They follow the cursor too faithfully. For fairy dust, maybe. For atmospheric particles drifting through a beam of afternoon light, not convincing. Seeing the failure case first makes the custom brush solution make much more sense.
Step 2: Create a New 500x500 Pixel Document for Your Brush Tip
 New Document dialog with 500x500 pixel dimensions entered
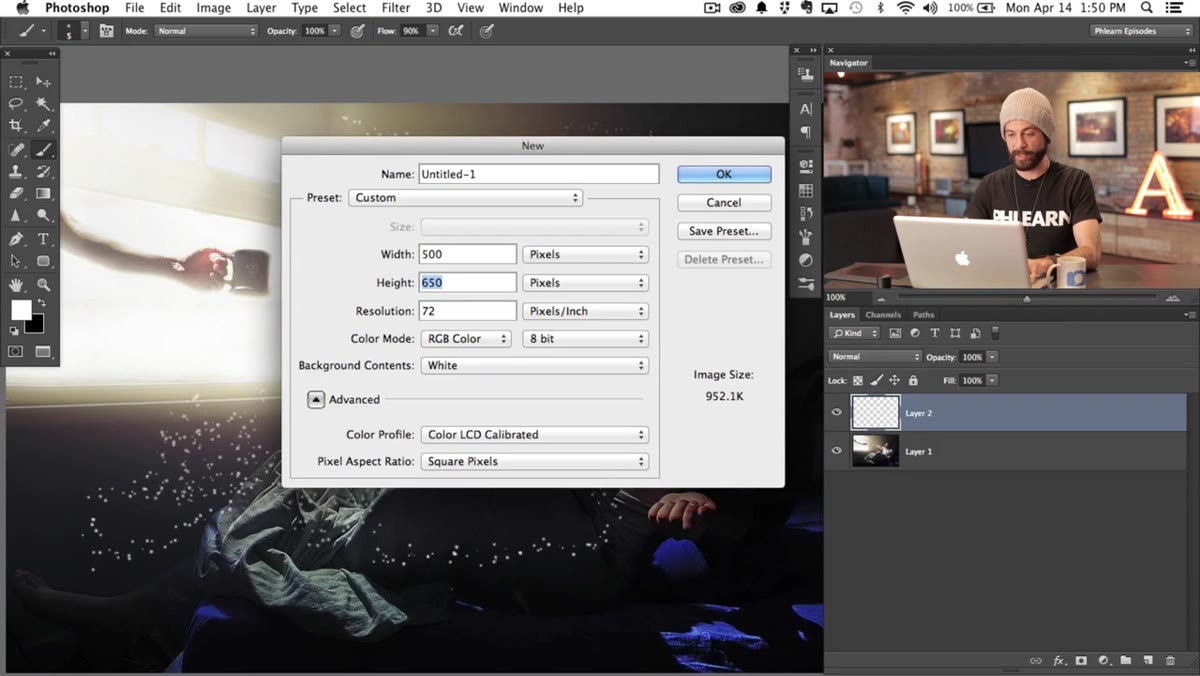
Hit Command+N (Ctrl+N on Windows) and create a new document at 500 by 500 pixels. The background should be white. This canvas is going to become the actual brush tip shape that Photoshop reads when you paint, so its size directly determines how much scatter range you’ll get. A 500-pixel canvas gives you a much wider scatter field than painting dots onto your working document with a 10-pixel brush ever would. Think of this step as setting the physical size of your scatter container.
New Document dialog with 500x500 pixel dimensions entered
Hit Command+N (Ctrl+N on Windows) and create a new document at 500 by 500 pixels. The background should be white. This canvas is going to become the actual brush tip shape that Photoshop reads when you paint, so its size directly determines how much scatter range you’ll get. A 500-pixel canvas gives you a much wider scatter field than painting dots onto your working document with a 10-pixel brush ever would. Think of this step as setting the physical size of your scatter container.
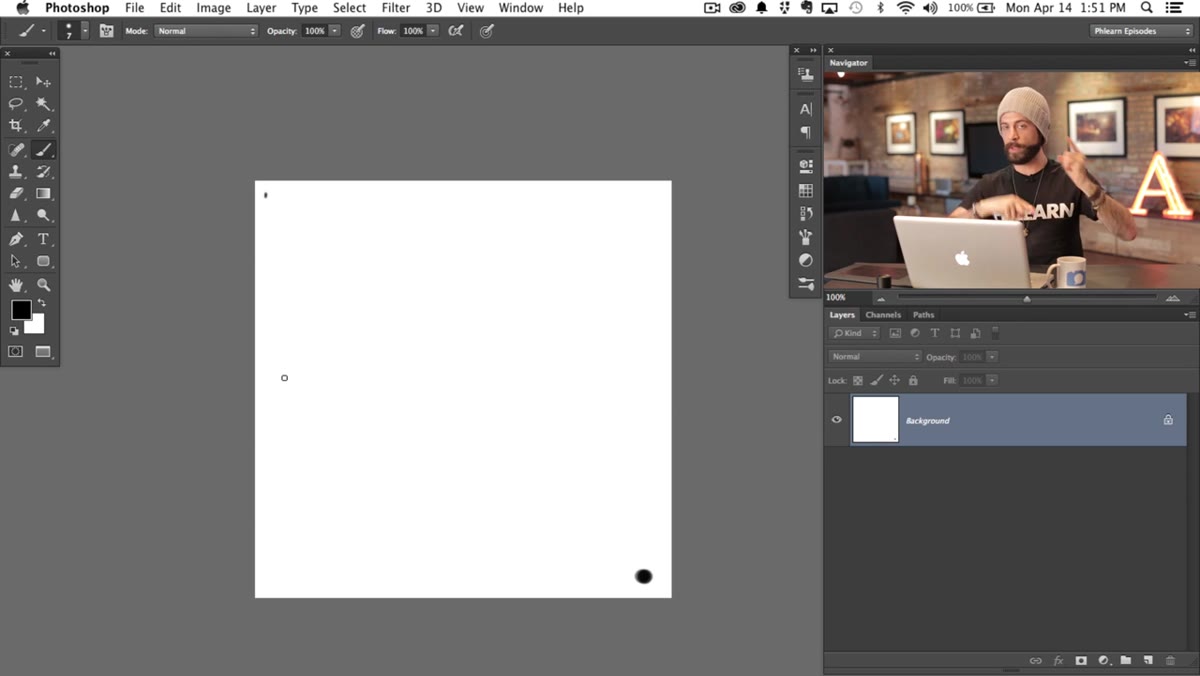
Step 3: Paint Scattered Dots Across the Canvas
 Small black dots painted at varying positions on white canvas
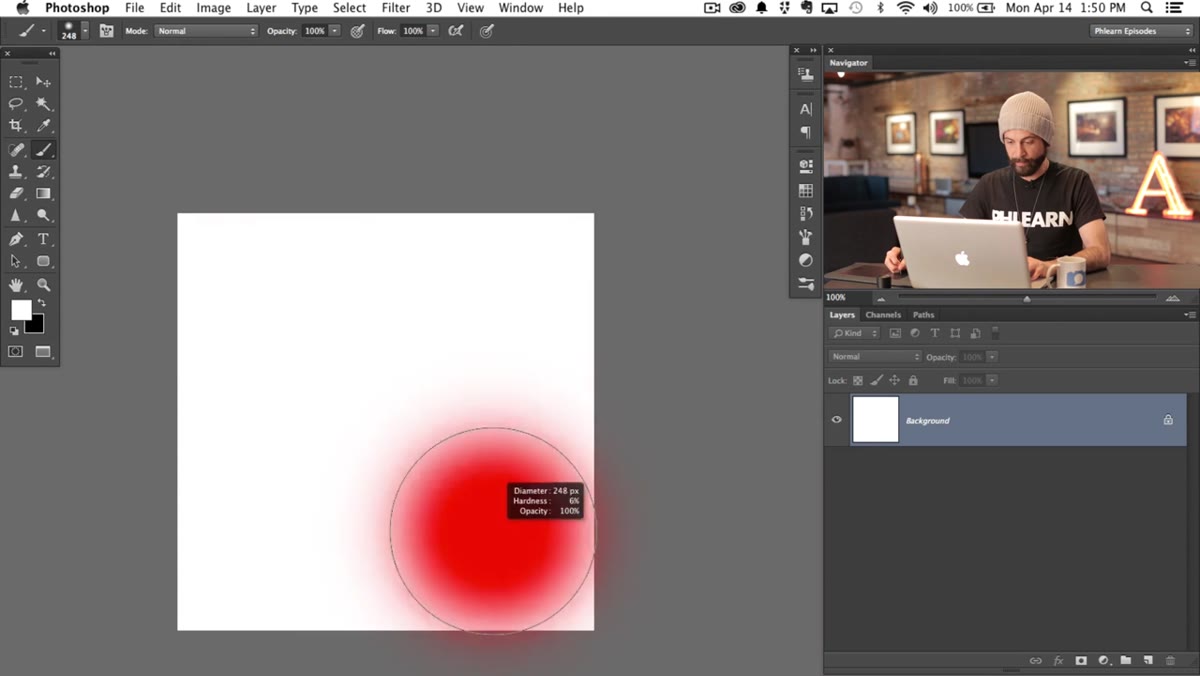
Switch to a hard round brush, set your foreground color to black, and paint a loose collection of small dots across the 500-pixel canvas. Vary their sizes manually. Place some in the upper left, a couple near the middle, a few toward the bottom right. You want them distributed unevenly, not in a grid. These dots become the brush tip’s stamp shape, and their positions across that wide canvas are what creates the convincing random scatter when you paint later. Spend about thirty seconds on this. It does not need to look perfect.
Small black dots painted at varying positions on white canvas
Switch to a hard round brush, set your foreground color to black, and paint a loose collection of small dots across the 500-pixel canvas. Vary their sizes manually. Place some in the upper left, a couple near the middle, a few toward the bottom right. You want them distributed unevenly, not in a grid. These dots become the brush tip’s stamp shape, and their positions across that wide canvas are what creates the convincing random scatter when you paint later. Spend about thirty seconds on this. It does not need to look perfect.
Step 4: Define the Brush Preset
 Edit menu open with Define Brush Preset option highlighted
Go to Edit > Define Brush Preset and give it a descriptive name. Something like “Dust Scatter 500” works. Photoshop reads the black areas of your canvas as the brush tip geometry and saves the whole thing as a new preset. From this point forward, that preset lives in your brush library and can be loaded into any project. If you work across multiple machines the way I do, export it immediately (Edit > Presets > Export/Import Presets) and drop it in your presets folder. Losing a custom brush you actually use is an avoidable frustration.
Edit menu open with Define Brush Preset option highlighted
Go to Edit > Define Brush Preset and give it a descriptive name. Something like “Dust Scatter 500” works. Photoshop reads the black areas of your canvas as the brush tip geometry and saves the whole thing as a new preset. From this point forward, that preset lives in your brush library and can be loaded into any project. If you work across multiple machines the way I do, export it immediately (Edit > Presets > Export/Import Presets) and drop it in your presets folder. Losing a custom brush you actually use is an avoidable frustration.
Step 5: Open Brush Settings and Configure Scatter Dynamics
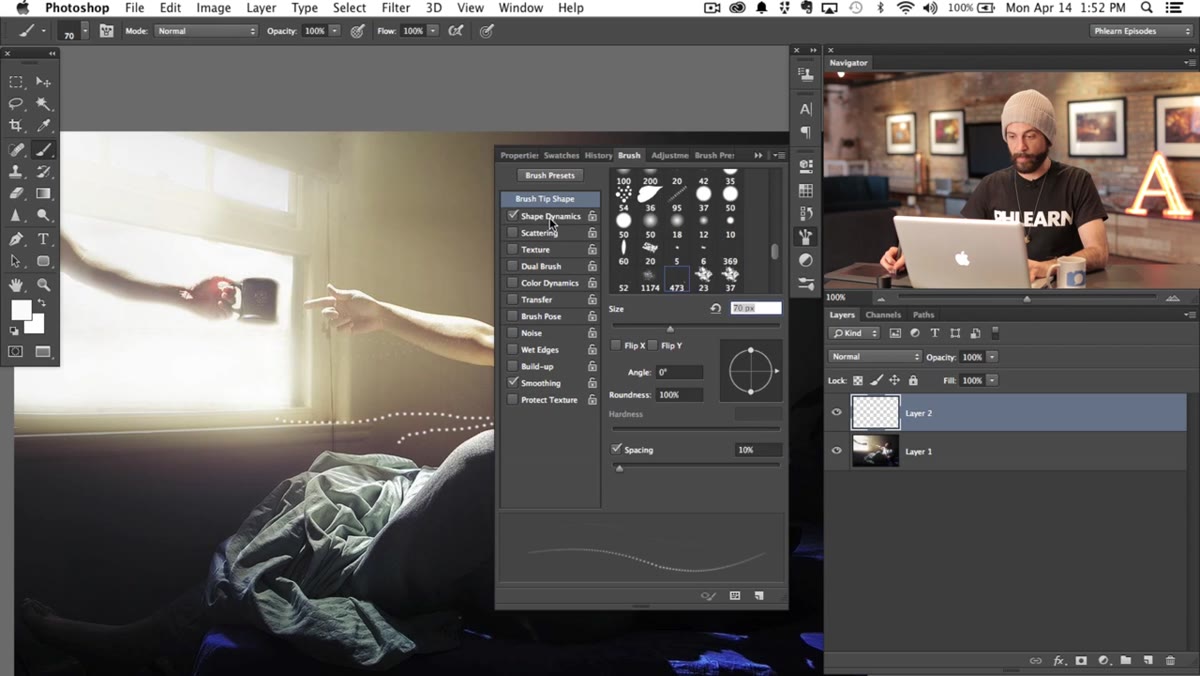 Brush Settings panel showing Shape Dynamics and Scatter controls
Select your new brush preset and open the Brush Settings panel. Under Shape Dynamics, push Size Jitter to somewhere between 70 and 100 percent. This randomizes the size of each dot stamp as you paint, so you get a natural mix of larger and smaller particles rather than a monotonous repeating shape. Then click into Scatter and raise the Scatter value significantly, with Both Axes checked. Because your brush tip is already 500 pixels wide with dots spread across it, even moderate scatter values produce a wide, organic spread across your canvas. Adjust the Count value to control how densely the particles appear per stroke.
Brush Settings panel showing Shape Dynamics and Scatter controls
Select your new brush preset and open the Brush Settings panel. Under Shape Dynamics, push Size Jitter to somewhere between 70 and 100 percent. This randomizes the size of each dot stamp as you paint, so you get a natural mix of larger and smaller particles rather than a monotonous repeating shape. Then click into Scatter and raise the Scatter value significantly, with Both Axes checked. Because your brush tip is already 500 pixels wide with dots spread across it, even moderate scatter values produce a wide, organic spread across your canvas. Adjust the Count value to control how densely the particles appear per stroke.
Step 6: Paint Particles on a New Layer and Add the Light Beam Blur
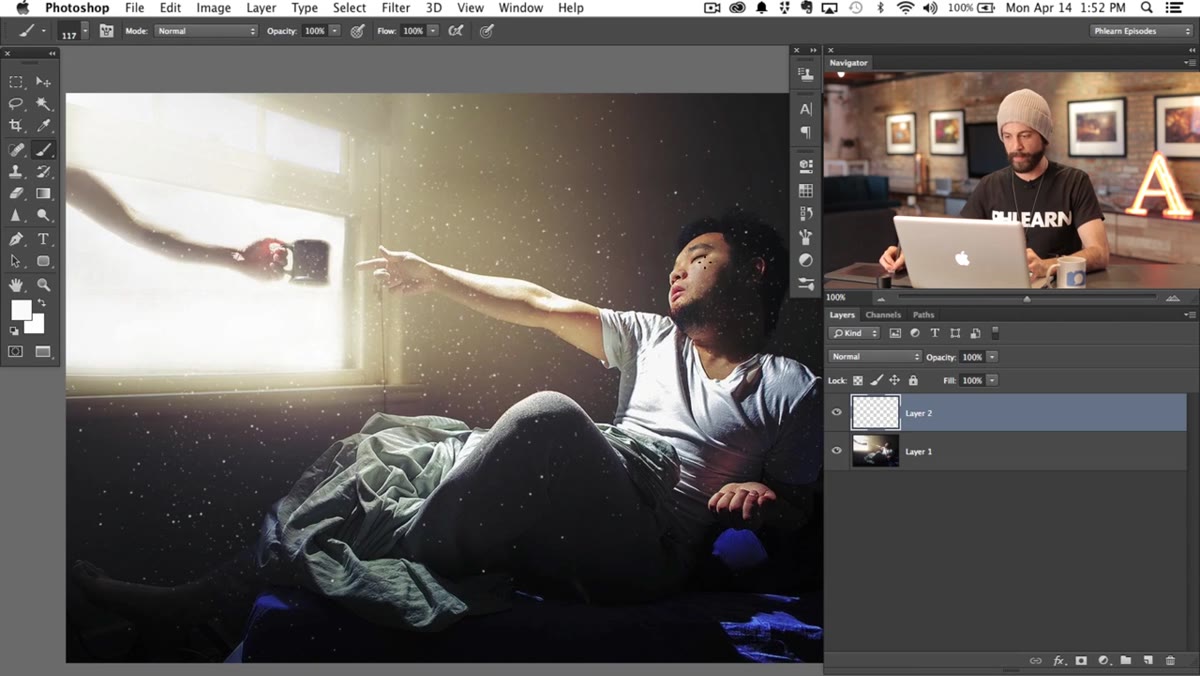 White brush strokes on dark layer showing particle distribution
Create a new layer above your photo, set it to Screen blending mode, and paint your particle strokes in white across the areas where the light source would logically cast through. Screen mode drops out anything dark and lets only the bright strokes show, which means your particles composite naturally into the image without a visible layer boundary. For the light rays themselves, Aaron adds another layer, paints a broad soft streak in the direction of the light source, then applies a Motion Blur (Filter > Blur > Motion Blur) at the angle that matches the light’s direction. The combination of scattered particles and a directional blur creates the layered atmosphere that makes the effect read as real.
White brush strokes on dark layer showing particle distribution
Create a new layer above your photo, set it to Screen blending mode, and paint your particle strokes in white across the areas where the light source would logically cast through. Screen mode drops out anything dark and lets only the bright strokes show, which means your particles composite naturally into the image without a visible layer boundary. For the light rays themselves, Aaron adds another layer, paints a broad soft streak in the direction of the light source, then applies a Motion Blur (Filter > Blur > Motion Blur) at the angle that matches the light’s direction. The combination of scattered particles and a directional blur creates the layered atmosphere that makes the effect read as real.
A Note From My Own Workflow
I tested this technique on an e-commerce lifestyle shot where the art director had asked for “something dusty and warm, like an old workshop.” Painting particles by hand had been my first instinct, and it took me 40 minutes to get something that looked forced. After building this brush, I had a more convincing result in under five minutes. The variable I underestimated was opacity. I now paint the particle layer at 60 to 70 percent capacity and mask off the edges, which keeps the effect from overpowering the subject. A second, slightly larger scatter stroke at 20 percent opacity underneath adds depth. It’s two layers instead of one, but it reads three-dimensional rather than flat.
The single most transferable idea from this tutorial is that your brush tip geometry is your scatter geometry. If you want wide, free distribution, you have to build it into the tip itself, not just rely on the scatter slider to do work it was never designed to do. That principle applies any time you’re building custom brushes for procedural texture or organic effects. Watch the full tutorial on YouTube to see Aaron walk through every step in real time, including the finished composite on the original image.
Comments
Leave a Comment