Most of the texture brushes I use in client work started as photographs. Concrete, fabric, water splashes, and yes, smoke. When you’re retouching a product shot for an ad agency and the art director wants “a little atmospheric haze,” you need something that blends naturally - not a canned plugin effect that looks like it came out of a 2009 tutorial. Building your own brush from real smoke footage solves that problem permanently. You make it once, you use it forever.
Watch the full tutorial on YouTube
In this CreativeLive tutorial, the instructor walks through the full process of converting a smoke photograph into a custom Photoshop brush, using Camera Raw as a non-destructive editing engine so you can iterate without committing. The logic here is straightforward, but there’s a mental inversion step in the middle that trips almost everyone the first time. I’m going to break it down clearly enough that you can follow along without scrubbing the video back and forth.
Step 1: Open Your Smoke Photo in Camera Raw
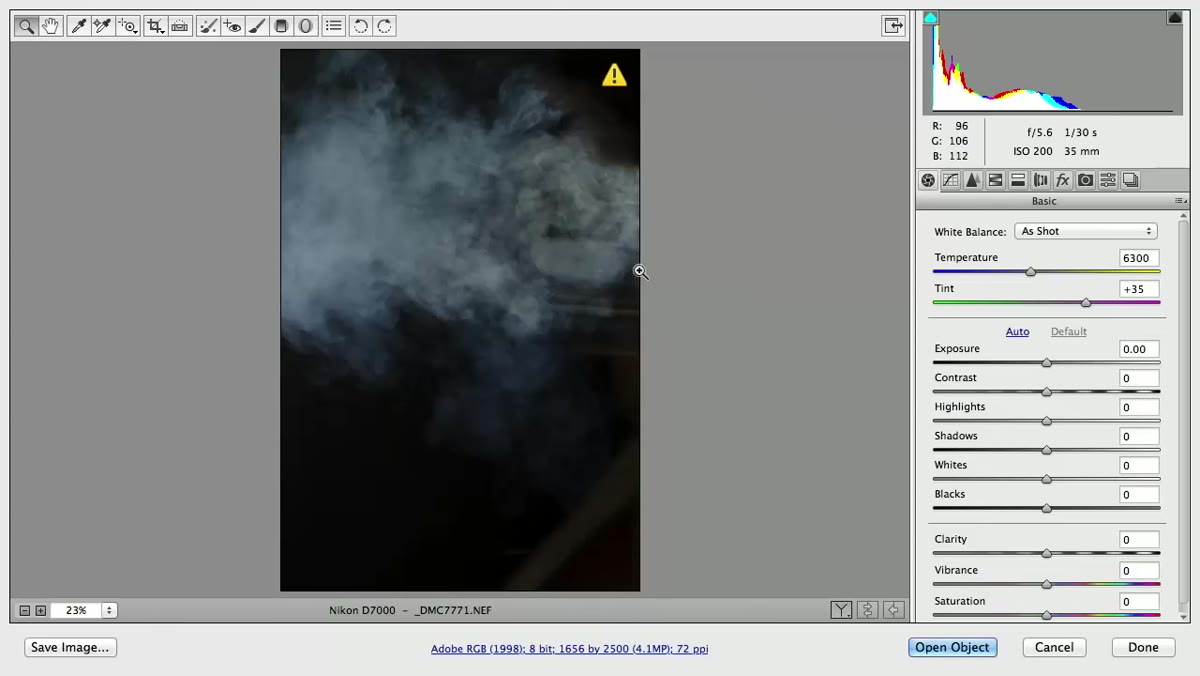 Smoke photograph open in Camera Raw with settings panel visible
Start with a photograph of smoke - ideally shot against a black background, which is the standard setup for this kind of source material. Open it in Camera Raw, either directly or by converting your layer to a Smart Object first. The Smart Object route is worth the extra click because it keeps Camera Raw editable at every stage.
Smoke photograph open in Camera Raw with settings panel visible
Start with a photograph of smoke - ideally shot against a black background, which is the standard setup for this kind of source material. Open it in Camera Raw, either directly or by converting your layer to a Smart Object first. The Smart Object route is worth the extra click because it keeps Camera Raw editable at every stage.
Your goal at this point is to push the background toward pure black while preserving the smoke detail. Pull the Shadows slider down hard. Turn on the clipping warning (the triangle icon in the histogram) so you can see exactly where you’re losing detail to pure black. Lower the Saturation as well - smoke photographs often pick up a blue color cast from studio lighting, and that color information will interfere with how the brush renders later. You want clean luminance values, nothing else.
Step 2: Push the Highlights to Brighten the Smoke
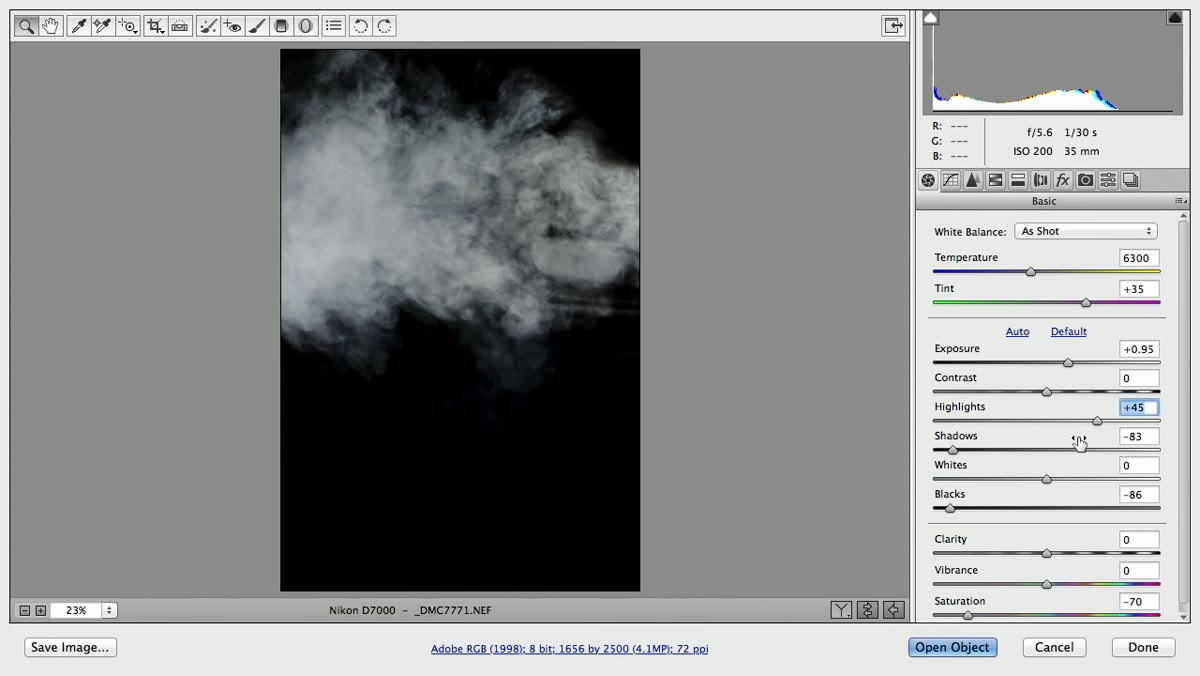 Camera Raw highlights slider being pushed up on smoke image
Once the background is as dark as you can get it without clipping the smoke itself, push the Highlights slider upward. You’re trying to maximize the contrast between the smoke (bright) and the background (black). This is the setting you’ll come back and adjust later, so don’t agonize over the exact value right now. Get it in the right neighborhood and hit Open Object.
Camera Raw highlights slider being pushed up on smoke image
Once the background is as dark as you can get it without clipping the smoke itself, push the Highlights slider upward. You’re trying to maximize the contrast between the smoke (bright) and the background (black). This is the setting you’ll come back and adjust later, so don’t agonize over the exact value right now. Get it in the right neighborhood and hit Open Object.
This step is where the non-destructive workflow pays off. Because you opened as a Smart Object, every Camera Raw setting you just applied is live and editable. Nothing is baked in. That flexibility becomes critical in Step 4.
Step 3: Add an Invert Adjustment Layer to Preview the Brush
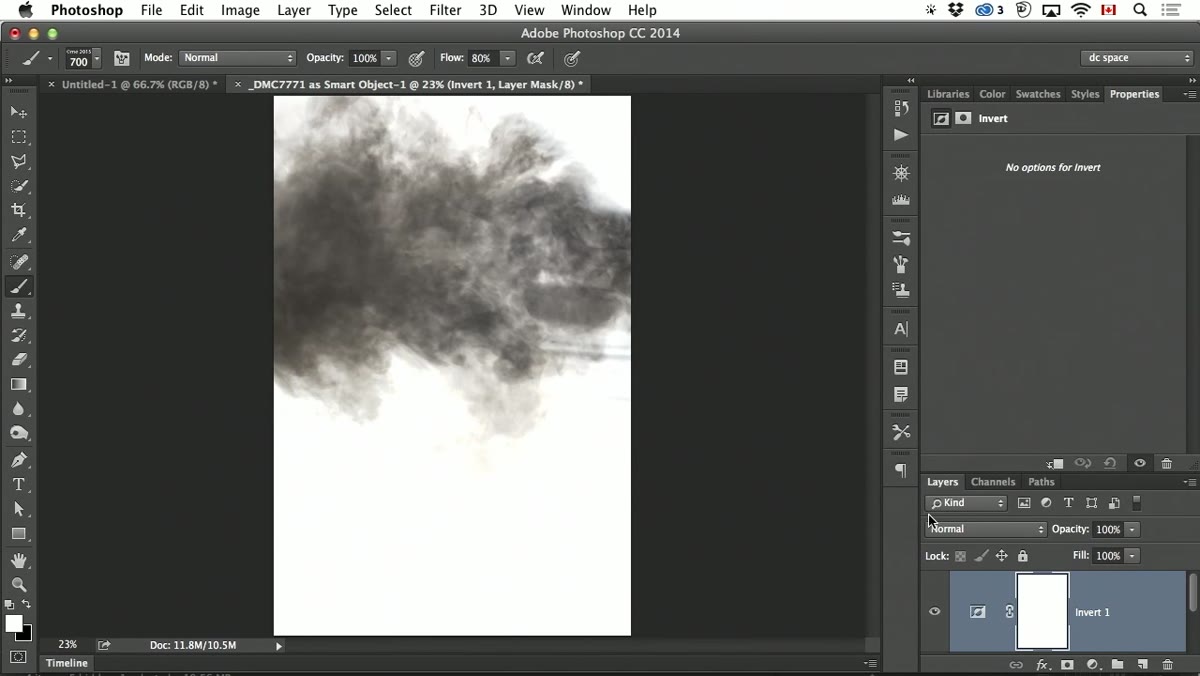 Invert adjustment layer applied, showing black smoke on white background
Here is the mental inversion that catches people off guard. Photoshop brushes work on a specific principle: black areas paint, white areas are transparent. Your smoke photo is currently white smoke on a black background - the exact opposite of what a brush needs. So before you define anything as a brush, add an Invert adjustment layer above your smoke layer.
Invert adjustment layer applied, showing black smoke on white background
Here is the mental inversion that catches people off guard. Photoshop brushes work on a specific principle: black areas paint, white areas are transparent. Your smoke photo is currently white smoke on a black background - the exact opposite of what a brush needs. So before you define anything as a brush, add an Invert adjustment layer above your smoke layer.
Now you’re seeing black smoke on a white background. What you’ll likely notice is that the smoke looks gray rather than true black. That’s fine - a slightly transparent brush is often exactly what you want for atmospheric effects. But if the smoke needs to be denser, that’s your cue to go back into Camera Raw and brighten the original image further. Brighter in the source equals darker (and more opaque) in the inverted preview. Yes, it feels backwards. It is backwards. Build that into your muscle memory and the rest of the process becomes intuitive.
Step 4: Return to Camera Raw and Refine the Density
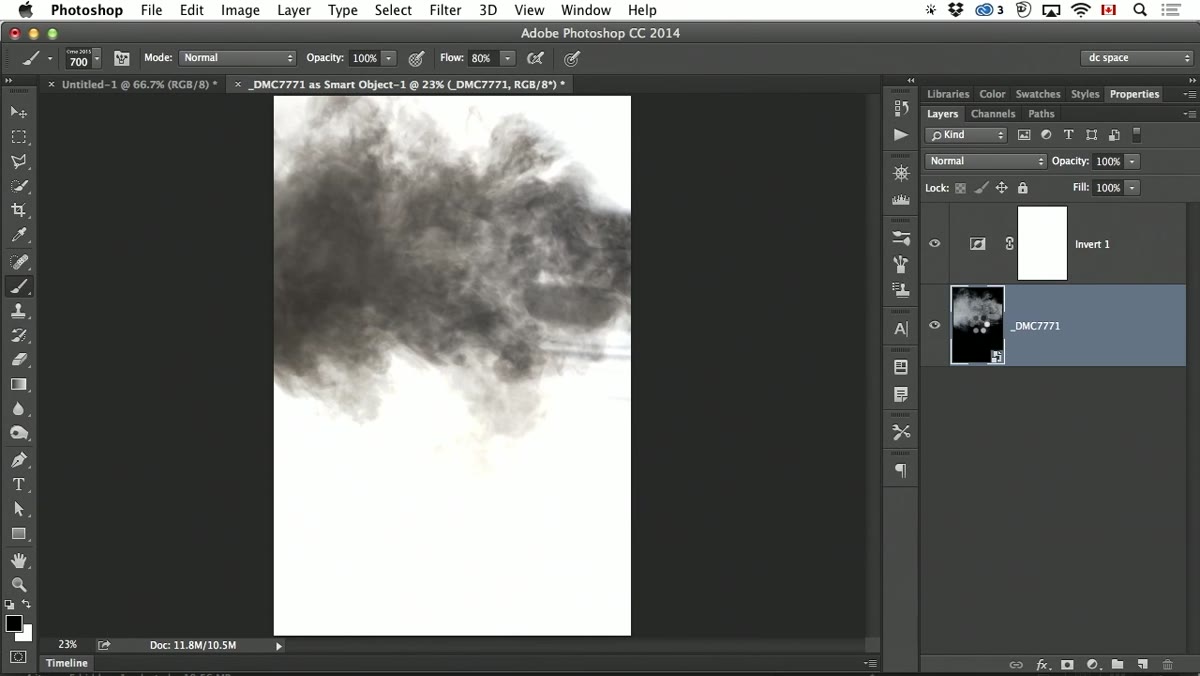 Camera Raw reopened from Smart Object to adjust brightness further
Double-click the Smart Object thumbnail to reopen Camera Raw. Push the exposure or highlights brighter than you think you need to. Because the Invert layer flips the values, going brighter here will translate to a darker, more opaque brush stroke in your final result. Make your adjustment, click OK, and check the inverted preview again.
Camera Raw reopened from Smart Object to adjust brightness further
Double-click the Smart Object thumbnail to reopen Camera Raw. Push the exposure or highlights brighter than you think you need to. Because the Invert layer flips the values, going brighter here will translate to a darker, more opaque brush stroke in your final result. Make your adjustment, click OK, and check the inverted preview again.
This back-and-forth is the whole point of using a Smart Object. You’re not guessing and flattening - you’re iterating in real time until the smoke density looks right for your specific use case. For a subtle haze effect you might want it lighter. For something dramatic, push it until the core of the smoke is nearly black in the inverted view.
Step 5: Mask the Edges with a Standard Soft Brush
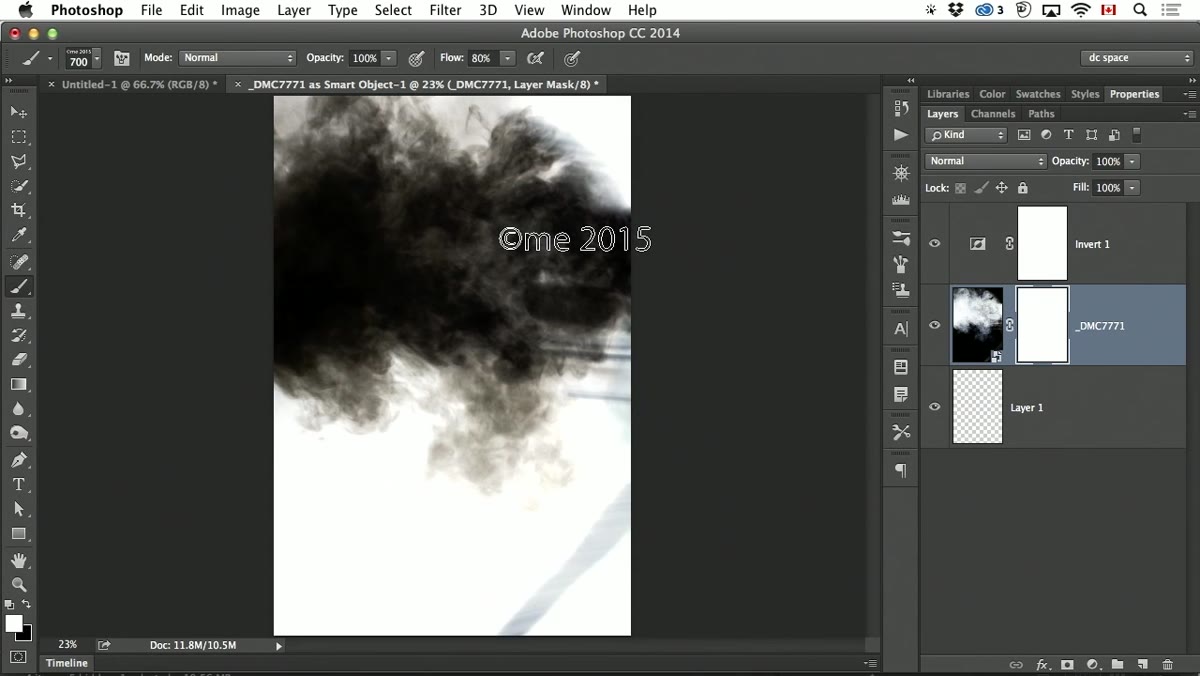 Layer mask being painted with soft brush to fade smoke edges
One practical problem with photographed smoke is that the frame cuts off at the edges, giving you hard rectangular boundaries. A brush with hard edges on the sides looks immediately fake in any composite. The fix is a layer mask on the smoke layer, painted with a large, soft-edged brush at reduced opacity.
Layer mask being painted with soft brush to fade smoke edges
One practical problem with photographed smoke is that the frame cuts off at the edges, giving you hard rectangular boundaries. A brush with hard edges on the sides looks immediately fake in any composite. The fix is a layer mask on the smoke layer, painted with a large, soft-edged brush at reduced opacity.
Create a new layer below the smoke, fill it with white (accounting for the Invert layer above - if your fill comes out black, that’s the Invert doing its job; toggle it off temporarily if you need to see clearly), and then add a mask to the smoke layer itself. Using a standard round soft brush at 20-30% opacity, paint black into the mask along the edges of the smoke, feathering them out gradually. Take your time here. Multiple light passes at low opacity will always look better than one aggressive stroke.
Step 6: Select and Define the Brush
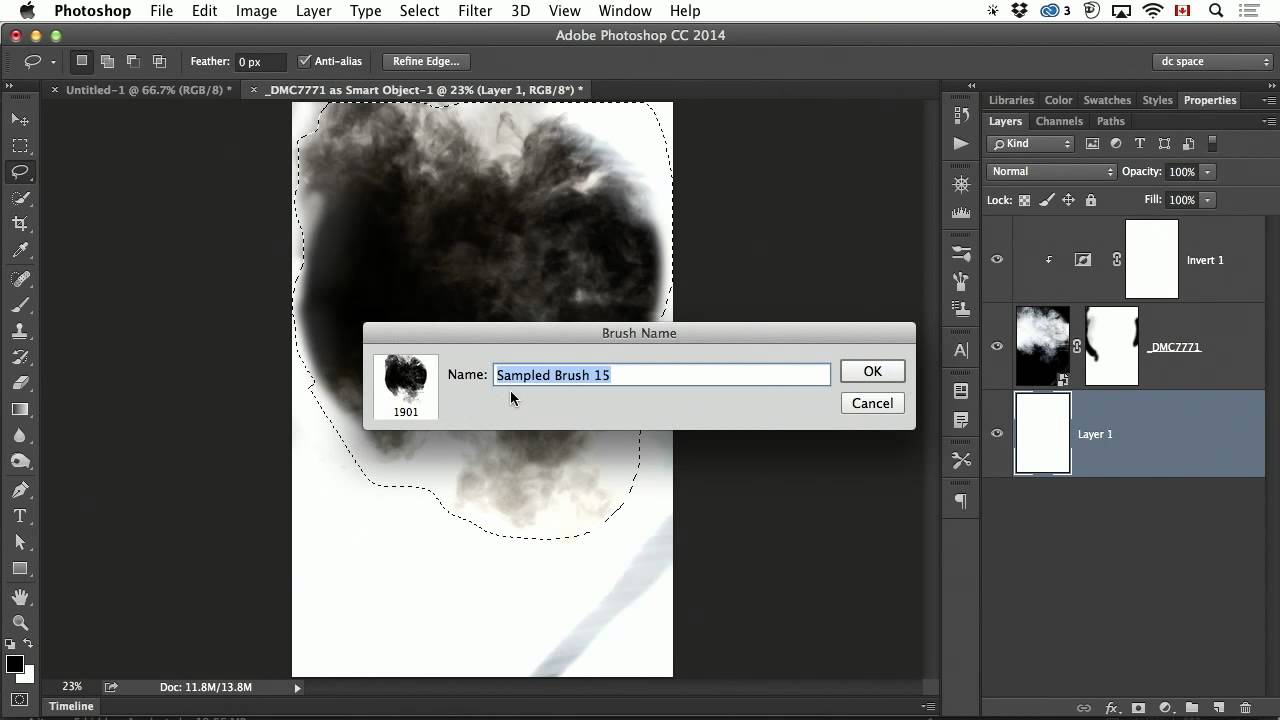
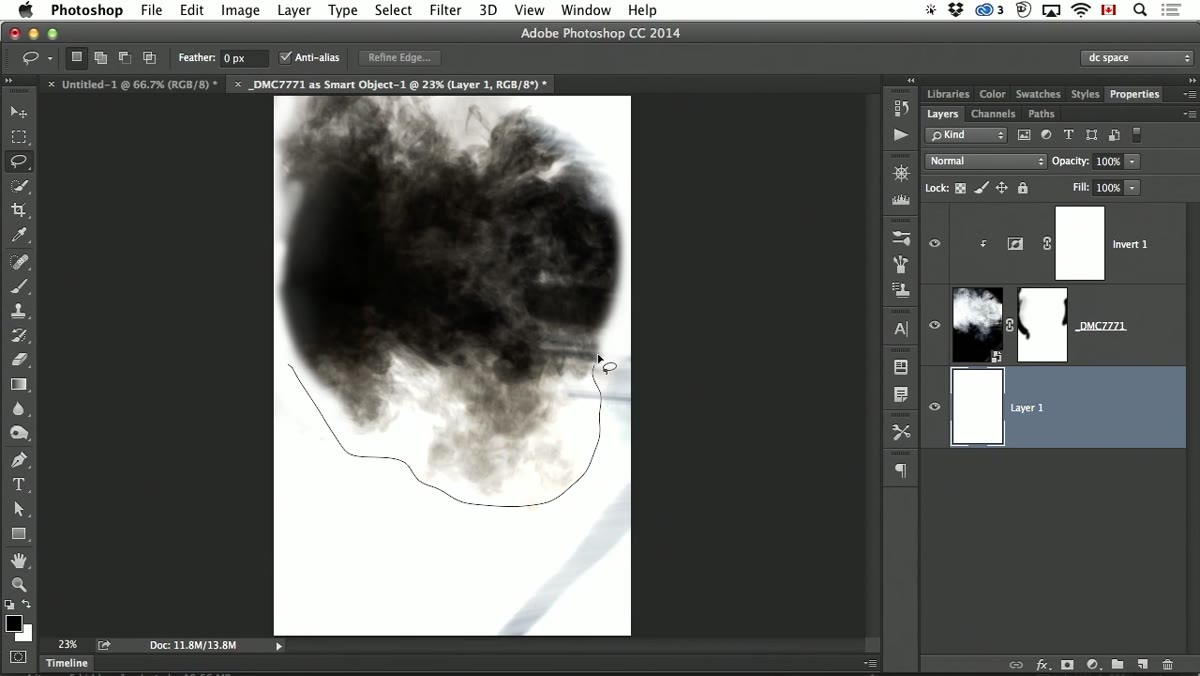 Lasso selection drawn around smoke area before defining brush preset
Use the Lasso tool to draw a loose selection around the smoke area you want to capture. You do not need a rectangular selection. This is a common misconception - Photoshop will define a brush from any active selection regardless of shape. A freehand lasso selection is completely valid.
Lasso selection drawn around smoke area before defining brush preset
Use the Lasso tool to draw a loose selection around the smoke area you want to capture. You do not need a rectangular selection. This is a common misconception - Photoshop will define a brush from any active selection regardless of shape. A freehand lasso selection is completely valid.
With your selection active and all relevant layers visible, go to Edit, then Define Brush Preset. Name it something specific - I use a naming convention that includes the source material and date, which makes it much easier to find three years later when I need it again. Your smoke brush is now saved and available in every document going forward.
A Note from My Own Workflow
I’ve been building source-photo brushes for years, and the single biggest improvement I made was shooting my own texture libraries rather than relying on stock. For smoke specifically, a black seamless backdrop, a decent incense stick or theatrical smoke source, and a camera with a fast shutter speed gets you raw material that nobody else has. Unique brushes compound in value over time - especially when clients start recognizing the visual signature of someone else’s preset pack.
One adjustment I always make that the tutorial doesn’t cover: after defining the brush, I go immediately into Brush Settings and reduce the Hardness to zero if it isn’t already, then save that as the actual preset. Photographed textures almost always benefit from the additional edge softness, particularly smoke.
The single most important idea in this whole process is the inversion logic: brighter source image equals denser brush stroke, because the Invert layer flips your tonal values. Once that clicks, the rest of the workflow is just settings management. Get your smoke image as a Smart Object, use an Invert adjustment layer as a live preview, iterate in Camera Raw until the density is right, mask your edges, and define the preset.
Watch the full tutorial on YouTube to see the instructor demonstrate the full sequence in real time - seeing the Camera Raw sliders move while watching the inverted preview update makes the tonal logic much easier to internalize.
Comments
Leave a Comment