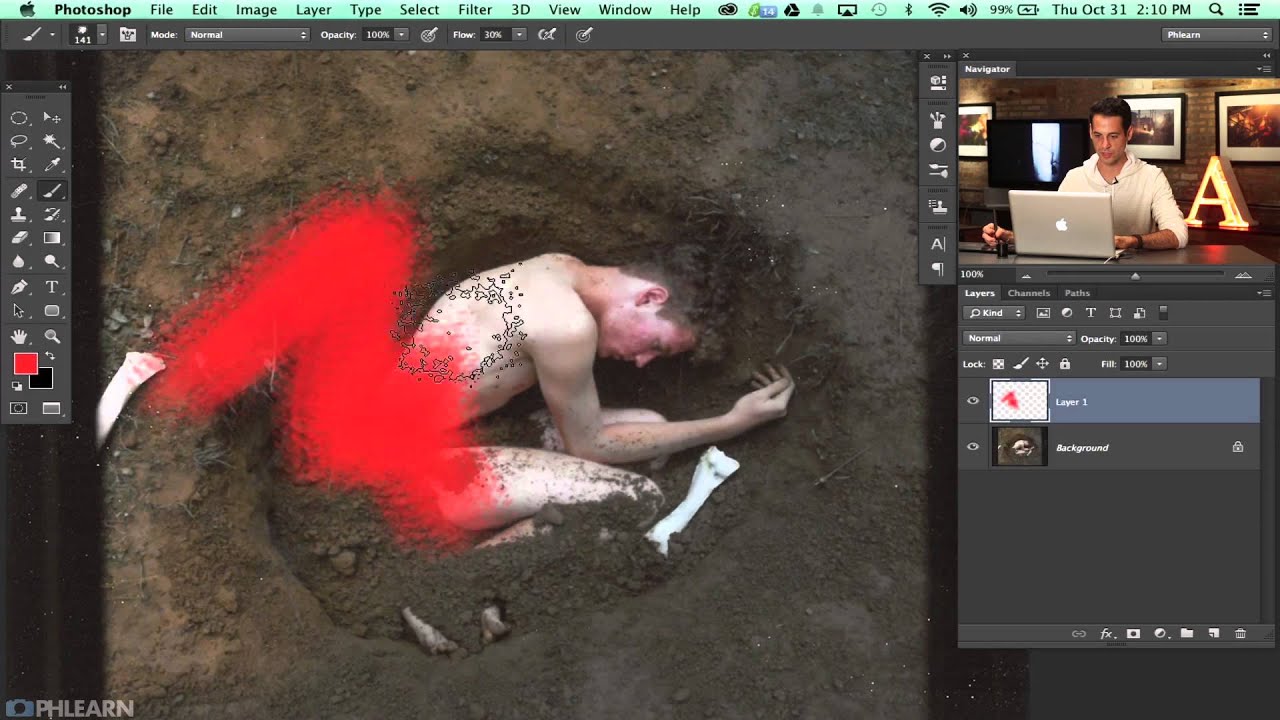
There’s a specific kind of retouching failure I’ve seen come out of otherwise competent studios for years: the ghost smear. You know the one. Someone used the Clone Stamp tool on a gravel path or a dirt surface, and no matter how carefully they feathered the edges, you can still see exactly where one clone sample ends and another begins. It’s subtle, but once you’ve spotted it on a client’s deliverable, you can’t unsee it. After enough of those moments, I started looking for a better system.
In this Aaron Nace (PHLEARN) tutorial, the fix is elegant: build a custom brush that mimics the actual texture you’re trying to blend, then use that brush as the stamp tip in your Clone Stamp tool. The result is a clone that inherits the organic randomness of a real texture instead of just copying a soft-edged circle over and over. Watch the full tutorial on YouTube - the visual examples alone are worth the click. Below is my breakdown of the exact process so you can follow along step by step.
Step 1: Identify the Problem Area in Your Image
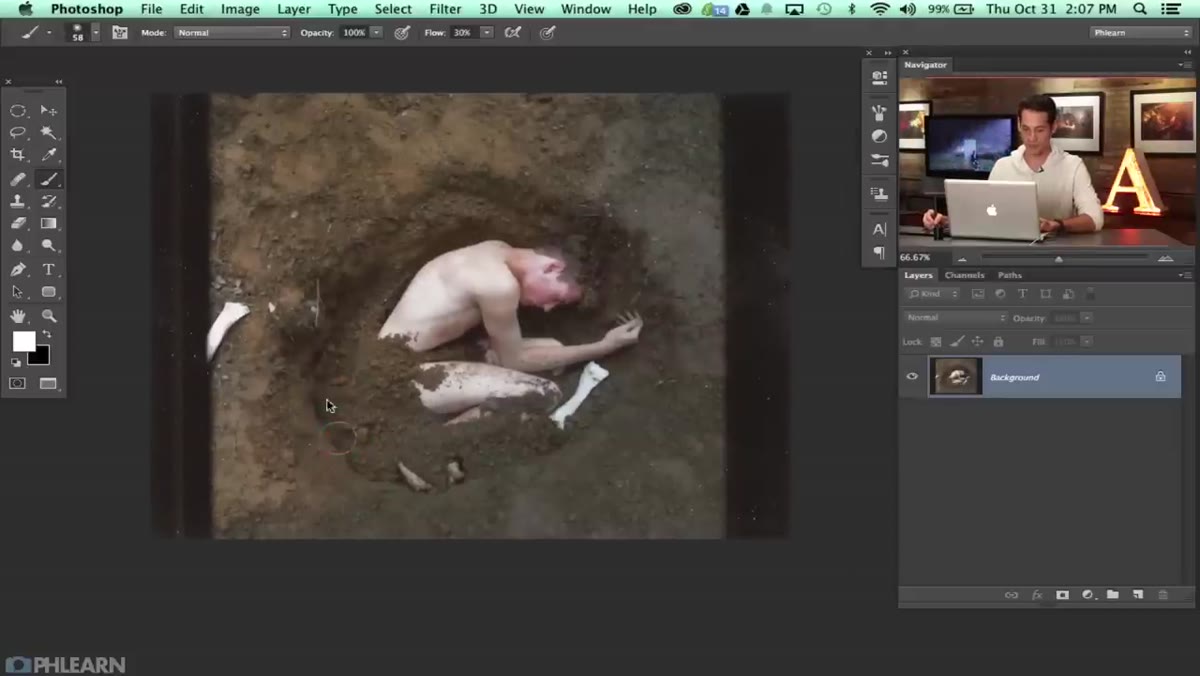 Clone stamp creating visible fuzzy edge on dirt surface
Before touching a brush, zoom into your image and look honestly at what the Clone Stamp is doing to the texture. Aaron demonstrates this directly by attempting a standard clone stamp pass on a dirt surface. The result is a slightly blurred halo wherever one clone pass meets another. On clean geometric surfaces that blur might blend away. On organic material like soil, gravel, or rough ground, it telegraphs immediately that something was painted in. The whole point of this technique is to make the stamp tool’s edge behavior match the texture it’s filling, not fight against it.
Clone stamp creating visible fuzzy edge on dirt surface
Before touching a brush, zoom into your image and look honestly at what the Clone Stamp is doing to the texture. Aaron demonstrates this directly by attempting a standard clone stamp pass on a dirt surface. The result is a slightly blurred halo wherever one clone pass meets another. On clean geometric surfaces that blur might blend away. On organic material like soil, gravel, or rough ground, it telegraphs immediately that something was painted in. The whole point of this technique is to make the stamp tool’s edge behavior match the texture it’s filling, not fight against it.
Step 2: Create a New 500x500 Document for Your Brush
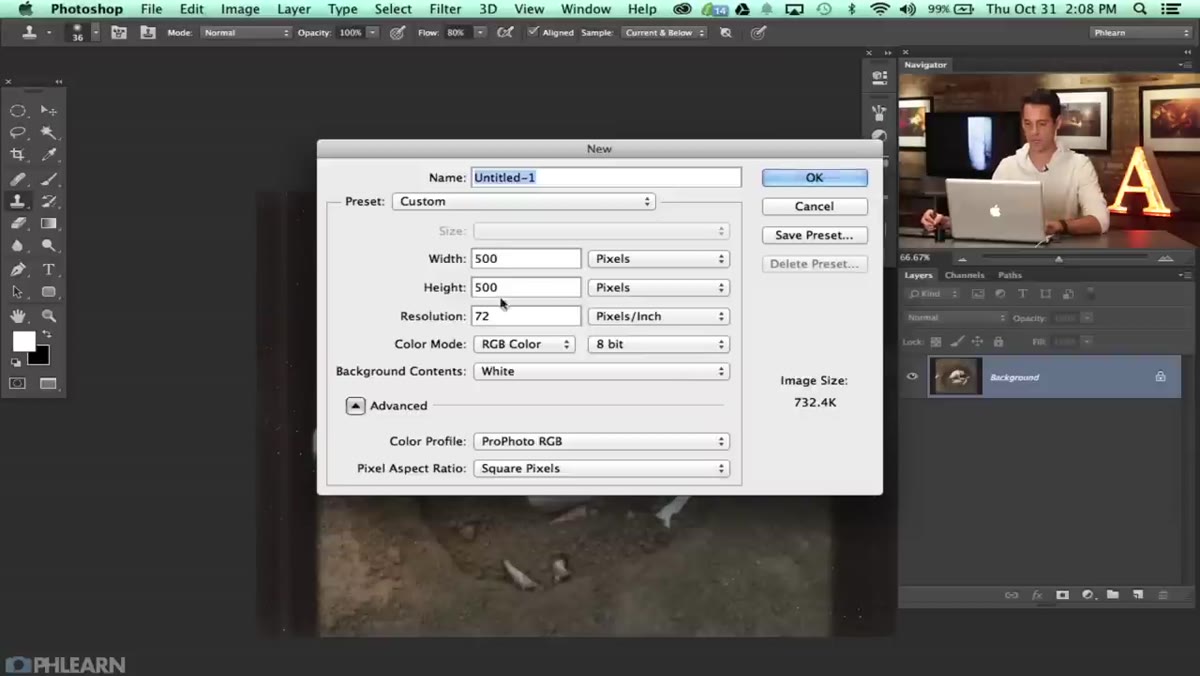 New document dialog set to 500 by 500 pixels
Go to File, New (or Command/Ctrl + N) and create a new document at 500 x 500 pixels. This is your brush canvas. White background, black foreground. The reason you work in a separate document is that Photoshop reads the black areas of an image as the active part of a brush tip when you define it. White areas become transparent. So whatever black marks you make here will become the shape of your custom brush.
New document dialog set to 500 by 500 pixels
Go to File, New (or Command/Ctrl + N) and create a new document at 500 x 500 pixels. This is your brush canvas. White background, black foreground. The reason you work in a separate document is that Photoshop reads the black areas of an image as the active part of a brush tip when you define it. White areas become transparent. So whatever black marks you make here will become the shape of your custom brush.
Step 3: Paint a Random Organic Shape Using Natural Brushes
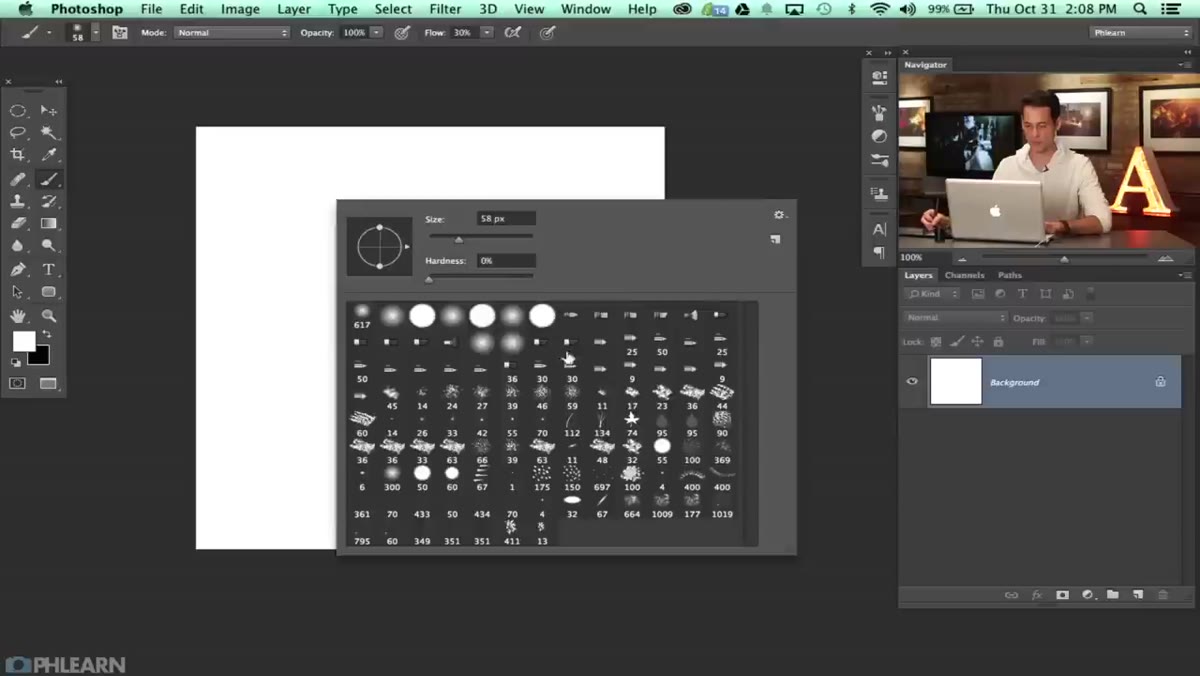 Natural splatter brushes loaded in the Brushes panel
Right-click to open your brush picker and load the Natural Brushes preset. Aaron clicks the gear icon in the brush panel, selects Natural Brushes, and appends them to the existing set. From that collection, pick a splatter-style brush and start making marks on your white canvas. The key instruction here: be deliberately random. Vary the brush size between marks. Overlap some areas. Leave others sparse. You’re not drawing anything representational - you’re simulating the kind of uneven scatter pattern that real dirt or grit makes. A few large splatter marks with smaller ones scattered around them is roughly the target. One pass across the whole canvas is usually enough. Overthinking it produces something that looks designed, which defeats the purpose.
Natural splatter brushes loaded in the Brushes panel
Right-click to open your brush picker and load the Natural Brushes preset. Aaron clicks the gear icon in the brush panel, selects Natural Brushes, and appends them to the existing set. From that collection, pick a splatter-style brush and start making marks on your white canvas. The key instruction here: be deliberately random. Vary the brush size between marks. Overlap some areas. Leave others sparse. You’re not drawing anything representational - you’re simulating the kind of uneven scatter pattern that real dirt or grit makes. A few large splatter marks with smaller ones scattered around them is roughly the target. One pass across the whole canvas is usually enough. Overthinking it produces something that looks designed, which defeats the purpose.
Step 4: Define the Brush as a Preset
 Edit menu open with Define Brush Preset option highlighted
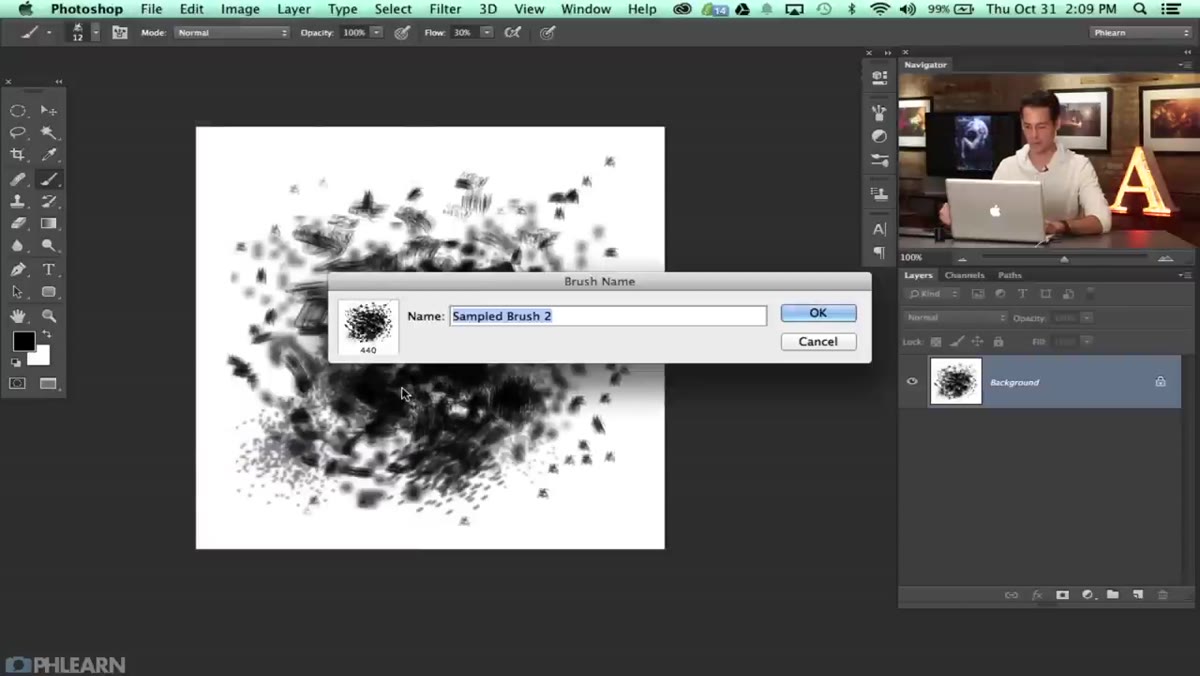
Once your painted marks look sufficiently chaotic, go to Edit and choose Define Brush Preset. Name it something useful - Aaron calls his “dirt,” which is honest and practical. That’s it. Photoshop has now registered the entire black-and-white composition as a single brush tip. You can close the temporary document. The brush is stored and ready to use across any project. This is also a good moment to remind yourself that you can create purpose-specific brush tips for other textures: concrete, fabric grain, skin pores - the same process applies everywhere.
Edit menu open with Define Brush Preset option highlighted
Once your painted marks look sufficiently chaotic, go to Edit and choose Define Brush Preset. Name it something useful - Aaron calls his “dirt,” which is honest and practical. That’s it. Photoshop has now registered the entire black-and-white composition as a single brush tip. You can close the temporary document. The brush is stored and ready to use across any project. This is also a good moment to remind yourself that you can create purpose-specific brush tips for other textures: concrete, fabric grain, skin pores - the same process applies everywhere.
Step 5: Load the Brush and Check Its Initial Behavior
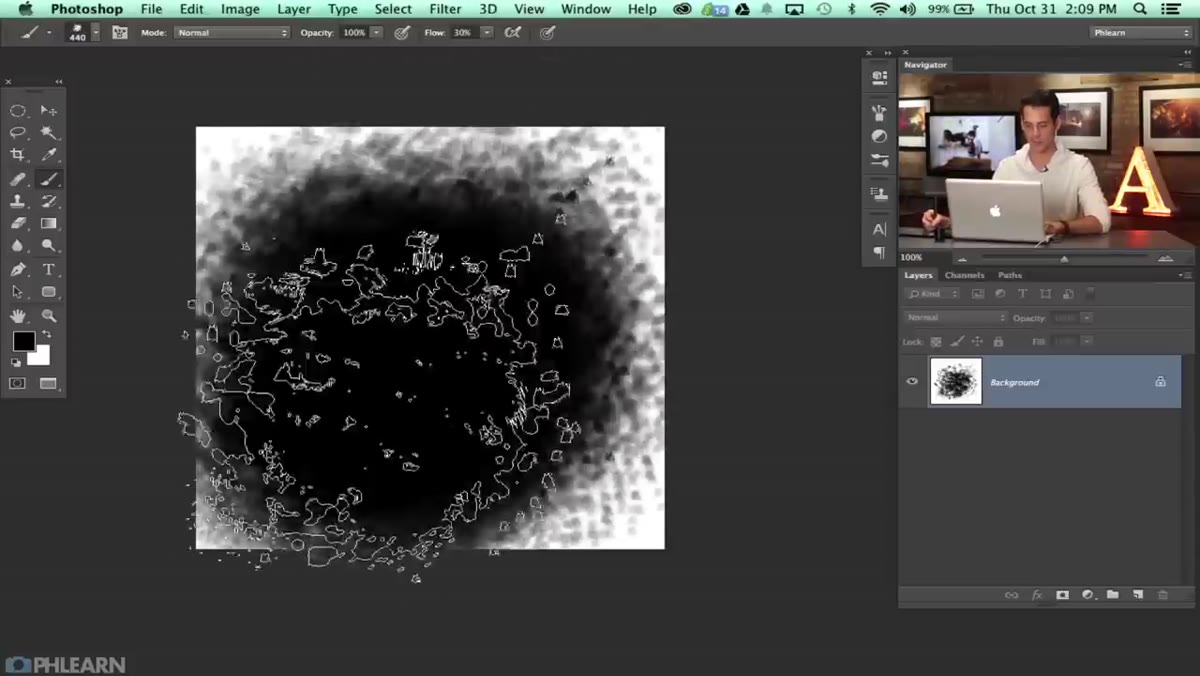 Custom dirt brush painting marks on a new layer in red
Switch back to your working image and create a new empty layer. Select the Brush tool, open the brush picker, and find your new dirt preset at the bottom of the list. Paint a few test marks - Aaron uses red here so the brush shape is easy to evaluate against the image. At this point the brush will look like a rough stamp, but it’s still behaving like a static shape. Every click will produce the same orientation and size, which is better than a round soft brush but still not convincingly organic. That gets fixed in the next step.
Custom dirt brush painting marks on a new layer in red
Switch back to your working image and create a new empty layer. Select the Brush tool, open the brush picker, and find your new dirt preset at the bottom of the list. Paint a few test marks - Aaron uses red here so the brush shape is easy to evaluate against the image. At this point the brush will look like a rough stamp, but it’s still behaving like a static shape. Every click will produce the same orientation and size, which is better than a round soft brush but still not convincingly organic. That gets fixed in the next step.
Step 6: Add Shape Dynamics in the Brush Settings Panel
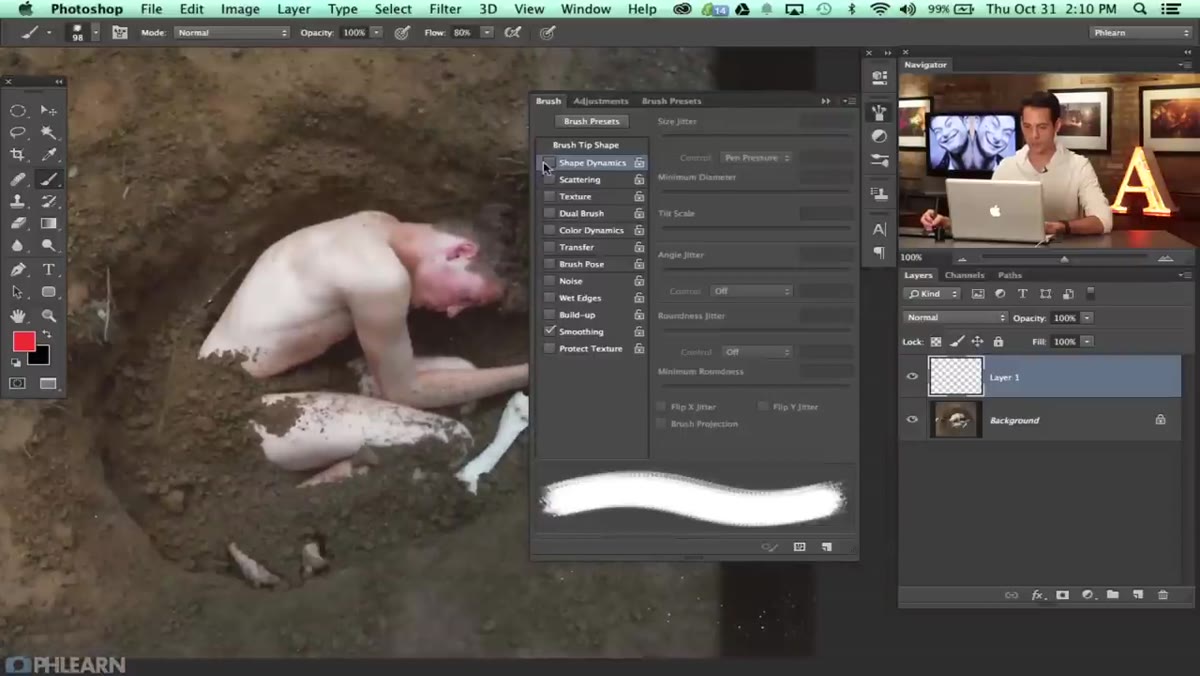 Brush Settings panel open with Shape Dynamics selected
Open the Brush Settings panel via Window, Brush Settings. Click on Shape Dynamics in the left column - clicking the label, not just the checkbox, so the full controls appear on the right. This is where you introduce the randomness that makes the brush feel alive. Size Jitter controls how much the brush tip varies in scale between strokes. Angle Jitter controls rotation. Flip X and Flip Y jitter mirror the brush tip unpredictably. Crank these values up. You want every single stamp to look slightly different from the last one. When you test paint again after adjusting these, the marks should look like no two are the same - that’s the goal.
Brush Settings panel open with Shape Dynamics selected
Open the Brush Settings panel via Window, Brush Settings. Click on Shape Dynamics in the left column - clicking the label, not just the checkbox, so the full controls appear on the right. This is where you introduce the randomness that makes the brush feel alive. Size Jitter controls how much the brush tip varies in scale between strokes. Angle Jitter controls rotation. Flip X and Flip Y jitter mirror the brush tip unpredictably. Crank these values up. You want every single stamp to look slightly different from the last one. When you test paint again after adjusting these, the marks should look like no two are the same - that’s the goal.
Step 7: Use the Brush as Your Clone Stamp Tip
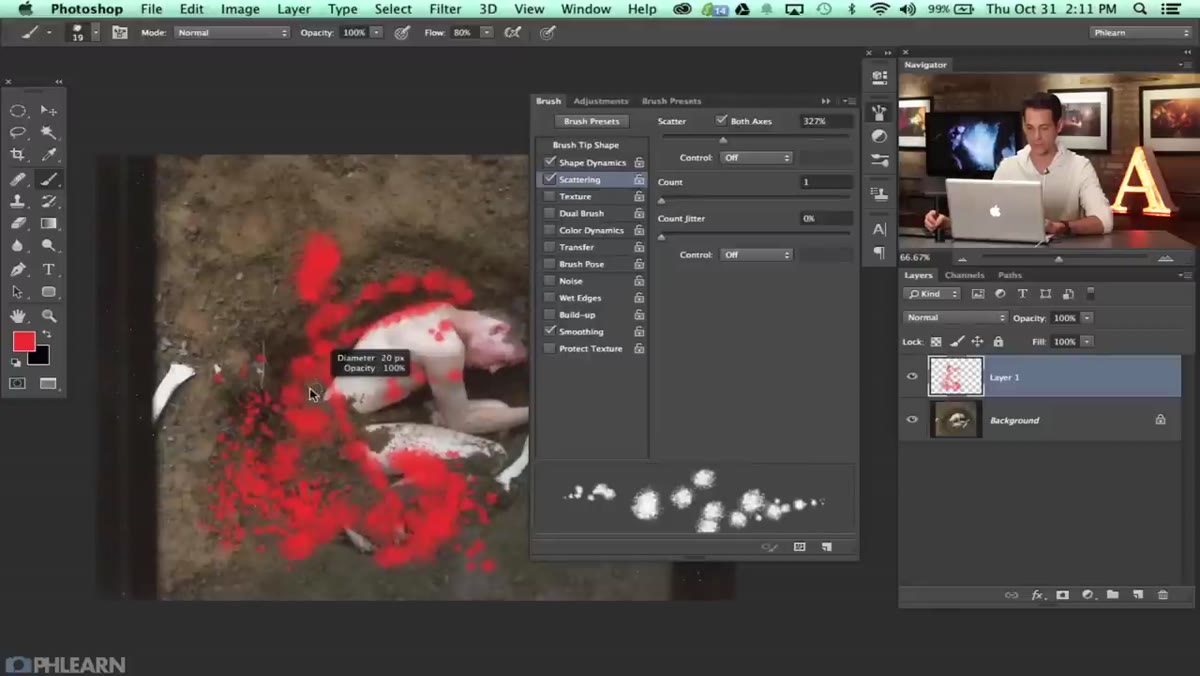 Clone Stamp tool active with custom brush tip selected
Select the Clone Stamp tool (S), then open the brush picker from the top options bar. Your custom dirt brush should be available. Set it as the active tip. Now Alt-click (Option-click on Mac) to sample a source area in your image, then paint over the region you need to fill. Because the stamp tip is now your organic splatter shape with full jitter applied, each pass creates an irregular edge that blends with the surrounding texture instead of sitting on top of it. The fuzzy ghost edge disappears because there’s no longer a clean circular boundary being stamped repeatedly.
Clone Stamp tool active with custom brush tip selected
Select the Clone Stamp tool (S), then open the brush picker from the top options bar. Your custom dirt brush should be available. Set it as the active tip. Now Alt-click (Option-click on Mac) to sample a source area in your image, then paint over the region you need to fill. Because the stamp tip is now your organic splatter shape with full jitter applied, each pass creates an irregular edge that blends with the surrounding texture instead of sitting on top of it. The fuzzy ghost edge disappears because there’s no longer a clean circular boundary being stamped repeatedly.
What I’d Add From Studio Experience
This technique is worth building into a saved brush library rather than recreating it per project. I keep a folder of about a dozen texture-specific brush tips - dirt, concrete, grass edge, wood grain - and I define each one as a Photoshop tool preset with the brush settings already baked in. That means I can switch between clone stamp configurations in two clicks rather than rebuilding the dynamics each session. If you’re processing multiple retouching jobs in the same category, that setup time compounds fast. My other addition: keep a low Opacity (around 40-60%) on the Clone Stamp when using an organic brush like this and build up coverage gradually. Trying to fill an area in one heavy pass often creates its own visible pattern.
The single most important thing this tutorial teaches isn’t the specific brush - it’s the principle that the Clone Stamp tool is only as good as the tip you’re using with it. Customizing that tip to match your actual texture is what separates a clean retouch from one that looks retouched.
Watch the full tutorial on YouTube to see Aaron demonstrate the before-and-after live - the difference is more obvious in motion than any screenshot can capture.
Comments
Leave a Comment