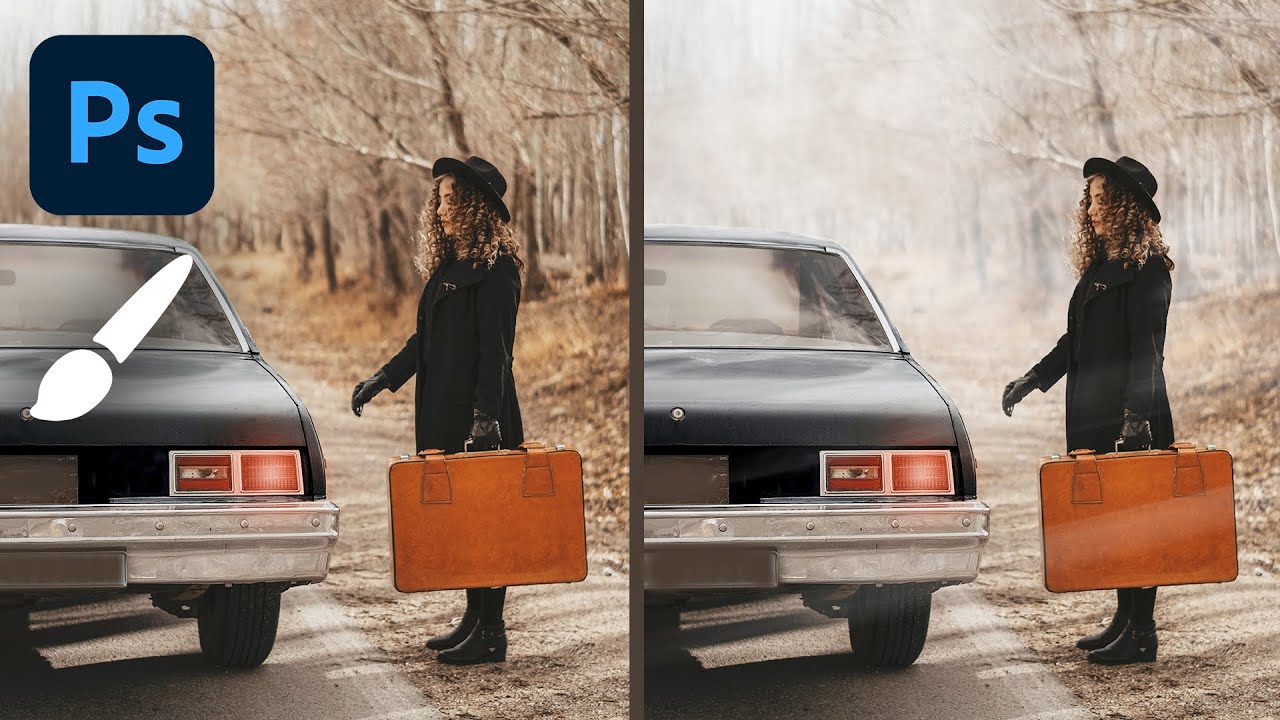
Fog is one of those atmospheric effects that looks deceptively simple until you actually try to add it to a photo. A soft white layer at low opacity fools nobody. It sits on top of the image like a bedsheet rather than wrapping around the scene, and the moment a client squints at it, the whole composite falls apart. I’ve been there. In commercial work, especially automotive and outdoor lifestyle shots, convincing atmosphere can be the difference between an image that sells the mood and one that just sells the product. So when I came across this Aaron Nace tutorial from PHLEARN on building a fog brush from scratch, I watched it twice. Watch the full tutorial on YouTube
What Nace walks through isn’t a filter trick or a stock overlay. It’s a proper brush-building workflow that starts with an actual cloud photograph, extracts the shape through channels, bakes it into a custom brush preset, and then uses brush dynamics to make the result look like it belongs in the scene. The depth-layering approach he covers at the end is the part that made me stop and take notes. Here’s the full breakdown so you can follow along without pausing the video every thirty seconds.
Step 1: Open Your Cloud Reference Image and Go to Channels
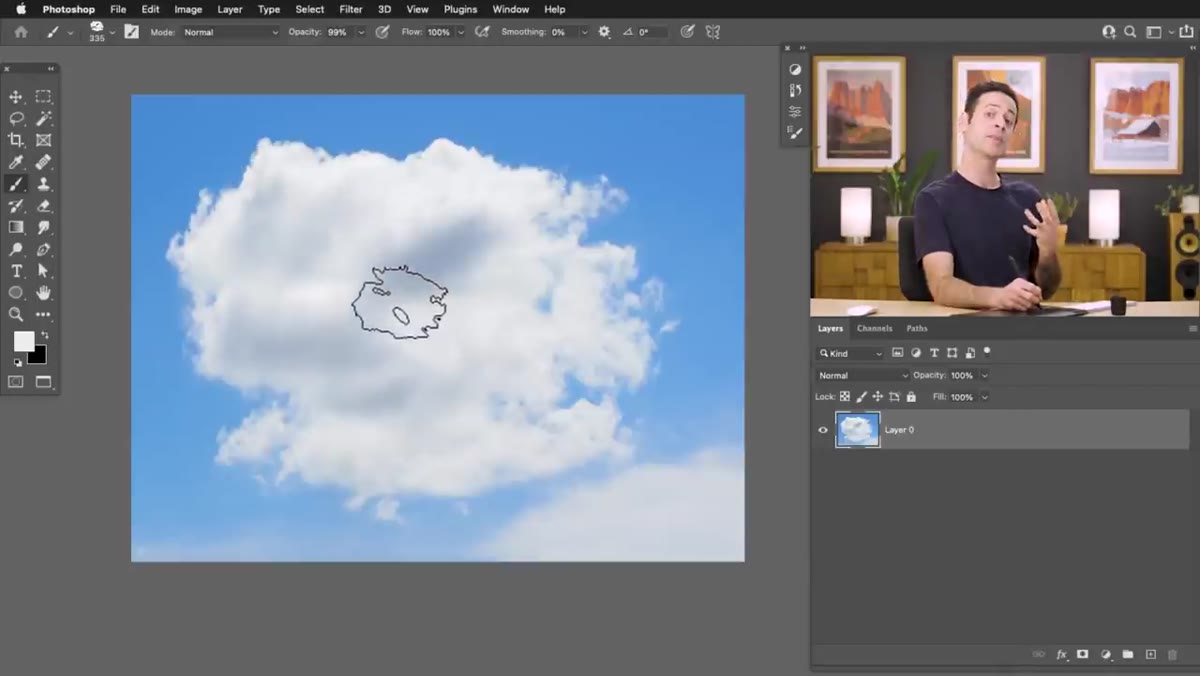 Channels panel open with red channel selected
You need two images open: the photo you want to add fog to, and a separate cloud photograph. The cloud image is your raw material for the brush stamp. Switch to it, open the Channels panel (Window > Channels), and click the Red channel. The Red channel typically gives you the strongest contrast between a white cloud and a blue or grey sky, which makes the extraction much cleaner than working in RGB or on the Blue channel.
Channels panel open with red channel selected
You need two images open: the photo you want to add fog to, and a separate cloud photograph. The cloud image is your raw material for the brush stamp. Switch to it, open the Channels panel (Window > Channels), and click the Red channel. The Red channel typically gives you the strongest contrast between a white cloud and a blue or grey sky, which makes the extraction much cleaner than working in RGB or on the Blue channel.
Duplicate the Red channel by dragging it to the new layer icon at the bottom of the panel. You’ll be doing all your editing on this duplicate, leaving the original untouched.
Step 2: Push the Contrast with Levels
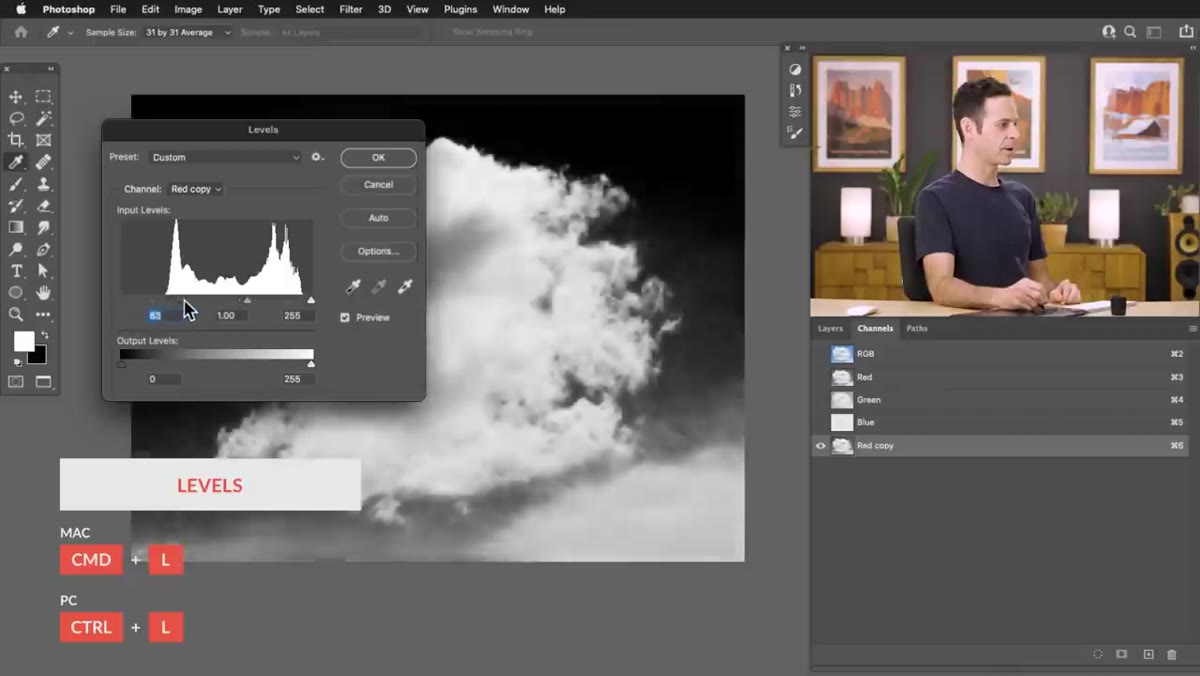 Levels dialog with black point slider pushed right
With your duplicated channel selected, open Levels with Ctrl/Cmd + L. Drag the black point slider inward from the left until the sky background goes nearly solid black. You want the cloud itself to read as bright white or near-white, with everything else as dark as possible. Don’t worry about being perfect here. You’re building a brush stamp, not a mask for a product cutout.
Levels dialog with black point slider pushed right
With your duplicated channel selected, open Levels with Ctrl/Cmd + L. Drag the black point slider inward from the left until the sky background goes nearly solid black. You want the cloud itself to read as bright white or near-white, with everything else as dark as possible. Don’t worry about being perfect here. You’re building a brush stamp, not a mask for a product cutout.
The goal is high contrast. If parts of the cloud edge are going grey instead of white, you’ll address that in the next step.
Step 3: Refine the Cloud Shape with a Brush in Overlay Mode
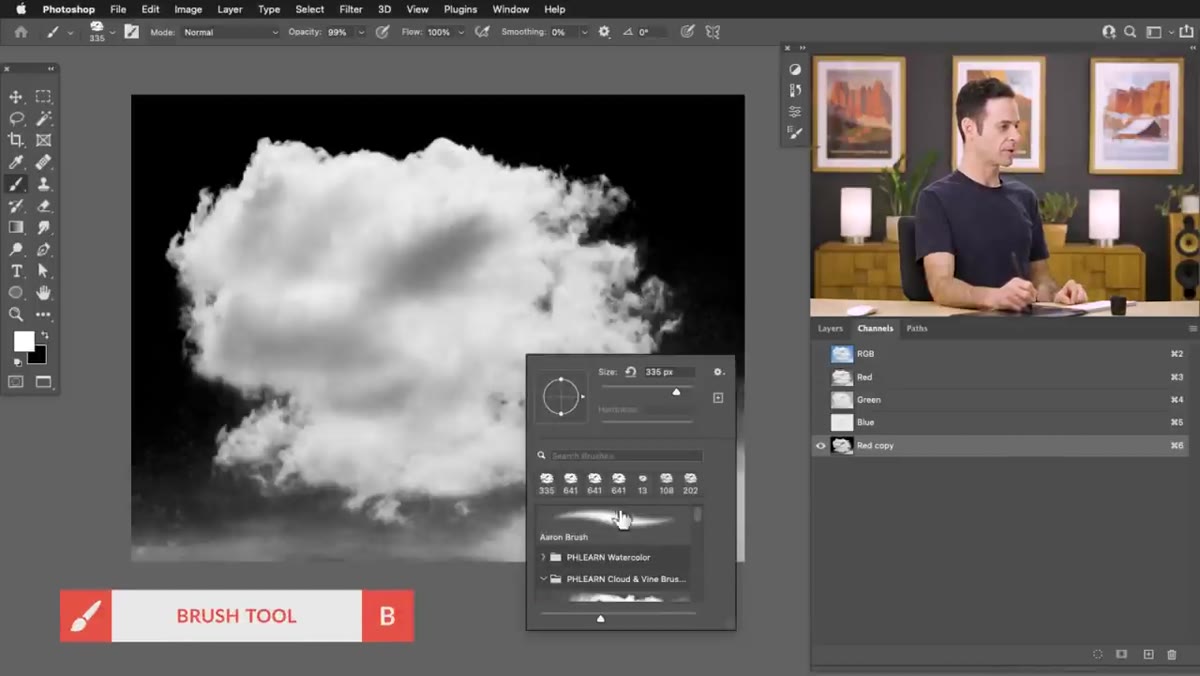 Brush in Overlay mode painting black around cloud edges
This is the step most tutorials skip, and it’s actually clever. Grab a soft round brush, set the foreground color to black, and change your brush blending mode to Overlay in the options bar at the top. Painting in Overlay mode lets you darken the background without blowing out the cloud highlights. Work around the edges of the cloud to clean up any grey fringe in the background.
Brush in Overlay mode painting black around cloud edges
This is the step most tutorials skip, and it’s actually clever. Grab a soft round brush, set the foreground color to black, and change your brush blending mode to Overlay in the options bar at the top. Painting in Overlay mode lets you darken the background without blowing out the cloud highlights. Work around the edges of the cloud to clean up any grey fringe in the background.
Switch your foreground color to white and paint over the center of the cloud with Overlay mode still active to push those cloud tones closer to pure white. The Overlay mode protects the relative tonal relationships, so you’re pushing contrast rather than just slapping paint over the image.
Step 4: Load the Channel as a Selection and Define the Brush Preset
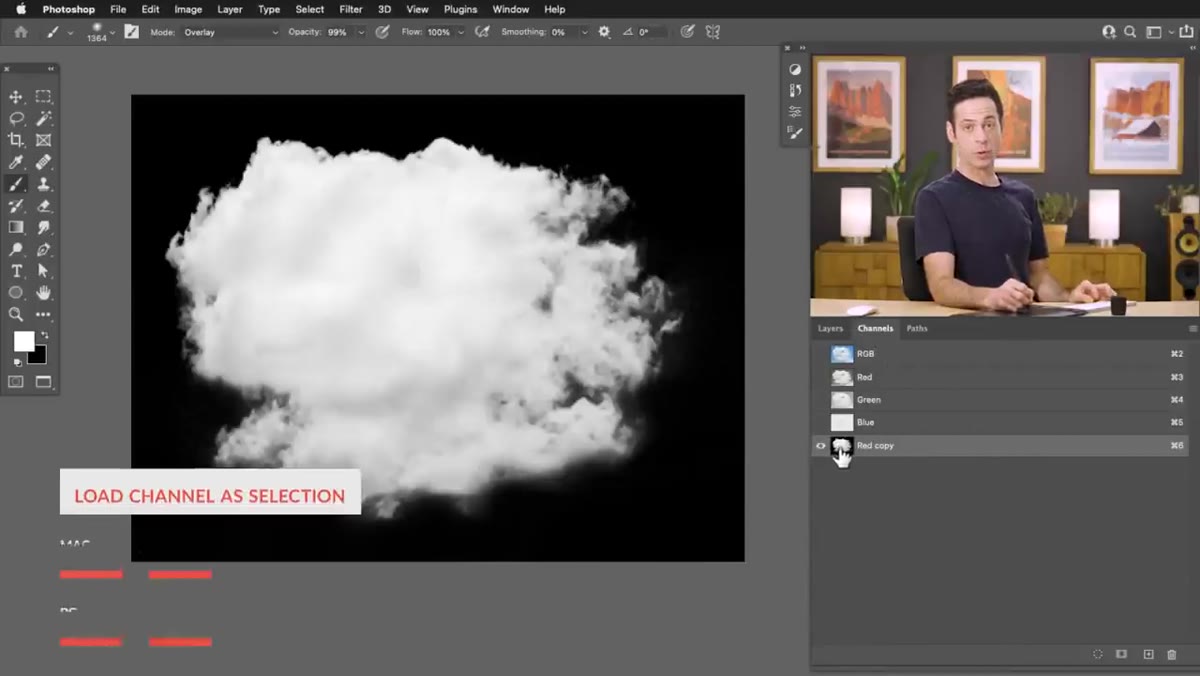 Edit menu open showing Define Brush Preset option
Ctrl/Cmd-click your refined channel thumbnail in the Channels panel to load it as a selection. The bright areas become the selected region. Jump back to the Layers panel, create a new blank layer, and go to Edit > Fill, choosing black as the fill color. Then add a white solid color fill layer underneath it. What you now have is a black cloud shape on a white background. That’s exactly the format Photoshop needs to read a brush stamp. Dark areas become the opaque part of the brush; white areas are transparent.
Edit menu open showing Define Brush Preset option
Ctrl/Cmd-click your refined channel thumbnail in the Channels panel to load it as a selection. The bright areas become the selected region. Jump back to the Layers panel, create a new blank layer, and go to Edit > Fill, choosing black as the fill color. Then add a white solid color fill layer underneath it. What you now have is a black cloud shape on a white background. That’s exactly the format Photoshop needs to read a brush stamp. Dark areas become the opaque part of the brush; white areas are transparent.
Go to Edit > Define Brush Preset and name it something you’ll recognize later. “Cloud-Fog-01” works. Click OK, and your custom brush now exists in Photoshop’s brush library.
Step 5: Configure Brush Dynamics to Break Up the Stamp
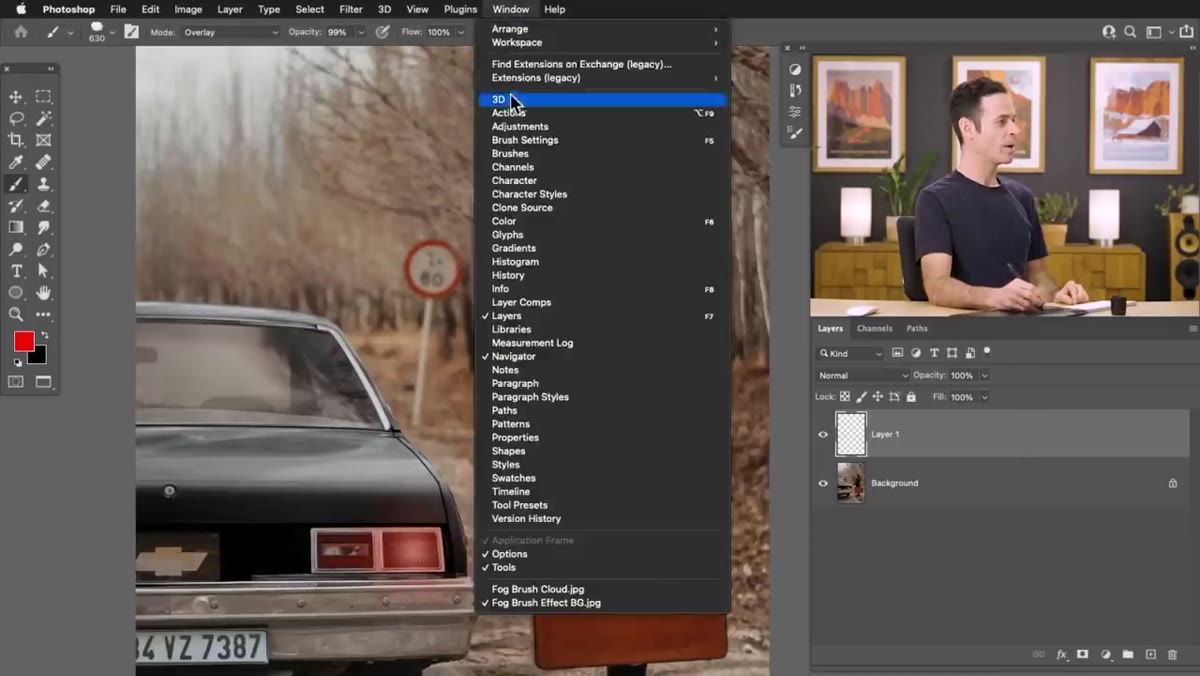 Brush Settings panel with Size Jitter and Angle Jitter at 100%
Switch to your target image, create a new layer, and select your new cloud brush. Before painting anything, open Brush Settings (Window > Brush Settings). A single repeated stamp of one cloud shape at one size and angle looks exactly as mechanical as it sounds. You need to randomize it.
Brush Settings panel with Size Jitter and Angle Jitter at 100%
Switch to your target image, create a new layer, and select your new cloud brush. Before painting anything, open Brush Settings (Window > Brush Settings). A single repeated stamp of one cloud shape at one size and angle looks exactly as mechanical as it sounds. You need to randomize it.
Under Shape Dynamics, push Size Jitter to 100%. This varies the brush size randomly with each stamp. Set Angle Jitter to 100% as well, so each stamp rotates to a different orientation. Enable Flip X Jitter and Flip Y Jitter so the cloud shape also mirrors horizontally and vertically. Move to the Spacing slider and increase it so individual stamps don’t pile on top of each other. The goal is a loose, irregular scatter that reads as natural vapor rather than a repeated texture tile.
Step 6: Paint Fog in Layers, Using Depth to Guide Opacity and Placement
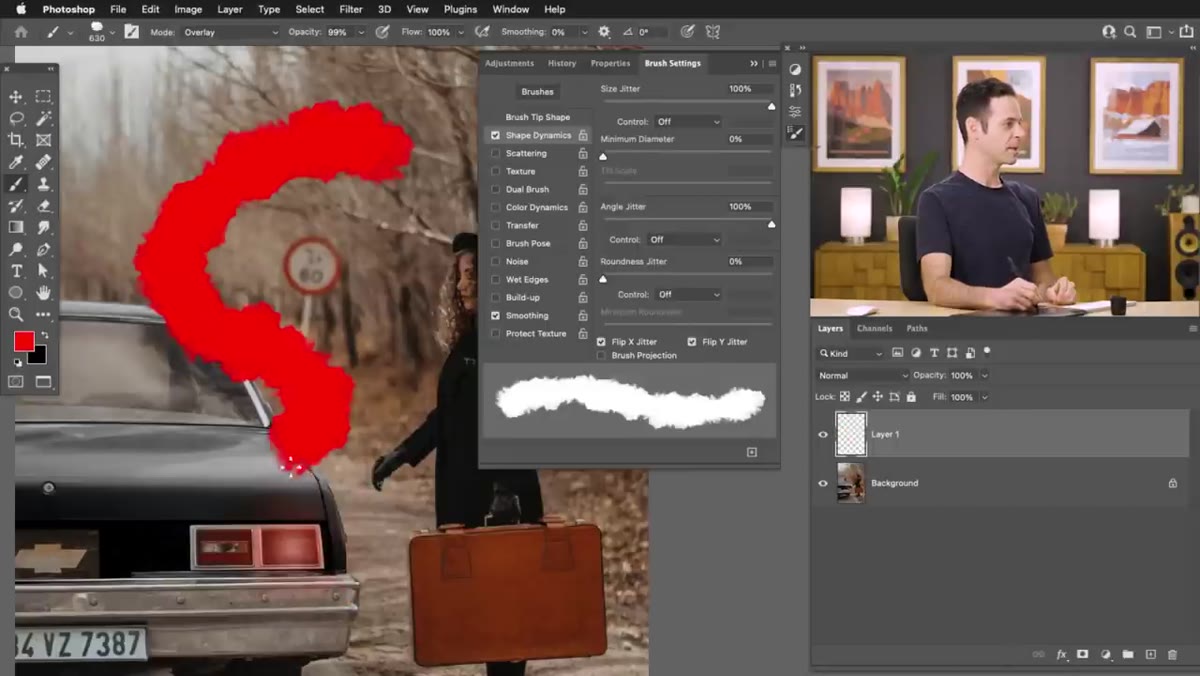 Multiple fog layers painted at different opacities across the scene
Here is where the effect goes from passable to convincing. Fog doesn’t sit in one flat plane. Objects farther from the camera are more obscured by atmospheric haze than objects close to it. Work with multiple layers, each handling a different depth zone in your image.
Multiple fog layers painted at different opacities across the scene
Here is where the effect goes from passable to convincing. Fog doesn’t sit in one flat plane. Objects farther from the camera are more obscured by atmospheric haze than objects close to it. Work with multiple layers, each handling a different depth zone in your image.
Start with the background. Use a lower brush opacity, around 30 to 50%, and loosely paint fog into the areas furthest from camera. Then create a new layer for the midground and repeat, adjusting opacity and scale of the brush. Objects in the foreground get the least fog, if any at all. Keeping each depth zone on a separate layer means you can fine-tune the opacity independently after the fact, which matters a lot when a client asks you to “just dial it back a little” at 11pm before a deadline.
A Note from My Own Workflow
I’d add one thing Nace doesn’t cover here: save your brush settings as a Tool Preset, not just the brush preset. The brush preset saves the stamp shape, but it won’t save your dynamics configuration. If you go to the Tool Options bar and save a Tool Preset with your cloud brush and all the dynamics dialed in, you can recall the entire setup instantly on any machine. I keep a small library of atmospheric brush presets, fog, smoke, dust, each one saved as a tool preset so I’m not rebuilding dynamics from scratch every job. This is exactly the kind of thing that goes into the automation spreadsheet I keep. Brush presets alone have probably saved me forty-plus hours across projects over the past two years, and that’s a conservative estimate.
The single most important takeaway here is that starting from a real photographic cloud, rather than a painted smear or a stock overlay, gives the fog a structural complexity you simply cannot fake by hand. Channels give you a clean extraction path, and brush dynamics give the stamp enough variation to feel organic at scale.
Watch the full tutorial on YouTube to see Aaron walk through the light ray technique as well, which builds directly on everything covered above and takes the effect into genuinely cinematic territory.
Comments (7)
Would love to see a follow-up going deeper into this topic.
I keep coming back to this article. It's that useful.
Simple but effective. Sometimes that's all you need.
Just used this on a wedding shoot edit. Client was thrilled.
This saved me so much time on my last edit. Wish I'd found this sooner.
Solid advice. Especially the part about taking your time with it.
Couldn't agree more. I've seen this make a huge difference in photography work specifically.
Leave a Comment