I built my first Photoshop action at 26 and I have not manually repeated a task since. That is not an exaggeration - I keep a spreadsheet. Right now it sits at over 2,400 hours saved across fifteen years of studio and consultancy work. So when I came across Vicki Taufer’s segment on actions and droplets in her CreativeLive tutorial on pets and people photography, I watched it twice. Not because the concepts were new to me, but because Vicki explains the mental model behind actions in a way that finally makes the whole system click for photographers who have been avoiding it. Watch the full tutorial on YouTube
The core idea is simple: an action is a recording of your steps, and a droplet is a portable launcher for that action. Together, they let you apply any sequence of edits to any number of images with zero repetition. For portrait photographers, that might mean a consistent black and white conversion across a full session. For commercial work like mine, it means processing 500 product shots in an afternoon instead of a week. Vicki’s walkthrough starts from scratch, which makes it accessible even if you have never opened the Actions panel before.
What I appreciate most is that she treats actions as a learning tool, not just a production shortcut. If an action does something you did not expect, you can crack it open and read every step it took. That is genuinely how I deepened my own Photoshop knowledge early on - by dissecting actions other people had built. Let’s walk through exactly what she demonstrates.
Step 1: Open the Actions Panel and Understand Its Structure
 Actions panel open showing default action folders and steps
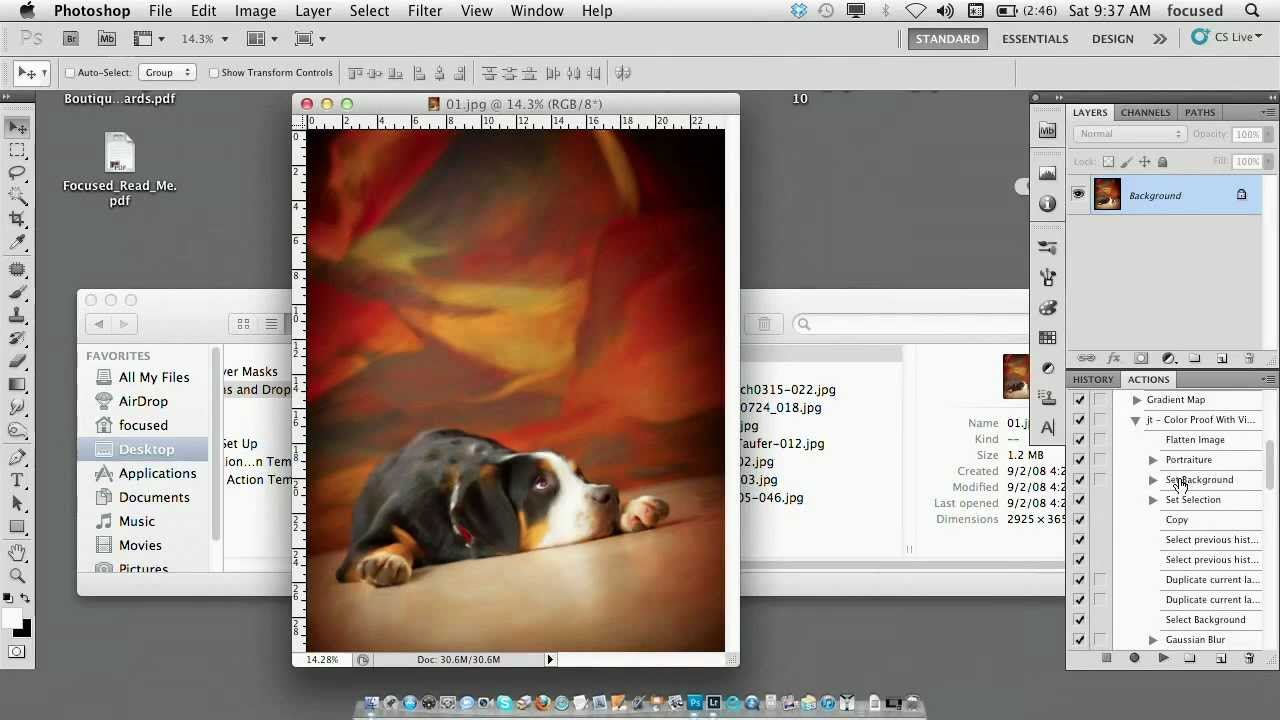
The Actions panel in Photoshop organizes everything into sets (folders) and individual actions inside those sets. The default sets that ship with Photoshop are good examples of what a finished action looks like. Click the arrow next to any action to expand it and see each recorded step listed in sequence. Vicki points to one of her own actions called “colorproof” as an example - it flattens the image, runs a plugin, then sets the background color. Each of those is a discrete, inspectable step.
Actions panel open showing default action folders and steps
The Actions panel in Photoshop organizes everything into sets (folders) and individual actions inside those sets. The default sets that ship with Photoshop are good examples of what a finished action looks like. Click the arrow next to any action to expand it and see each recorded step listed in sequence. Vicki points to one of her own actions called “colorproof” as an example - it flattens the image, runs a plugin, then sets the background color. Each of those is a discrete, inspectable step.
This expandability is the part most people miss. You are not looking at a black box. Every levels adjustment, every filter call, every menu command is listed in plain language. If you are new to actions, spend five minutes expanding the defaults and just reading what they do. You will learn more about Photoshop’s internal logic in those five minutes than in most tutorials.
Step 2: Create a New Action and Start Recording
 New Action dialog box with name field and Record button
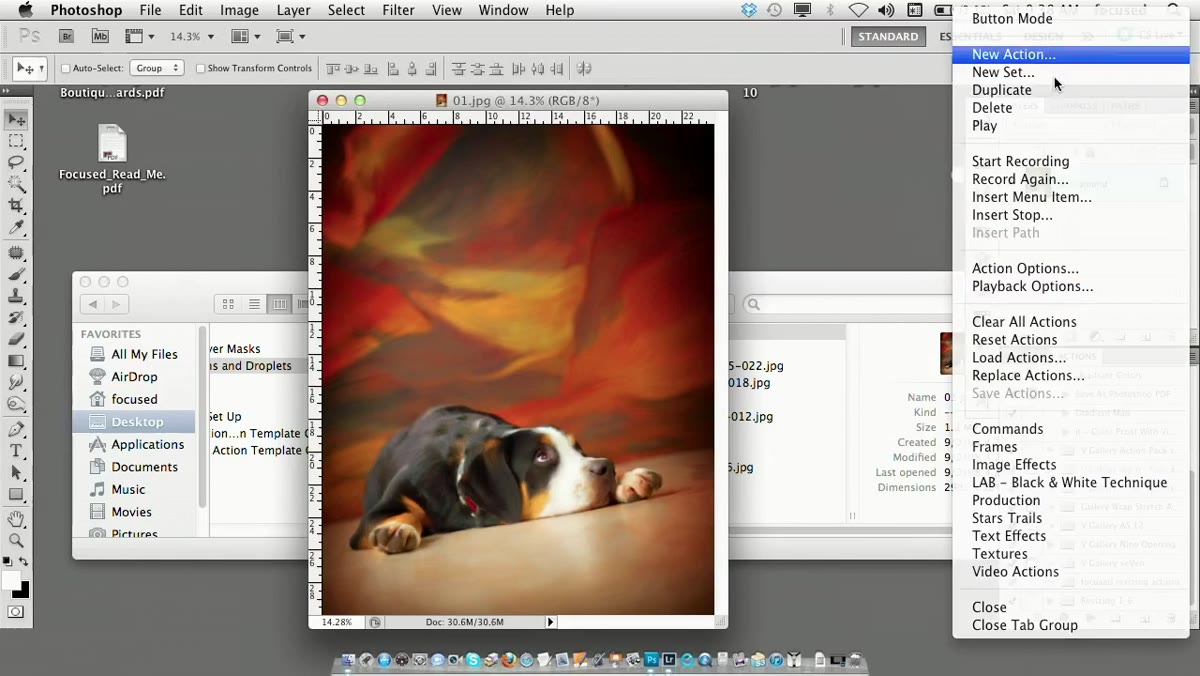
With your image open, go to the Actions panel menu and select New Action. Give it a descriptive name - Vicki uses “simple black and white” as her example. Choose which set to place it in (the default actions set is fine for practice) and hit Record. The red record indicator will appear at the bottom of the panel.
New Action dialog box with name field and Record button
With your image open, go to the Actions panel menu and select New Action. Give it a descriptive name - Vicki uses “simple black and white” as her example. Choose which set to place it in (the default actions set is fine for practice) and hit Record. The red record indicator will appear at the bottom of the panel.
From this point forward, every command you execute in Photoshop is being logged. That includes menu choices, adjustments, and keyboard shortcuts. The important thing to internalize here: do not wander. Plan your steps before you hit Record, because stray clicks and undos can get captured and cause problems when the action plays back on different images.
Step 3: Record Your Edit Steps
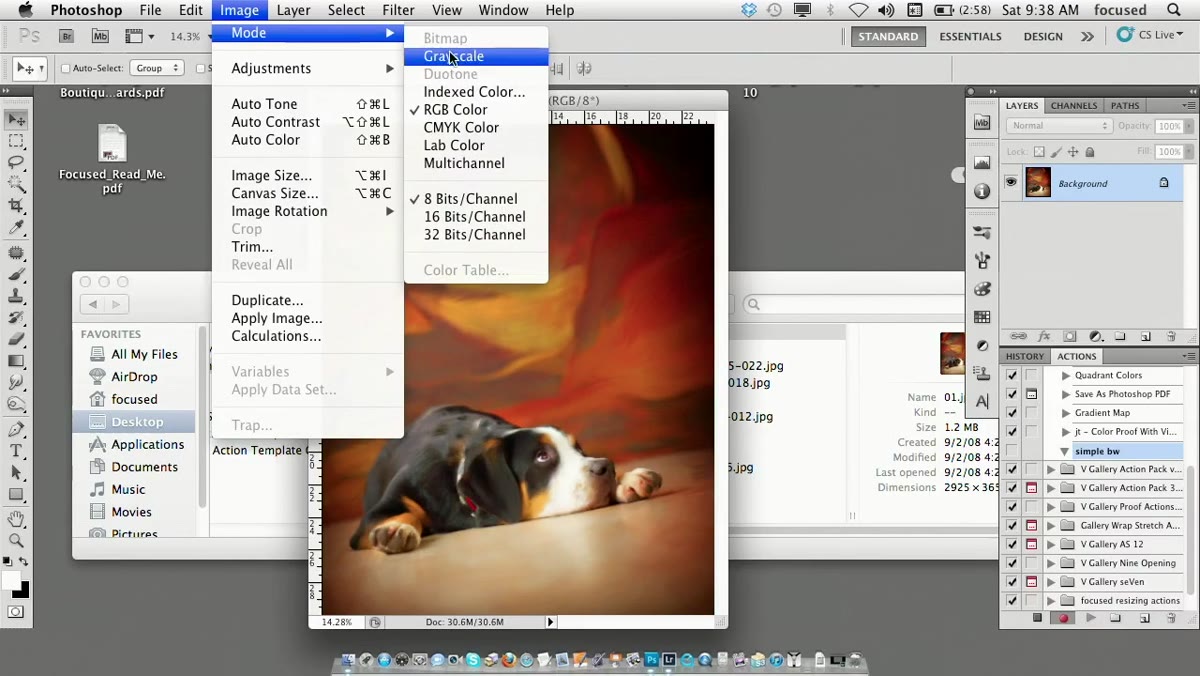 Image menu open showing Desaturate option selected
Vicki’s demonstration action has two steps. First, she goes to Image, Adjustments, Desaturate - this strips the color from the image and gives a flat black and white conversion. Second, she adds a Curves adjustment using Command+M, pulls a gentle S-curve to add contrast, and clicks OK. That is the entire action: desaturate, then boost contrast with curves.
Image menu open showing Desaturate option selected
Vicki’s demonstration action has two steps. First, she goes to Image, Adjustments, Desaturate - this strips the color from the image and gives a flat black and white conversion. Second, she adds a Curves adjustment using Command+M, pulls a gentle S-curve to add contrast, and clicks OK. That is the entire action: desaturate, then boost contrast with curves.
The choice of Desaturate over converting to Grayscale mode is intentional. Desaturate keeps the image in RGB, which means it stays compatible with layers, color overlays, and any other adjustments downstream. Converting to Grayscale mode changes the color profile and can cause problems if the image needs further composite work. For a simple session workflow, the Desaturate route is the cleaner call.
Step 4: Stop Recording
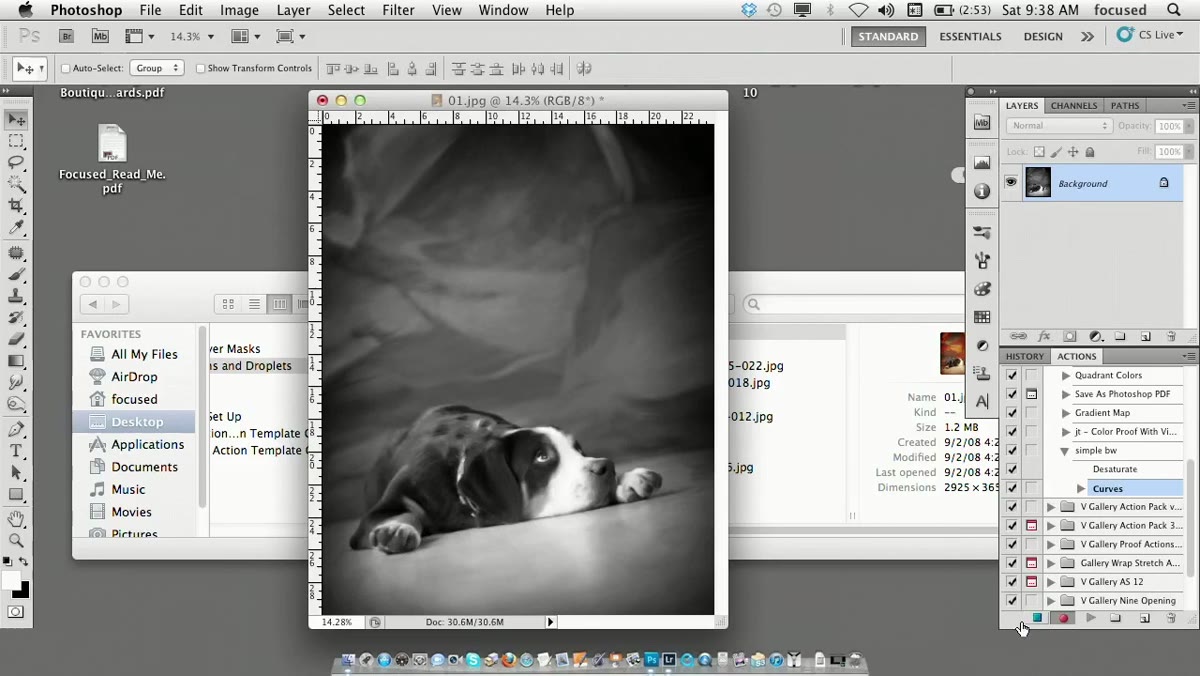 Actions panel showing Stop button at bottom of panel
When your edits are done, click the square Stop button at the bottom of the Actions panel. This is the step Vicki specifically flags as easy to forget - and she is right. If you walk away without stopping the recording, everything you do next gets appended to the action. I have inherited actions from other studios that had hundreds of phantom steps because someone forgot to stop. One click on that Stop button and your action is saved.
Actions panel showing Stop button at bottom of panel
When your edits are done, click the square Stop button at the bottom of the Actions panel. This is the step Vicki specifically flags as easy to forget - and she is right. If you walk away without stopping the recording, everything you do next gets appended to the action. I have inherited actions from other studios that had hundreds of phantom steps because someone forgot to stop. One click on that Stop button and your action is saved.
Step 5: Test the Action on Another Image
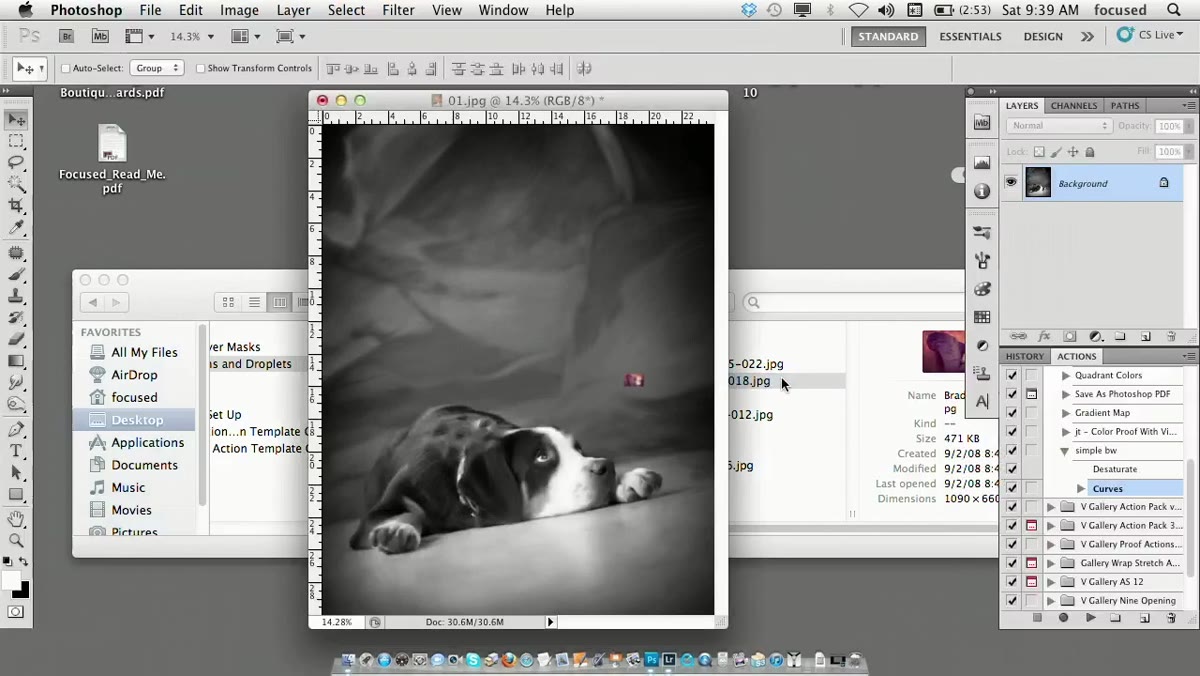 Second image open with Play button being clicked in Actions panel
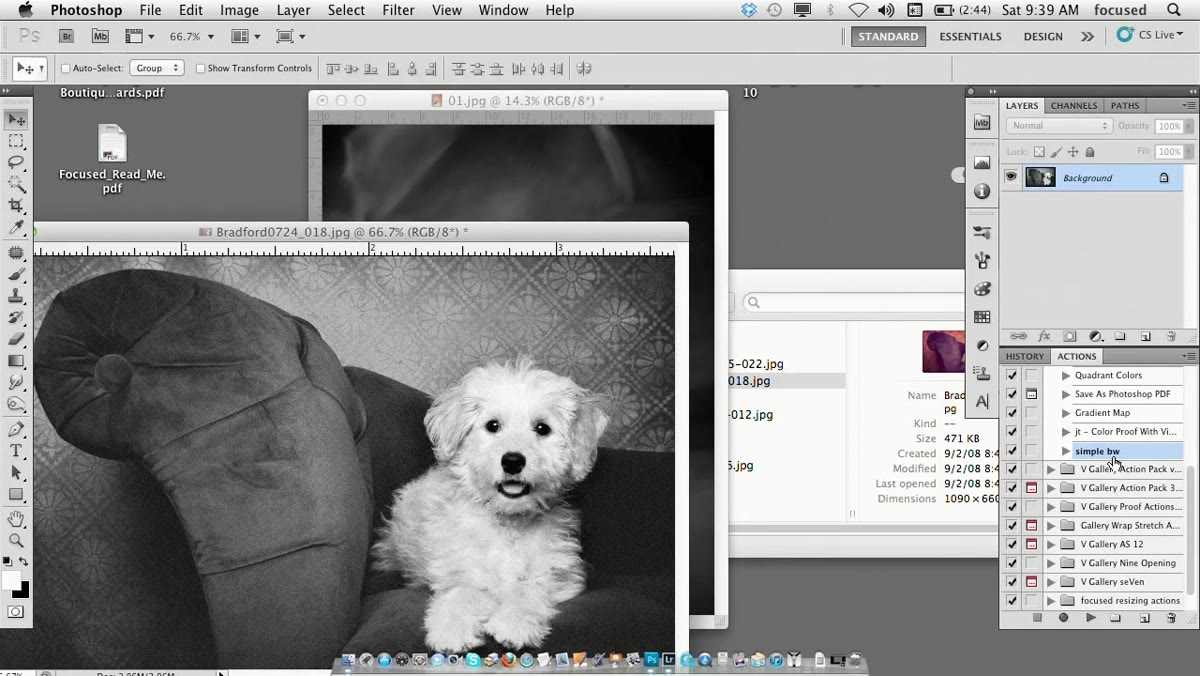
Open a different image, select your new action in the panel, and hit the Play button (the triangle at the bottom of the panel). Photoshop will run through every recorded step in sequence. Vicki does this live in the tutorial and the result comes through immediately - the image desaturates and the curves adjustment applies automatically. If the result looks wrong on a different image, that is useful diagnostic information. It usually means one of the steps used an absolute value (like a specific color hex) instead of a relative adjustment.
Second image open with Play button being clicked in Actions panel
Open a different image, select your new action in the panel, and hit the Play button (the triangle at the bottom of the panel). Photoshop will run through every recorded step in sequence. Vicki does this live in the tutorial and the result comes through immediately - the image desaturates and the curves adjustment applies automatically. If the result looks wrong on a different image, that is useful diagnostic information. It usually means one of the steps used an absolute value (like a specific color hex) instead of a relative adjustment.
Step 6: Create a Droplet from the Action
 File menu open showing Automate then Create Droplet submenu
Here is where the workflow scales. Go to File, Automate, Create Droplet. A dialog box opens asking you to name the droplet, choose which action it points to, and specify where to save the droplet file itself. Vicki saves hers directly to the desktop for fast access. The Destination section at the bottom controls where processed files are saved after the action runs - leave it set to None if you want Photoshop to just apply the action and leave the file open.
File menu open showing Automate then Create Droplet submenu
Here is where the workflow scales. Go to File, Automate, Create Droplet. A dialog box opens asking you to name the droplet, choose which action it points to, and specify where to save the droplet file itself. Vicki saves hers directly to the desktop for fast access. The Destination section at the bottom controls where processed files are saved after the action runs - leave it set to None if you want Photoshop to just apply the action and leave the file open.
Save the droplet. It appears on your desktop (or wherever you saved it) as a small icon. From now on, you can drag any image file - or an entire folder of image files - onto that icon and Photoshop will open each one, run the action, and process them all in sequence. No batch dialog, no menu navigation. Just drag and drop.
What I Would Add for Production Environments
Vicki’s walkthrough covers the fundamentals cleanly, but in a commercial setting I would add one more layer: build your actions to work on flattened copies rather than originals. I do this by including a Duplicate and Flatten step at the very start of any destructive action, so the source file is never touched. Pair that with setting the Destination in the droplet dialog to a specific output folder, and you have a non-destructive batch pipeline. Your originals stay intact, your processed files land in a designated folder, and you can re-run the whole batch any time the brief changes.
For portrait photographers, the same principle applies. Keep your layered PSD as the master. Let the action work on an export copy.
The single most valuable thing in this tutorial is the idea that actions are not just shortcuts - they are reusable, inspectable, shareable workflows. Build one correctly and it works for you indefinitely. Build a droplet around it and it works for your entire team without anyone needing to touch the Actions panel at all.
Watch the full tutorial on YouTube to see Vicki’s complete production workflow, including the more advanced actions she references later in the session.
Comments
Leave a Comment