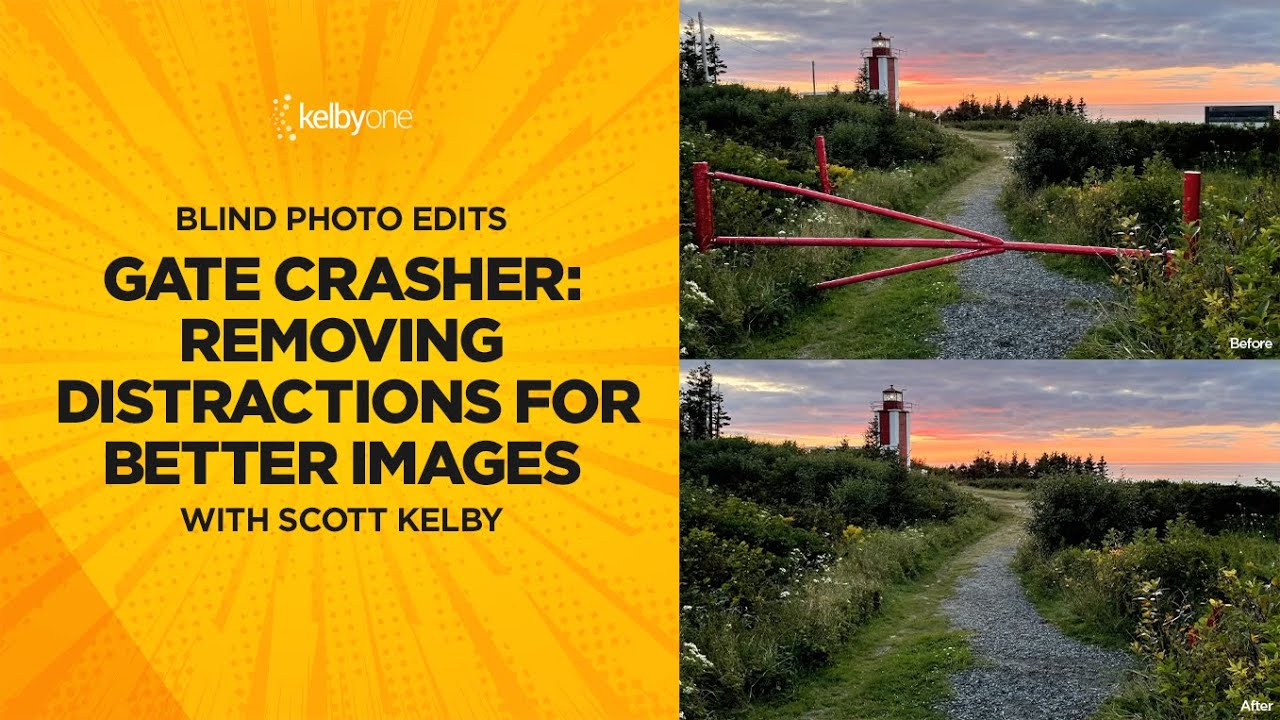
Every location shoot comes with baggage. Fences, utility poles, stray branches, the occasional gate that someone definitely could have walked around. I’ve been cleaning up this kind of environmental noise for clients for years, and the honest truth is that the tools have never been better than they are right now. The challenge isn’t capability anymore. It’s knowing the exact sequence and settings that get you to a clean result without burning an hour on a single frame.
In this KelbyOne tutorial, Scott Kelby works through a blind photo edit on an iPhone 12 Pro lighthouse shot, and the whole thing is structured around one core idea: remove anything that pulls the viewer’s eye away from the subject. Watch the full tutorial on YouTube before diving into the steps below, or use this breakdown as a reference while you work through your own images.
What makes this worth your time isn’t any single tool. It’s the decision-making. Kelby identifies distractions in a specific order, pairs the right tool to each type of problem, and keeps moving. That pacing is something I try to build into my own retouching workflows, because stalling over a single element usually means you’re not seeing the image as a whole anymore.
Step 1: Identify the Primary Distraction Before You Touch Anything
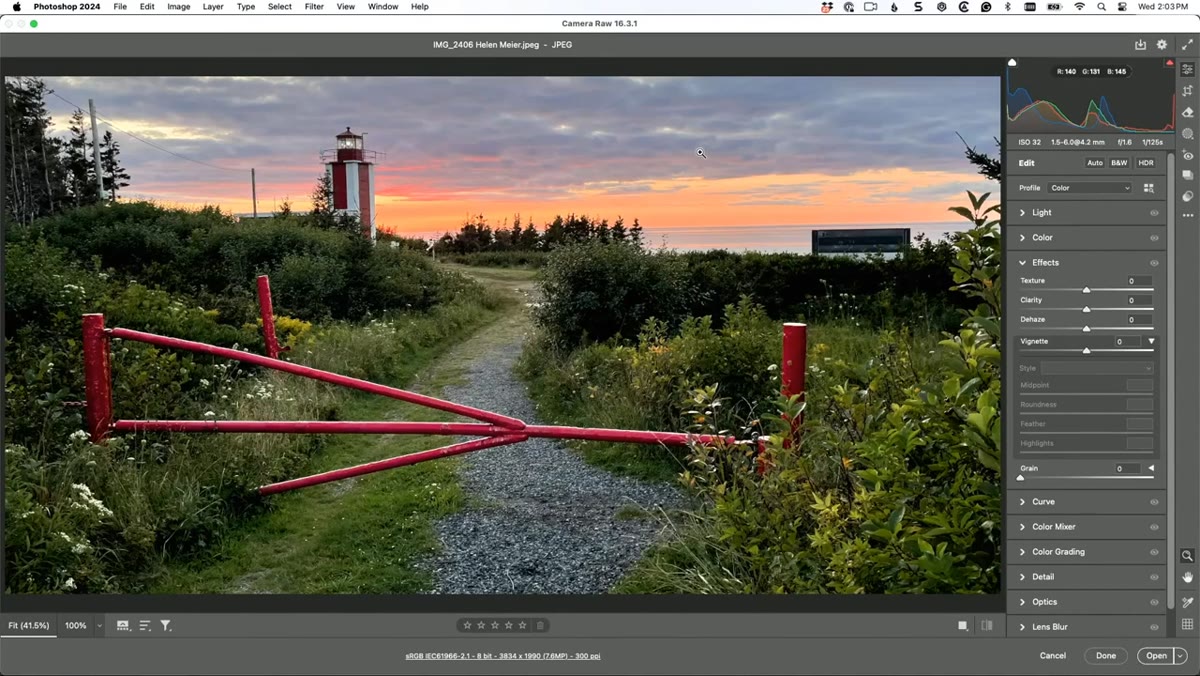 Gate visible in foreground of lighthouse iPhone photo
Before opening a single tool, Kelby pauses to assess what’s actually hurting the image. In this case it’s a gate in the foreground, and his point is blunt: the shot was about a lighthouse, not a gate. This sounds obvious, but in practice most people jump straight to the clone stamp and start patching without deciding what the finished image should feel like.
Gate visible in foreground of lighthouse iPhone photo
Before opening a single tool, Kelby pauses to assess what’s actually hurting the image. In this case it’s a gate in the foreground, and his point is blunt: the shot was about a lighthouse, not a gate. This sounds obvious, but in practice most people jump straight to the clone stamp and start patching without deciding what the finished image should feel like.
Make a quick mental hierarchy of distractions from most damaging to least. Large foreground obstructions first, then mid-frame clutter, then edge intrusions last. This order matters because large fills can affect surrounding pixels and change how you approach the smaller fixes.
Step 2: Select the Distraction with the Object Select Tool
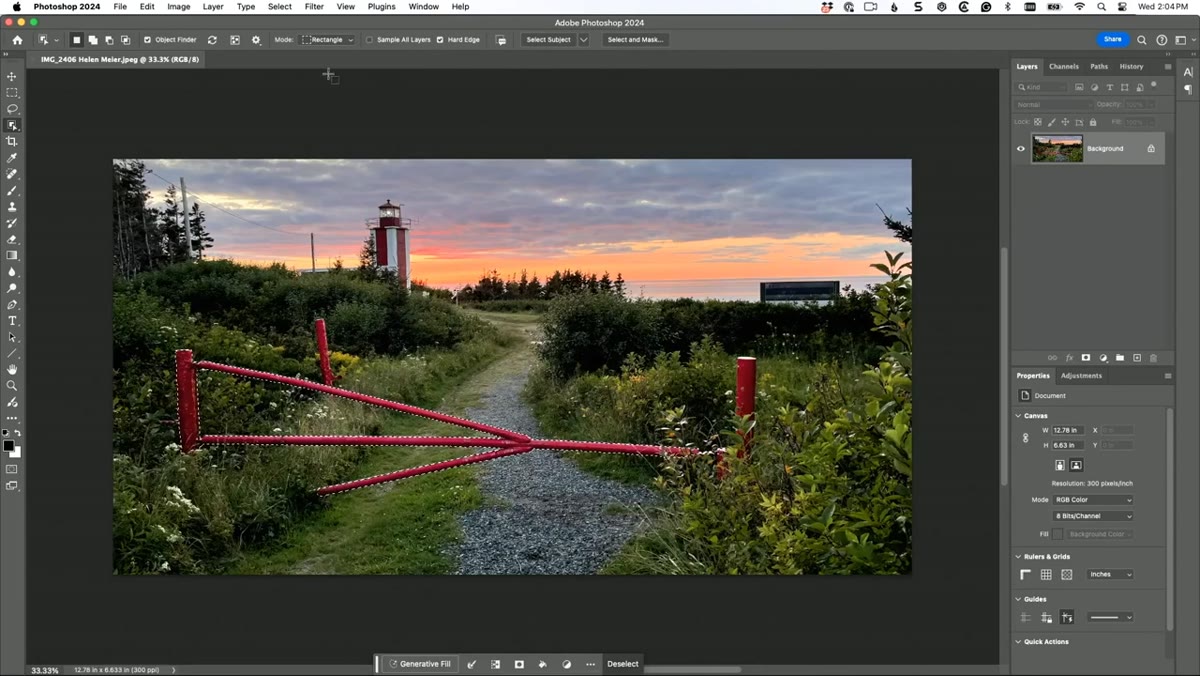 Object Select Tool active with gate selected in photo
Use the Object Select Tool (shortcut W, then cycle to it if needed) and click on the element you want removed. Photoshop will attempt to trace the edges automatically. For something like a gate or fence with relatively defined edges against a sky or landscape, this works well. The selection doesn’t need to be pixel-perfect here because of what comes next.
Object Select Tool active with gate selected in photo
Use the Object Select Tool (shortcut W, then cycle to it if needed) and click on the element you want removed. Photoshop will attempt to trace the edges automatically. For something like a gate or fence with relatively defined edges against a sky or landscape, this works well. The selection doesn’t need to be pixel-perfect here because of what comes next.
Keep the selection active and don’t refine it yet. The magic happens in the next step, and over-refining at this stage is wasted time.
Step 3: Expand the Selection by 20 Pixels Before Running Generative Fill
 Modify Expand dialog box set to 20 pixels
This is the step most people skip, and it’s the reason their Generative Fill results look like the object is still vaguely there. Go to Select, then Modify, then Expand, and type in 20 pixels. What this does is push your selection slightly beyond the edges of the object, giving Generative Fill a border of the surrounding background to reference when it builds the replacement content.
Modify Expand dialog box set to 20 pixels
This is the step most people skip, and it’s the reason their Generative Fill results look like the object is still vaguely there. Go to Select, then Modify, then Expand, and type in 20 pixels. What this does is push your selection slightly beyond the edges of the object, giving Generative Fill a border of the surrounding background to reference when it builds the replacement content.
Without this buffer, the AI is essentially painting blind at the edges and you’ll often see a faint ghost of the original object, or a hard seam where the fill meets the untouched image. Twenty pixels is Kelby’s working number and it matches what I’ve landed on through my own testing. On very large, dense objects you might push it to 30, but 20 handles most situations cleanly.
Step 4: Run Generative Fill with No Text Prompt
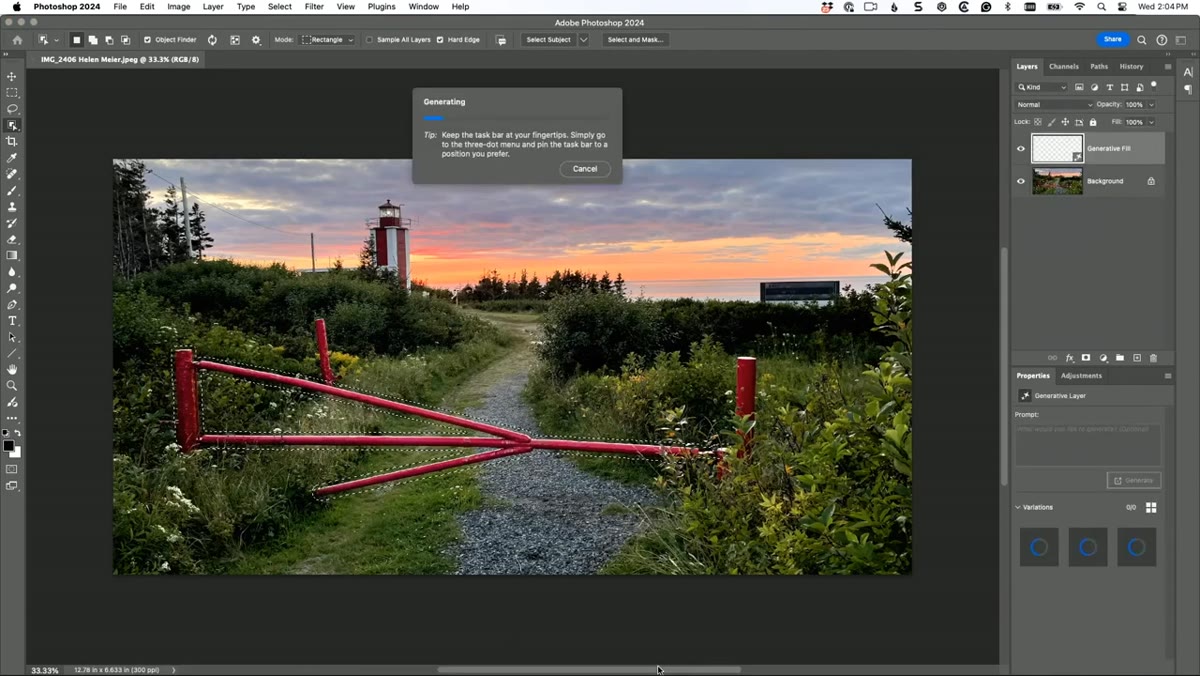 Generative Fill dialog open with empty prompt field
With your expanded selection active, open the Generative Fill bar at the bottom of the canvas (or via the contextual taskbar) and leave the text prompt completely empty. Click Generate. Photoshop will produce three variations for you to choose from in the Properties panel.
Generative Fill dialog open with empty prompt field
With your expanded selection active, open the Generative Fill bar at the bottom of the canvas (or via the contextual taskbar) and leave the text prompt completely empty. Click Generate. Photoshop will produce three variations for you to choose from in the Properties panel.
An empty prompt tells the AI to fill based purely on the surrounding context rather than introducing new content. For removal tasks, this almost always gives you cleaner, more natural results than typing something like “sky” or “grass,” which can introduce textures that don’t match your specific image. Let the context drive it.
Step 5: Handle Remaining Poles and Edges with a Second Pass
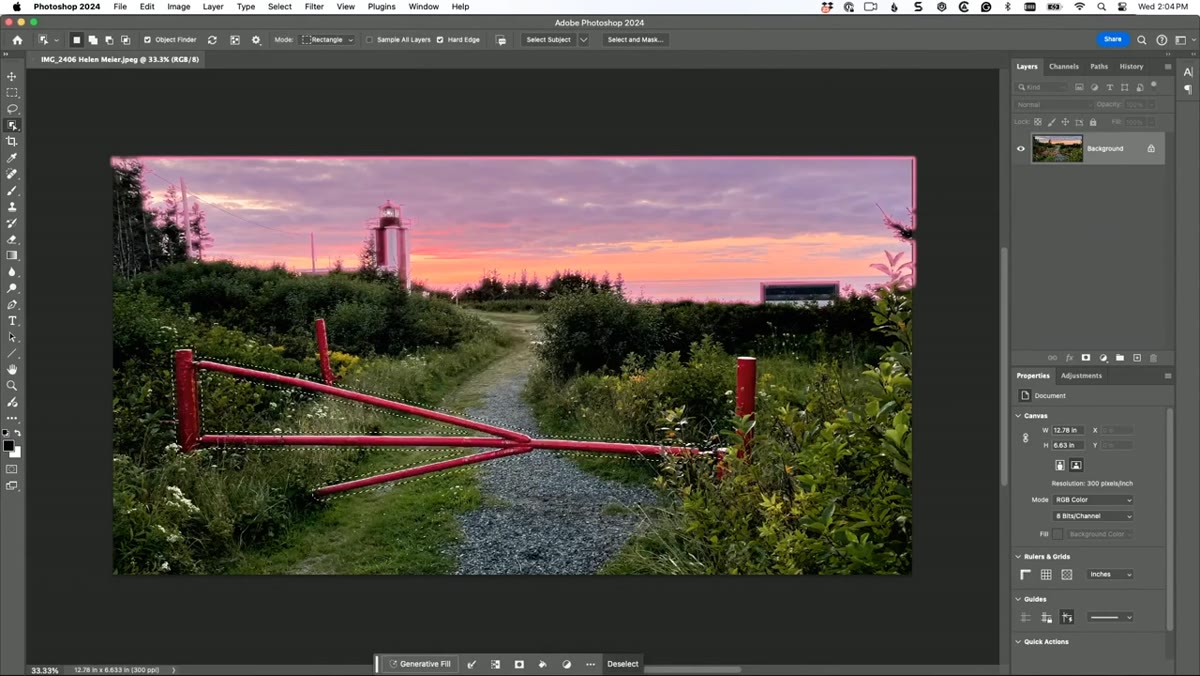
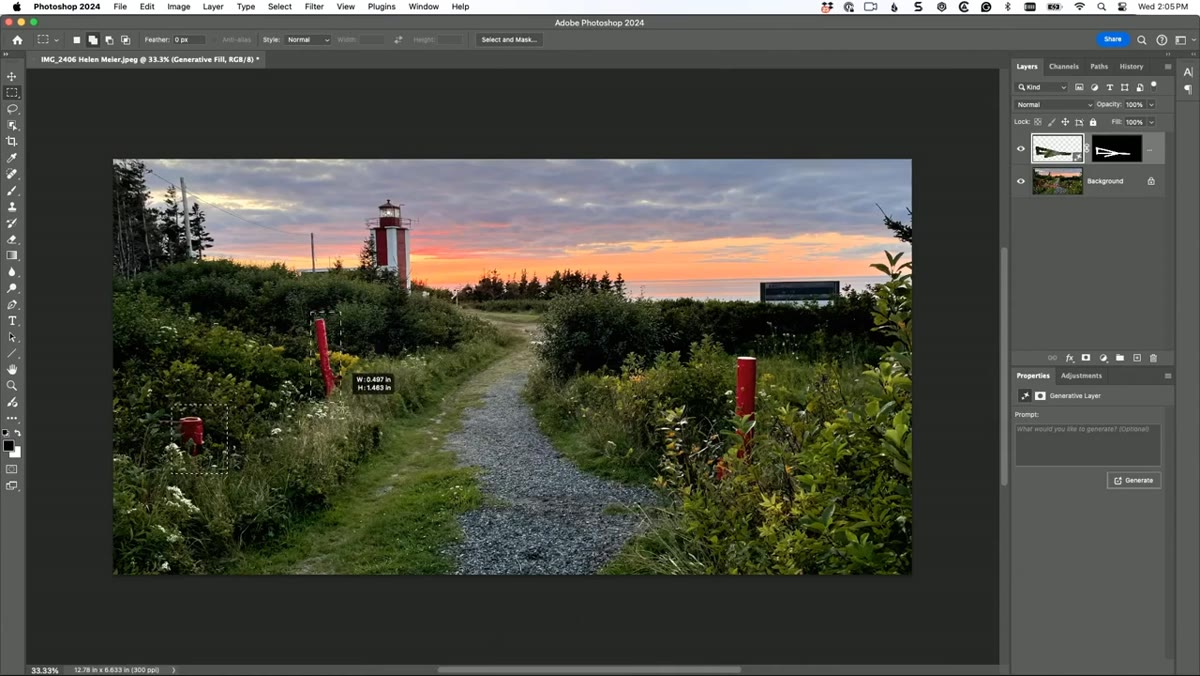 Remaining fence posts selected for second Generative Fill pass
Generative Fill rarely catches everything in one shot on complex objects with thin vertical elements like fence posts or poles. Kelby selects the remaining stragglers with a regular selection tool, expands again, and runs a second Generate. This two-pass approach is faster than trying to select every element at once in a single oversized selection, which can confuse the fill engine.
Remaining fence posts selected for second Generative Fill pass
Generative Fill rarely catches everything in one shot on complex objects with thin vertical elements like fence posts or poles. Kelby selects the remaining stragglers with a regular selection tool, expands again, and runs a second Generate. This two-pass approach is faster than trying to select every element at once in a single oversized selection, which can confuse the fill engine.
For isolated thin objects like telephone poles, the same method applies. Select, expand 20 pixels, generate empty prompt. On power lines, Kelby switches to the Healing Brush in Photoshop (not Lightroom, and he’s clear about why) and uses a shift-click technique to draw straight strokes along the length of the line.
Step 6: Remove Power Lines with the Healing Brush and Shift-Click
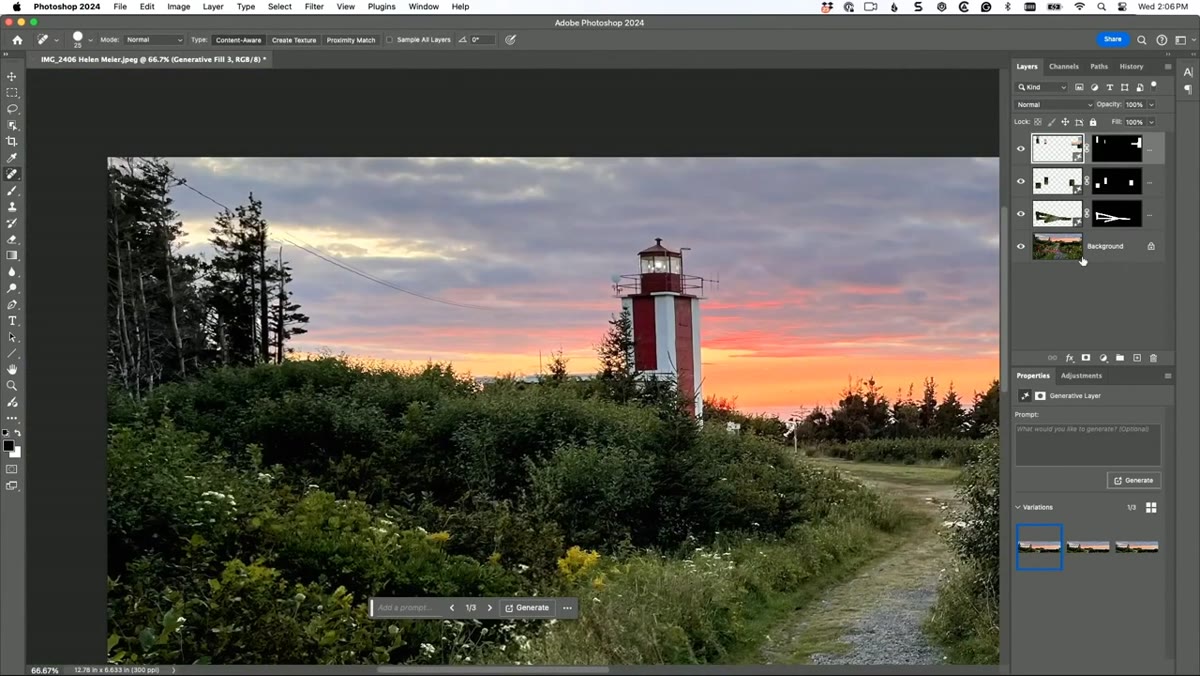 Healing Brush drawing straight line along power line with Shift key
Click once at the start of a power line to set your first healing point. Then hold Shift and click at the end of that line segment. Photoshop draws a straight healing stroke between the two points, sampling from the surrounding pixels to blend the correction. This is dramatically faster than painting freehand along a line, and it keeps your strokes consistent.
Healing Brush drawing straight line along power line with Shift key
Click once at the start of a power line to set your first healing point. Then hold Shift and click at the end of that line segment. Photoshop draws a straight healing stroke between the two points, sampling from the surrounding pixels to blend the correction. This is dramatically faster than painting freehand along a line, and it keeps your strokes consistent.
Work in segments on longer lines rather than trying to cover the full span in one click-shift-click. Shorter segments give the healing algorithm a smaller, more consistent area to sample from, and you get cleaner blends.
Step 7: Straighten the Horizon and Crop to Finalize the Composition
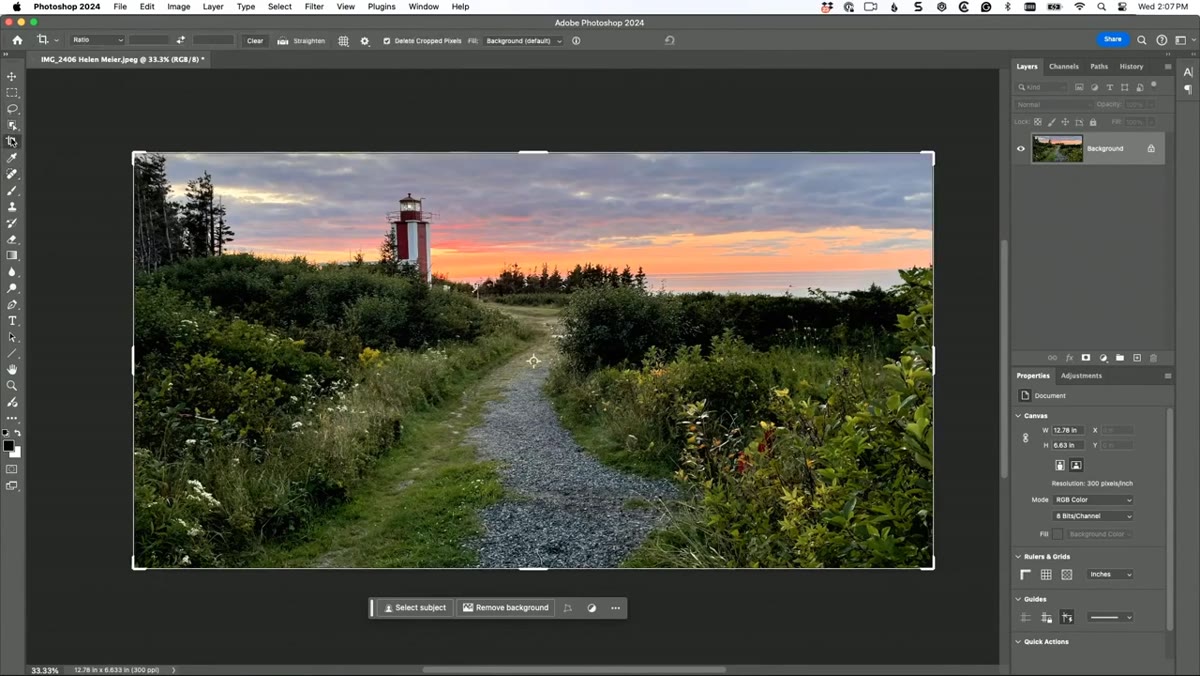 Crop tool active with straighten tool dragged along horizon line
Activate the Crop Tool and look for the Straighten option in the toolbar. Click and drag along your horizon line and Photoshop will calculate the rotation angle and apply it when you commit. Kelby finds the auto-straighten lands at roughly 1.9 degrees but doesn’t trust the result fully, so he duplicates the layer, rotates manually, and brings down a ruler (Command R) to verify the horizon is actually level before cropping.
Crop tool active with straighten tool dragged along horizon line
Activate the Crop Tool and look for the Straighten option in the toolbar. Click and drag along your horizon line and Photoshop will calculate the rotation angle and apply it when you commit. Kelby finds the auto-straighten lands at roughly 1.9 degrees but doesn’t trust the result fully, so he duplicates the layer, rotates manually, and brings down a ruler (Command R) to verify the horizon is actually level before cropping.
When you crop, hold Shift and Option together to crop from the center outward rather than from a corner. This keeps the composition balanced and avoids accidentally shifting your subject off-axis during the final trim.
A Note from My Own Workflow
The 20-pixel expand rule is the one I’d tattoo on the wall if I were running a training session. I’ve watched junior retouchers spend 20 minutes trying to clean up a Generative Fill result that would have been usable in one pass if they’d just expanded the selection first. I’ve added it as a step inside a Photoshop action that auto-preps selections before any generative work runs. The time savings compound fast once it’s in your standard process.
One additional tool worth knowing: Kelby briefly mentions a plugin option for power lines. Adobe’s own Remove Tool (available in newer Photoshop builds) handles wire removal with a single brushstroke and no selection setup at all. It’s worth testing alongside the healing brush method to see which gives you cleaner results on your specific image types.
The biggest shift this tutorial pushed me toward was committing to the distraction audit before touching any tool. Deciding what the image is actually about, then systematically removing everything that contradicts that, is faster and produces better results than reactive patching. Clean up with intention, not just habit.
Watch the full tutorial on YouTube to see Kelby work through the complete edit in real time.
Comments (2)
Clear and practical. No fluff. Appreciate that.
Printing this out and pinning it next to my monitor. That good.
Leave a Comment