There is a certain kind of pain that only photographers know. You finish editing a set of images, they look great, and then you spend the next forty-five minutes manually exporting the same files at different sizes for Instagram, your client’s website, and the print lab. Same dialog box, slightly different numbers, over and over. I spent an embarrassing amount of time doing exactly this before I finally sat down and built a proper export preset system in Lightroom. I wish I had done it years earlier.
In this Aaron Nace tutorial from PHLEARN, he walks through the full process of creating export presets for multiple destinations, including Instagram and web. Watch the full tutorial on YouTube if you want to follow along. The core idea is simple: configure your export settings once, save them as a named preset, and from that point forward the whole thing is a two-click operation no matter how many images you’re sending out.
What I like about Nace’s approach is that he doesn’t just show you where to click. He thinks about the file naming structure at the same time as the export settings, which is something a lot of tutorials skip over. When you’re managing hundreds of files across multiple clients and campaigns, a consistent naming convention isn’t a nice-to-have, it’s the thing that keeps you from losing your mind at 11pm before a deadline.
Step 1: Import Your Images and Plan for Multiple Destinations
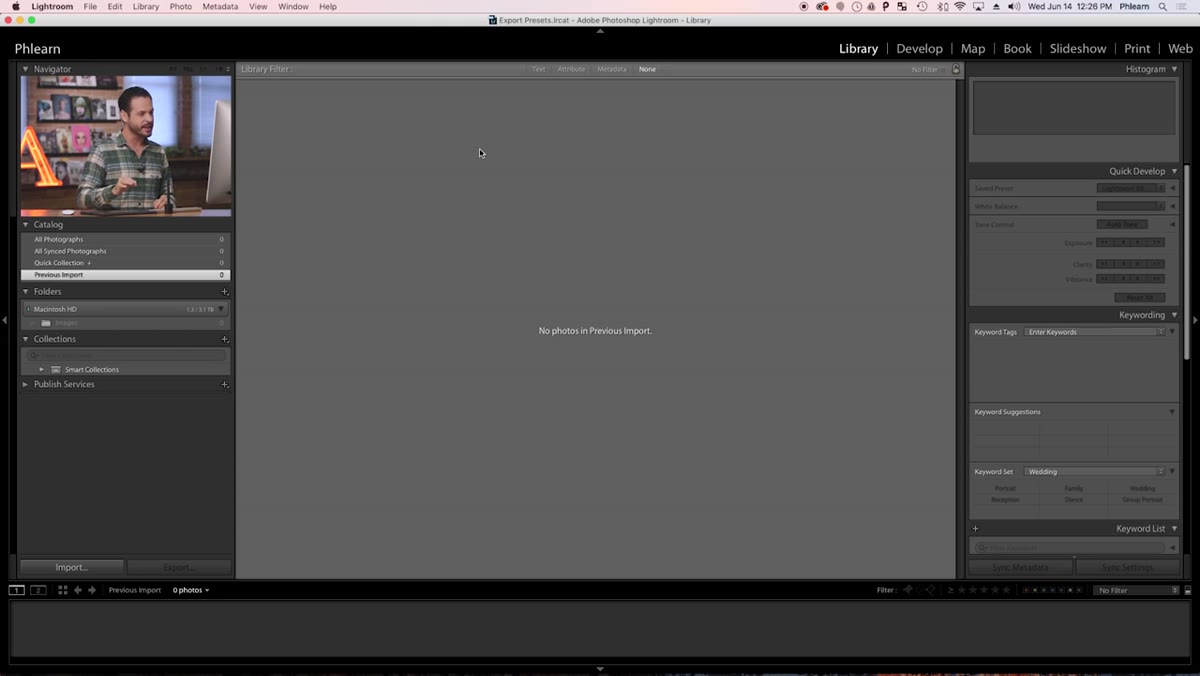 Lightroom library with imported images visible in grid view
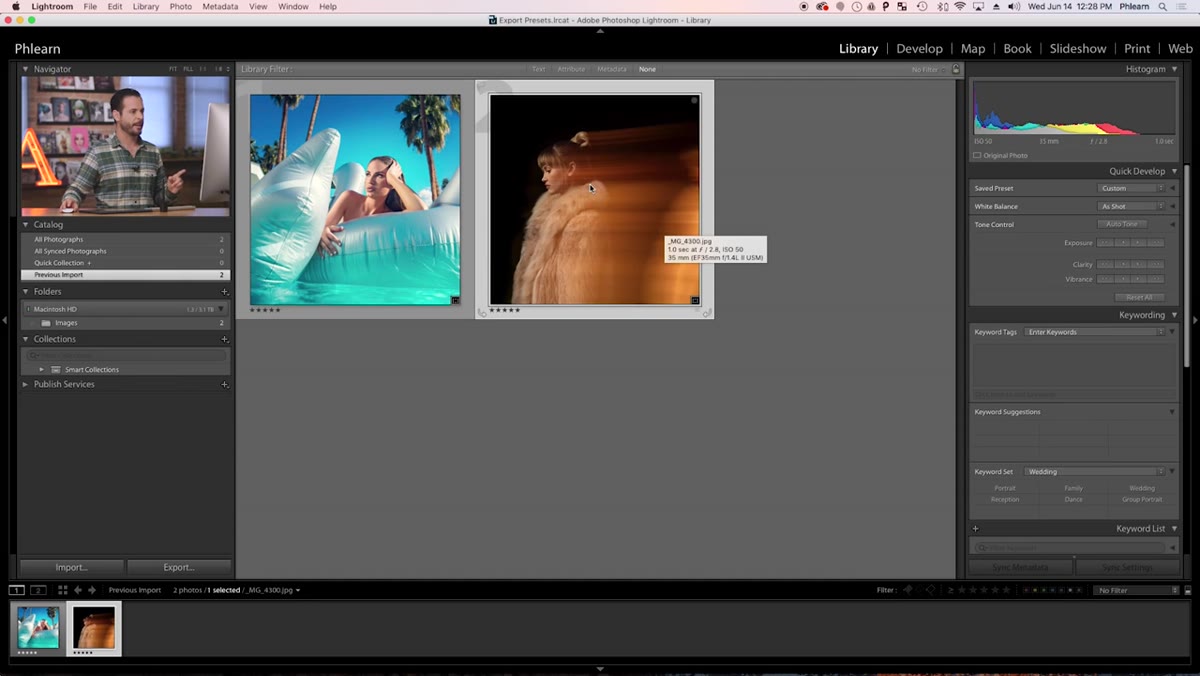
Before you touch the export dialog, have a clear picture of where your images are going. In the tutorial, Nace imports two images from a photography shoot, and he specifically notes that one is portrait orientation and one is landscape. This matters because different destinations, and different aspect ratios, will need slightly different treatment even within the same preset category. As you’re importing, start thinking in terms of output destinations: social media, web portfolio, client delivery, print. Each of those is a preset you’re about to build.
Lightroom library with imported images visible in grid view
Before you touch the export dialog, have a clear picture of where your images are going. In the tutorial, Nace imports two images from a photography shoot, and he specifically notes that one is portrait orientation and one is landscape. This matters because different destinations, and different aspect ratios, will need slightly different treatment even within the same preset category. As you’re importing, start thinking in terms of output destinations: social media, web portfolio, client delivery, print. Each of those is a preset you’re about to build.
Step 2: Crop for the Target Platform First
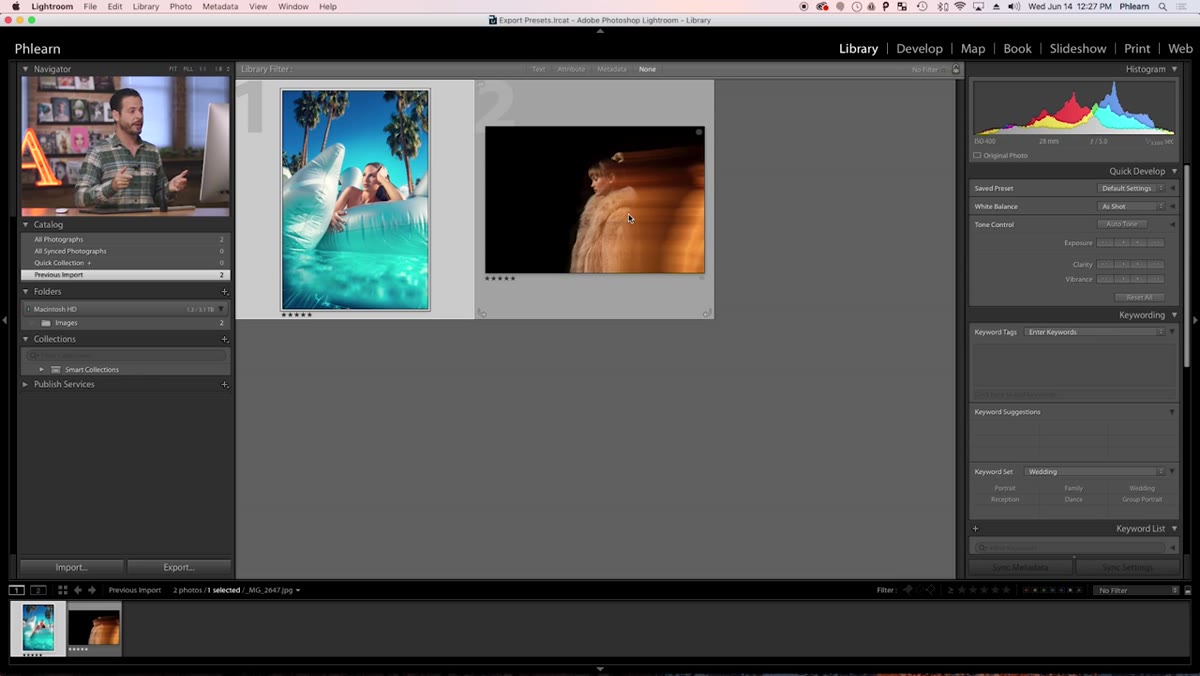 Lightroom Develop module with crop tool and 1:1 aspect ratio selected
For Instagram, Nace crops both images to a 1:1 square ratio before exporting. In the Develop module, open the crop overlay, click the aspect ratio dropdown, and select 1:1. Drag the crop box to the composition you want and hit Enter. Do this for each image that’s heading to Instagram. The important thing to know here is that Lightroom is non-destructive, so this crop doesn’t permanently alter your file. You can return to the original full-frame image any time.
Lightroom Develop module with crop tool and 1:1 aspect ratio selected
For Instagram, Nace crops both images to a 1:1 square ratio before exporting. In the Develop module, open the crop overlay, click the aspect ratio dropdown, and select 1:1. Drag the crop box to the composition you want and hit Enter. Do this for each image that’s heading to Instagram. The important thing to know here is that Lightroom is non-destructive, so this crop doesn’t permanently alter your file. You can return to the original full-frame image any time.
If you’re building presets for multiple platforms simultaneously, it’s worth doing all your Instagram crops in one pass before you move on to the export dialog. Keeping similar tasks grouped together is faster than bouncing back and forth between crop adjustments and export settings.
Step 3: Open the Export Dialog
 Right-click context menu showing Export option in Lightroom library
Right-click any image in the Library module and navigate to Export, then Export again in the submenu. This opens Lightroom’s main export dialog, which is where you’ll configure and eventually save your preset. You don’t need to select a destination folder yet. Nace recommends leaving the folder selection open for now and choosing it later, because the goal at this stage is to get the settings right first. The folder structure is something you can standardize separately.
Right-click context menu showing Export option in Lightroom library
Right-click any image in the Library module and navigate to Export, then Export again in the submenu. This opens Lightroom’s main export dialog, which is where you’ll configure and eventually save your preset. You don’t need to select a destination folder yet. Nace recommends leaving the folder selection open for now and choosing it later, because the goal at this stage is to get the settings right first. The folder structure is something you can standardize separately.
Step 4: Set Up Your File Naming Convention
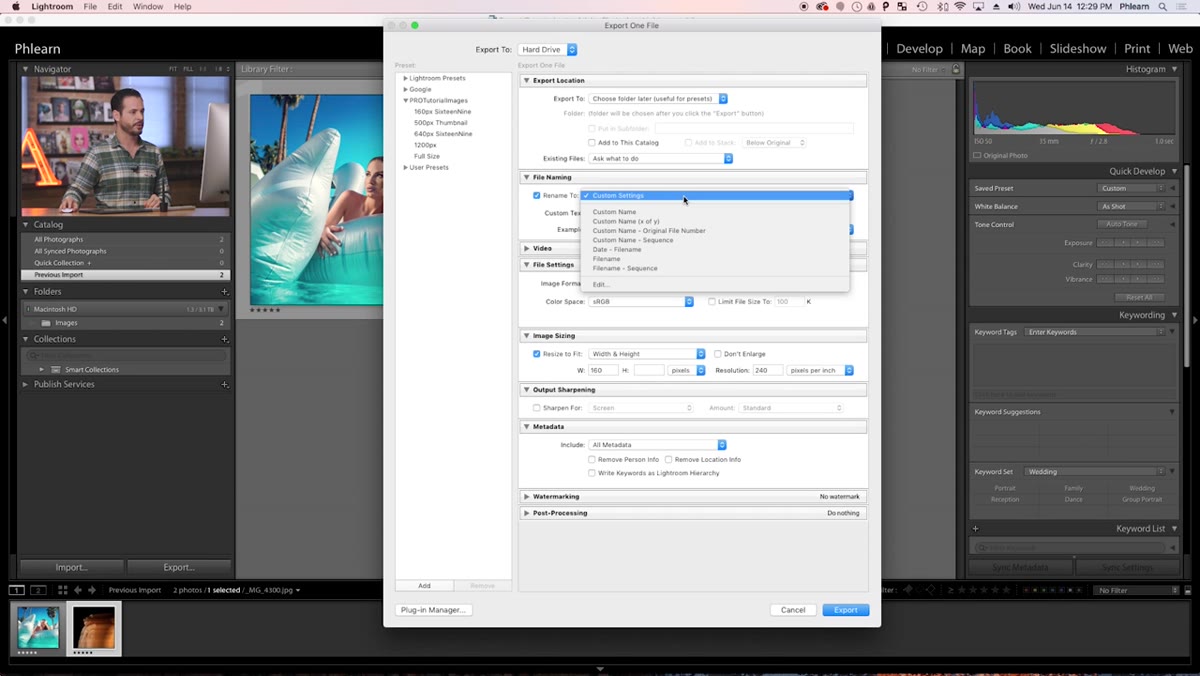 File Naming section of Lightroom export dialog with template editor open
This step is where a lot of people get lazy and end up with a folder full of files called “IMG_4300.jpg” and “IMG_4300-1.jpg” and “IMG_4300-final.jpg.” Don’t do that. In the export dialog, go to the File Naming section, select Rename To, and choose Edit to open the template editor.
File Naming section of Lightroom export dialog with template editor open
This step is where a lot of people get lazy and end up with a folder full of files called “IMG_4300.jpg” and “IMG_4300-1.jpg” and “IMG_4300-final.jpg.” Don’t do that. In the export dialog, go to the File Naming section, select Rename To, and choose Edit to open the template editor.
Nace builds a naming template that combines the original file name with a custom text string. The result is something like “IMG_4300_1080_Instagram,” which tells you the original file reference, the pixel dimensions, and the intended platform. You can replicate this by inserting the “Filename” token, then adding an underscore as a separator, then inserting a “Custom Text” token. In the Custom Text field, type something like “1080_Instagram.” That naming pattern will apply automatically to every file you export using this preset.
Step 5: Configure File Format and Quality Settings
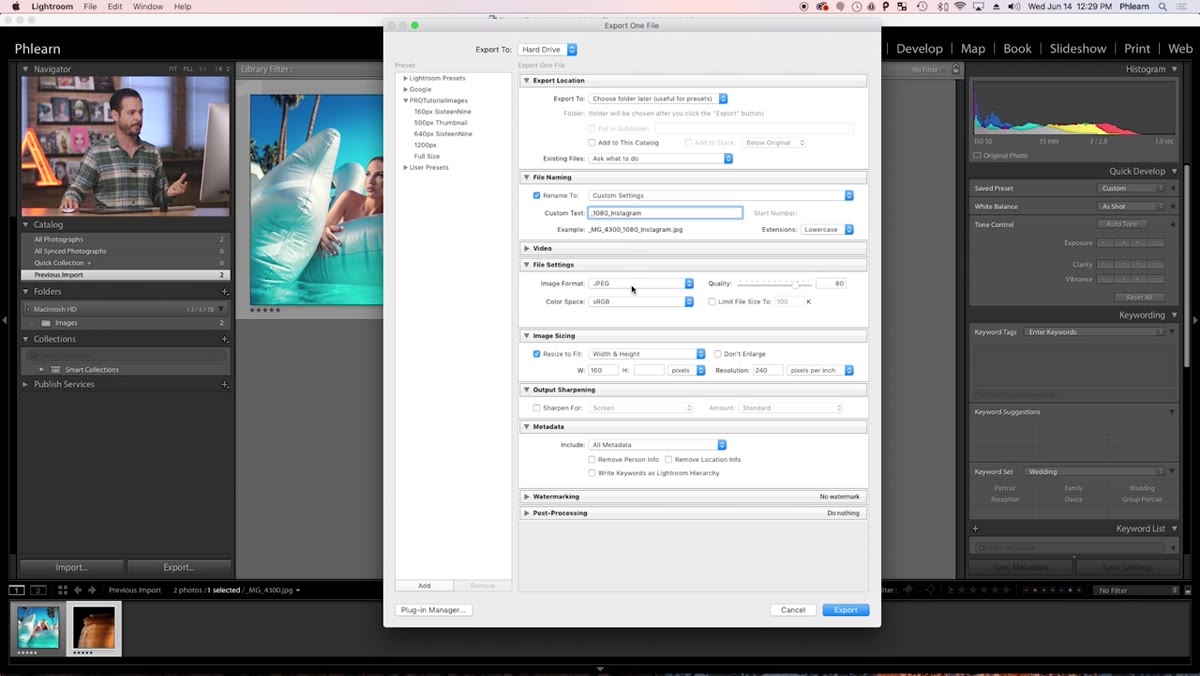 File Settings section showing JPEG format, sRGB color space, and quality slider
In the File Settings section, set the format to JPEG, the color space to sRGB, and the quality to 80. For screen delivery, including Instagram and web use, sRGB is the correct color space. JPEG at quality 80 gives you a good balance of file size and visual quality. Going higher than 80 rarely produces a visible difference for web output and just inflates your file sizes unnecessarily.
File Settings section showing JPEG format, sRGB color space, and quality slider
In the File Settings section, set the format to JPEG, the color space to sRGB, and the quality to 80. For screen delivery, including Instagram and web use, sRGB is the correct color space. JPEG at quality 80 gives you a good balance of file size and visual quality. Going higher than 80 rarely produces a visible difference for web output and just inflates your file sizes unnecessarily.
Step 6: Set Image Sizing and Output Sharpening
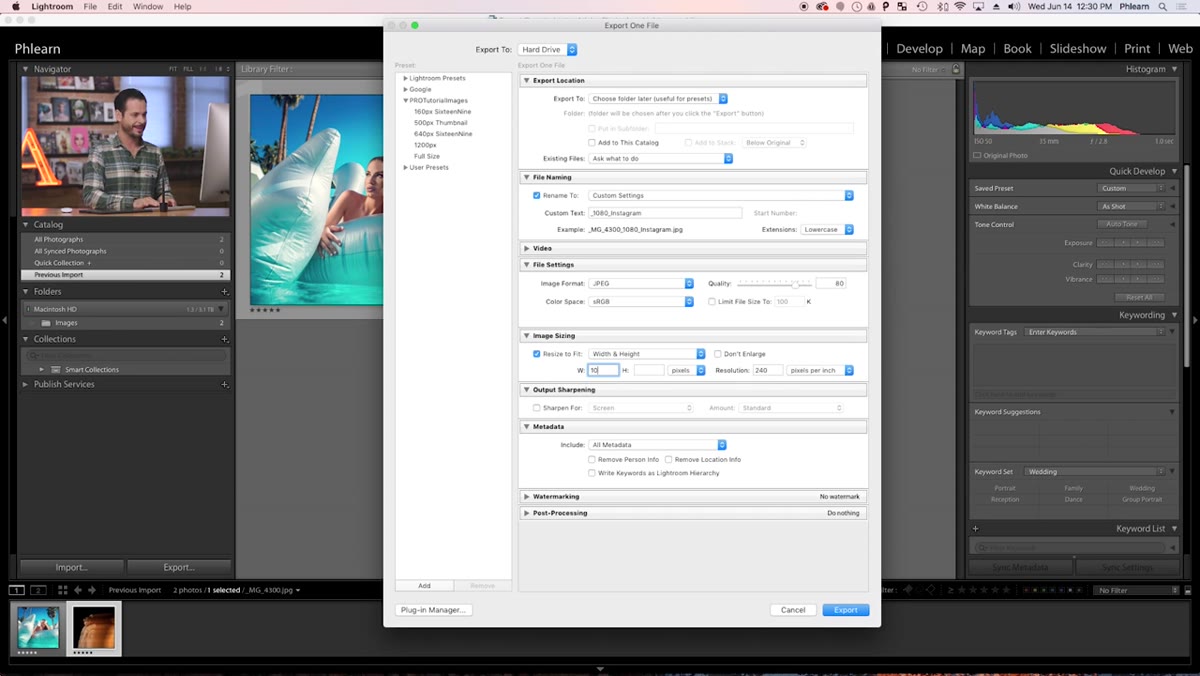 Image Sizing section with Resize to Fit enabled and 1080 pixels entered
In the Image Sizing section, check Resize to Fit and select Width from the dropdown. Type 1080 in the width field. For Instagram, 1080 pixels wide is the standard upload resolution and Lightroom will constrain the proportions automatically. Below that, in the Output Sharpening section, enable Sharpen For and set it to Screen at the Standard amount. This adds a light sharpening pass that compensates for the softening that can happen during the resize process.
Image Sizing section with Resize to Fit enabled and 1080 pixels entered
In the Image Sizing section, check Resize to Fit and select Width from the dropdown. Type 1080 in the width field. For Instagram, 1080 pixels wide is the standard upload resolution and Lightroom will constrain the proportions automatically. Below that, in the Output Sharpening section, enable Sharpen For and set it to Screen at the Standard amount. This adds a light sharpening pass that compensates for the softening that can happen during the resize process.
Step 7: Save the Preset
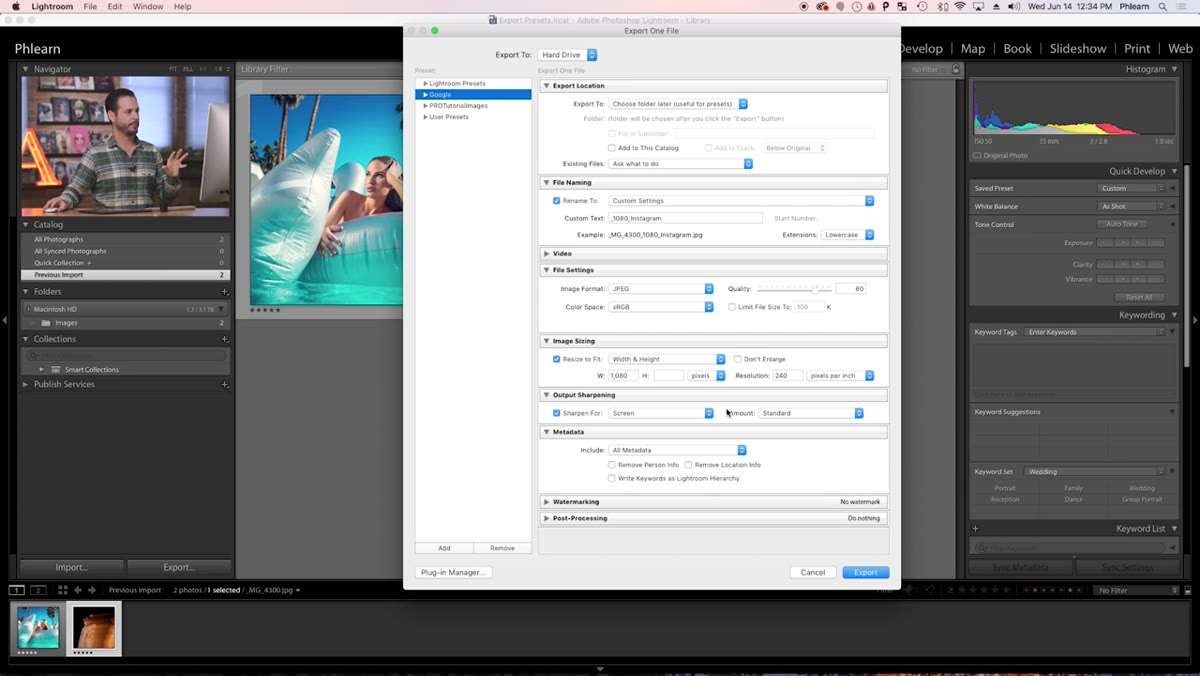 Add Preset dialog with new folder being created in the export presets panel
Once all your settings are configured, click the Add button in the lower left panel of the export dialog. Lightroom will prompt you to name the preset and optionally place it in a folder. Create a new folder, something like “Output Presets” or “Platform Exports,” and give the preset a clear name like “Instagram 1080px Square.” From this point forward, that preset lives in your export panel and is accessible with a single click any time you right-click an image.
Add Preset dialog with new folder being created in the export presets panel
Once all your settings are configured, click the Add button in the lower left panel of the export dialog. Lightroom will prompt you to name the preset and optionally place it in a folder. Create a new folder, something like “Output Presets” or “Platform Exports,” and give the preset a clear name like “Instagram 1080px Square.” From this point forward, that preset lives in your export panel and is accessible with a single click any time you right-click an image.
One Thing I’d Add From My Own Workflow
The tutorial covers Instagram and web, which is the right starting point. But if you’re doing client delivery or e-commerce work, I’d suggest building a separate preset folder just for output review copies, a medium-res JPEG in a client-readable format with simple file naming. I built something similar after I processed 500 product shots in a single afternoon using a batch system I’d put together over a weekend. The actual export took about four minutes. The folder organization afterward, because I hadn’t set up clean naming presets, took much longer than it should have. Get your naming convention locked in before you scale up.
Also, build your presets in a logical order. I color-code mine by destination type in Lightroom’s preset panel: one color for social, one for web, one for print. It sounds like overkill until you’re working fast and need to find the right preset in under two seconds.
The single most important thing Lightroom export presets do is remove decision fatigue from a task that should be fully automatic. Once the settings are right, they’re right permanently. You never have to think about them again. That’s the compounding value of any good preset system, and it’s the reason I track my saved hours as obsessively as I do.
Watch the full tutorial on YouTube to see Aaron Nace walk through the complete setup, including his folder structure recommendations and how to handle different aspect ratios across platforms.
Comments (2)
The tip about stop exporting images one at a was the missing piece for me. Thank you.
Clear and practical. No fluff. Appreciate that.
Leave a Comment