For years, my multi-machine setup was held together with a 32GB flash drive and a lot of optimism. I had one workstation in my studio, a laptop for on-site client reviews, and a home machine I used for late-night retouching sessions. Every time I built a new action set or refined my brush library, I had to remember to copy everything over manually. I didn’t always remember. I once showed up to a client presentation with the wrong version of my color-grading presets loaded, and the whole review turned into an awkward “that’s not quite what we approved” conversation.
This is exactly the problem that Creative Cloud’s preset sync feature was built to solve, and it works better than I expected once you actually understand what it does and doesn’t do automatically. In this CreativeLive tutorial, the instructor walks through the full sync workflow clearly and without the usual hand-waving. Watch the full tutorial on YouTube - it runs just a few minutes and is worth your time before you read further.
Step 1: Open the Sync Settings Menu
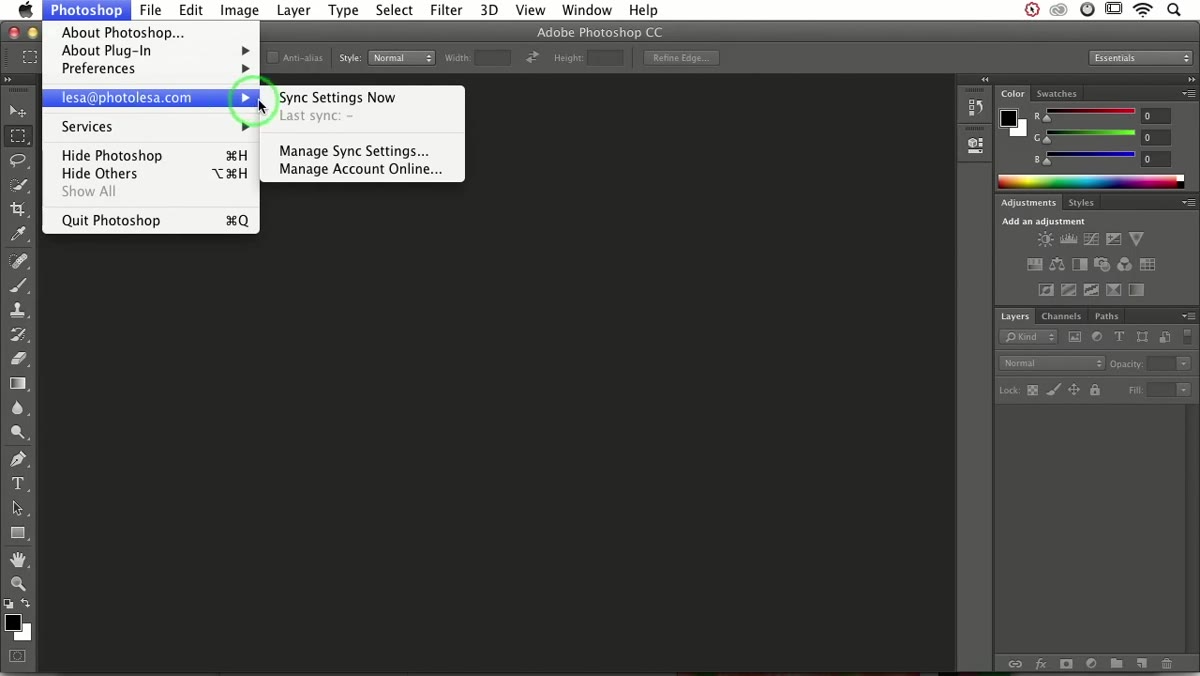 Photoshop menu open showing sync settings options
Start by navigating to the Photoshop menu on Mac (or Edit on Windows). You will see sync-related options listed there. Before you trigger any sync, though, the instructor recommends taking a detour first - you want to confirm exactly what is going to be synced before anything moves to the cloud. Rushing past this step is how you accidentally overwrite a carefully curated preset library with an older version from a different machine.
Photoshop menu open showing sync settings options
Start by navigating to the Photoshop menu on Mac (or Edit on Windows). You will see sync-related options listed there. Before you trigger any sync, though, the instructor recommends taking a detour first - you want to confirm exactly what is going to be synced before anything moves to the cloud. Rushing past this step is how you accidentally overwrite a carefully curated preset library with an older version from a different machine.
Step 2: Check Your Sync Preferences
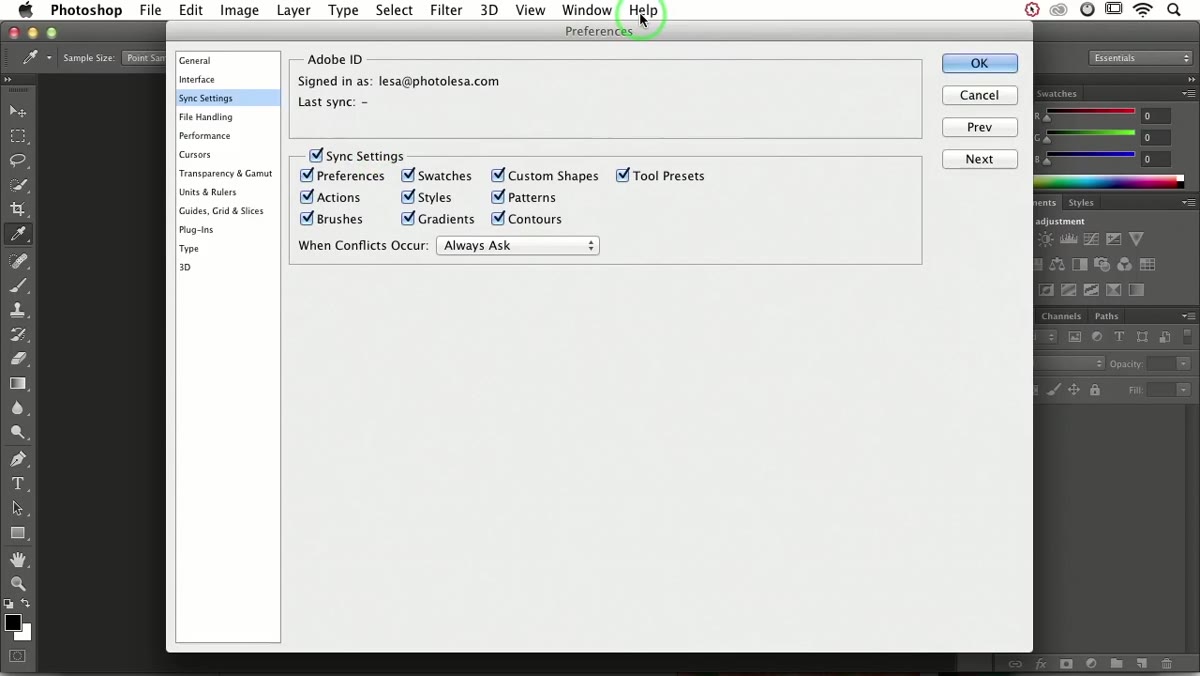 Photoshop Preferences panel showing sync checkboxes
Click the preferences option within that sync menu to open the Creative Cloud sync panel inside Photoshop’s preferences. Out of the box, every checkbox in this panel is turned on. That means Photoshop is set to sync all of the following when you trigger a sync: general preferences, actions, brushes, swatches, styles, gradients, custom shapes, patterns, contours, and tool presets.
Photoshop Preferences panel showing sync checkboxes
Click the preferences option within that sync menu to open the Creative Cloud sync panel inside Photoshop’s preferences. Out of the box, every checkbox in this panel is turned on. That means Photoshop is set to sync all of the following when you trigger a sync: general preferences, actions, brushes, swatches, styles, gradients, custom shapes, patterns, contours, and tool presets.
Take a moment here to actually read through the list. If you share a machine with another photographer or you have a client-specific brush set you do not want pushed to every device, turn off the relevant checkboxes now. Unchecking a category is all it takes to exclude it from syncing entirely. This panel also shows the timestamp of your last sync, which is genuinely useful when you are troubleshooting why one machine seems to be running an older set of assets.
Step 3: Set Your Conflict Behavior
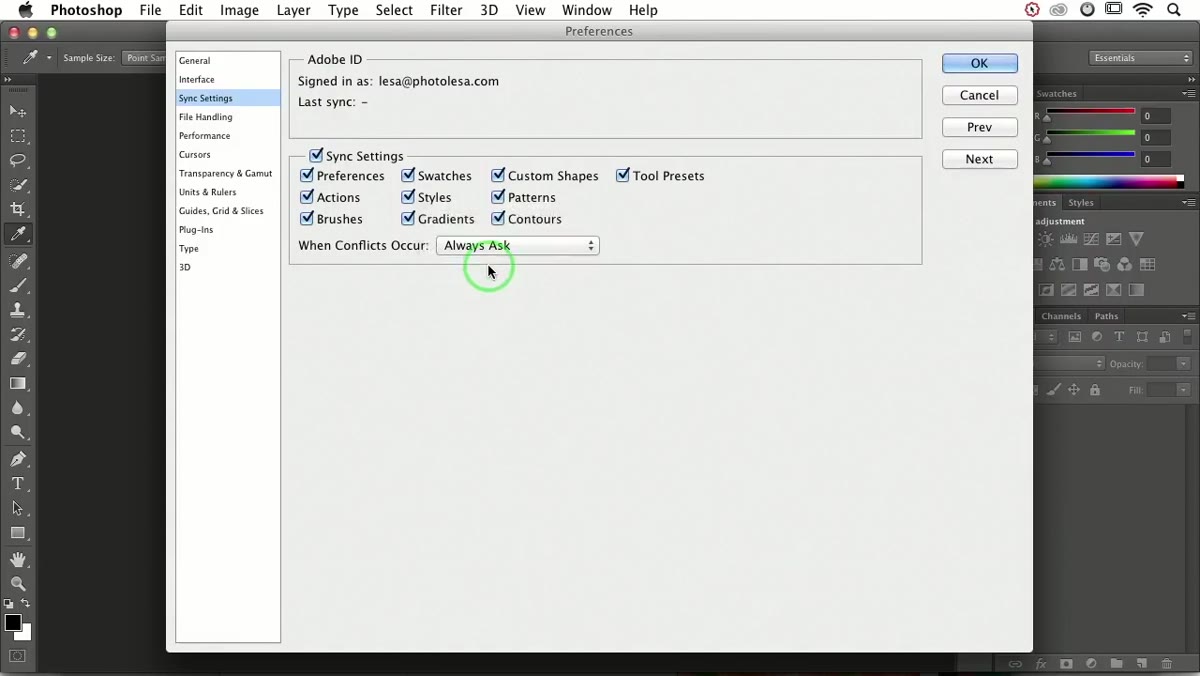 Preferences panel with conflict resolution dropdown visible
Still inside that preferences panel, look for the setting that controls what happens when the settings you are pushing differ from what is already stored in Creative Cloud. The default is “Always Ask,” which means Photoshop will pause and prompt you to choose before overwriting anything.
Preferences panel with conflict resolution dropdown visible
Still inside that preferences panel, look for the setting that controls what happens when the settings you are pushing differ from what is already stored in Creative Cloud. The default is “Always Ask,” which means Photoshop will pause and prompt you to choose before overwriting anything.
Leave this set to “Always Ask.” I know it can feel like an extra click you do not need, but that prompt has saved me from some genuinely bad situations. When Photoshop asks whether you want to keep your local settings or pull from the cloud, it is giving you a real choice with real consequences. The answer depends entirely on which machine has the most current work. Once you have reviewed everything, click OK to close preferences.
Step 4: Open a Document (This Reveals a Faster Sync Option)
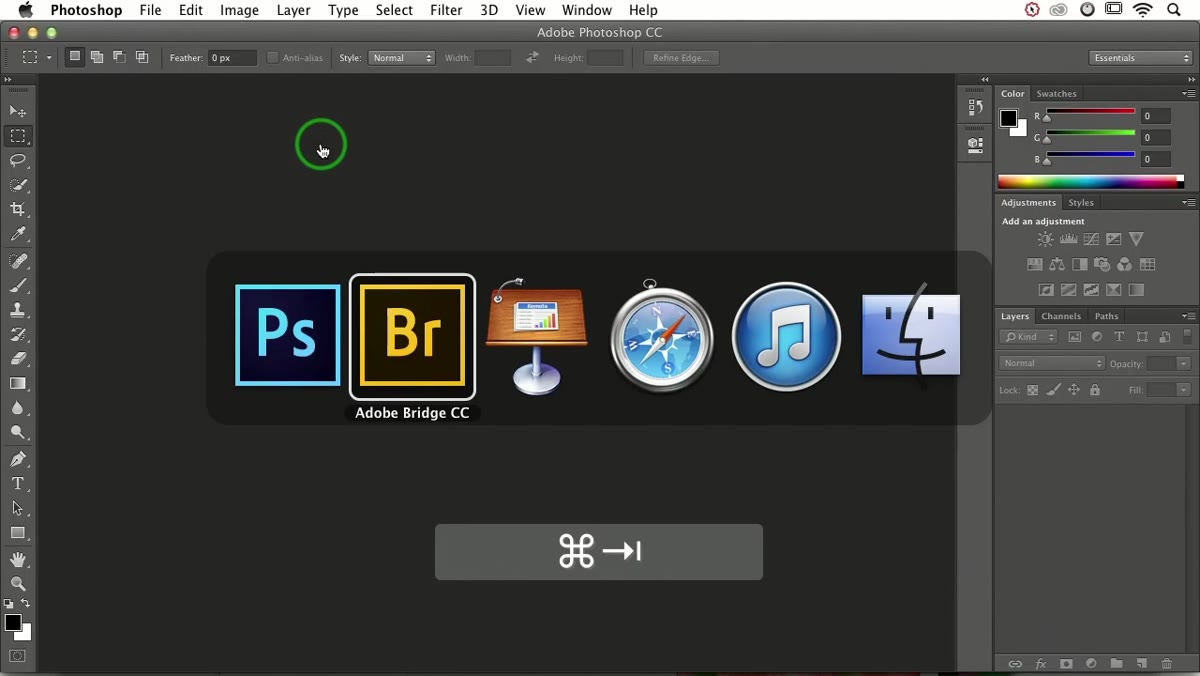 Photoshop workspace with document open in canvas
This step is less about the document itself and more about what opening one reveals. The instructor opens an image through Bridge to show that Photoshop’s workspace changes slightly once a file is loaded. There is a small icon that appears in the lower portion of the interface - easy to miss if you have never been told to look for it.
Photoshop workspace with document open in canvas
This step is less about the document itself and more about what opening one reveals. The instructor opens an image through Bridge to show that Photoshop’s workspace changes slightly once a file is loaded. There is a small icon that appears in the lower portion of the interface - easy to miss if you have never been told to look for it.
With a document open, check the bottom status bar area of your Photoshop window. That tiny icon is a dedicated sync button. It gives you one-click access to trigger a settings sync without navigating through any menus. Once you know it is there, you will use it constantly.
Step 5: Sync via the Status Bar Icon
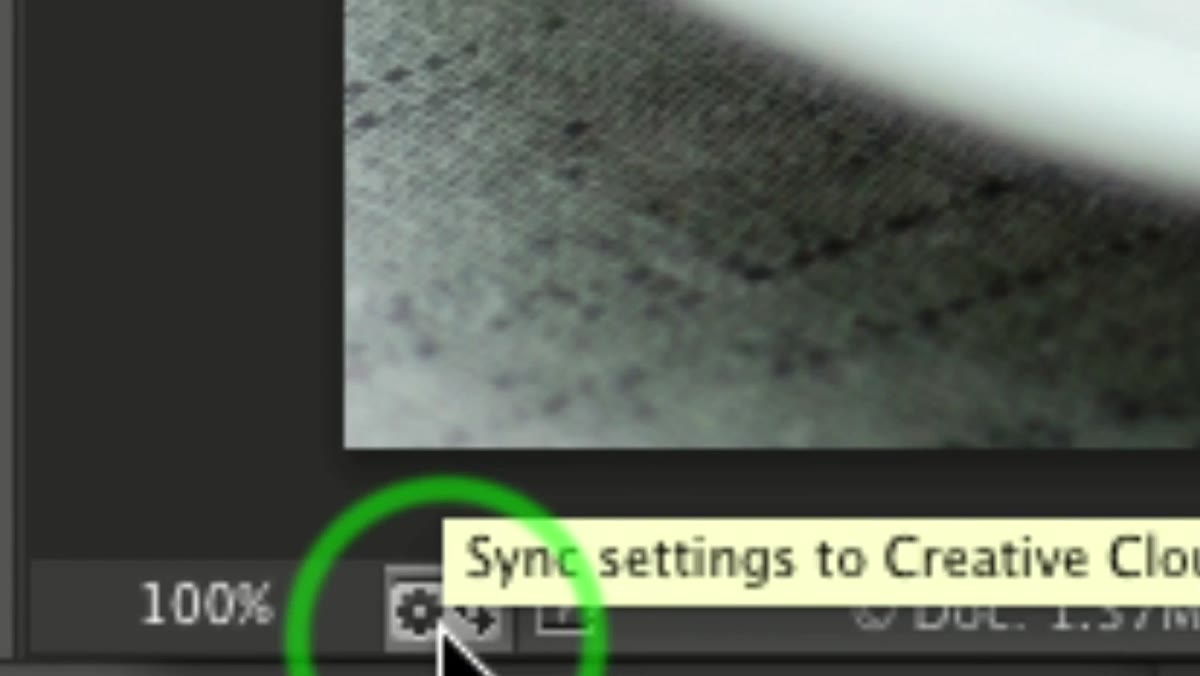 Photoshop status bar with sync settings icon highlighted
Click the sync icon in the status bar. Photoshop will display a small dialog showing when your last sync occurred on this machine. If this is a fresh install or a machine you have never synced from before, that field will be empty - that is normal.
Photoshop status bar with sync settings icon highlighted
Click the sync icon in the status bar. Photoshop will display a small dialog showing when your last sync occurred on this machine. If this is a fresh install or a machine you have never synced from before, that field will be empty - that is normal.
From this dialog, click “Sync Settings Now.” A small progress bar will appear and Photoshop will begin pulling your presets down from Creative Cloud. The whole process is fast, typically under a minute for most preset libraries. You are watching actions, brushes, and all the other checked categories get delivered to the machine without a USB drive in sight.
Step 6: Resolve Any Conflicts
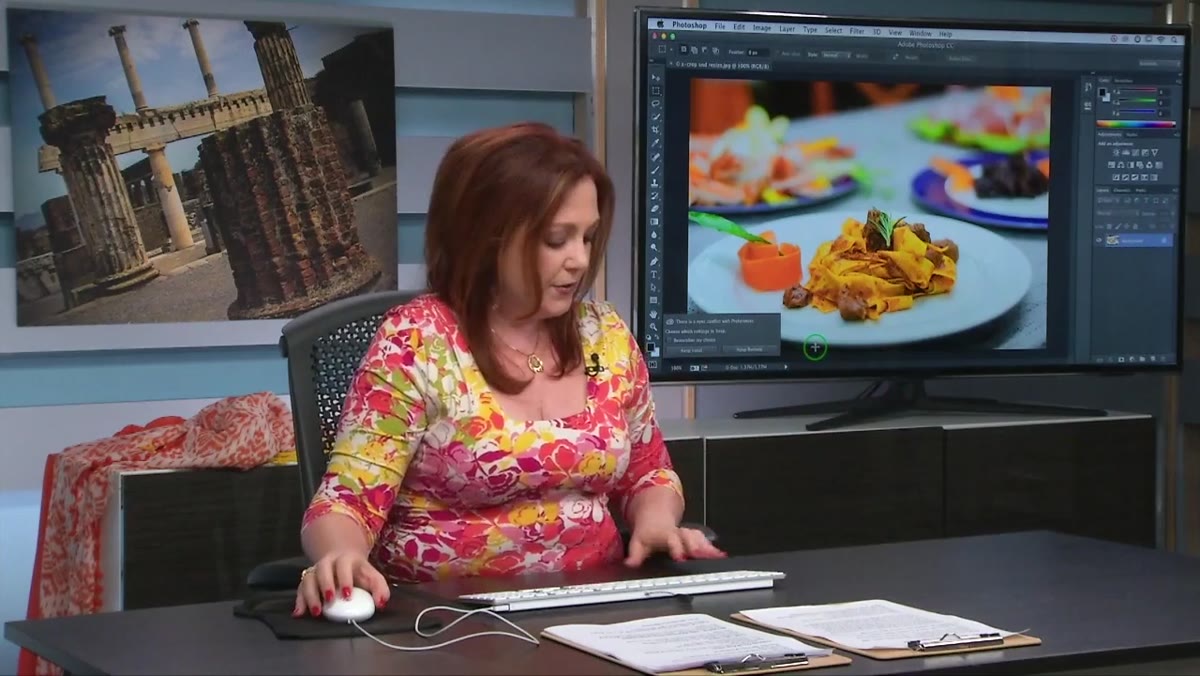 Conflict resolution dialog asking to keep local or remote settings
If the settings on the machine you are syncing to differ from what is stored in Creative Cloud, Photoshop will stop and ask you to choose. You will see options to keep the local settings or pull from the remote (cloud) version.
Conflict resolution dialog asking to keep local or remote settings
If the settings on the machine you are syncing to differ from what is stored in Creative Cloud, Photoshop will stop and ask you to choose. You will see options to keep the local settings or pull from the remote (cloud) version.
This is the moment where you actually think before clicking. If you are setting up a new machine and your cloud version is the most current, choose remote. If you have been building new presets locally and have not synced yet, choose local and the cloud will be updated to match. There is no automatic “right answer” here - it depends on your specific situation, which is exactly why “Always Ask” is the correct default.
What I Would Add to This Workflow
The tutorial covers the mechanics cleanly, but there is one habit I would stack on top of it: before triggering any sync, especially a first sync on a new machine, do a manual export of your current presets to a local folder first. Go to your Presets Manager, export the categories you care about most, and drop them into a dated folder on your desktop.
I do this automatically now. With over 2,400 hours of accumulated time savings baked into the action sets I have built over the years, losing even one of them to a bad sync conflict would be genuinely painful. The cloud sync is reliable, but having a local snapshot before any major sync operation costs you about 90 seconds and has saved me at least twice. Backup the backups. You already know my feelings on that.
The single most important thing to take away here is that Creative Cloud preset sync is not automatic - it only runs when you tell it to, and it asks you to resolve conflicts before overwriting anything. That combination of manual control and conflict prompting makes it genuinely safe to use across multiple machines. The flash drive era is over.
Watch the full tutorial on YouTube to see the instructor walk through each step in real time, including a live conflict resolution at the end that makes the whole process click.
Comments (6)
The before and after really sells it. Incredible difference.
I tried this on a client project yesterday and the results were way better than expected.
Really solid breakdown. This pairs perfectly with the lighting work I've been writing about.
Love how you break down complex stuff into manageable steps.
This is going in my reference folder. Incredibly useful.
Love this. I referenced a similar technique in one of my recent posts. Always good to see other perspectives.
Leave a Comment