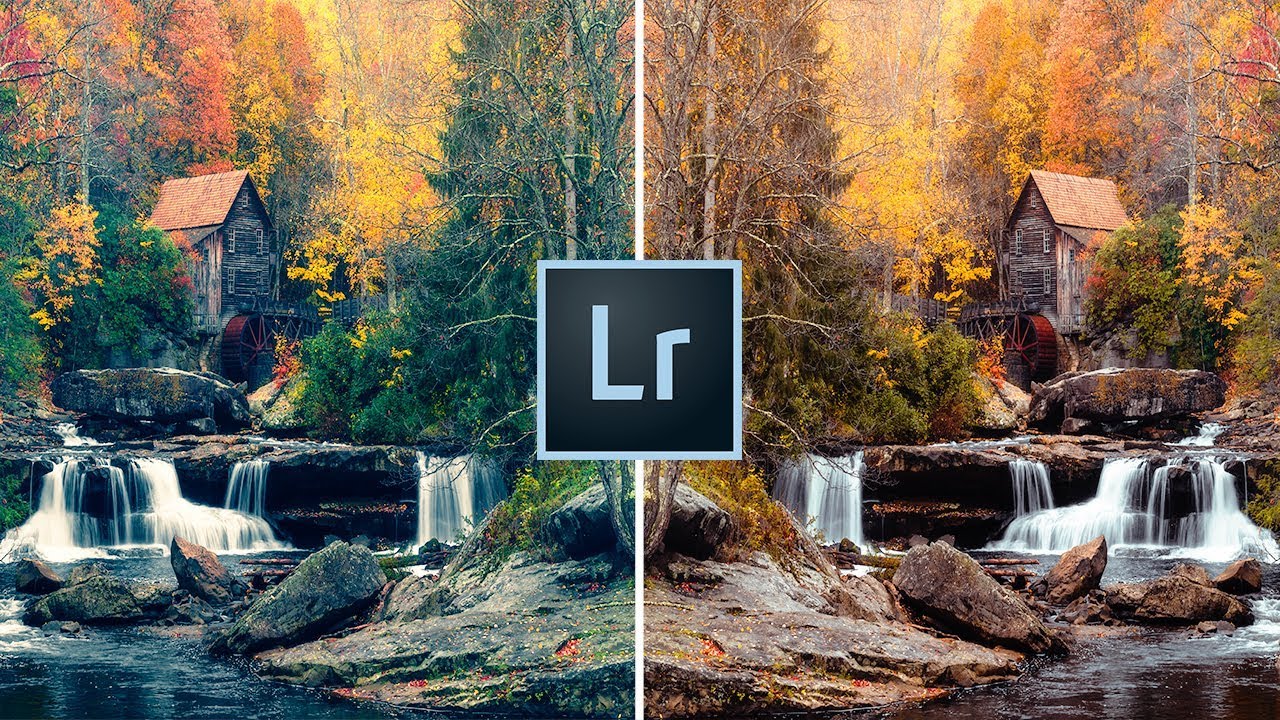
Every editor has a version of this problem. You open a raw file, and before you even really look at it, your hands are already moving. Lens correction. Remove chromatic aberration. Enable profile corrections. Slight vignette. Bump vibrance, pull back saturation a touch. Add sharpening. Clip the highlights. Lift the shadows. You do it so automatically it barely registers as thinking anymore. For me, working through large product shot batches for e-commerce clients, that kind of robotic repetition used to eat 20 to 30 minutes per session before I’d even made a single creative decision. That’s time I was burning on autopilot, not on actual editing.
In this Mark Denney tutorial, Watch the full tutorial on YouTube, Denney makes a case I wish someone had put to me years ago: the presets worth having are the ones you build yourself, designed around your own repetitive habits. He’s not selling anything. He tried the commercial preset market, spent a few hundred dollars across multiple bundles, and eventually abandoned all of it out of frustration. What changed his mind wasn’t better presets. It was a different idea of what a preset is actually for.
The real insight here is that a preset doesn’t have to be a final look. It can be a starting gun, a way to skip the mechanical setup and land somewhere sensible so you can focus on the actual image in front of you. That reframe is small but it changes everything about how you build and use them.
Step 1: Identify the Adjustments You Apply Robotically to Every Image
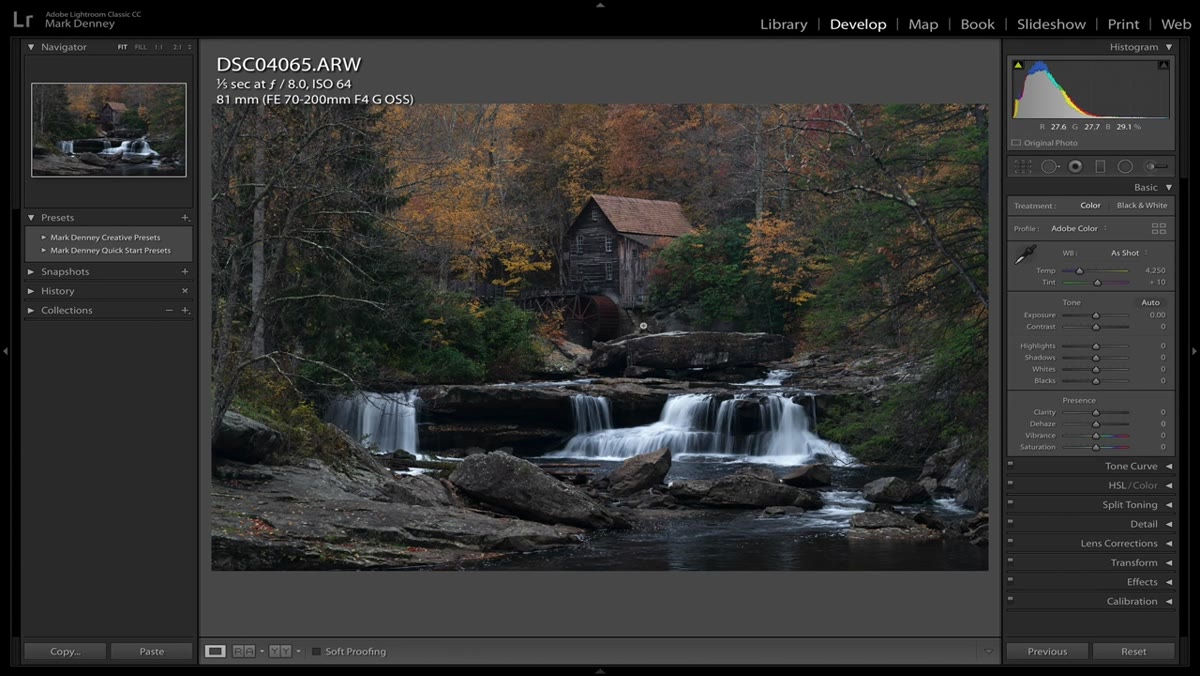 Raw landscape file open in Lightroom with zero edits applied
Before you build anything, audit yourself. Pull up your last ten raw files and watch what you do in the first two minutes without thinking. Denney’s list was lens corrections, a vignette, a vibrance tweak, sharpening, and a highlights/shadows adjustment. Yours will probably be different, but you almost certainly have a list. Write it down. These are the adjustments that belong inside your custom starting preset, because you’re doing them anyway on every single image. Automating them isn’t cutting corners. It’s just being honest about your own process.
Raw landscape file open in Lightroom with zero edits applied
Before you build anything, audit yourself. Pull up your last ten raw files and watch what you do in the first two minutes without thinking. Denney’s list was lens corrections, a vignette, a vibrance tweak, sharpening, and a highlights/shadows adjustment. Yours will probably be different, but you almost certainly have a list. Write it down. These are the adjustments that belong inside your custom starting preset, because you’re doing them anyway on every single image. Automating them isn’t cutting corners. It’s just being honest about your own process.
Step 2: Understand What Lightroom’s Auto Function Actually Does
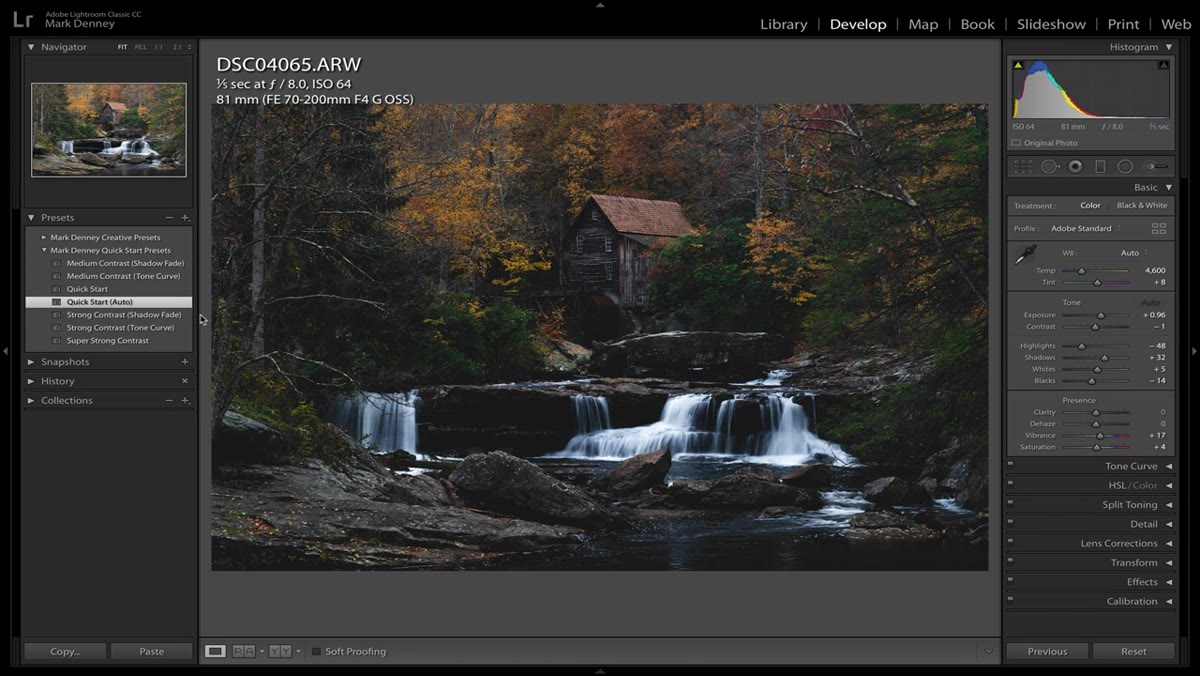
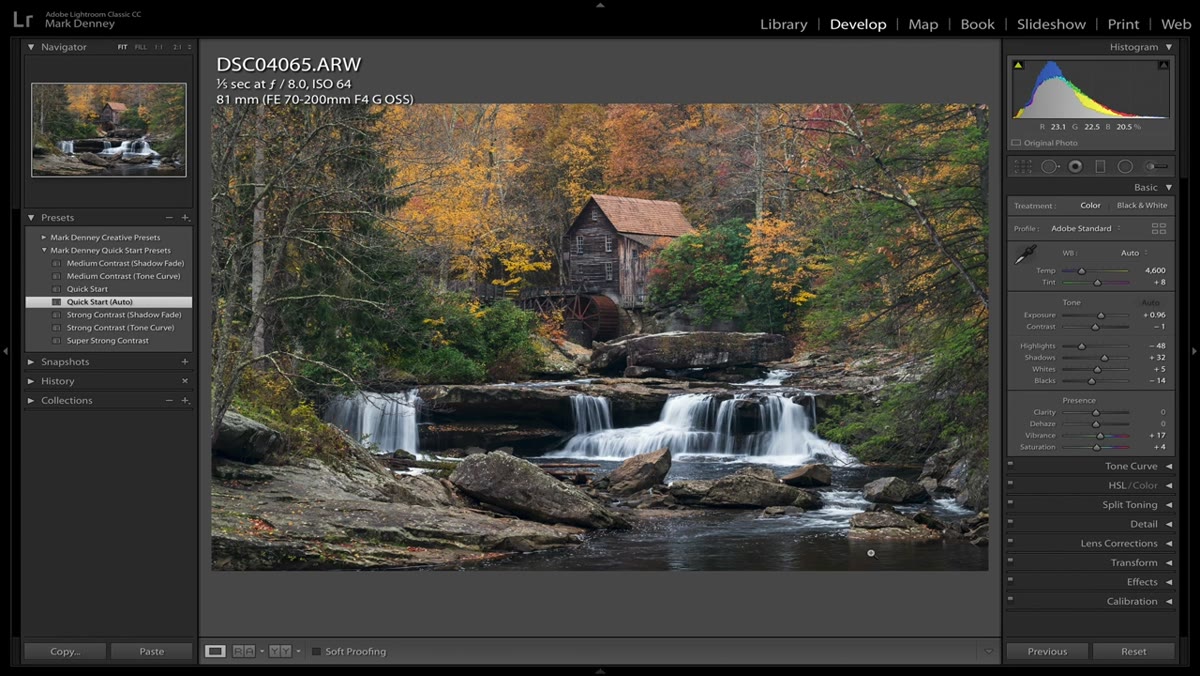 Basic panel showing automatic adjustments applied across white balance and tone sliders
This is the part that genuinely surprised me when I watched Denney demo it. Lightroom’s Auto function, when embedded in a preset, will analyze each individual image and set its own values for white balance, exposure, contrast, highlights, shadows, whites, blacks, vibrance, and saturation. It leaves clarity and dehaze alone, which is smart because those are stylistic rather than corrective. The result isn’t a finished edit. It’s a reasonable starting exposure that’s tuned to that specific file. You’ll still go in and refine everything. But instead of starting from a completely flat raw, you’re starting from somewhere in the neighborhood of correct. For editorial and landscape work especially, this is a genuine time saver.
Basic panel showing automatic adjustments applied across white balance and tone sliders
This is the part that genuinely surprised me when I watched Denney demo it. Lightroom’s Auto function, when embedded in a preset, will analyze each individual image and set its own values for white balance, exposure, contrast, highlights, shadows, whites, blacks, vibrance, and saturation. It leaves clarity and dehaze alone, which is smart because those are stylistic rather than corrective. The result isn’t a finished edit. It’s a reasonable starting exposure that’s tuned to that specific file. You’ll still go in and refine everything. But instead of starting from a completely flat raw, you’re starting from somewhere in the neighborhood of correct. For editorial and landscape work especially, this is a genuine time saver.
Step 3: Build Your “Quick Start” Preset in Lightroom
 Lightroom Develop module with preset panel open showing Quick Start preset folder
Once you know which adjustments you always make, apply them all to a single image manually, then save them as a new preset. In Lightroom Classic, go to the Preset panel on the left side of the Develop module, click the plus icon, and choose Create Preset. In the dialog box, check only the settings you actually want included. This is important: uncheck everything else. If you include settings you don’t mean to, the preset will override work you may have already done on a file. Name it something descriptive. Denney calls his “Quick Start Auto,” which tells him exactly what it contains and what it will do. Put it in its own folder so it’s easy to find.
Lightroom Develop module with preset panel open showing Quick Start preset folder
Once you know which adjustments you always make, apply them all to a single image manually, then save them as a new preset. In Lightroom Classic, go to the Preset panel on the left side of the Develop module, click the plus icon, and choose Create Preset. In the dialog box, check only the settings you actually want included. This is important: uncheck everything else. If you include settings you don’t mean to, the preset will override work you may have already done on a file. Name it something descriptive. Denney calls his “Quick Start Auto,” which tells him exactly what it contains and what it will do. Put it in its own folder so it’s easy to find.
Step 4: Apply the Preset and Let It Do the Mechanical Work
 Before and after comparison showing raw file versus quick start preset applied
With your preset saved, the workflow changes immediately. Import your raw file, click the preset once, and Lightroom handles the corrective layer. What used to take two to three minutes of clicking through panels happens in under a second. Denney shows this on a landscape shot from West Virginia and the before-to-after jump is significant, not because the image is finished, but because it’s already in a reasonable working state. From that point, all your attention goes to what’s actually unique about the image: the light, the color temperature, the local adjustments. That’s where your skill and judgment live. The preset just clears the road.
Before and after comparison showing raw file versus quick start preset applied
With your preset saved, the workflow changes immediately. Import your raw file, click the preset once, and Lightroom handles the corrective layer. What used to take two to three minutes of clicking through panels happens in under a second. Denney shows this on a landscape shot from West Virginia and the before-to-after jump is significant, not because the image is finished, but because it’s already in a reasonable working state. From that point, all your attention goes to what’s actually unique about the image: the light, the color temperature, the local adjustments. That’s where your skill and judgment live. The preset just clears the road.
Step 5: Recognize That One Preset Doesn’t Have to Cover Everything
 Multiple presets visible in panel suggesting a folder system for different scenarios
This is a point Denney makes clearly and it’s worth sitting with. A custom preset built around your habits will still look different on different files because the Auto function adapts to each image individually. You’re not stamping a fixed look across everything. You’re applying a consistent corrective foundation that responds to the actual content of the file. If you shoot across different conditions, you might end up building a small family of starting presets. One for overcast outdoor work. One for studio or artificial light. One for golden hour. The goal is fewer decisions before you start editing, not zero decisions forever.
Multiple presets visible in panel suggesting a folder system for different scenarios
This is a point Denney makes clearly and it’s worth sitting with. A custom preset built around your habits will still look different on different files because the Auto function adapts to each image individually. You’re not stamping a fixed look across everything. You’re applying a consistent corrective foundation that responds to the actual content of the file. If you shoot across different conditions, you might end up building a small family of starting presets. One for overcast outdoor work. One for studio or artificial light. One for golden hour. The goal is fewer decisions before you start editing, not zero decisions forever.
What I’d Add From Working With Batch Workflows
Denney builds his case around landscape photography, but this approach translates directly into commercial and product work. I’d go a step further and say that once you have a starting preset you trust, it becomes the foundation for Lightroom’s batch sync tools. Select a hundred images from the same shoot, apply your quick start preset to all of them at once, then sync any additional adjustments across the set. The corrective work scales automatically. The creative work still happens image by image, but you’re not burning time on setup for every single file.
One caution: don’t build your starting preset from an image you’ve already spent real time on. Build it clean, from a deliberately average raw file, so the values are genuinely neutral. If you anchor your preset to a hero shot you loved, the settings inside it will be optimized for that image’s specific problems, not for general use. Keep it corrective. Keep it conservative. Save the style for the work you do after it runs.
The single most important idea in this tutorial is also the simplest one: the presets worth building are descriptions of your own habits, not someone else’s aesthetic. Once I started thinking of presets as automation tools rather than style filters, the way I use Lightroom shifted in ways I haven’t fully stopped benefiting from. If you want to see Denney walk through this live with real before-and-after examples, Watch the full tutorial on YouTube.
Comments (3)
Solid advice. Especially the part about taking your time with it.
Never thought of approaching it this way. Really creative.
Well explained. I think my audience would really benefit from this — mind if I link to it?
Leave a Comment