
Every hour I spend clicking through the same sequence of menus is an hour I’m not billing. That’s not philosophy, that’s arithmetic. I’ve been running post-production for ad agencies and e-commerce brands long enough to know that the difference between a profitable shoot day and a painful one often comes down to how much of your repetitive work you’ve already automated before the files land in your lap.
That’s exactly why I keep coming back to tutorials on Photoshop Actions, even after all these years. In this CreativeLive tutorial, Watch the full tutorial on YouTube, the instructor walks through building a border-and-rule action from scratch, and while the technique itself is straightforward, the underlying logic is something every working photographer and retoucher should internalize. You’re not just making a border. You’re building a repeatable, one-click deliverable that works the same way at 9am and at 11pm when you’re on your fourth coffee.
What follows is my breakdown of the walkthrough, step by step, with the actual values and settings you need to replicate it yourself. I’ve also added a note at the end about how I adapt this kind of action for client work, because there are a few places where the default approach needs a small tweak in a production environment.
Step 1: Create a New Action Set and Name Your Action
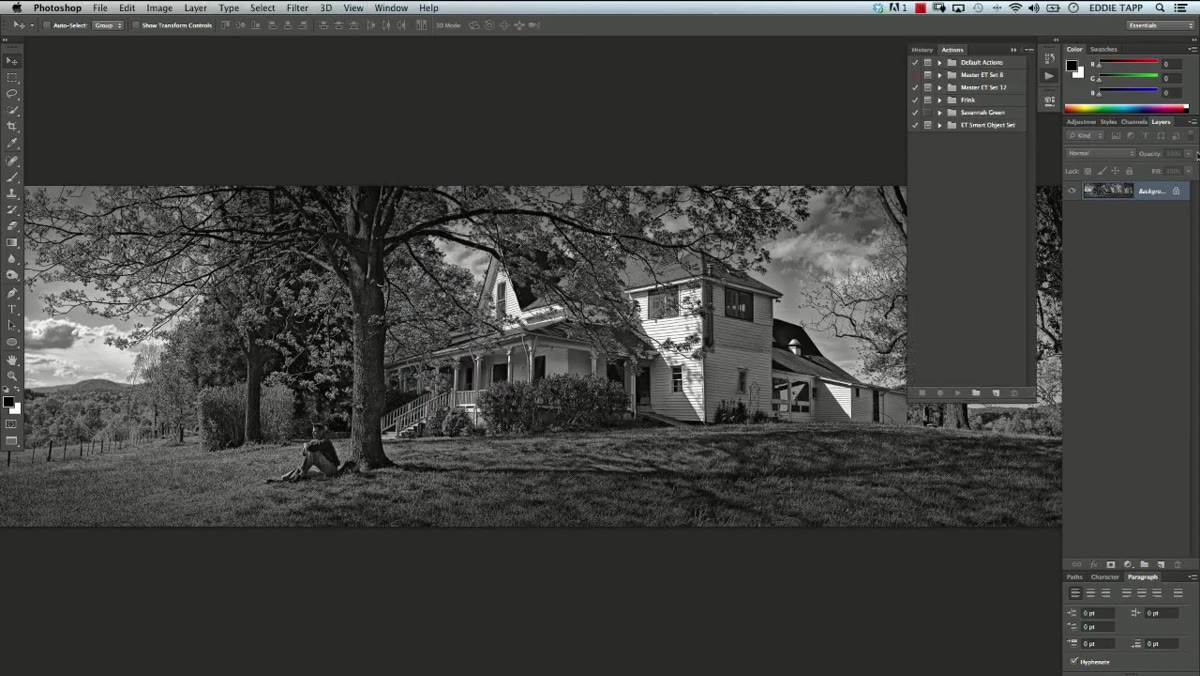 Opening the Actions panel from the Window menu
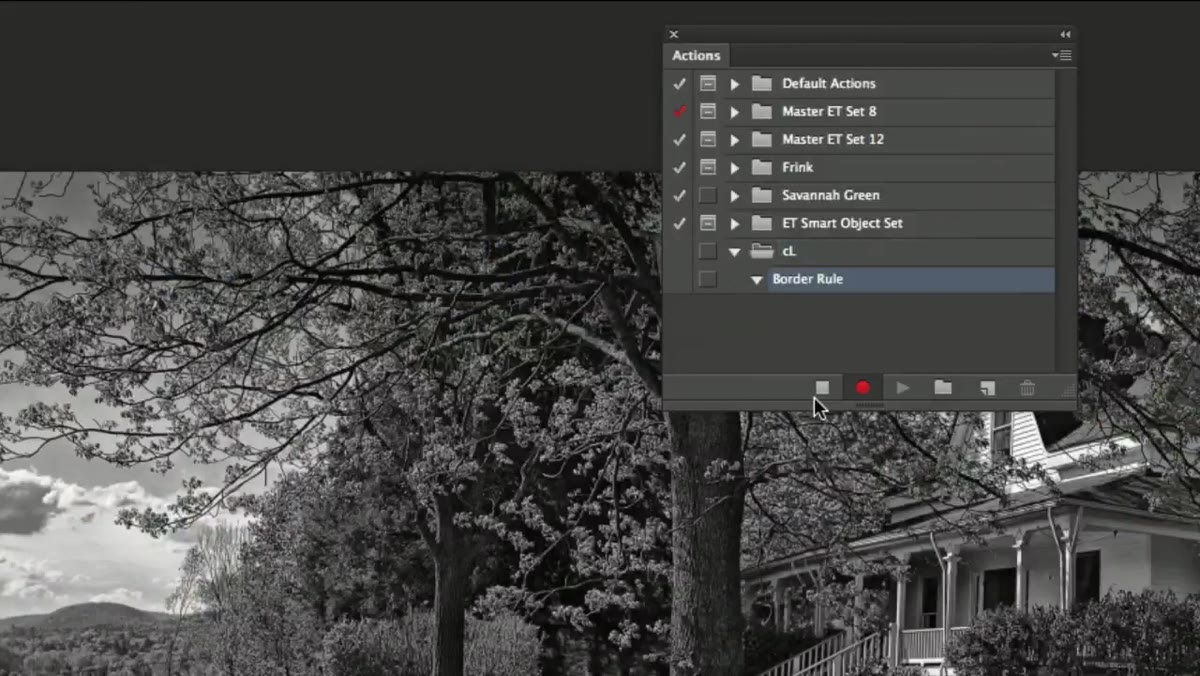
Open the Actions panel from Window > Actions. Before you record anything, create a new Action Set by clicking the folder icon at the bottom of the panel. Think of the set as a filing cabinet drawer: everything related to a project or output type lives together. Name it something specific, not “My Actions.” The instructor names his set “CL” for CreativeLive, which works fine for a demo, but in practice I name mine by client or output type, like “Ecomm-White-BG” or “Print-Borders.”
Opening the Actions panel from the Window menu
Open the Actions panel from Window > Actions. Before you record anything, create a new Action Set by clicking the folder icon at the bottom of the panel. Think of the set as a filing cabinet drawer: everything related to a project or output type lives together. Name it something specific, not “My Actions.” The instructor names his set “CL” for CreativeLive, which works fine for a demo, but in practice I name mine by client or output type, like “Ecomm-White-BG” or “Print-Borders.”
Once the set exists, create a new action inside it. Name this one something like “Border Rule.” Click Record only when you are completely ready. The Actions recorder is unforgiving. It captures everything, including the wrong turn you took before you caught yourself. Clear your other work, silence your phone, and run through the steps mentally before you hit that red button.
Step 2: Reset Foreground and Background Colors
 Typing D to reset foreground and background colors
With recording active, the first keystroke is simply the letter D. That resets your foreground color to black and your background color to white. This matters because the border rule you’re about to apply pulls from the foreground color. If you skip this step and your foreground is some leftover cyan from a previous job, your border will be cyan. Recording this reset into the action means it never becomes a variable.
Typing D to reset foreground and background colors
With recording active, the first keystroke is simply the letter D. That resets your foreground color to black and your background color to white. This matters because the border rule you’re about to apply pulls from the foreground color. If you skip this step and your foreground is some leftover cyan from a previous job, your border will be cyan. Recording this reset into the action means it never becomes a variable.
Step 3: Expand the Canvas to Create the Border Space
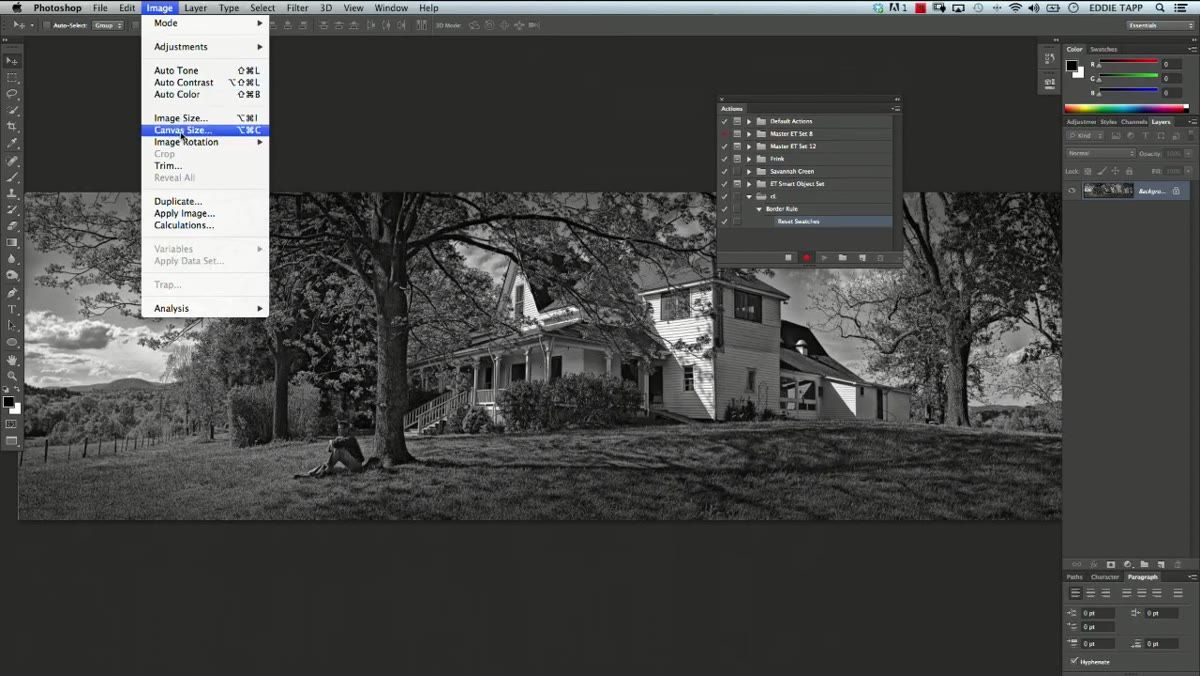 Canvas Size dialog with Relative checkbox and 2-inch values
Go to Image > Canvas Size. In the dialog, check the Relative box. This changes the Width and Height fields from absolute dimensions to expansion amounts, which is exactly what you want when the action needs to work across images of different sizes. Set both Width and Height to 2 inches. Make sure the anchor grid in the center of the dialog is set to the middle square so the canvas expands equally on all four sides. Set the Canvas Extension Color to White. Click OK.
Canvas Size dialog with Relative checkbox and 2-inch values
Go to Image > Canvas Size. In the dialog, check the Relative box. This changes the Width and Height fields from absolute dimensions to expansion amounts, which is exactly what you want when the action needs to work across images of different sizes. Set both Width and Height to 2 inches. Make sure the anchor grid in the center of the dialog is set to the middle square so the canvas expands equally on all four sides. Set the Canvas Extension Color to White. Click OK.
The image now has a two-inch white border all the way around it. That white space is where the rule will land.
Step 4: Select the Entire Canvas and Apply a Stroke
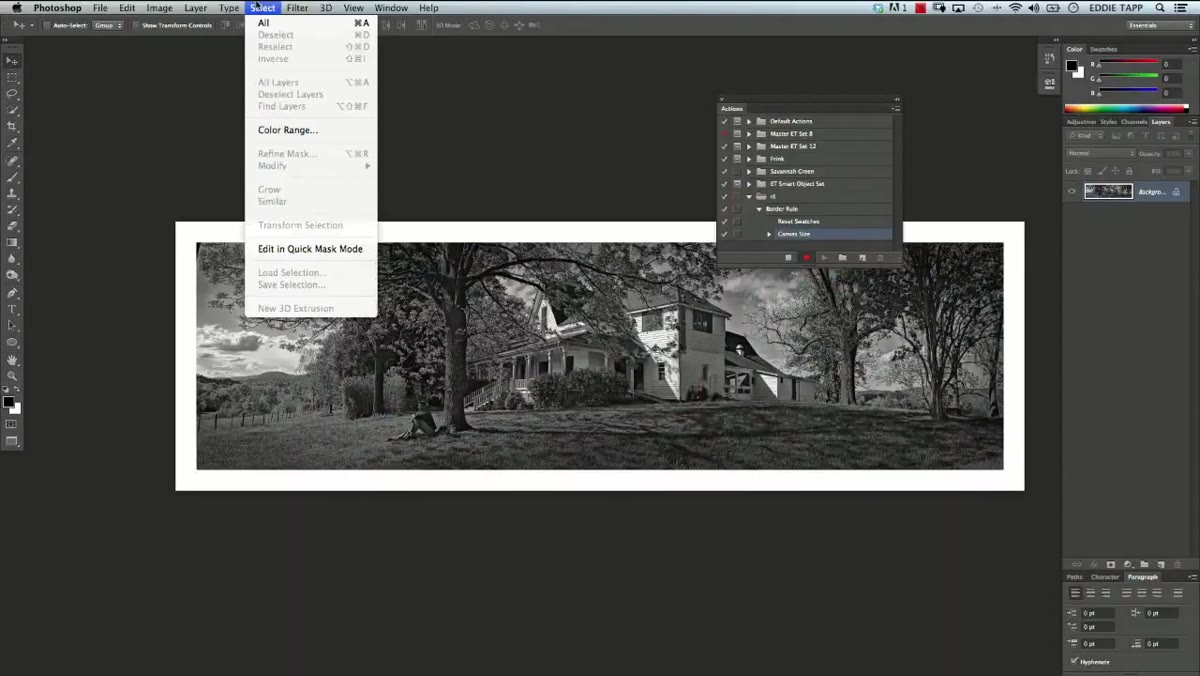 Edit Stroke dialog showing 3px black centered stroke
Use Ctrl+A (Cmd+A on Mac) to select the entire canvas. This puts a selection around the outermost edge of the frame. Then go to Edit > Stroke. In the Stroke dialog, set the Width to 3 pixels, confirm the Color is black (click the color swatch to verify or change it), and set the Location to Center. Leave the blending mode at Normal and opacity at 100%. Click OK, then deselect with Ctrl+D.
Edit Stroke dialog showing 3px black centered stroke
Use Ctrl+A (Cmd+A on Mac) to select the entire canvas. This puts a selection around the outermost edge of the frame. Then go to Edit > Stroke. In the Stroke dialog, set the Width to 3 pixels, confirm the Color is black (click the color swatch to verify or change it), and set the Location to Center. Leave the blending mode at Normal and opacity at 100%. Click OK, then deselect with Ctrl+D.
Three pixels is a deliberate choice here. It’s thin enough to read as a professional rule rather than a decorative frame, but substantial enough to hold up in print. The Center location setting is also important: it ensures the stroke falls exactly on the selection edge, giving you clean, sharp corners with no overlap artifacts.
Step 5: Expand the Canvas a Second Time to Reveal the Rule
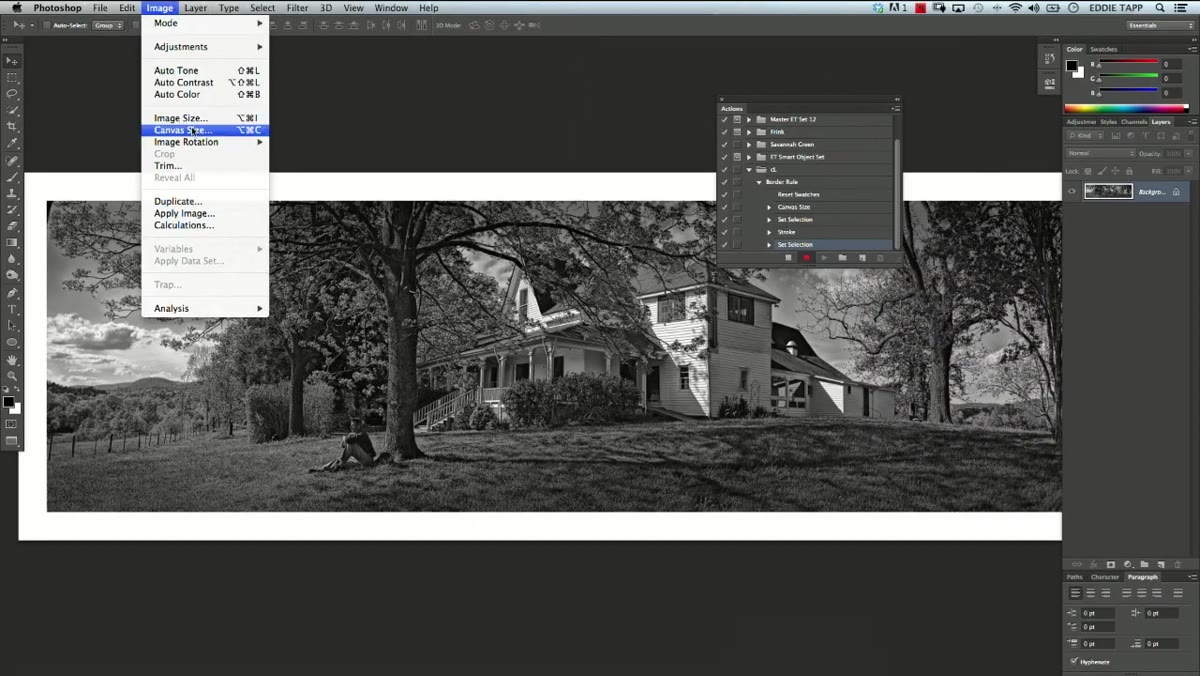 Second canvas expansion showing the rule surrounded by white space
Here’s the step that makes the rule visible and gives the final piece its finished look. Go back to Image > Canvas Size, keep Relative checked, and enter 2 inches for Width and 2 inches for Height again, with the anchor still centered. Click OK. What you now have is the rule sitting between two bands of white: the inner band (from the first expansion) and the outer band (from this second expansion). The thin black line is clean, centered, and surrounded by breathing room on both sides.
Second canvas expansion showing the rule surrounded by white space
Here’s the step that makes the rule visible and gives the final piece its finished look. Go back to Image > Canvas Size, keep Relative checked, and enter 2 inches for Width and 2 inches for Height again, with the anchor still centered. Click OK. What you now have is the rule sitting between two bands of white: the inner band (from the first expansion) and the outer band (from this second expansion). The thin black line is clean, centered, and surrounded by breathing room on both sides.
This is also the point where you can add creative variation. The instructor mentions adjusting the bottom margin to be larger than the top, which works well for fine art prints or any output where you want space for a caption or signature. You would do this by shifting the anchor point in the Canvas Size dialog before applying the second expansion.
Step 6: Stop Recording and Test the Action
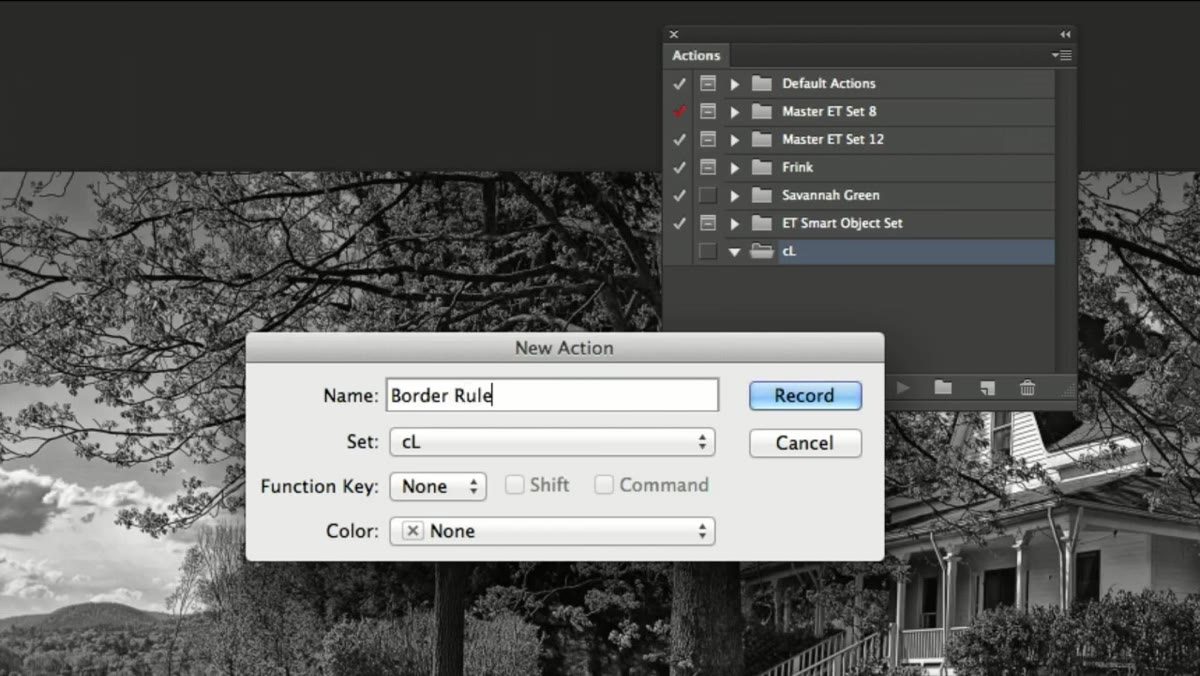 Record button active showing red dot in Actions panel
Click the Stop button at the bottom of the Actions panel (the square icon). Your action is saved. To test it, open a fresh image, make sure you’re working on a flattened background layer rather than a smart object for this version of the action, and click the Play button with your new “Border Rule” action selected. Watch it run. Check the corners, check the rule weight, and check that the expansion is even on all sides.
Record button active showing red dot in Actions panel
Click the Stop button at the bottom of the Actions panel (the square icon). Your action is saved. To test it, open a fresh image, make sure you’re working on a flattened background layer rather than a smart object for this version of the action, and click the Play button with your new “Border Rule” action selected. Watch it run. Check the corners, check the rule weight, and check that the expansion is even on all sides.
If anything looks off, don’t patch it manually. Delete the action and re-record it cleanly. A patched action is a future problem.
How I Adapt This for Client Deliverables
The tutorial’s approach is solid as a foundation, but when I’m running this against a client folder of mixed-resolution images, I add one step before the first canvas expansion: flattening the image. Some files come in with adjustment layers or layer masks still intact from a previous stage of the retouching pipeline, and the canvas expansion behaves unpredictably if there’s a mask that doesn’t cover the full canvas. Flattening first, as part of the action itself, eliminates that variable entirely.
I also keep two versions of this action: one with the 2-inch expansion for print output and one with a tighter 0.5-inch expansion for web crops and e-commerce thumbnails. They live in separate action sets labeled by output type. On a batch run, picking the right set takes two seconds. Rebuilding a client’s border on 200 images because you used the wrong one takes considerably longer, trust me.
The most important thing this tutorial demonstrates is not the border itself. It’s the mindset behind it: before you do any repeatable task manually more than once, ask whether that task can be captured in an action. Every step you record is a step you never have to think about again. Over time, those saved decisions add up to something real.
Watch the full tutorial on YouTube to see the complete walkthrough, including the instructor’s discussion of smart object workflows, which picks up right after this action segment and is worth your time if you’re building actions that need to be non-destructive.
Comments (2)
Love how you break down complex stuff into manageable steps.
Bookmarked. Coming back to this one for sure.
Leave a Comment