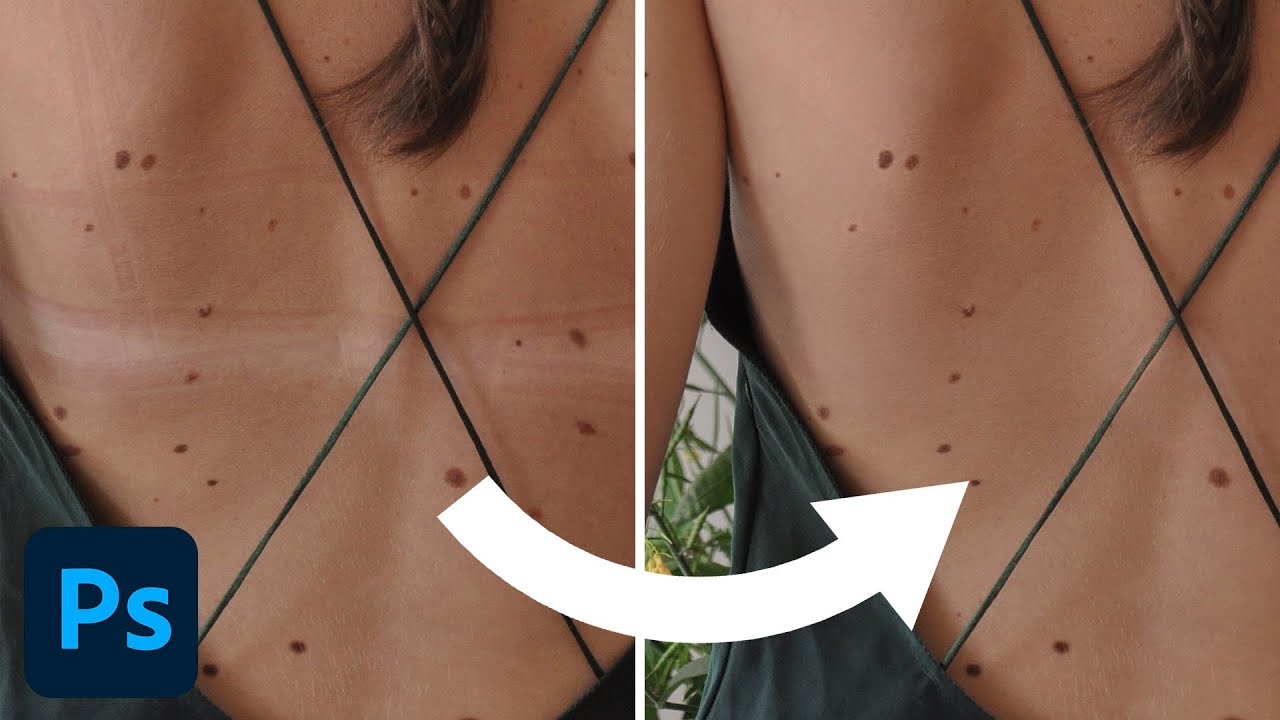
Skin retouching at commercial scale has a way of exposing every shortcut you thought you knew. I’ve spent the better part of 15 years watching well-meaning retouchers reach for the spot healing brush on complex skin work, paint over a few marks, and then quietly deliver something that looks like a wax museum exhibit. The texture goes flat, repetition artifacts creep in, and suddenly you’ve created more problems than you started with. In this Aaron Nace (PHLEARN) tutorial, he walks through exactly why the default tools fail on large skin areas and how frequency separation - run through a free downloadable action - actually solves the problem. Watch the full tutorial on YouTube
The core issue is one I see constantly with e-commerce and advertising work: skin marks that cover a significant portion of the frame. Small blemishes are one thing. But when marks span a large section of a subject’s back, for example, you can’t just stamp over them. You need to preserve the skin’s underlying texture while only changing the color and tone sitting on top. That’s exactly what frequency separation is designed to do, and understanding it at a mechanical level changes how you approach every skin job.
What makes this tutorial especially useful is that Aaron doesn’t just hand you the technique. He first demonstrates why the easier tools fail, which is the kind of honest workflow reasoning that actually helps you make better decisions on your own jobs.
Step 1: Test the Spot Healing Brush First - Then Discard It
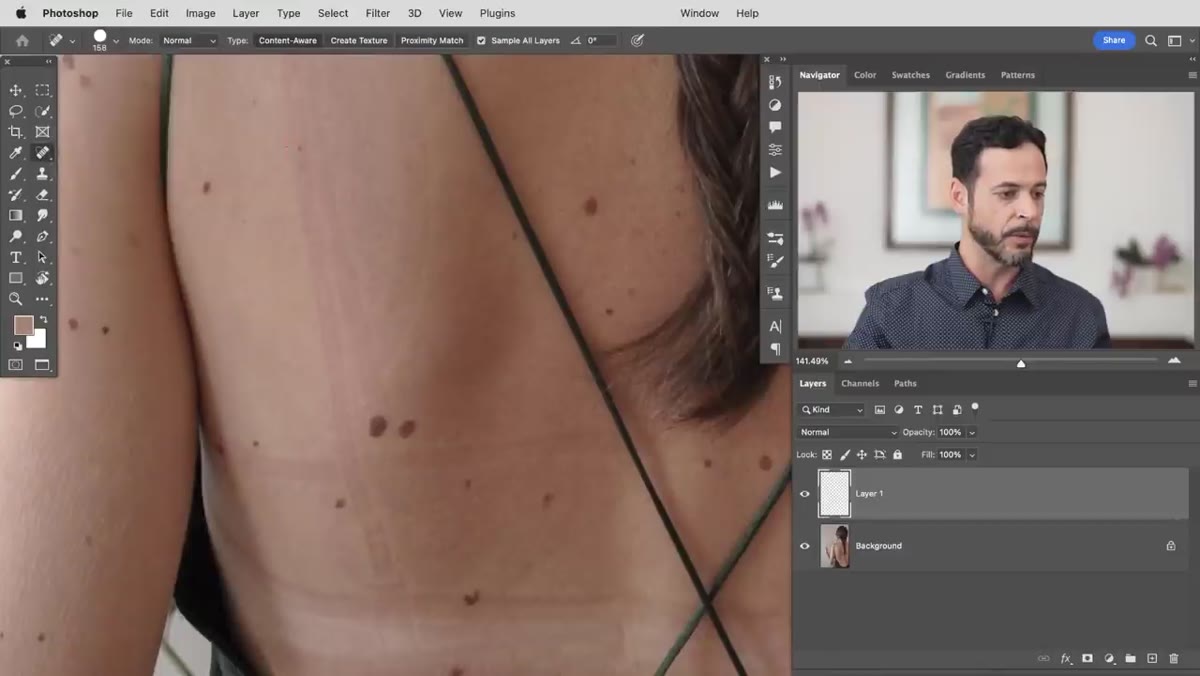 Spot healing brush painting over skin marks
Create a new empty layer above your image. Select the Spot Healing Brush (keyboard shortcut J), set the Type to Content Aware in the top options bar, and check Sample All Layers so your work stays non-destructive. Paint over the marks and watch what happens. On small, isolated spots against a clean background, this tool is fine. On skin with real texture and large affected areas, it starts repeating texture patterns and producing an unnaturally smooth, smeared result. The moment you see that repetition, you know the tool has hit its limit. Delete the layer and move on.
Spot healing brush painting over skin marks
Create a new empty layer above your image. Select the Spot Healing Brush (keyboard shortcut J), set the Type to Content Aware in the top options bar, and check Sample All Layers so your work stays non-destructive. Paint over the marks and watch what happens. On small, isolated spots against a clean background, this tool is fine. On skin with real texture and large affected areas, it starts repeating texture patterns and producing an unnaturally smooth, smeared result. The moment you see that repetition, you know the tool has hit its limit. Delete the layer and move on.
Step 2: Reject the Patch Tool for the Same Reason
 Patch tool dragged over large skin area with poor result
The Patch Tool is the Spot Healing Brush’s bigger sibling - useful for replacing larger regions in simple backgrounds, but it runs into the same fundamental problem on detailed skin. Create a new layer, set the Patch Tool to Content Aware in the options bar, enable Sample All Layers, draw a selection around a mark, and drag it to a clean area nearby. The result will likely look worse than the spot healer did. The tool simply doesn’t have enough consistent texture information to work with on complex organic surfaces. Undo and move on. This step isn’t wasted time - it confirms that you need a tool that gives you manual control over where texture is sampled from.
Patch tool dragged over large skin area with poor result
The Patch Tool is the Spot Healing Brush’s bigger sibling - useful for replacing larger regions in simple backgrounds, but it runs into the same fundamental problem on detailed skin. Create a new layer, set the Patch Tool to Content Aware in the options bar, enable Sample All Layers, draw a selection around a mark, and drag it to a clean area nearby. The result will likely look worse than the spot healer did. The tool simply doesn’t have enough consistent texture information to work with on complex organic surfaces. Undo and move on. This step isn’t wasted time - it confirms that you need a tool that gives you manual control over where texture is sampled from.
Step 3: Switch to the Regular Healing Brush and Sample Carefully
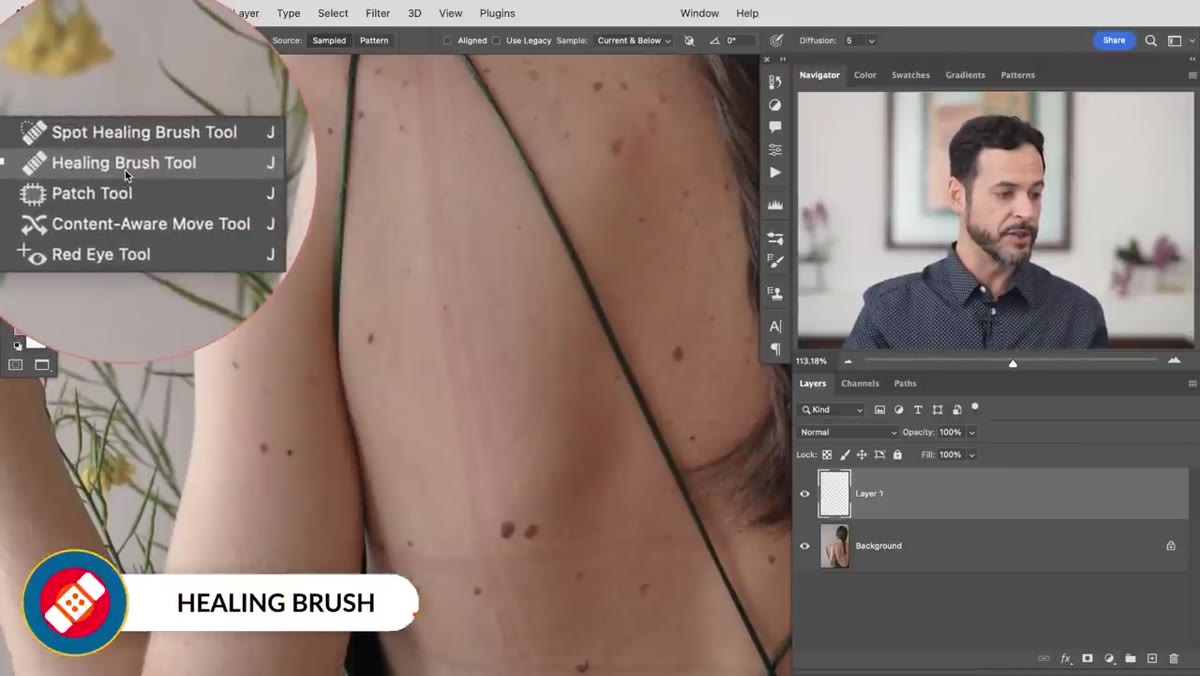 Healing brush with alt-click sample point set near skin mark
The regular Healing Brush (also J, cycle through with Shift+J) is where round one of the actual work begins. In the top options bar, change the Sample dropdown to Current and Below so you can work on a new empty layer without flattening anything. Zoom in close. Hold Alt (Option on Mac) and click to set your sample point directly adjacent to the mark you want to remove - ideally an area with matching skin direction, pore size, and lighting angle. Now paint over the mark. The tool pulls texture from your sample point and color from the area you’re painting over, blending the two. Done carefully with frequent re-sampling, this produces a dramatically more natural result than either automated tool. The trade-off is time: you’re making dozens of small decisions per image rather than letting the algorithm guess.
Healing brush with alt-click sample point set near skin mark
The regular Healing Brush (also J, cycle through with Shift+J) is where round one of the actual work begins. In the top options bar, change the Sample dropdown to Current and Below so you can work on a new empty layer without flattening anything. Zoom in close. Hold Alt (Option on Mac) and click to set your sample point directly adjacent to the mark you want to remove - ideally an area with matching skin direction, pore size, and lighting angle. Now paint over the mark. The tool pulls texture from your sample point and color from the area you’re painting over, blending the two. Done carefully with frequent re-sampling, this produces a dramatically more natural result than either automated tool. The trade-off is time: you’re making dozens of small decisions per image rather than letting the algorithm guess.
Step 4: Understand What Frequency Separation Actually Does
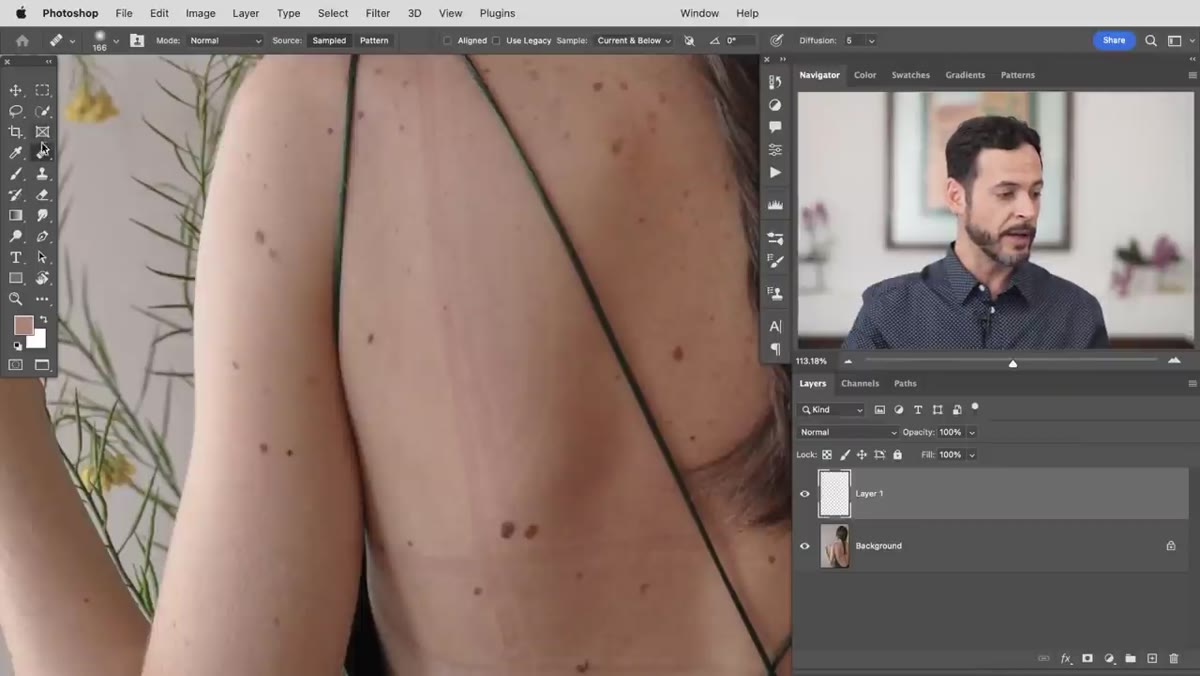 Overview of healing brush results before frequency separation
Before running the action, it’s worth knowing what you’re automating. Frequency separation splits your image into two layers: a low-frequency layer containing color and tone gradients (essentially the “light” information), and a high-frequency layer containing fine texture detail. When you retouch on the low-frequency layer only, you can smooth out color variations - redness, shadows from marks, uneven tone - without touching the texture that makes skin look like skin. The free PHLEARN action handles all the technical layer setup automatically. Download it from the link in the video description, load it into Photoshop via the Actions panel, and run it on your working file.
Overview of healing brush results before frequency separation
Before running the action, it’s worth knowing what you’re automating. Frequency separation splits your image into two layers: a low-frequency layer containing color and tone gradients (essentially the “light” information), and a high-frequency layer containing fine texture detail. When you retouch on the low-frequency layer only, you can smooth out color variations - redness, shadows from marks, uneven tone - without touching the texture that makes skin look like skin. The free PHLEARN action handles all the technical layer setup automatically. Download it from the link in the video description, load it into Photoshop via the Actions panel, and run it on your working file.
Step 5: Retouch the Low-Frequency Layer for Color and Tone
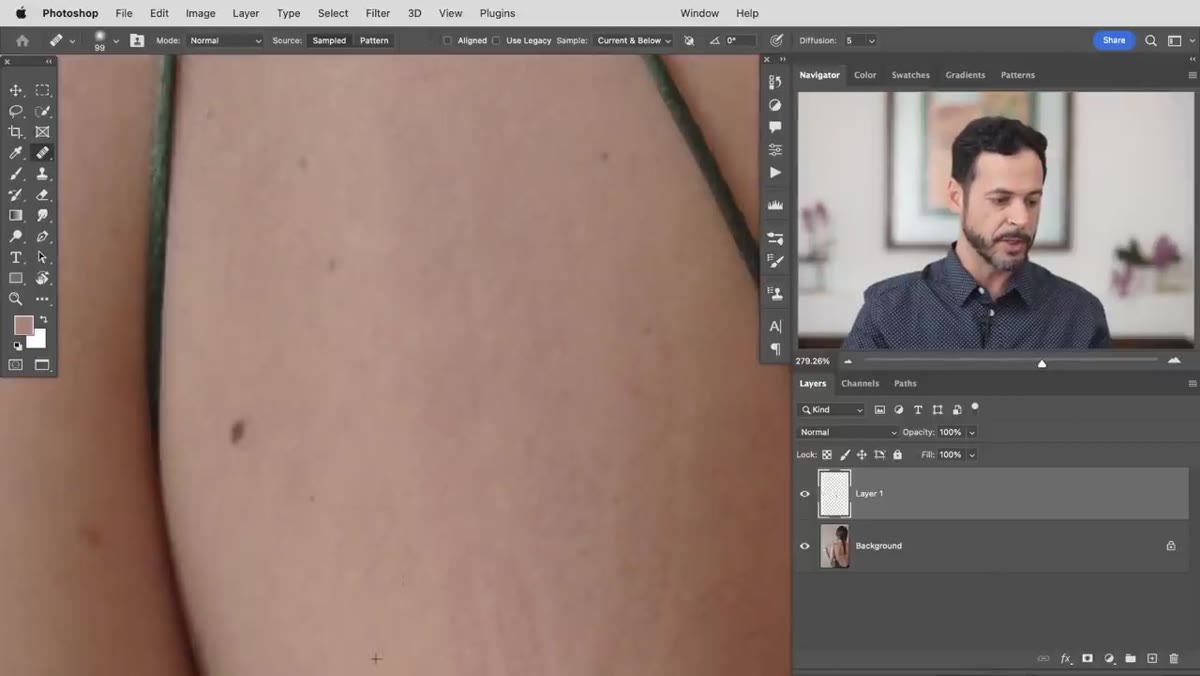 Working on blurred low frequency layer to smooth color
Once the action runs, you’ll have your separated layers stacked correctly. Target the low-frequency (color/tone) layer. Use a large, soft brush with the regular Healing Brush or even the Mixer Brush to smooth out the color variation left behind by the marks. Because texture is isolated on a separate layer above, you can be quite aggressive here without worrying about smearing skin detail. Blend out redness and tonal irregularities across the affected area. The goal is an even, smooth color field that matches the surrounding skin tone.
Working on blurred low frequency layer to smooth color
Once the action runs, you’ll have your separated layers stacked correctly. Target the low-frequency (color/tone) layer. Use a large, soft brush with the regular Healing Brush or even the Mixer Brush to smooth out the color variation left behind by the marks. Because texture is isolated on a separate layer above, you can be quite aggressive here without worrying about smearing skin detail. Blend out redness and tonal irregularities across the affected area. The goal is an even, smooth color field that matches the surrounding skin tone.
Step 6: Address Any Remaining Texture on the High-Frequency Layer
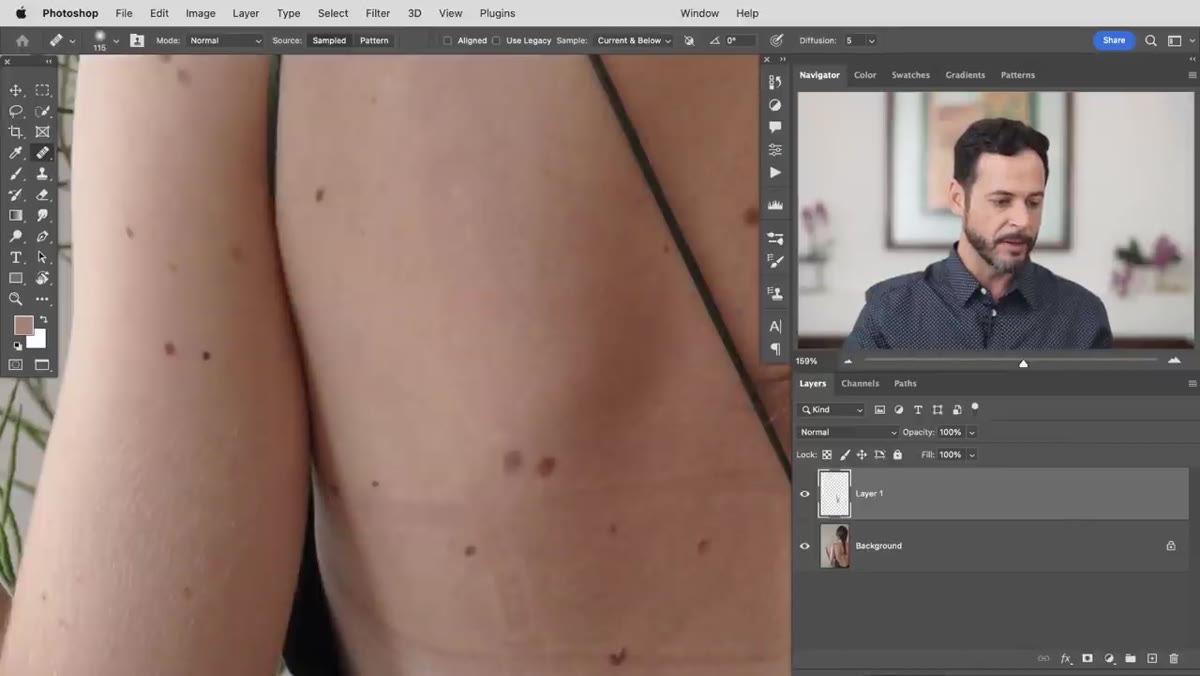 High frequency layer showing skin texture detail isolated
Switch to the high-frequency (texture) layer. If any marks left behind physical texture variation - raised areas, indentations - you can retouch these here using the Healing Brush with a very small, hard brush, sampling texture from nearby clean skin. Because color is handled on the other layer, you’re only moving texture information. This two-pass approach - color first, then texture - is what makes frequency separation so effective on problem skin areas that defeat single-layer techniques.
High frequency layer showing skin texture detail isolated
Switch to the high-frequency (texture) layer. If any marks left behind physical texture variation - raised areas, indentations - you can retouch these here using the Healing Brush with a very small, hard brush, sampling texture from nearby clean skin. Because color is handled on the other layer, you’re only moving texture information. This two-pass approach - color first, then texture - is what makes frequency separation so effective on problem skin areas that defeat single-layer techniques.
A Note on When to Reach for the Action Versus Manual Work
I run frequency separation on probably 60 percent of the portrait and body work that comes through my studio. But I’ve also watched people over-apply it and end up with that telltale “plastic skin” look that clients notice immediately, even if they can’t name what’s wrong. The action speeds up setup, but the judgment calls still happen at every brush stroke. My own rule: use the regular Healing Brush for anything smaller than a thumbnail nail. Reserve frequency separation for anything larger, anything with strong color variation, or anything where the mark disrupts a large continuous skin surface. The action saves setup time - I’d estimate 10 to 15 minutes per complex job - but it doesn’t replace knowing when the simpler tool is actually sufficient.
The single most important idea in this tutorial is one Aaron makes almost offhandedly: understanding why a tool fails is what teaches you to choose correctly next time. The spot healer and patch tool aren’t bad tools - they’re wrong tools for this specific problem. Frequency separation is the right tool because it matches the actual structure of the problem: color and texture need to be addressed independently when both are compromised.
Watch the full tutorial on YouTube and grab the free frequency separation action from the description while you’re there. It’s one of those workflow additions that earns its place in the panel permanently.
Comments
Leave a Comment