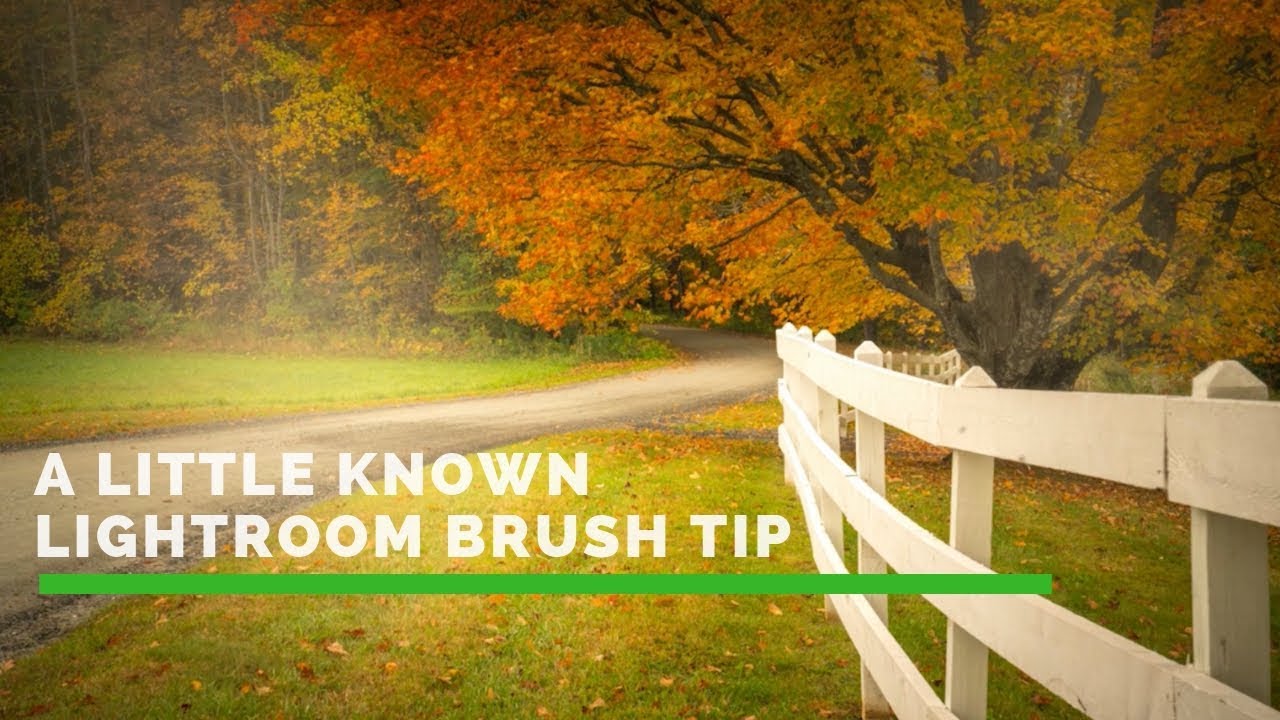
There’s a category of Lightroom feature I think of as “hiding in plain sight” — things that have been in the software for a while, that plenty of experienced editors have never noticed, and that quietly change the way you work once you find them. The Amount slider collapse in local adjustments is exactly that kind of feature. I stumbled across this tip in a recent tutorial from Matt Kloskowski, and my first reaction was genuine annoyance that I hadn’t known about it sooner. Watch the full tutorial on YouTube
Here’s the problem it solves. When I’m doing selective adjustments on commercial work, I’ll often build a radial filter or a brush stroke with four or five sliders adjusted: exposure pulled down, shadows lifted, maybe some dehaze and texture thrown in. Then I duplicate that adjustment and move it to a different part of the frame. The light falls differently there. The effect is too heavy. And now I’m standing in front of six individual sliders trying to remember what ratio everything was in and manually dialing each one back. It’s the kind of low-grade friction that doesn’t seem like a big deal on one image but absolutely compounds across a 200-shot catalog.
What Matt shows in this tutorial is a small UI control that collapses all those sliders into a single proportional scaling handle. It’s not new functionality, exactly, but it’s the kind of thing that gets accidentally closed and then forgotten. Here’s how it works.
Step 1: Open a Local Adjustment Tool
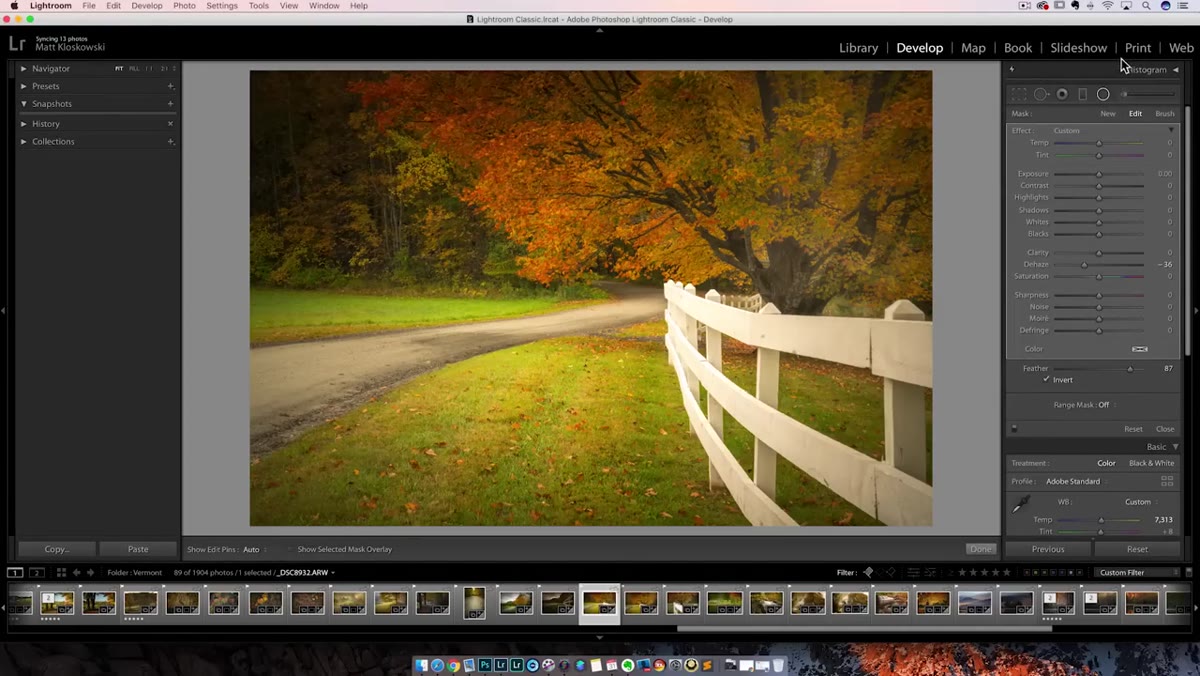 Lightroom Develop module showing brush, radial, and graduated filter icons
Head into the Develop module and select any one of the three local adjustment tools: the Adjustment Brush, the Radial Filter, or the Graduated Filter. The technique Matt demonstrates works identically across all three, so whatever you have open in your current project will do. For his example, he’s working with a Radial Filter to create a spotlight-style effect with some dehaze layered in to give the image a moody, atmospheric quality.
Lightroom Develop module showing brush, radial, and graduated filter icons
Head into the Develop module and select any one of the three local adjustment tools: the Adjustment Brush, the Radial Filter, or the Graduated Filter. The technique Matt demonstrates works identically across all three, so whatever you have open in your current project will do. For his example, he’s working with a Radial Filter to create a spotlight-style effect with some dehaze layered in to give the image a moody, atmospheric quality.
Step 2: Build a Multi-Slider Adjustment
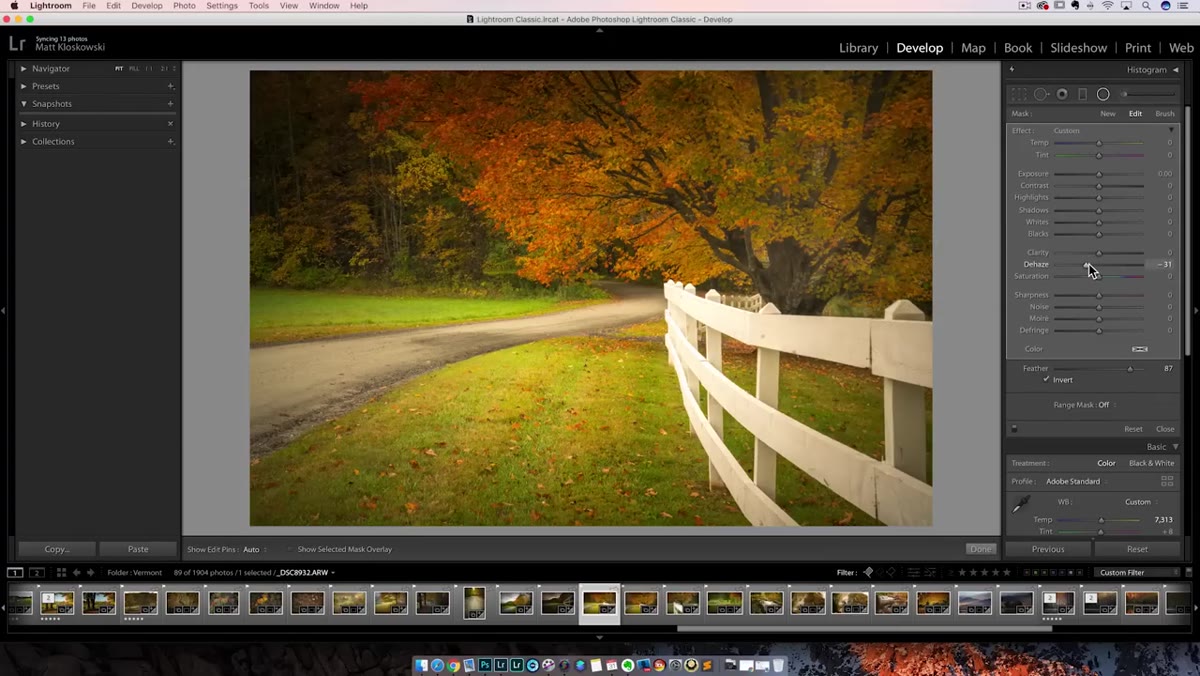 Radial filter applied to image with spotlight and dehaze effect visible
Apply your local adjustment and dial in a combination of settings. The more sliders you have engaged, the more useful this technique becomes. In the tutorial, the radial filter has exposure, shadows, highlights, and dehaze all contributing to the look. This is a realistic scenario for most creative edits, where the effect you want requires more than just a single push on one parameter.
Radial filter applied to image with spotlight and dehaze effect visible
Apply your local adjustment and dial in a combination of settings. The more sliders you have engaged, the more useful this technique becomes. In the tutorial, the radial filter has exposure, shadows, highlights, and dehaze all contributing to the look. This is a realistic scenario for most creative edits, where the effect you want requires more than just a single push on one parameter.
Step 3: Duplicate the Adjustment Pin
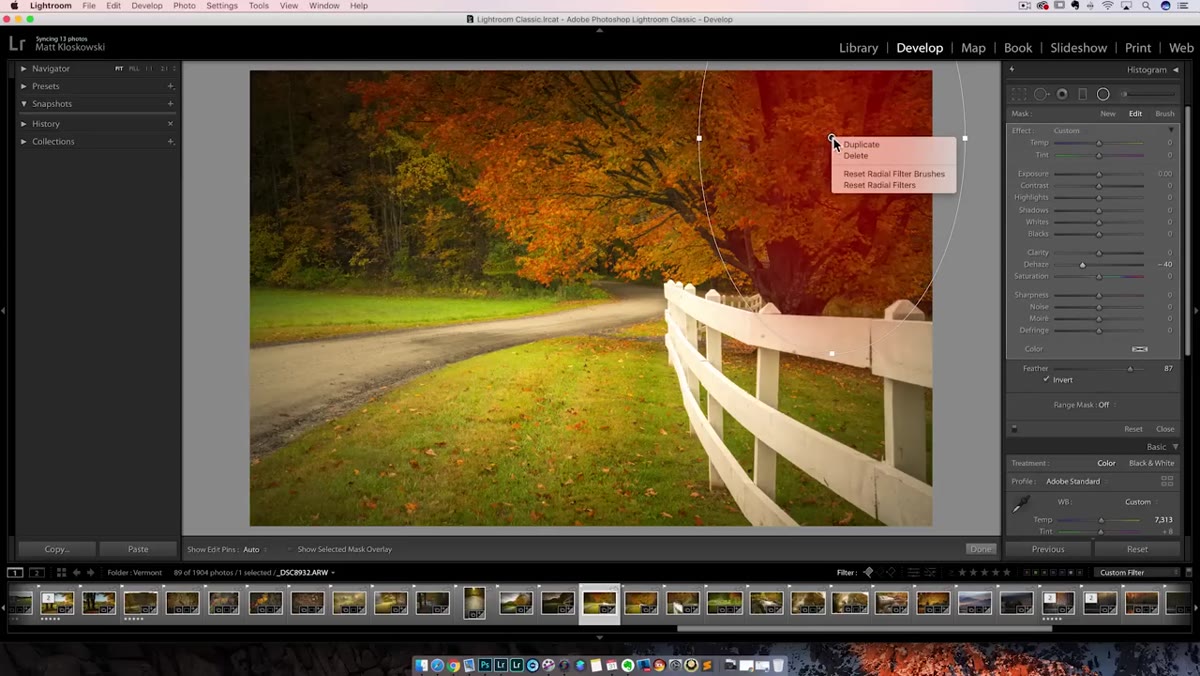 Right-click context menu on adjustment pin showing Duplicate option
Right-click directly on the adjustment pin in the image to bring up the context menu. You’ll see a Duplicate option. Click it, and Lightroom creates an identical copy of the adjustment, same settings, same shape. You can then drag it to a new position in the frame and even rotate it. This is genuinely useful on its own, and I’d wager a lot of people reading this didn’t know it existed. Matt uses it to place a second foggy haze on a different part of the scene.
Right-click context menu on adjustment pin showing Duplicate option
Right-click directly on the adjustment pin in the image to bring up the context menu. You’ll see a Duplicate option. Click it, and Lightroom creates an identical copy of the adjustment, same settings, same shape. You can then drag it to a new position in the frame and even rotate it. This is genuinely useful on its own, and I’d wager a lot of people reading this didn’t know it existed. Matt uses it to place a second foggy haze on a different part of the scene.
Step 4: Recognize the Problem That Creates
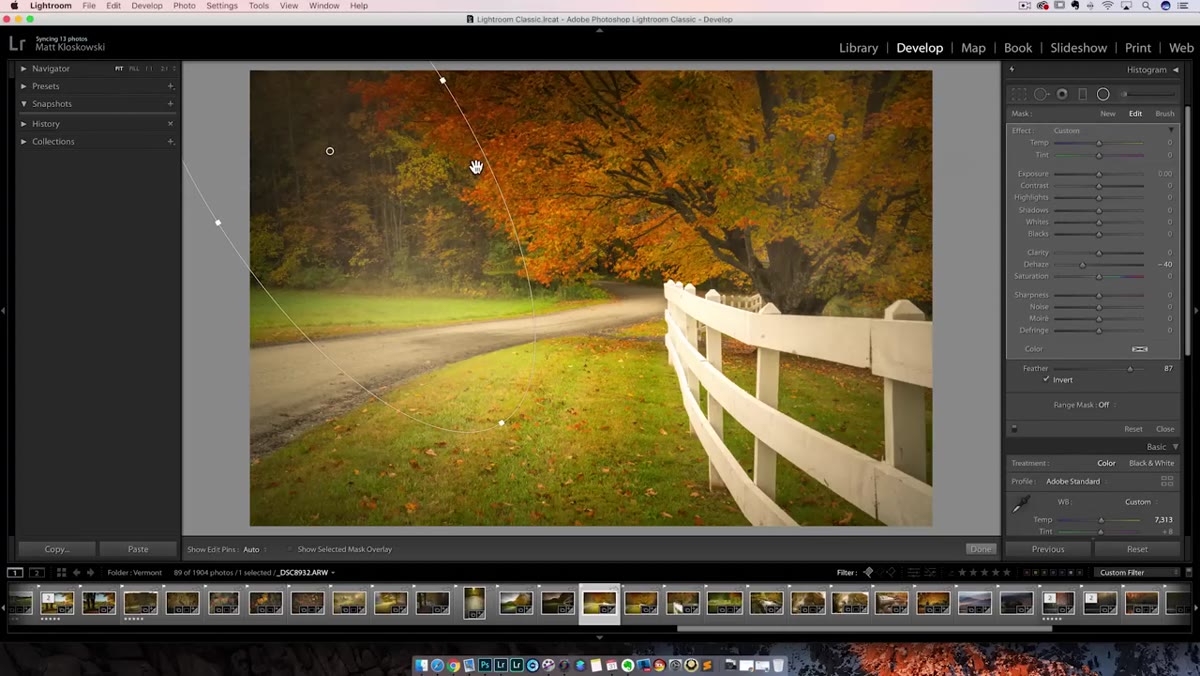 Duplicated radial filter repositioned, with slider panel showing multiple active settings
Once the duplicated filter is in its new position, the original settings may not suit the new location at all. The light is different. The background tone is different. The effect needs to be softer, or stronger, or just calibrated differently for where it now sits in the composition. At this point, most people would start manually adjusting each slider, which gets tedious fast, especially if you have a complex set of adjustments and you’re trying to preserve the relative balance between them.
Duplicated radial filter repositioned, with slider panel showing multiple active settings
Once the duplicated filter is in its new position, the original settings may not suit the new location at all. The light is different. The background tone is different. The effect needs to be softer, or stronger, or just calibrated differently for where it now sits in the composition. At this point, most people would start manually adjusting each slider, which gets tedious fast, especially if you have a complex set of adjustments and you’re trying to preserve the relative balance between them.
Step 5: Click the Collapse Arrow in the Top Right of the Panel
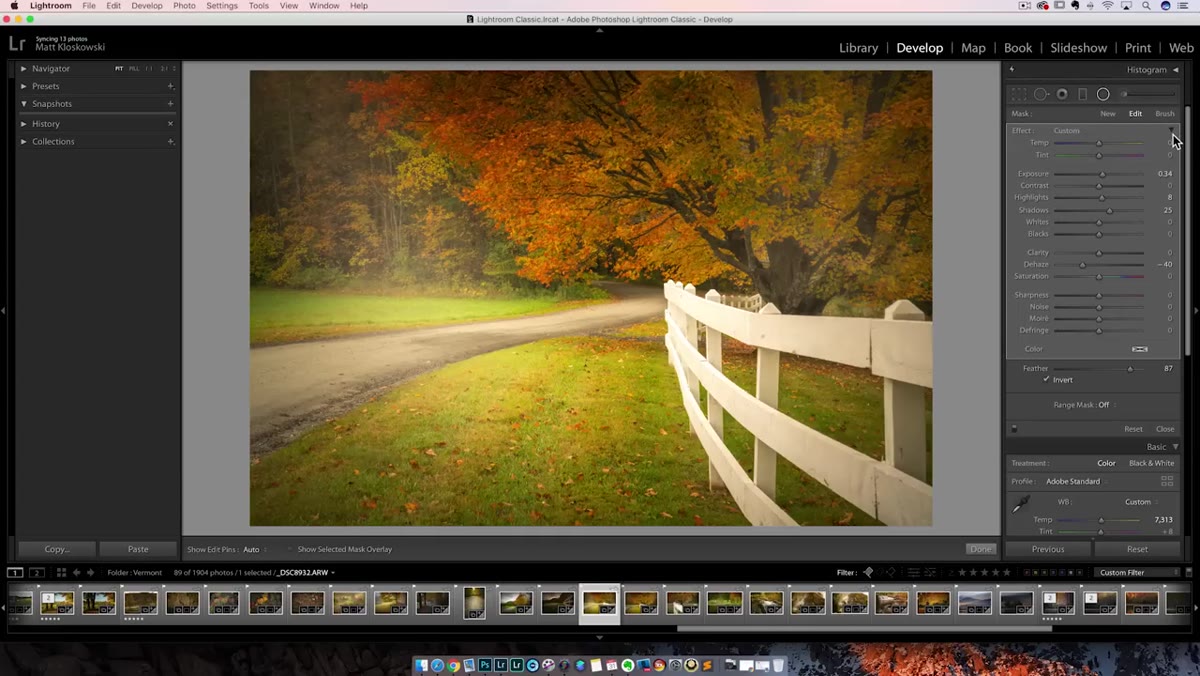 Small downward-facing arrow in top right corner of adjustment panel
Here’s where the actual tip lives. Look at the top right corner of your local adjustment panel, the floating panel that shows all your sliders. There’s a small downward-facing arrow icon. Click it. The panel collapses and all of your individual sliders disappear, replaced by a single slider labeled “Amount.” This is the control most people have either never seen or accidentally triggered without understanding what it did.
Small downward-facing arrow in top right corner of adjustment panel
Here’s where the actual tip lives. Look at the top right corner of your local adjustment panel, the floating panel that shows all your sliders. There’s a small downward-facing arrow icon. Click it. The panel collapses and all of your individual sliders disappear, replaced by a single slider labeled “Amount.” This is the control most people have either never seen or accidentally triggered without understanding what it did.
Step 6: Use the Amount Slider to Scale Everything Proportionally
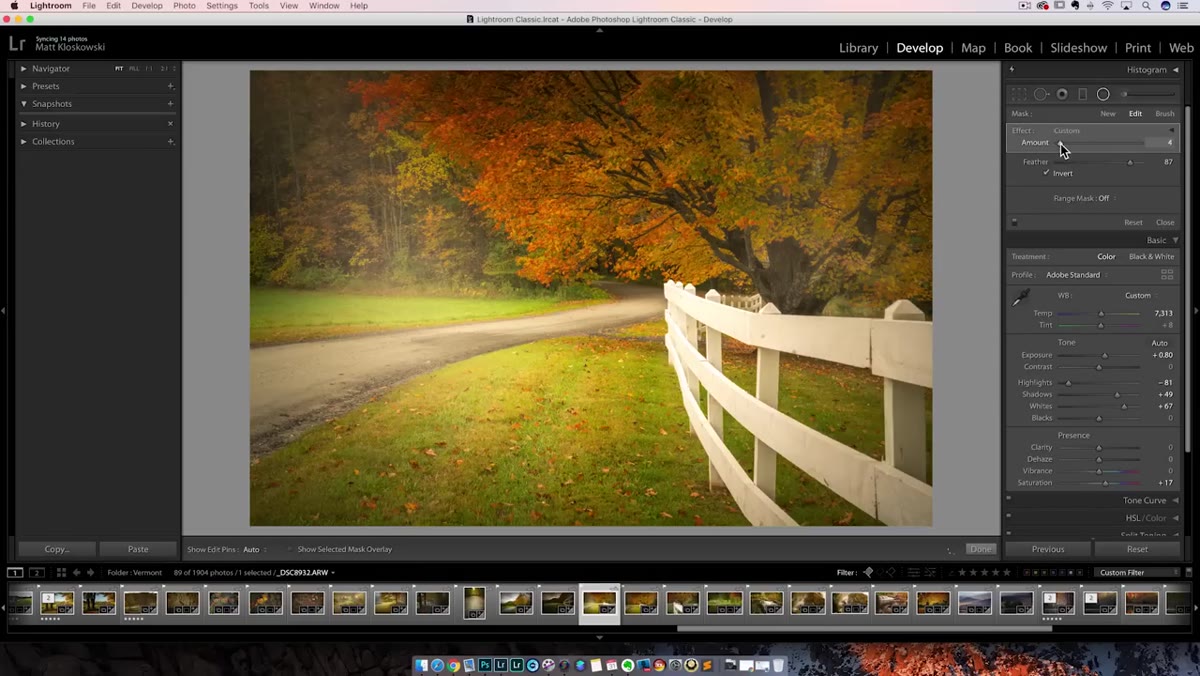 Collapsed panel showing single Amount slider being adjusted
With the panel collapsed, drag the Amount slider up or down. What Lightroom is doing under the hood is scaling all of your active slider values proportionally. Crank it up and everything gets more intense while preserving the relationship between, say, your exposure and your dehaze values. Pull it back and the whole effect softens uniformly. Matt demonstrates opening the panel back up after adjusting the Amount, and you can see all the individual sliders have shifted together. The proportions are maintained. The effect just changes in overall intensity.
Collapsed panel showing single Amount slider being adjusted
With the panel collapsed, drag the Amount slider up or down. What Lightroom is doing under the hood is scaling all of your active slider values proportionally. Crank it up and everything gets more intense while preserving the relationship between, say, your exposure and your dehaze values. Pull it back and the whole effect softens uniformly. Matt demonstrates opening the panel back up after adjusting the Amount, and you can see all the individual sliders have shifted together. The proportions are maintained. The effect just changes in overall intensity.
Step 7: Expand the Panel Again for Fine-Tuning
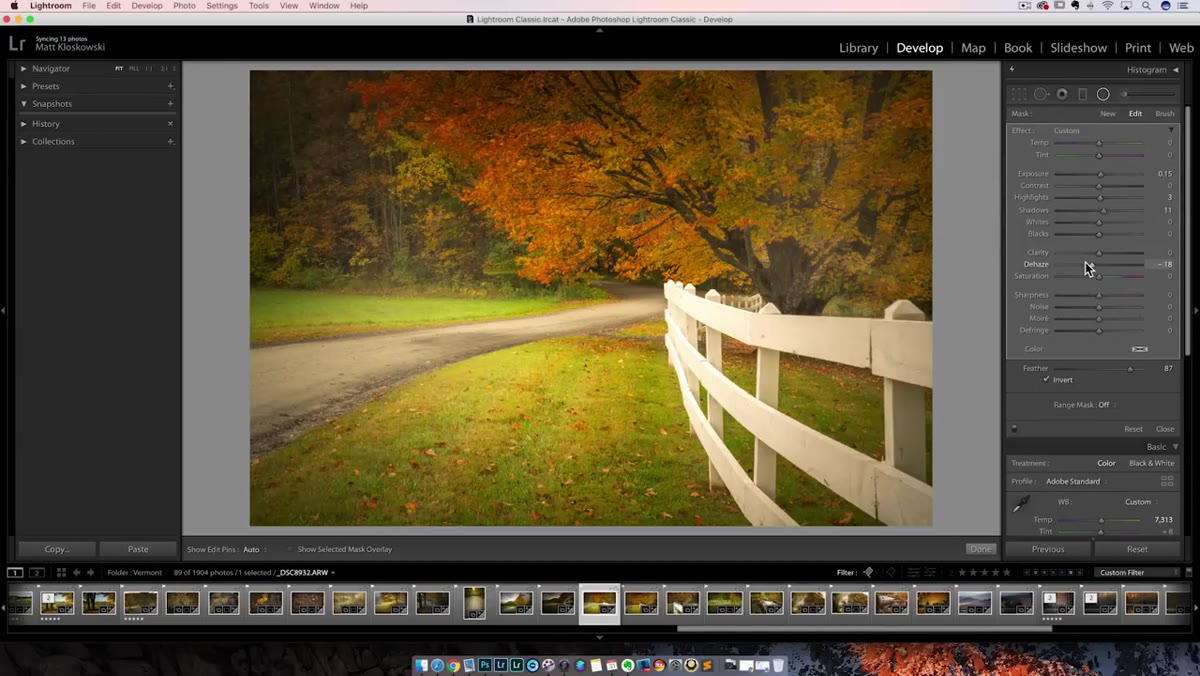 Full slider panel reopened showing proportionally adjusted values
Click the arrow again to expand the panel and get back to your individual sliders. At this point you’ve done the heavy lifting with the Amount control and you’re back to doing any precise fine-tuning that the specific placement requires. Think of it as a two-pass approach: rough scaling with Amount, then precise finishing with individual sliders. The workflow is significantly faster than starting from scratch on each duplicated adjustment.
Full slider panel reopened showing proportionally adjusted values
Click the arrow again to expand the panel and get back to your individual sliders. At this point you’ve done the heavy lifting with the Amount control and you’re back to doing any precise fine-tuning that the specific placement requires. Think of it as a two-pass approach: rough scaling with Amount, then precise finishing with individual sliders. The workflow is significantly faster than starting from scratch on each duplicated adjustment.
Where This Fits in a Heavier Production Workflow
I work with e-commerce catalogs where consistency is everything and speed matters almost as much. The way I’ve started using this is during culling and initial pass edits. I’ll build a solid radial or brush adjustment on one hero image, then when I need to adapt that same look to a similar but not identical frame, I duplicate and use the Amount slider to get in the ballpark before touching anything else. It’s a roughing-in move, not a finishing move, but it saves the kind of back-and-forth that quietly eats 20 minutes out of a session.
One thing worth knowing: the Amount slider can be pushed past the original values, so you’re not capped at 100% of what you originally set. That means you can also use this to intensify an adjustment you’d originally kept conservative, not just soften one that’s too heavy. That directional flexibility makes it useful in more scenarios than just the “I duplicated this and it’s too strong” situation Matt demonstrates.
The single most important thing to take from this tutorial: the collapsed Amount slider is not a simplified view, it’s a proportional scaling control, and treating it that way changes how you approach duplicating and repurposing local adjustments. It’s a small UI element that does meaningful workflow work once you know it’s there.
Watch the full tutorial on YouTube to see Matt walk through the full example with the before and after side by side.
Comments (5)
Been doing this wrong for years apparently. Thanks for the wake-up call.
Finally someone explains this in a way that actually makes sense.
Solid advice. Especially the part about taking your time with it.
I tried this on a client project yesterday and the results were way better than expected.
This is fantastic. I've been recommending this approach to my readers too.
Leave a Comment