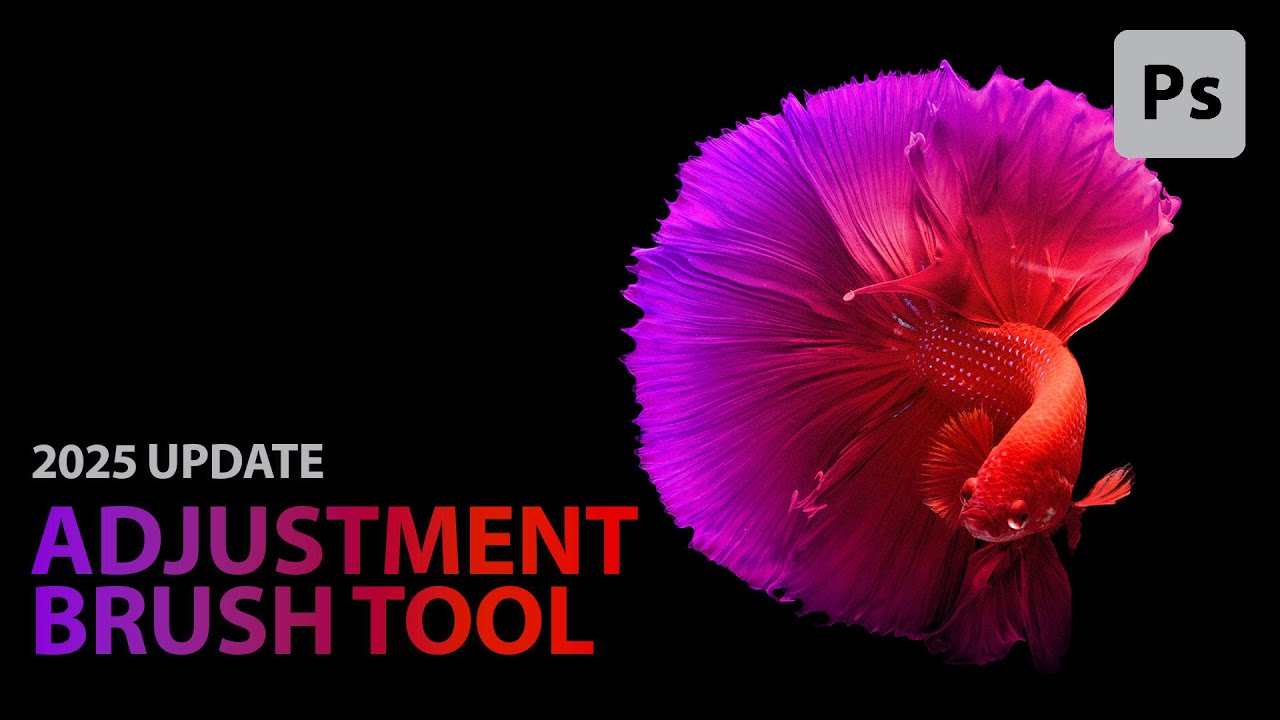
I run post-production for e-commerce and advertising clients, which means I spend a lot of time making isolated edits to specific objects in a photo. Change the color of that product. Brighten just this element. Keep everything else untouched. For years, my workflow for this was: create an adjustment layer, manually paint or refine a mask, adjust the settings, check the mask, fix the edges, repeat. It works. But it adds up fast when you’re moving through dozens of images in a session.
In this Aaron Nace (PHLEARN) tutorial, he walks through the new Adjustment Brush tool in Photoshop 2025, and I want to be upfront about something he is also upfront about: this tool is not doing anything that was previously impossible. What it does is collapse several steps into one motion. For someone who has tracked every hour saved by a smarter workflow (I am genuinely at over 2,400 hours saved by my action library at this point), that compression matters. If you haven’t updated to the full release of Photoshop 2025 yet, do that first. This tool was in beta and is now in the stable build.
Watch the full tutorial on YouTube
Step 1: Locate the Adjustment Brush Tool in the Toolbar
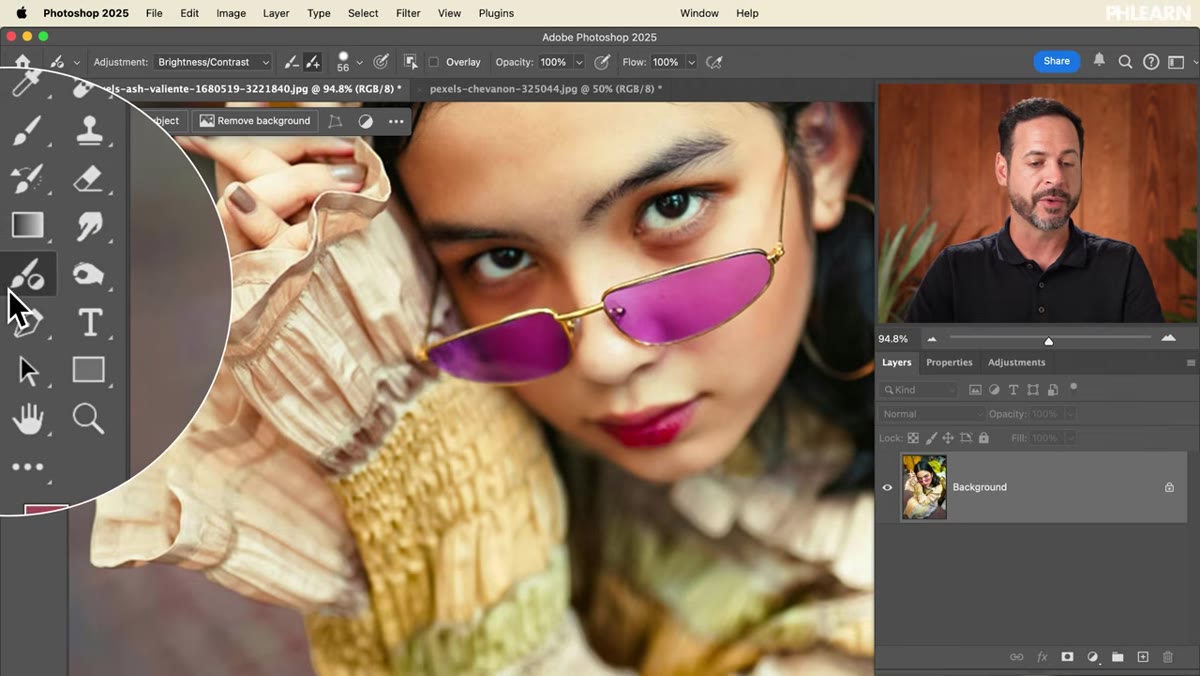 New Adjustment Brush tool highlighted in Photoshop 2025 toolbar
After updating to Photoshop 2025, open any image and look for the Adjustment Brush in the toolbar. It sits alongside your other brush tools and is new enough that you may need to scroll or look for it in the nested tool options. Once selected, the tool surfaces a set of adjustment types in the options bar or a floating panel, including Brightness/Contrast, Exposure, Vibrance, Hue/Saturation, and Photo Filter. Choose the adjustment type before you start painting, because that selection determines what kind of adjustment layer gets generated automatically when you make your first brushstroke.
New Adjustment Brush tool highlighted in Photoshop 2025 toolbar
After updating to Photoshop 2025, open any image and look for the Adjustment Brush in the toolbar. It sits alongside your other brush tools and is new enough that you may need to scroll or look for it in the nested tool options. Once selected, the tool surfaces a set of adjustment types in the options bar or a floating panel, including Brightness/Contrast, Exposure, Vibrance, Hue/Saturation, and Photo Filter. Choose the adjustment type before you start painting, because that selection determines what kind of adjustment layer gets generated automatically when you make your first brushstroke.
Step 2: Paint a Hue/Saturation Adjustment Directly onto a Subject
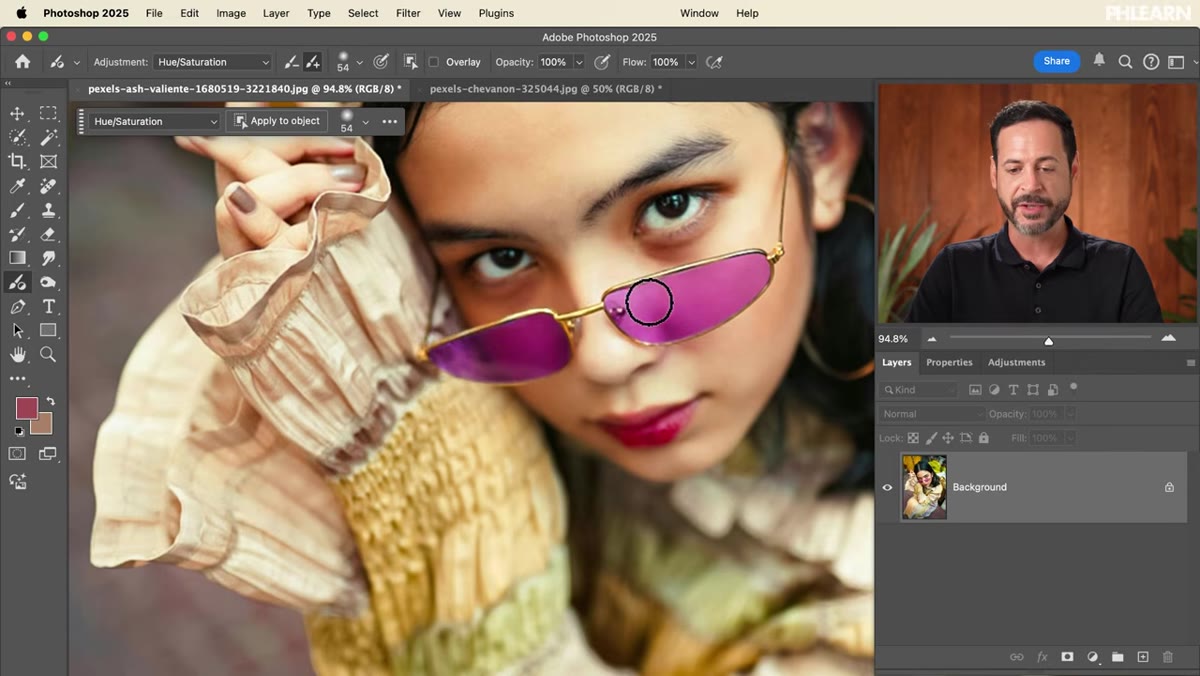 Painting on glasses with Hue/Saturation adjustment active
With Hue/Saturation selected as your adjustment type, start painting over the area you want to affect. In the tutorial, Aaron paints over a pair of glasses. The moment you begin brushing, Photoshop automatically creates a Hue/Saturation adjustment layer and builds a layer mask based exactly on where you painted. You don’t open the Layers panel, you don’t click the “Add Adjustment Layer” button, and you don’t manually paint white onto a mask. All of that happens in the background.
Painting on glasses with Hue/Saturation adjustment active
With Hue/Saturation selected as your adjustment type, start painting over the area you want to affect. In the tutorial, Aaron paints over a pair of glasses. The moment you begin brushing, Photoshop automatically creates a Hue/Saturation adjustment layer and builds a layer mask based exactly on where you painted. You don’t open the Layers panel, you don’t click the “Add Adjustment Layer” button, and you don’t manually paint white onto a mask. All of that happens in the background.
Once the layer is created, the Hue/Saturation panel becomes active and you can slide the Hue control to shift colors. The adjustment layer sits in the Layers panel like any other, fully editable and non-destructive. You can go back and paint more onto the mask, or erase areas of it, at any point.
Step 3: Use Colorize for Extreme Hue Shifts
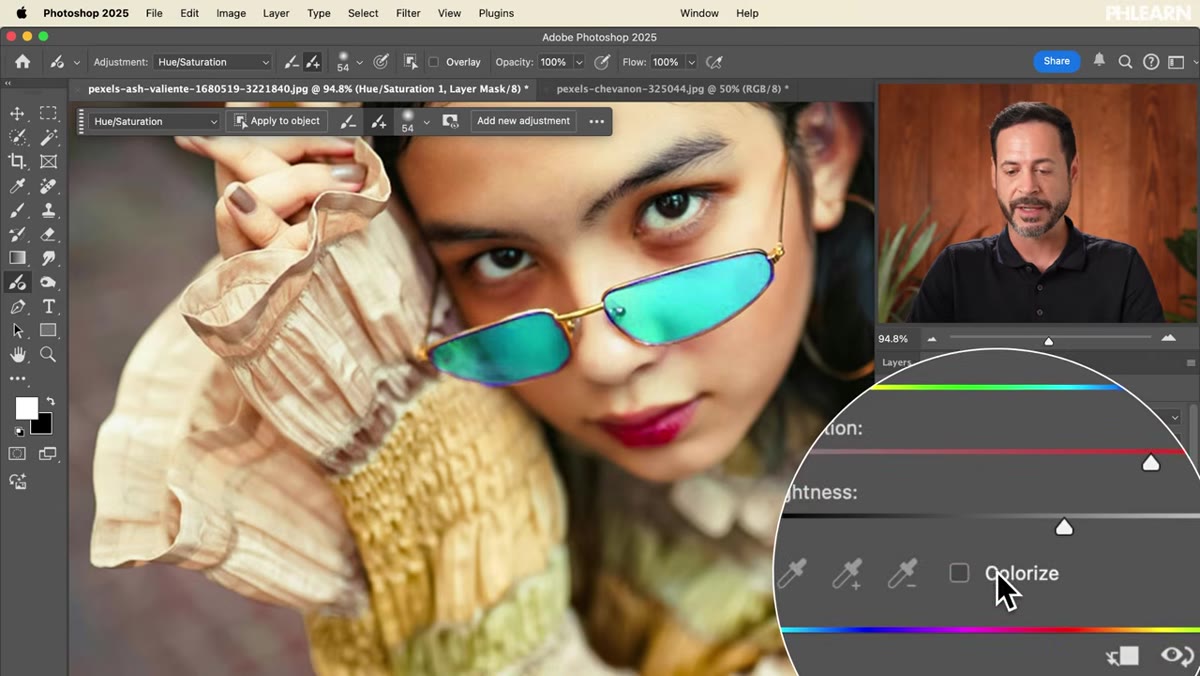 Colorize checkbox enabled in Hue/Saturation panel
Here is something worth knowing before you push the Hue slider too far. When you make a dramatic hue shift without colorizing, you can get muddy or unnatural results, especially on colors that are far from the target hue. Aaron demonstrates this clearly with yellow tones. If the standard Hue shift isn’t holding up, check the Colorize box inside the Hue/Saturation panel. Colorize replaces the existing color information entirely and applies a single, clean hue across the masked area. Then you adjust Saturation to taste.
Colorize checkbox enabled in Hue/Saturation panel
Here is something worth knowing before you push the Hue slider too far. When you make a dramatic hue shift without colorizing, you can get muddy or unnatural results, especially on colors that are far from the target hue. Aaron demonstrates this clearly with yellow tones. If the standard Hue shift isn’t holding up, check the Colorize box inside the Hue/Saturation panel. Colorize replaces the existing color information entirely and applies a single, clean hue across the masked area. Then you adjust Saturation to taste.
Use Colorize when you need a full color replacement. Leave it unchecked for subtle tint shifts where you want the original color variation to partially show through. Knowing when to flip that switch saves you from chasing bad results with more slider adjustments.
Step 4: Apply Adjustments to an Object Automatically Using “Apply to Object”
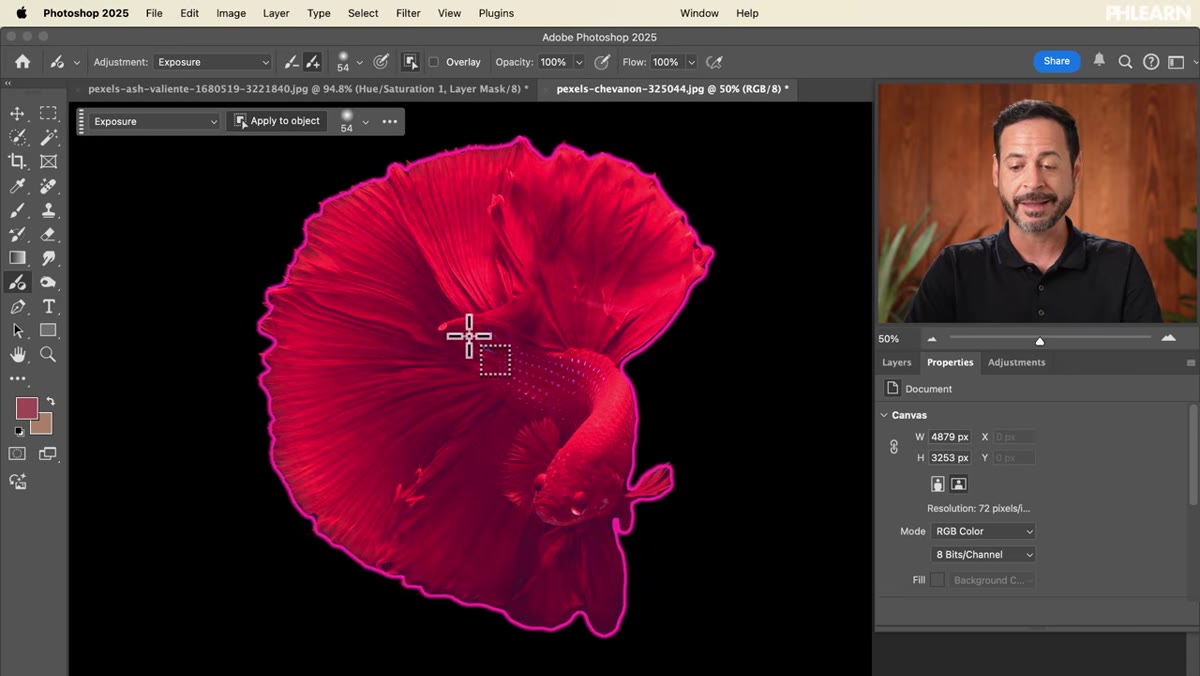 Clicking Apply to Object then selecting the fish
This is where the tool starts to feel genuinely useful for product and commercial work. Instead of painting freehand, you can click “Apply to Object” in the tool options. Then click directly on a distinct element in the image. Photoshop identifies the object, and the adjustment layer’s mask is generated from that object selection automatically.
Clicking Apply to Object then selecting the fish
This is where the tool starts to feel genuinely useful for product and commercial work. Instead of painting freehand, you can click “Apply to Object” in the tool options. Then click directly on a distinct element in the image. Photoshop identifies the object, and the adjustment layer’s mask is generated from that object selection automatically.
Aaron uses an exposure adjustment on a fish in a photo as the example. After clicking the fish, the Exposure panel opens with three controls: Exposure, Offset, and Gamma. Adjust them and the edit is contained precisely to the fish, with a clean mask already built. This is the part that genuinely compresses what used to be a multi-step task. Object selection, mask creation, and adjustment layer setup all happen in one click.
Step 5: Stack Multiple Adjustments on the Same Image
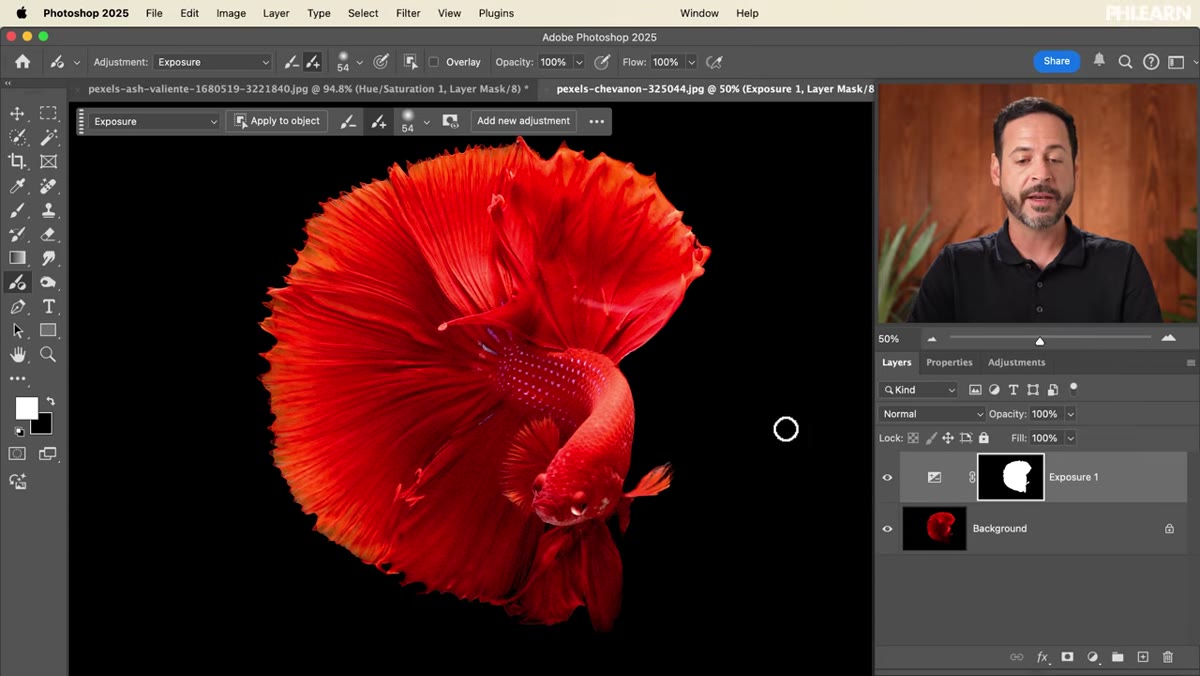 Adding a second adjustment layer with hue/saturation on the same fish
The tool supports stacking. After your first adjustment is applied, click “Add a New Adjustment” in the panel to start a second one without losing the first. In the tutorial, Aaron adds a Hue/Saturation adjustment on top of the existing Exposure adjustment, again using “Apply to Object” to target the same fish. Both adjustments stack as separate layers in the Layers panel, each with its own mask, each independently editable.
Adding a second adjustment layer with hue/saturation on the same fish
The tool supports stacking. After your first adjustment is applied, click “Add a New Adjustment” in the panel to start a second one without losing the first. In the tutorial, Aaron adds a Hue/Saturation adjustment on top of the existing Exposure adjustment, again using “Apply to Object” to target the same fish. Both adjustments stack as separate layers in the Layers panel, each with its own mask, each independently editable.
This is standard Photoshop behavior underneath, but the speed at which you build that stack is new. For complex product edits where you might want to separately control luminosity and color, this layered approach stays clean and organized without extra manual setup.
Step 6: Edit the Generated Mask Manually for Creative Effects
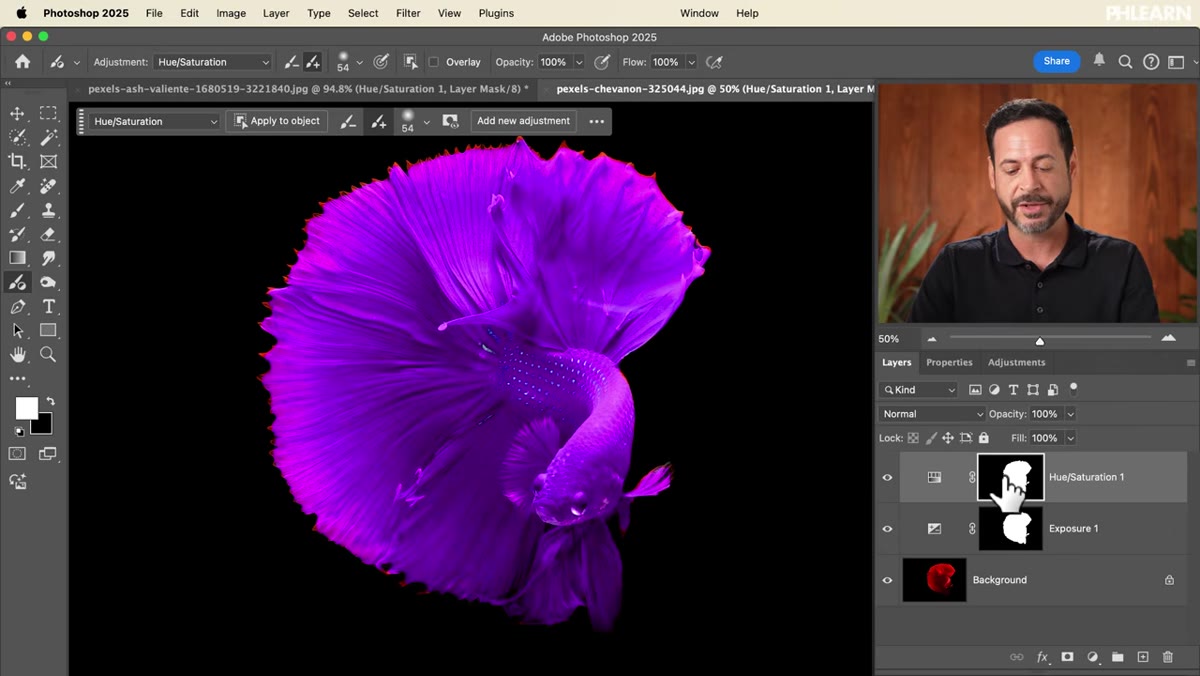 Gradient applied to layer mask in Layers panel
Because the Adjustment Brush is just generating standard adjustment layers and masks, you have full access to every mask editing technique you already know. Aaron demonstrates this by selecting the layer mask thumbnail in the Layers panel and applying a black-to-white gradient. The result is a smooth fade where the color effect transitions across the image rather than stopping at a hard edge.
Gradient applied to layer mask in Layers panel
Because the Adjustment Brush is just generating standard adjustment layers and masks, you have full access to every mask editing technique you already know. Aaron demonstrates this by selecting the layer mask thumbnail in the Layers panel and applying a black-to-white gradient. The result is a smooth fade where the color effect transitions across the image rather than stopping at a hard edge.
Click the mask thumbnail, grab the Gradient tool, set it to a black-to-white linear gradient, and drag across the canvas. The Reverse option in the gradient toolbar flips the direction of the fade. This is a good reminder that the Adjustment Brush is an entry point, not a cage. Everything it creates is standard, editable Photoshop infrastructure.
How I’ll Actually Use This in Client Work
The “Apply to Object” feature is what I’ll reach for most. In e-commerce work, clients frequently ask for color variants of a product after the shoot. Previously I’d select the object, refine the edge, create the adjustment layer, link the mask. Now that’s a two-click operation. My only caveat is that Photoshop’s object detection is not perfect on every image, particularly with transparent or reflective surfaces like glass or chrome. For those, I’ll still clean up the mask manually. But for solid, well-defined objects, the automatic masking is fast and accurate enough to use as a starting point without major corrections.
I also want to flag that this tool works best when you understand what it’s doing underneath. If you know adjustment layers and masks already, the Adjustment Brush makes you faster. If you don’t, I’d suggest learning those fundamentals first so you can fix things when the automatic selection isn’t quite right.
The single most useful thing this tool does is eliminate the setup friction between “I want to make a targeted edit” and “the edit is made.” Everything it creates is standard Photoshop, fully non-destructive, and completely editable after the fact. That’s the combination that makes it worth adding to your regular workflow.
Watch the full tutorial on YouTube to see Aaron walk through each technique on actual images. His pacing makes it easy to follow along in your own file at the same time.
Comments (2)
Love how you break down complex stuff into manageable steps.
Really solid breakdown. This pairs perfectly with the gear work I've been writing about.
Leave a Comment