Portrait retouching is where studio time goes to die. I know this from experience. Early in my commercial work, I’d clock a solid hour on a single headshot: adjusting brush for teeth, healing tool for under-eye circles, manual skin smoothing pass, back and forth until the art director finally signed off. Multiply that by a hundred frames from a branding shoot and you understand why I’ve spent a significant portion of my career building systems to avoid repeating myself. My spreadsheet currently sits at 2,400+ hours saved through automation. Every tool that earns a line in that spreadsheet has to prove itself.
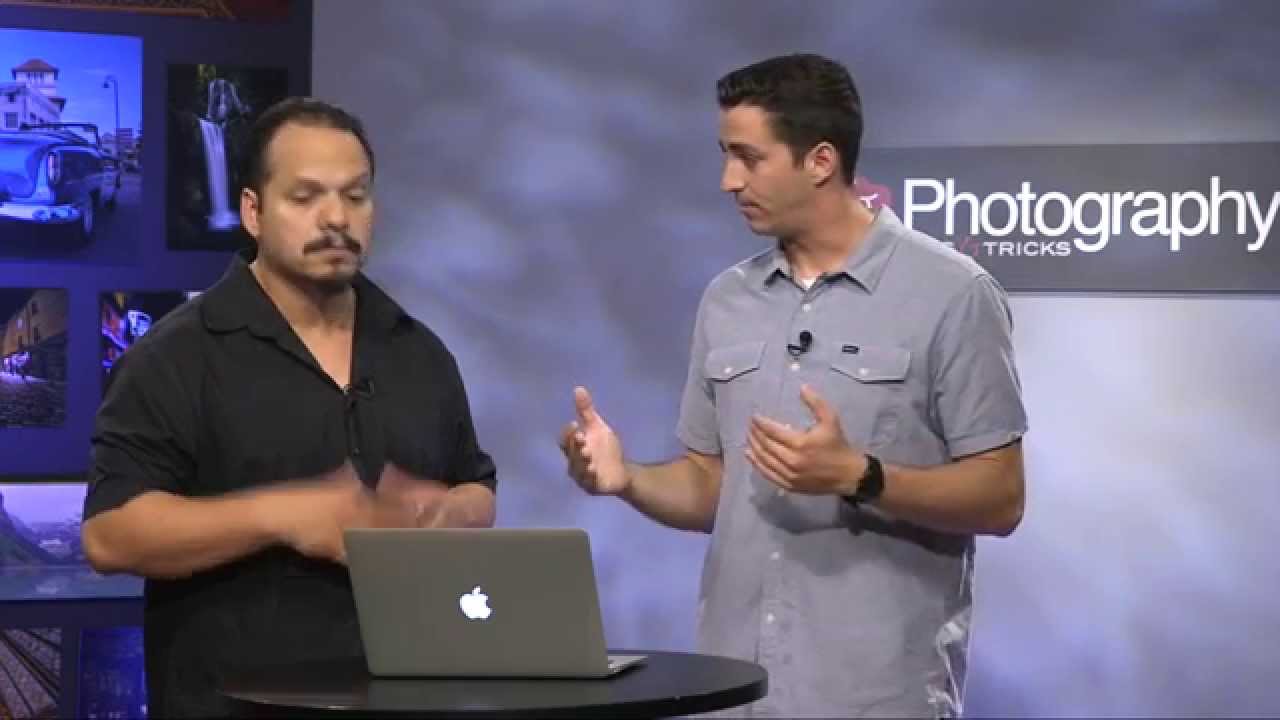
In this KelbyOne tutorial, RC and Riley from Athentech walk through the portrait-specific features inside Perfectly Clear, a plugin that runs in both Lightroom and Photoshop. I’d seen the product demoed before, mostly focused on the landscape and one-click presets. What I hadn’t seen covered clearly was the adjustment layer underneath those presets, plus the beautification tools and the batch workflow. Those three things are exactly what matter to e-commerce and commercial portrait work, so I paid attention. Watch the full tutorial on YouTube if you want to follow along with the original demo.
Step 1: Launch Perfectly Clear from Lightroom
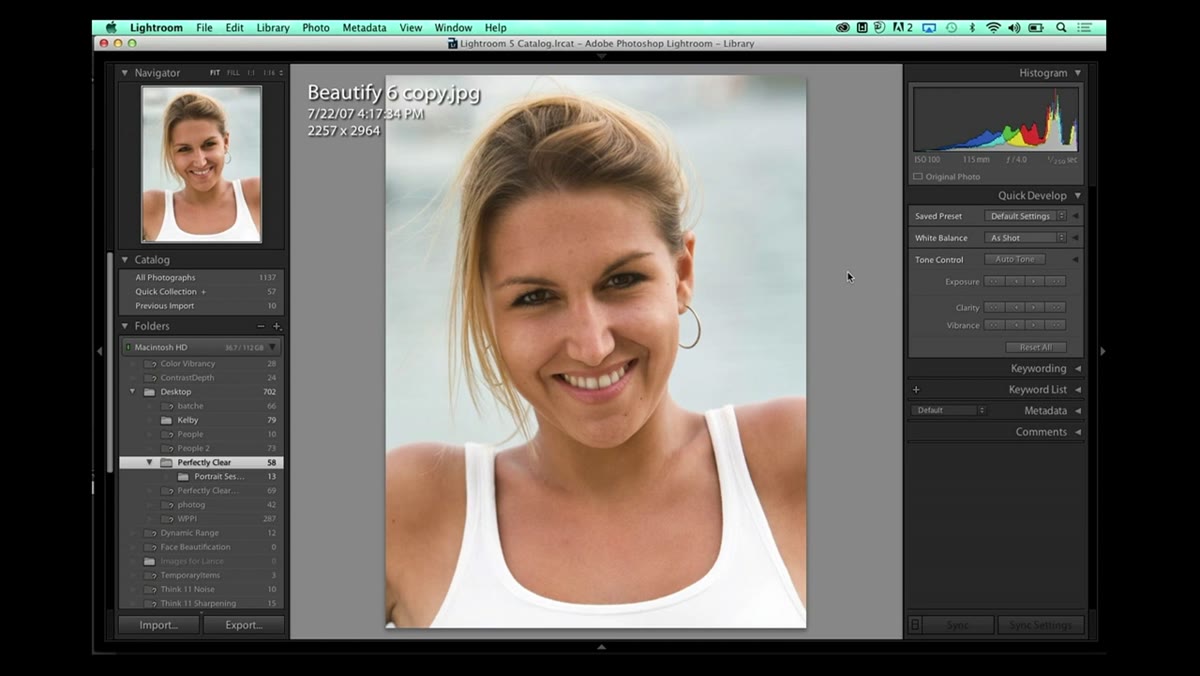 Riley opening Perfectly Clear plugin from within Lightroom
Perfectly Clear runs as a plugin from inside Lightroom. You’re not exporting to a separate app, round-tripping through Photoshop, or breaking your catalog flow. From the demo, Riley opens the plugin directly on a portrait image, and the interface loads with the preset buttons immediately visible. If you’ve already seen the landscape and details presets from earlier sessions, you’ll recognize the layout. The key thing to know before you click anything: every single preset button in the interface connects to the same adjustment panel. One panel, all presets. That changes how you should think about the tool.
Riley opening Perfectly Clear plugin from within Lightroom
Perfectly Clear runs as a plugin from inside Lightroom. You’re not exporting to a separate app, round-tripping through Photoshop, or breaking your catalog flow. From the demo, Riley opens the plugin directly on a portrait image, and the interface loads with the preset buttons immediately visible. If you’ve already seen the landscape and details presets from earlier sessions, you’ll recognize the layout. The key thing to know before you click anything: every single preset button in the interface connects to the same adjustment panel. One panel, all presets. That changes how you should think about the tool.
Step 2: Apply the Beautify Preset as Your Starting Point
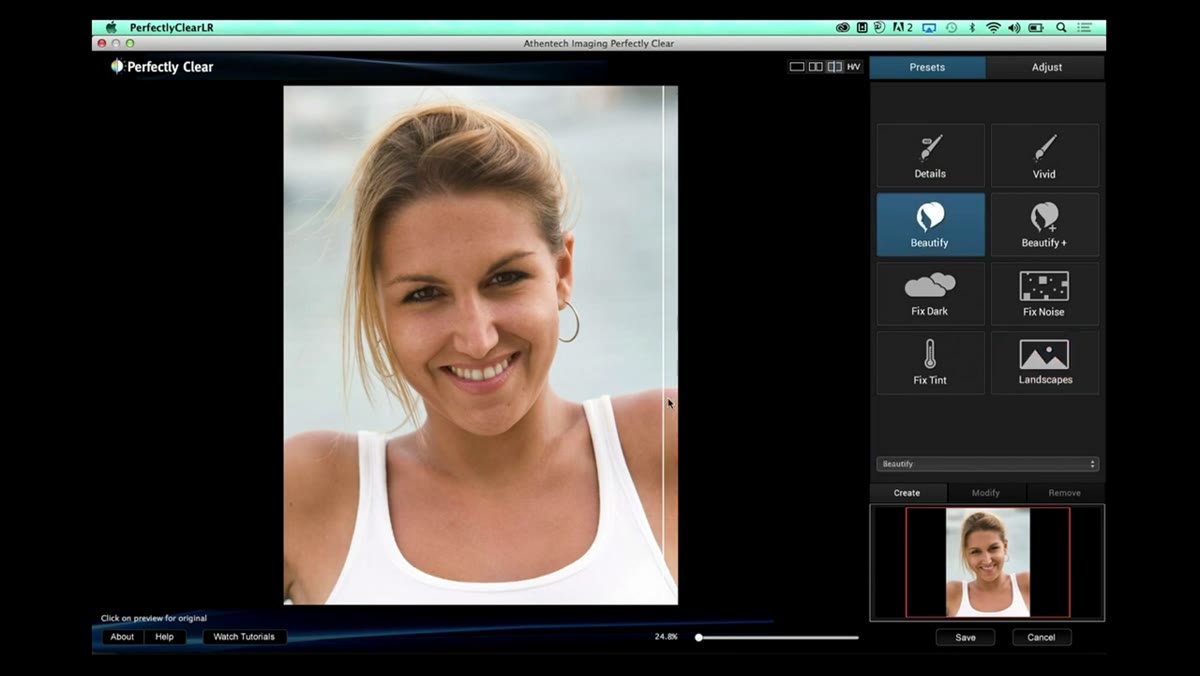 Beautify preset button being clicked with portrait image loaded
With your portrait open inside Perfectly Clear, hit the Beautify preset. This is the one-click entry point designed specifically for human subjects. What it does immediately: skin smoothing, some reduction of under-eye detail, and a general tonal correction calibrated for faces rather than landscapes. In the demo, the subject has visible freckles, and Riley is clear that the preset doesn’t erase them. It smooths and corrects without nuking natural texture. That matters. I’ve seen plugins obliterate skin character in a way that makes commercial clients push back hard. Beautify reads more like a targeted correction than a filter.
Beautify preset button being clicked with portrait image loaded
With your portrait open inside Perfectly Clear, hit the Beautify preset. This is the one-click entry point designed specifically for human subjects. What it does immediately: skin smoothing, some reduction of under-eye detail, and a general tonal correction calibrated for faces rather than landscapes. In the demo, the subject has visible freckles, and Riley is clear that the preset doesn’t erase them. It smooths and corrects without nuking natural texture. That matters. I’ve seen plugins obliterate skin character in a way that makes commercial clients push back hard. Beautify reads more like a targeted correction than a filter.
Step 3: Open the Adjust Panel in the Top Right
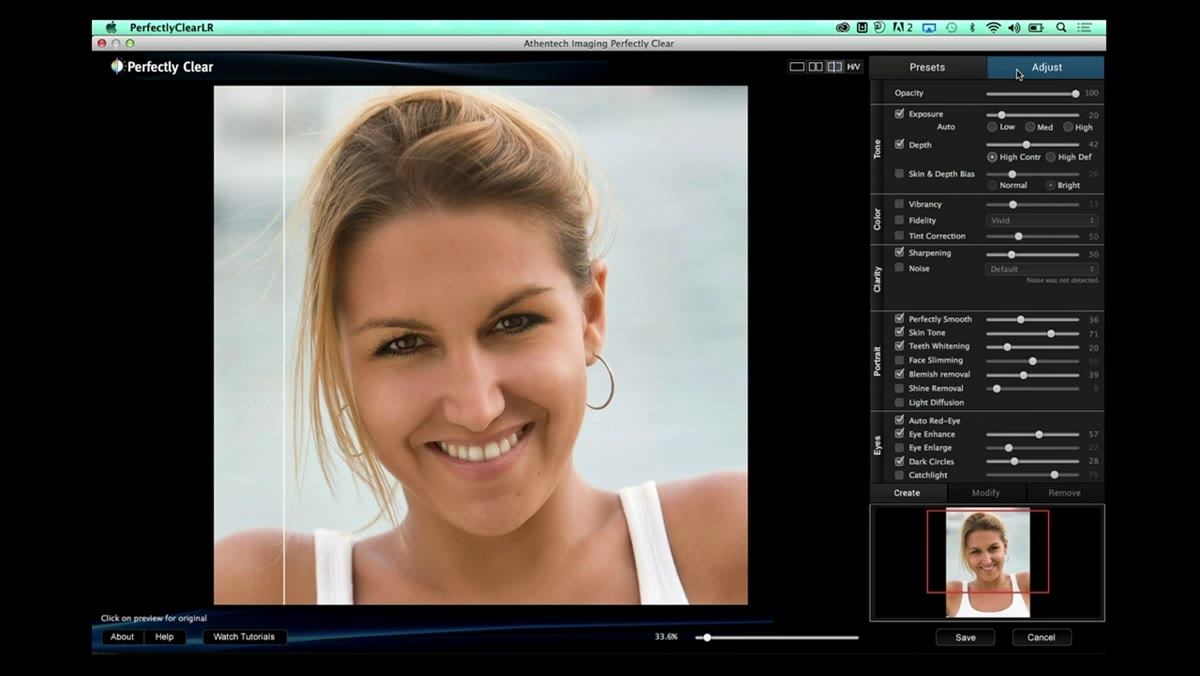 Adjust panel opening in upper right corner of the interface
After the preset applies, navigate to the Adjust section in the top right of the interface. This is the panel that unlocks the real value of the tool. Riley makes a point of emphasizing that this adjust panel is not exclusive to Beautify. It’s available for every preset in the system, whether you’re working on a landscape, a product shot, or a portrait. Think of the preset as your floor, and this panel as everything you build on top of it. The first control you’ll see is an opacity slider for the overall effect, which is useful when you want the correction to read subtly rather than fully processed.
Adjust panel opening in upper right corner of the interface
After the preset applies, navigate to the Adjust section in the top right of the interface. This is the panel that unlocks the real value of the tool. Riley makes a point of emphasizing that this adjust panel is not exclusive to Beautify. It’s available for every preset in the system, whether you’re working on a landscape, a product shot, or a portrait. Think of the preset as your floor, and this panel as everything you build on top of it. The first control you’ll see is an opacity slider for the overall effect, which is useful when you want the correction to read subtly rather than fully processed.
Step 4: Use the Portrait and Eyes Section for Targeted Corrections
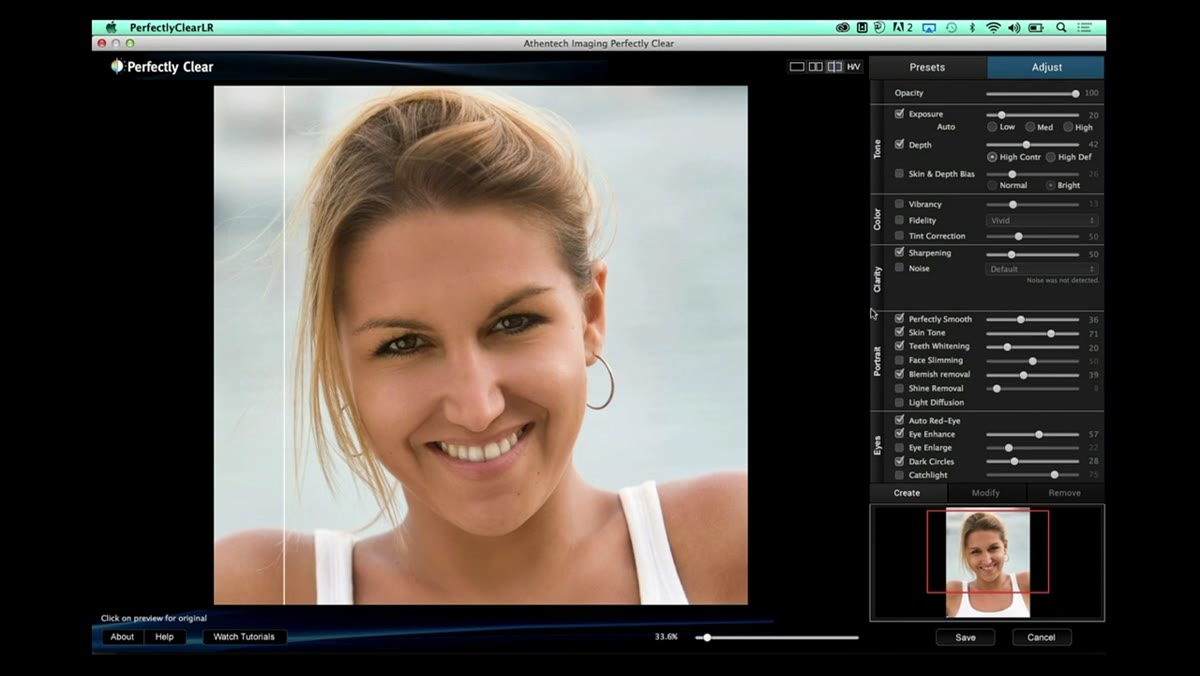 Portrait and eyes adjustment sliders visible in the panel
Below opacity, you hit what Riley calls the Portrait and Eyes section, and this is where the time savings get concrete. The demo walks through teeth whitening specifically. Traditionally in Lightroom, whitening teeth means grabbing the adjustment brush, zooming in, painting a selection carefully, adjusting the exposure and saturation, and hoping the edges look clean. Riley estimates four to six minutes for a careful manual job on a single image. In Perfectly Clear, you drag the teeth whitening slider and the plugin identifies the teeth in the image automatically, applying the correction without you placing a cursor on the photo. The slider runs from 0 to 100, so you’re not locked into a default intensity.
Portrait and eyes adjustment sliders visible in the panel
Below opacity, you hit what Riley calls the Portrait and Eyes section, and this is where the time savings get concrete. The demo walks through teeth whitening specifically. Traditionally in Lightroom, whitening teeth means grabbing the adjustment brush, zooming in, painting a selection carefully, adjusting the exposure and saturation, and hoping the edges look clean. Riley estimates four to six minutes for a careful manual job on a single image. In Perfectly Clear, you drag the teeth whitening slider and the plugin identifies the teeth in the image automatically, applying the correction without you placing a cursor on the photo. The slider runs from 0 to 100, so you’re not locked into a default intensity.
Step 5: Dial In the Under-Eye Correction
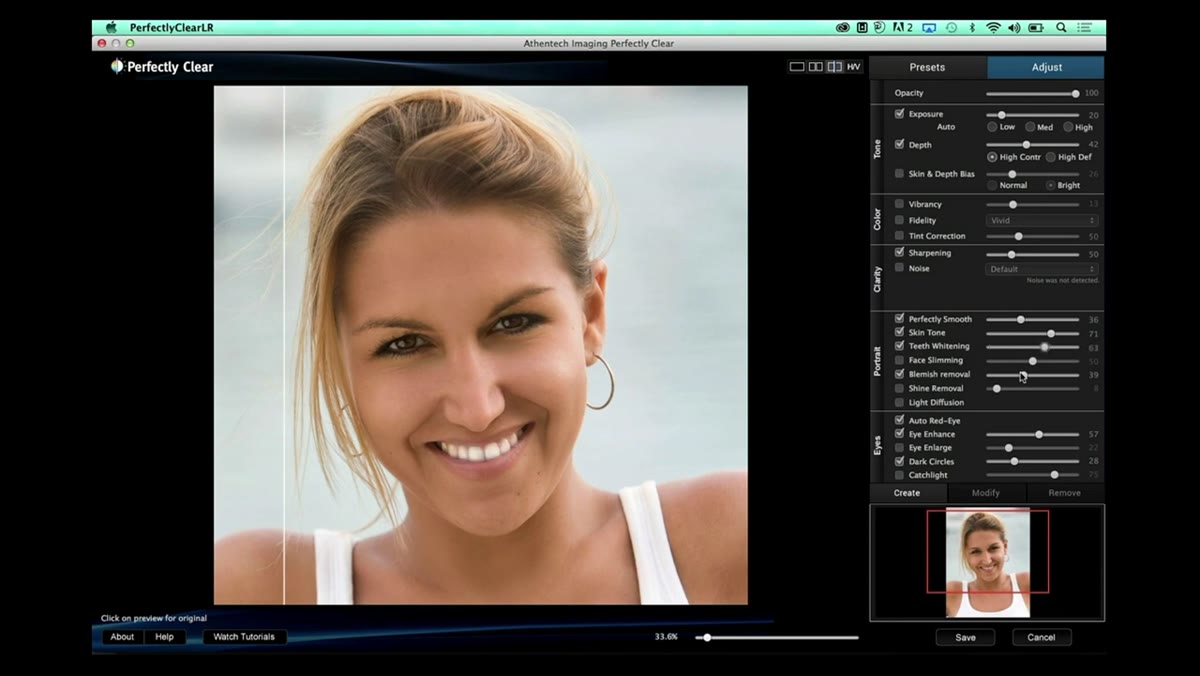 Under-eye slider being adjusted with visible result on portrait
Still inside the Portrait and Eyes section, there’s a dedicated under-eye slider. The demo subject has mild shadows under the eyes, and Riley dials the slider up to show the correction in real time. Same principle as the teeth tool: no selection required, no masking, no healing brush. The plugin finds the region and applies the adjustment automatically. For anyone doing volume portrait work, including corporate headshots, event photography, or e-commerce beauty shots, this alone is worth evaluating the tool. Under-eye correction is one of those tasks that seems fast until you’re doing it on frame 47 of 200.
Under-eye slider being adjusted with visible result on portrait
Still inside the Portrait and Eyes section, there’s a dedicated under-eye slider. The demo subject has mild shadows under the eyes, and Riley dials the slider up to show the correction in real time. Same principle as the teeth tool: no selection required, no masking, no healing brush. The plugin finds the region and applies the adjustment automatically. For anyone doing volume portrait work, including corporate headshots, event photography, or e-commerce beauty shots, this alone is worth evaluating the tool. Under-eye correction is one of those tasks that seems fast until you’re doing it on frame 47 of 200.
Step 6: Fine-Tune Skin Smoothing with Full Slider Control
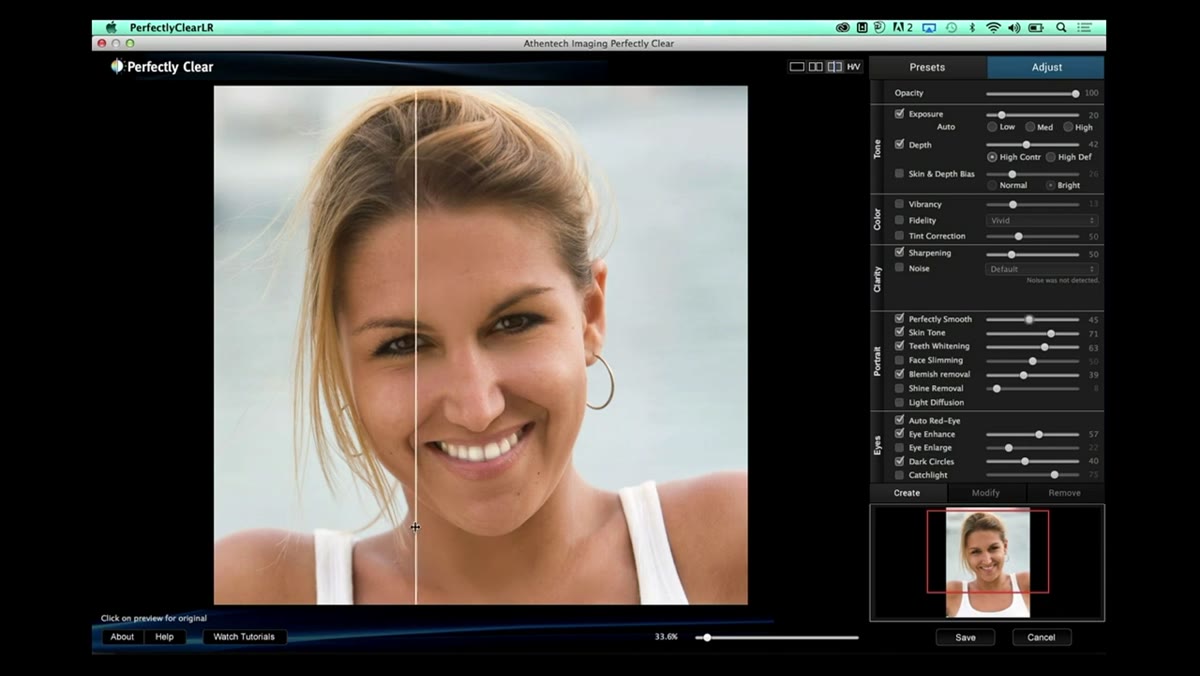 Skin smoothing slider with before-and-after comparison visible
The skin smoothing control also lives in this section and follows the same 0-to-100 range. What Riley demonstrates here reinforces the broader point about Perfectly Clear’s approach: the preset handles the gross correction, and the sliders handle the refinement. You’re not stuck with whatever the algorithm decided. If Beautify came in a little heavy on smoothing for a particular subject or lighting condition, you pull it back. If the shot needs more work than the default, you push it up. The combination of automated detection plus manual range is what separates this from a simple filter.
Skin smoothing slider with before-and-after comparison visible
The skin smoothing control also lives in this section and follows the same 0-to-100 range. What Riley demonstrates here reinforces the broader point about Perfectly Clear’s approach: the preset handles the gross correction, and the sliders handle the refinement. You’re not stuck with whatever the algorithm decided. If Beautify came in a little heavy on smoothing for a particular subject or lighting condition, you pull it back. If the shot needs more work than the default, you push it up. The combination of automated detection plus manual range is what separates this from a simple filter.
What I’d Add From My Own Workflow
The tutorial doesn’t go deep on batch processing in this segment, though it’s mentioned as a topic. From my side of the desk, batch is where the math gets interesting. I’ve run similar AI-assisted correction tools across sets of 300 to 500 images in an afternoon, using consistent preset settings locked in at the start of a session. The approach Riley describes here, where every preset uses the same underlying adjustment panel, is exactly the architecture you want for batch work. You calibrate once on a representative frame, lock your settings, and run the sequence. If you’re considering Perfectly Clear for studio or e-commerce volume, spend time with that batch workflow before you commit to it. It’ll tell you more than any single-image demo can.
The core argument from this tutorial is a simple one: automated detection removes the repetitive cursor work, and adjustable sliders keep you in control of the result. For portrait work specifically, teeth whitening and under-eye correction are the two tasks most likely to eat your editing hours on a high-volume shoot. A tool that handles both without manual masking is worth a serious look.
Watch the full tutorial on YouTube to see the before-and-after comparisons and the full interface walkthrough from RC and Riley.
Comments (3)
Never thought of approaching it this way. Really creative.
I tried this on a client project yesterday and the results were way better than expected.
Applied this to my portfolio shots and the improvement is noticeable.
Leave a Comment