
Composite portrait work makes up a significant chunk of what I do for ad agency clients, and the single biggest complaint I hear from art directors is that the subject looks “pasted in.” The background is sharp, the person is sharp, and nothing feels like it was shot together. What actually sells a composite is controlled imperfection: the right amount of blur, some light bleed, a little grain. Getting that to feel photographic rather than digital is the whole game.
In this PHLEARN tutorial, the team walks through a light blur portrait effect that addresses exactly that problem in just over a minute. Watch the full tutorial on YouTube before or after reading, because the visual reference helps. What I want to do here is slow it down, fill in the settings details, and flag the steps where I’ve found room to push the technique further in a production context.
The workflow is non-destructive start to finish, which matters more than people realize. When a client asks you to change the mood of a background image three rounds into the job, you want to be able to do that in under two minutes. This technique lets you.
Step 1: Remove the Background from Your Portrait
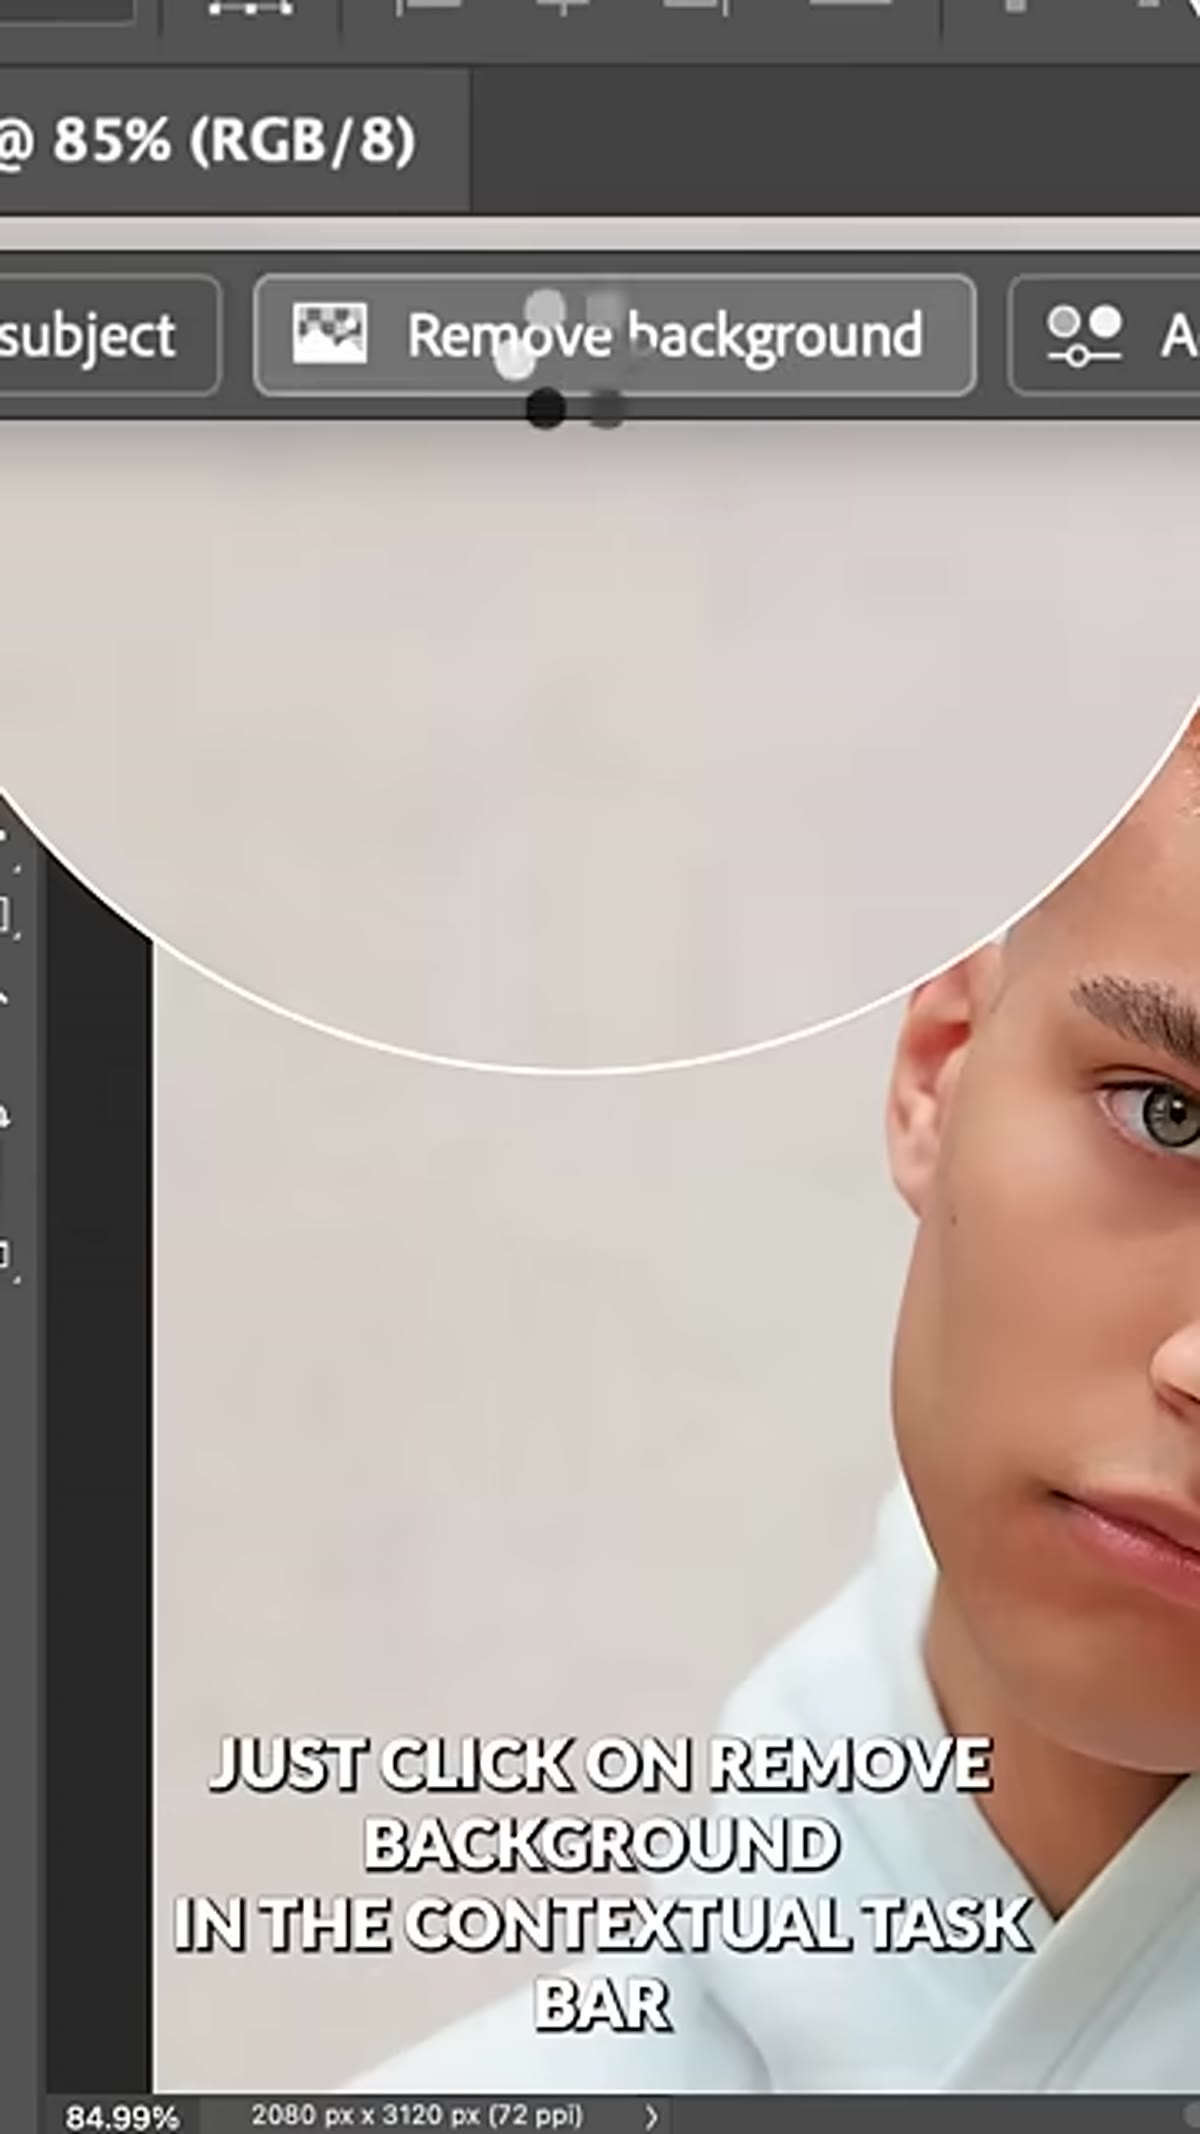 Clicking Remove Background in the contextual taskbar
With your portrait open, look for the contextual taskbar that appears near the bottom of the canvas. There is a “Remove Background” button there that uses Photoshop’s AI-powered subject selection to cut the subject out in one click. For most clean studio portraits, the result is good enough to work with immediately. For hair and complex edges, you may want to refine the mask using Select and Mask afterward. The output is a layer with a pixel mask attached, which keeps you non-destructive from the start.
Clicking Remove Background in the contextual taskbar
With your portrait open, look for the contextual taskbar that appears near the bottom of the canvas. There is a “Remove Background” button there that uses Photoshop’s AI-powered subject selection to cut the subject out in one click. For most clean studio portraits, the result is good enough to work with immediately. For hair and complex edges, you may want to refine the mask using Select and Mask afterward. The output is a layer with a pixel mask attached, which keeps you non-destructive from the start.
Step 2: Bring In a Background and Adjust Brightness
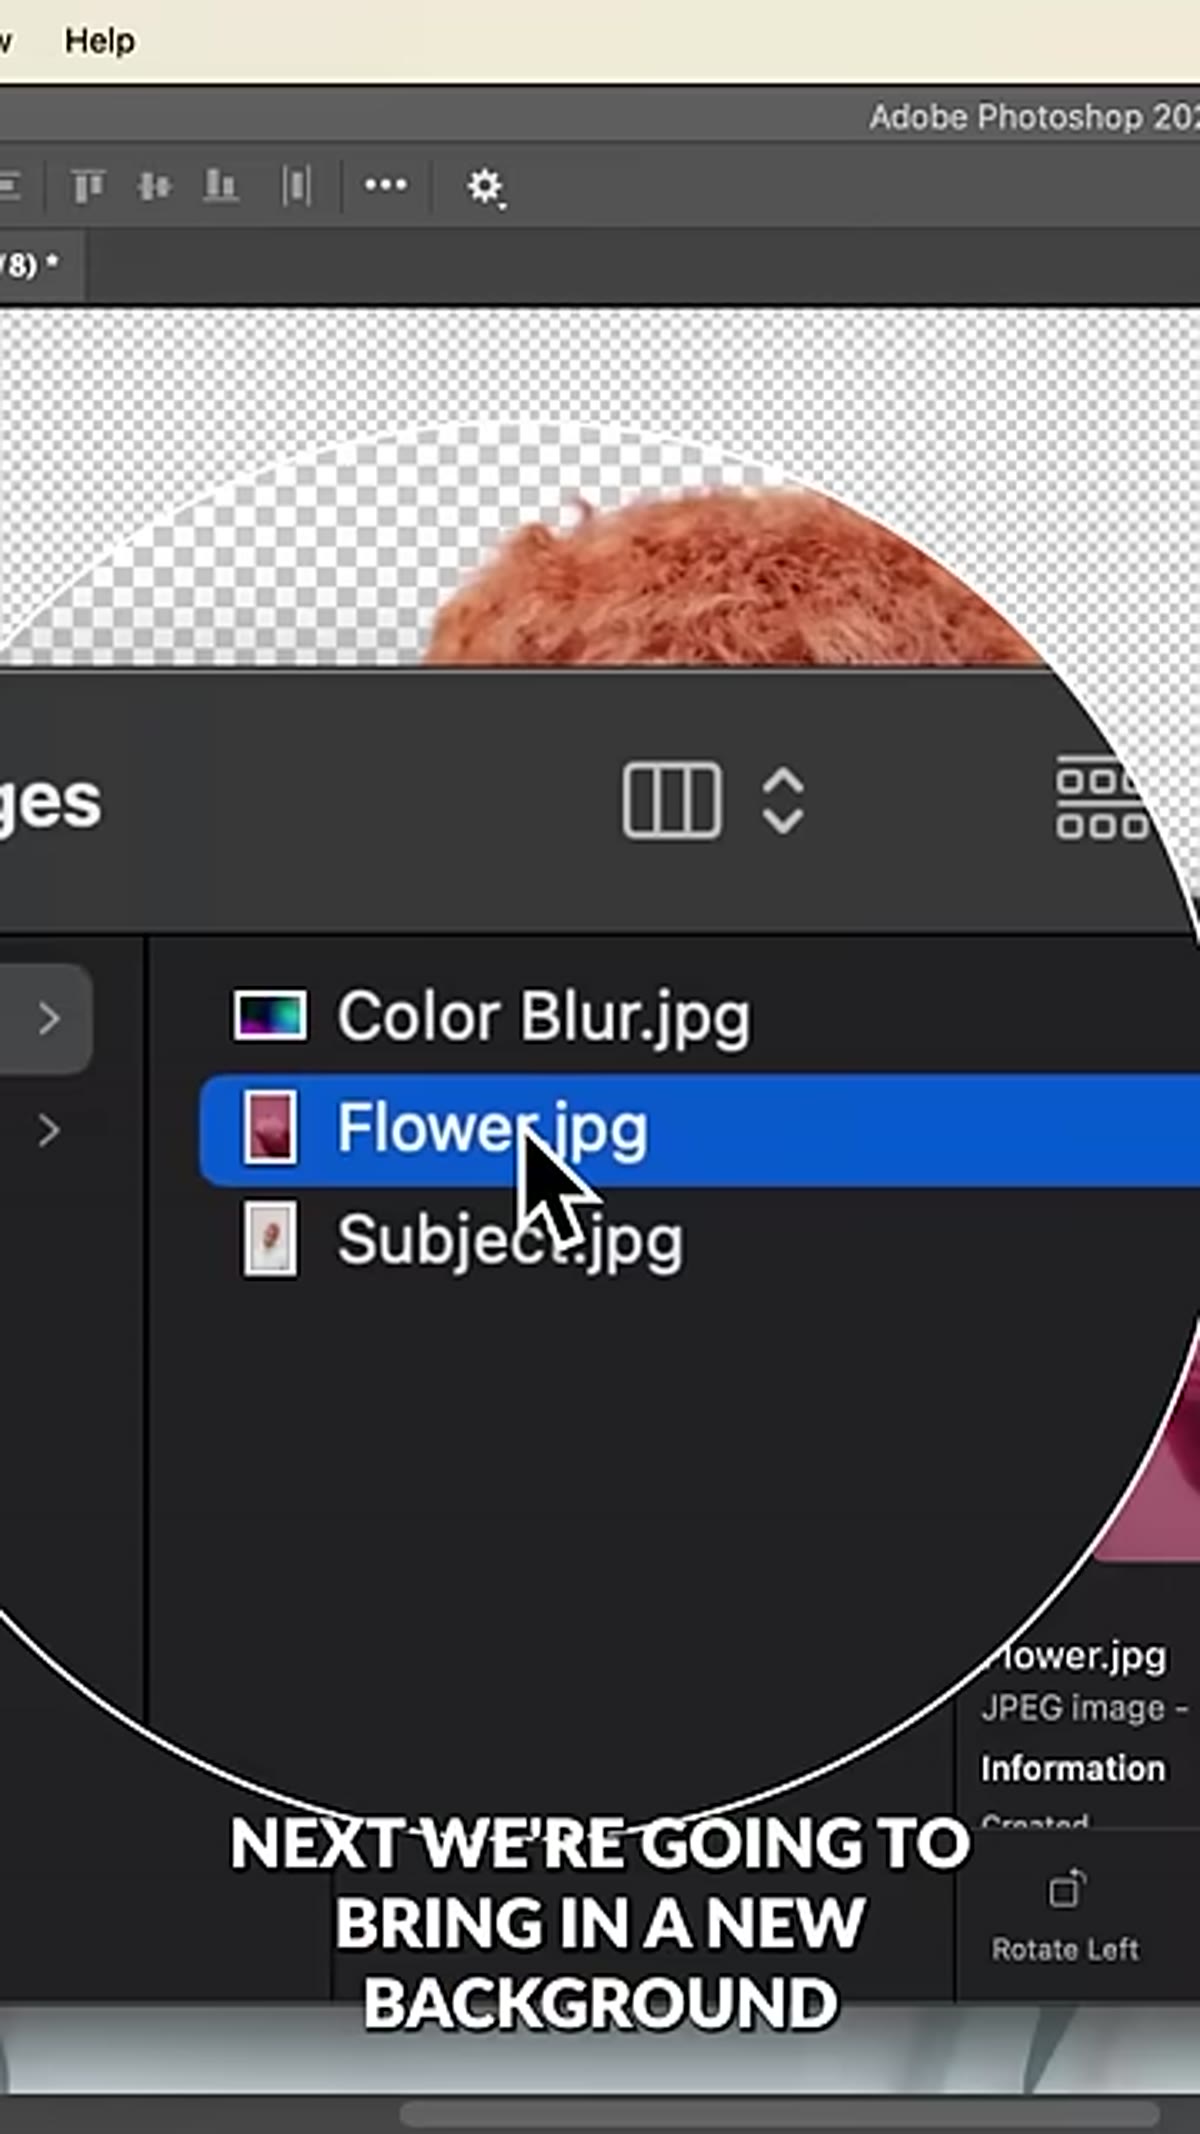 Dragging a flower photograph into Photoshop behind the subject layer
Open your background image, then click and drag it directly into your working document. In the Layers panel, drag it below your subject layer. The tutorial uses a flower photograph, which works well because organic textures blur beautifully and avoid the “stock photo backdrop” look. Once it is in place, add a Levels adjustment layer clipped to the background layer. Pull the white output slider or the midtone input slider to the right until the image brightens to roughly the exposure level you want. Clipping the adjustment layer means it only affects the background, not your subject.
Dragging a flower photograph into Photoshop behind the subject layer
Open your background image, then click and drag it directly into your working document. In the Layers panel, drag it below your subject layer. The tutorial uses a flower photograph, which works well because organic textures blur beautifully and avoid the “stock photo backdrop” look. Once it is in place, add a Levels adjustment layer clipped to the background layer. Pull the white output slider or the midtone input slider to the right until the image brightens to roughly the exposure level you want. Clipping the adjustment layer means it only affects the background, not your subject.
Step 3: Apply a Path Blur to the Background
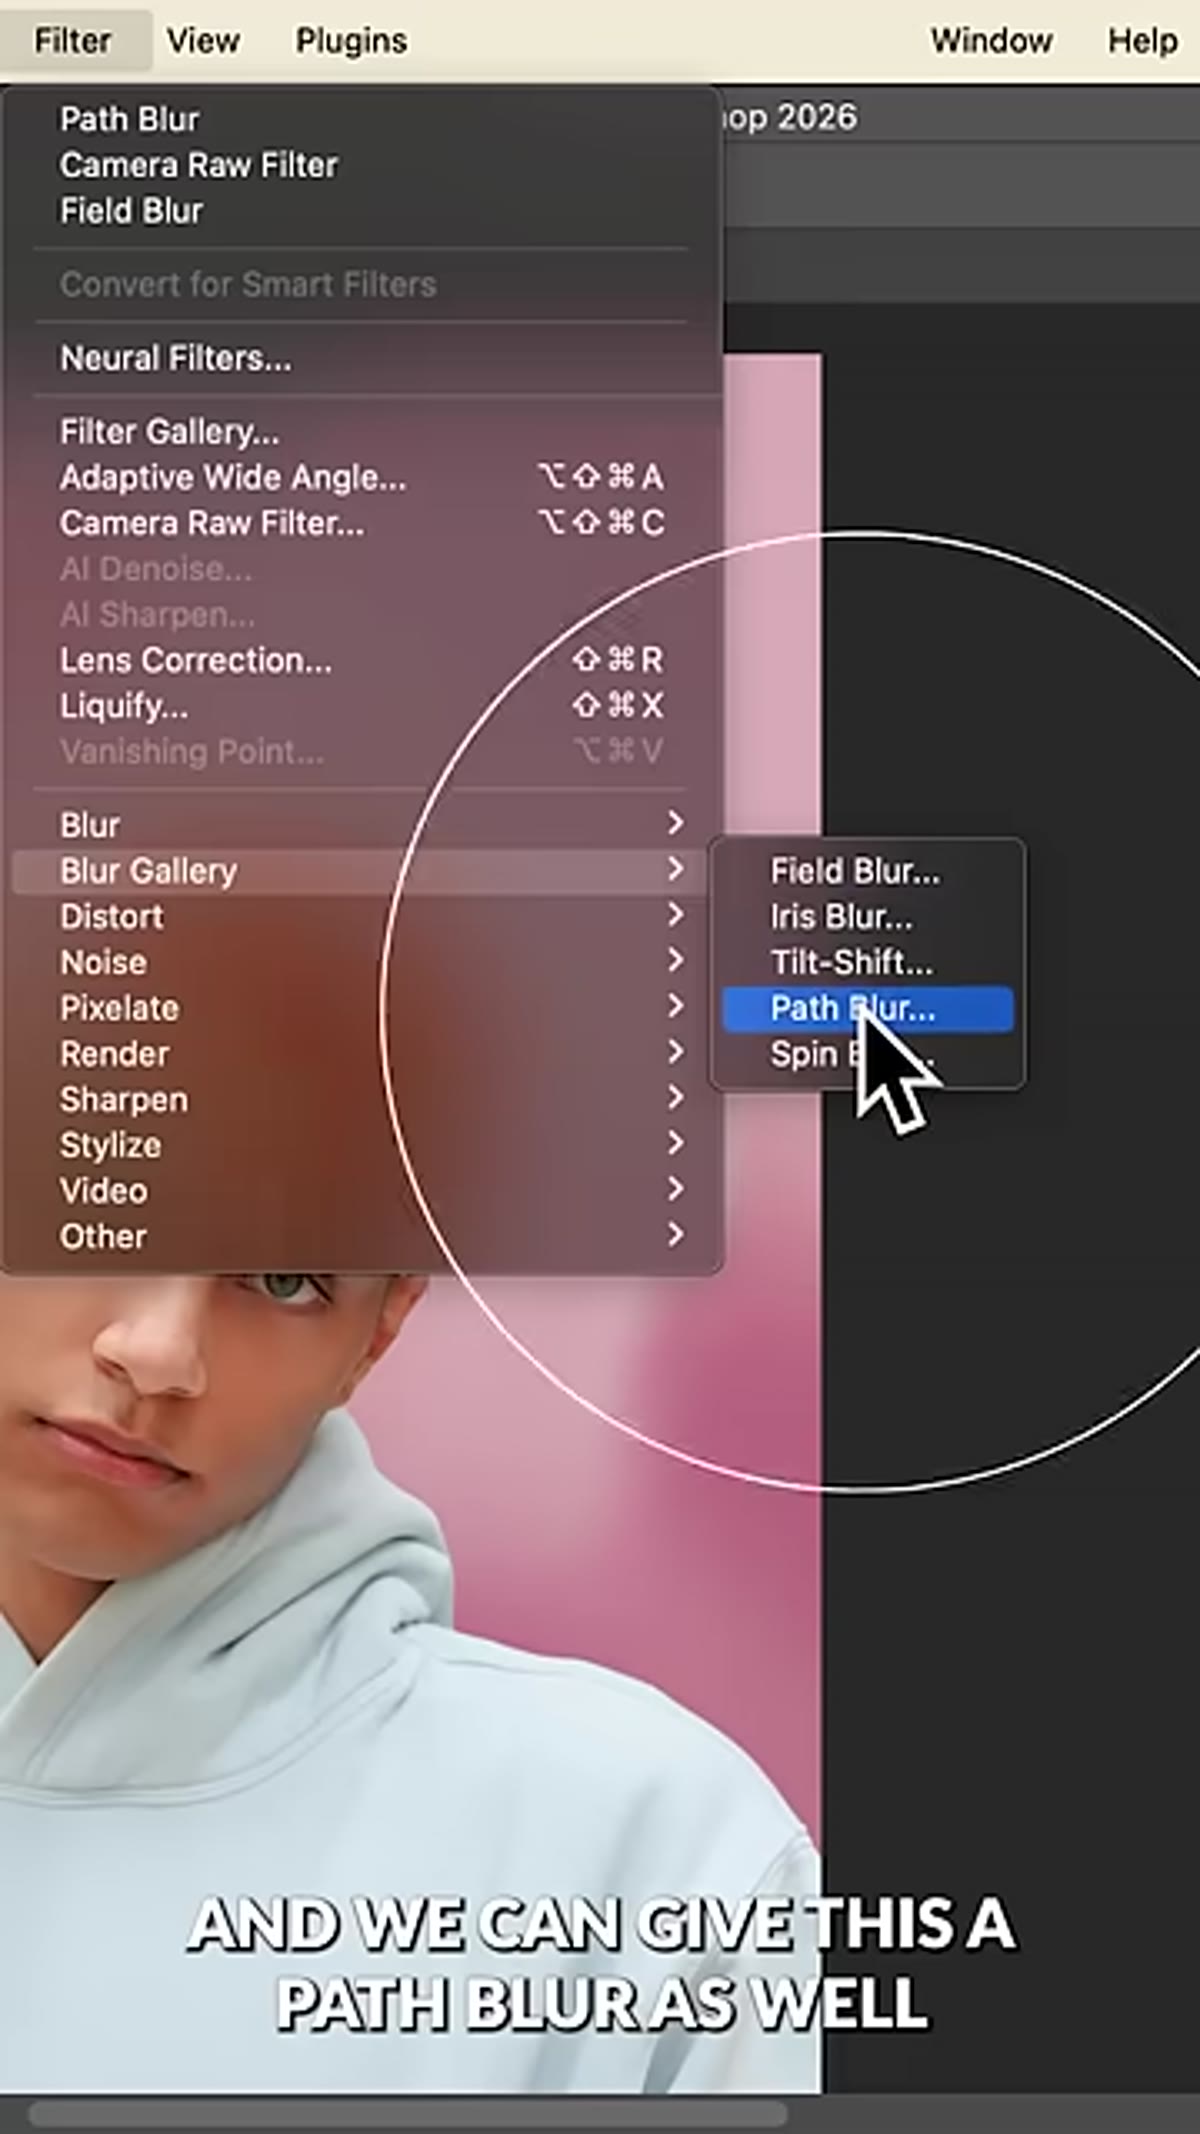
 Path Blur filter dialog open with blur path on background layer
This is the step that makes the whole effect work. First, convert your background layer to a Smart Object (right-click the layer, choose Convert to Smart Object). Then go to Filter, Blur Gallery, Path Blur. A default path will appear on your image. You can click and drag the endpoints to control the direction of the blur, and you can add additional paths by clicking anywhere on the canvas. The Speed slider controls blur intensity. Start around 50-80% and adjust based on how much movement you want. Because this is applied to a Smart Object, the blur is editable after the fact, which is the whole reason you convert to a Smart Object first.
Path Blur filter dialog open with blur path on background layer
This is the step that makes the whole effect work. First, convert your background layer to a Smart Object (right-click the layer, choose Convert to Smart Object). Then go to Filter, Blur Gallery, Path Blur. A default path will appear on your image. You can click and drag the endpoints to control the direction of the blur, and you can add additional paths by clicking anywhere on the canvas. The Speed slider controls blur intensity. Start around 50-80% and adjust based on how much movement you want. Because this is applied to a Smart Object, the blur is editable after the fact, which is the whole reason you convert to a Smart Object first.
Step 4: Apply a Path Blur to the Subject Layer
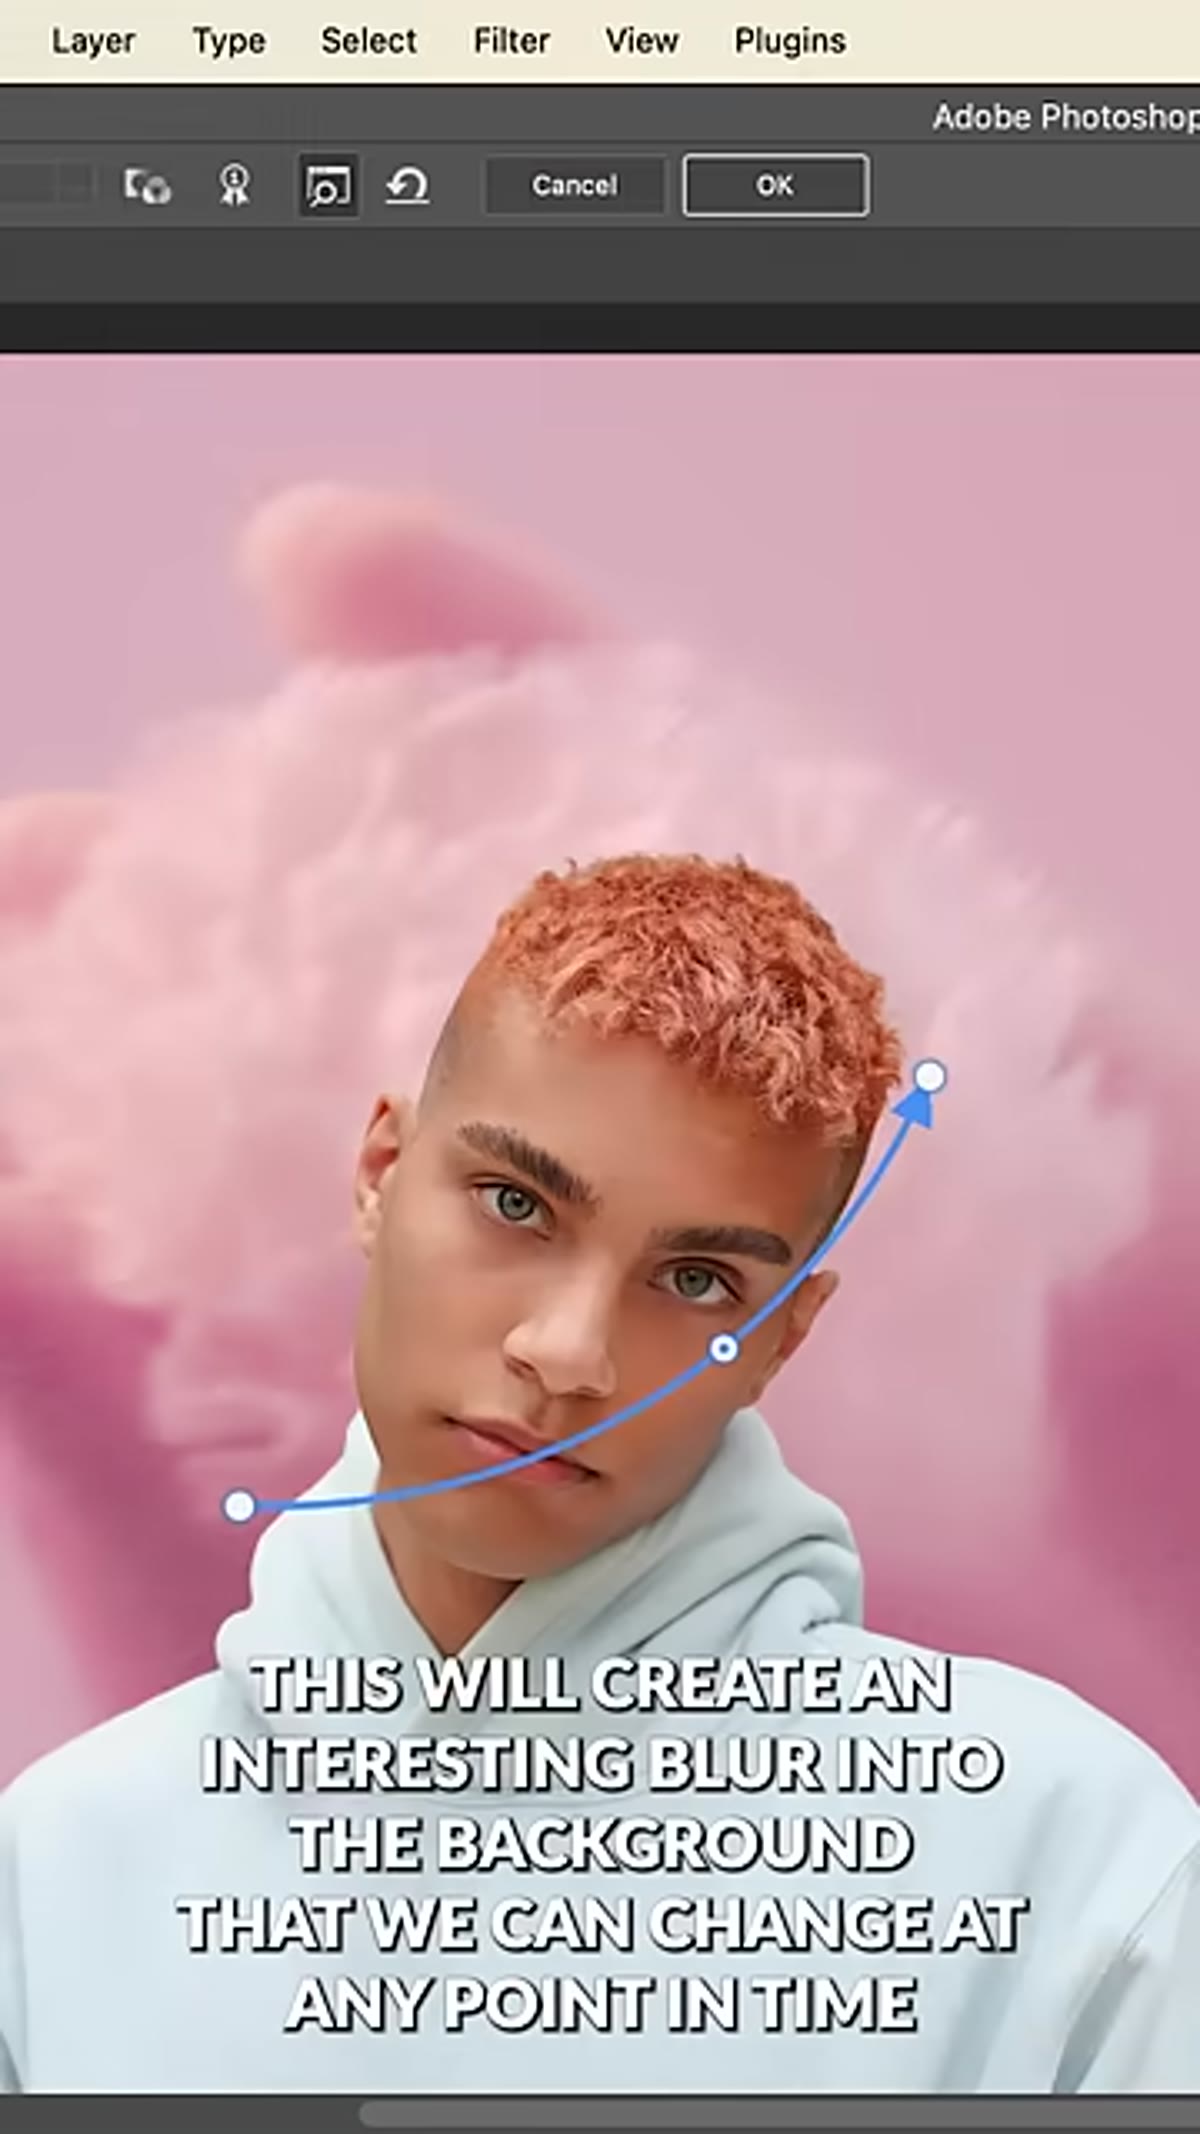
 Path Blur being applied to the subject Smart Object layer
This is the counterintuitive step, and it is also the one that makes the final image feel cohesive. Convert your subject layer to a Smart Object, then apply a Path Blur to it as well. Go heavier than feels comfortable. The point is to simulate the motion blur or focus fall-off you might get from a fast lens, and matching the blur direction between subject and background is what visually ties them together. Do not worry about losing detail at this stage because the next step handles that.
Path Blur being applied to the subject Smart Object layer
This is the counterintuitive step, and it is also the one that makes the final image feel cohesive. Convert your subject layer to a Smart Object, then apply a Path Blur to it as well. Go heavier than feels comfortable. The point is to simulate the motion blur or focus fall-off you might get from a fast lens, and matching the blur direction between subject and background is what visually ties them together. Do not worry about losing detail at this stage because the next step handles that.
Step 5: Paint Focus Back Into the Eyes
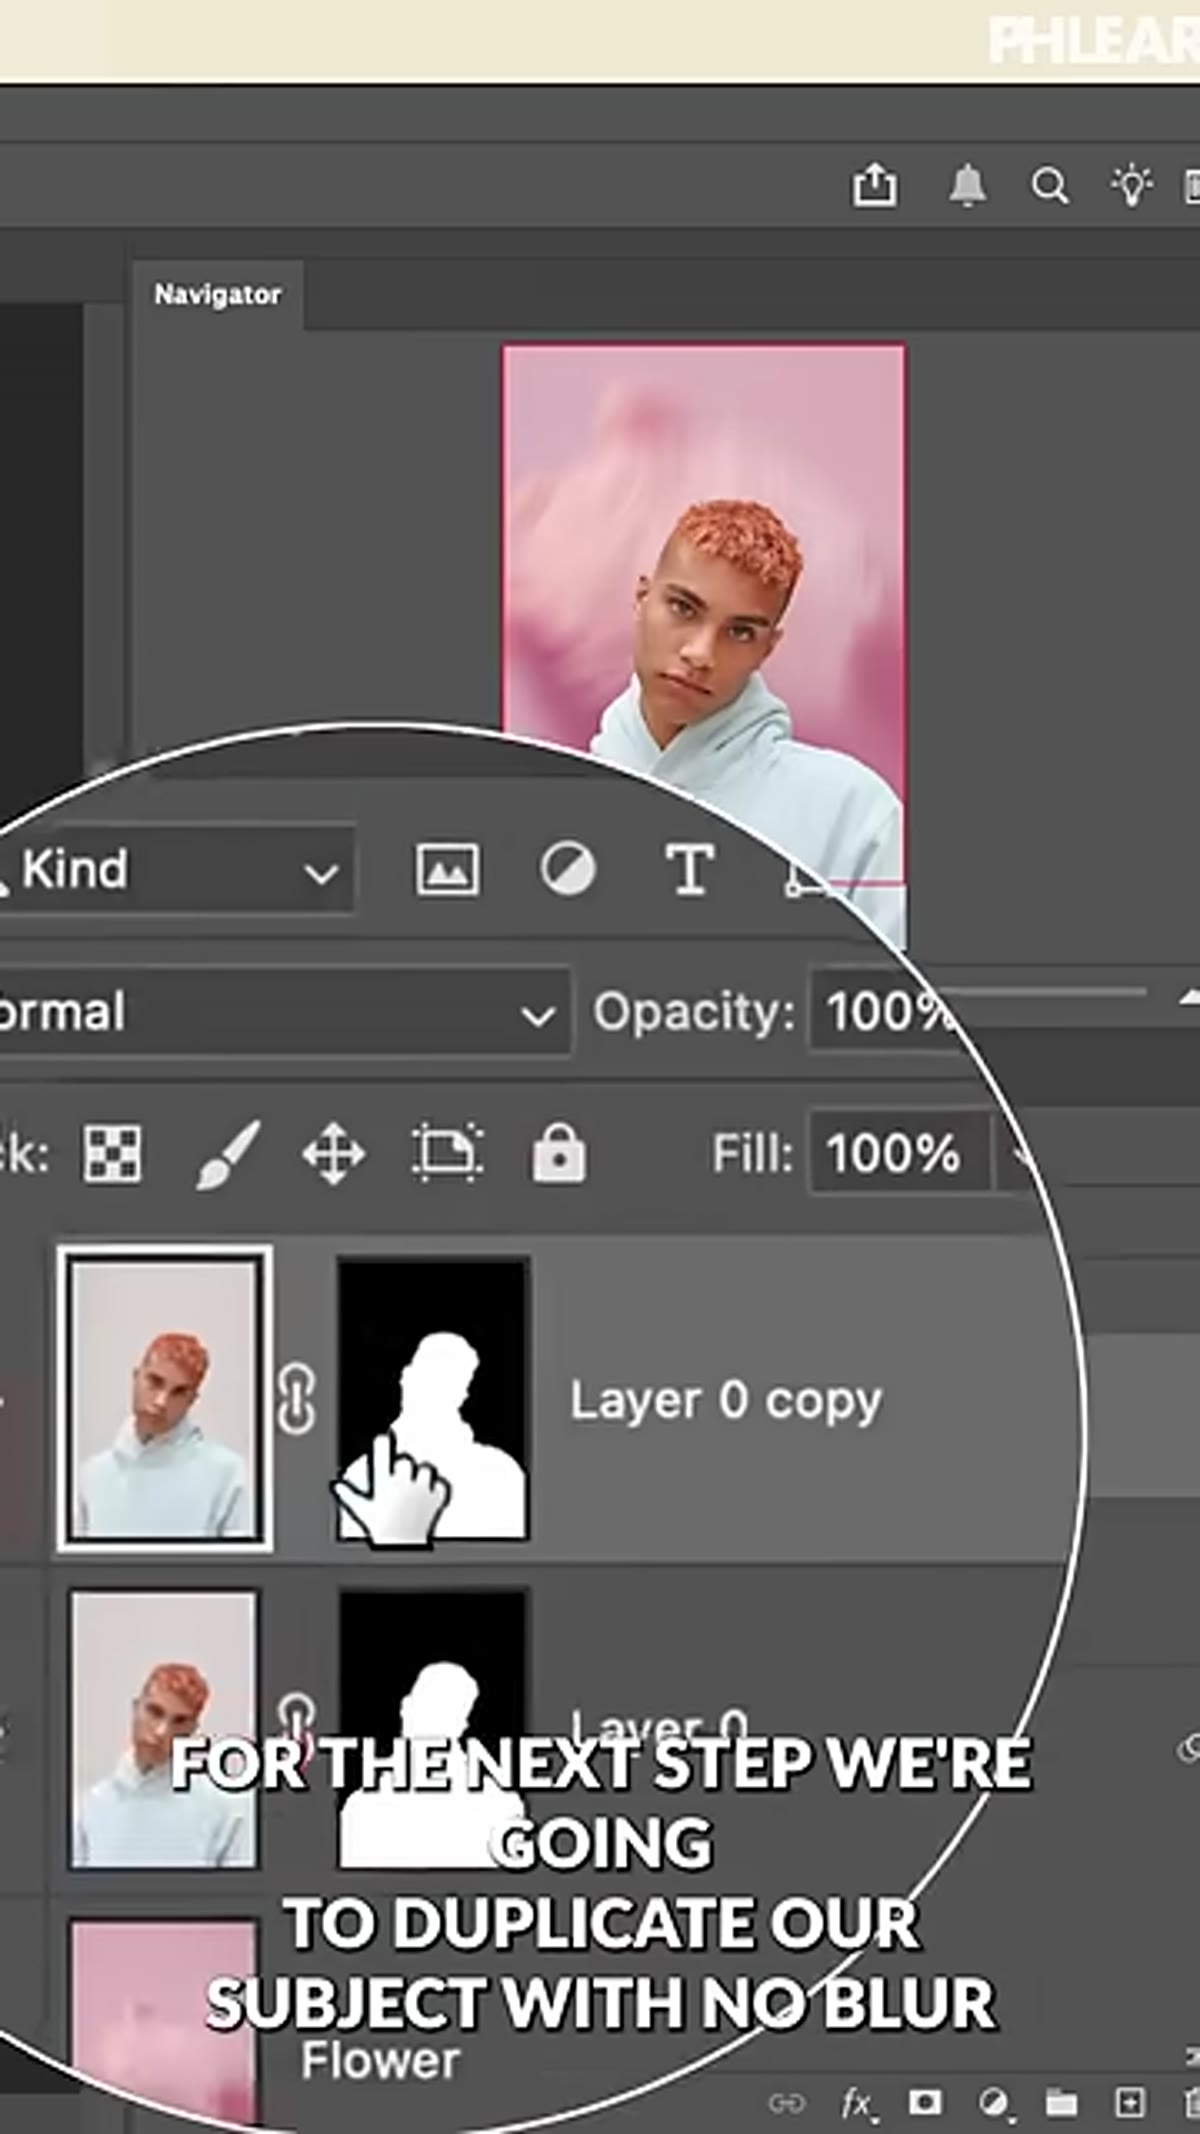 Black layer mask with white brush revealing sharp eyes on duplicate layer
Duplicate your subject Smart Object layer (before the blur is applied, or use the original masked layer from Step 1). Place this duplicate directly above the blurred subject layer. Add a black layer mask to it by holding Alt and clicking the Add Layer Mask button. A black mask hides the entire layer by default. Now, with a soft white brush at around 50-70% opacity, paint over the eyes only. What you are doing is revealing the sharp, original version of just the eyes through the blurred layer. The eyes hold the viewer’s attention, and having them in focus while the rest of the subject blurs out creates a sense of shallow depth of field that reads as very intentional.
Black layer mask with white brush revealing sharp eyes on duplicate layer
Duplicate your subject Smart Object layer (before the blur is applied, or use the original masked layer from Step 1). Place this duplicate directly above the blurred subject layer. Add a black layer mask to it by holding Alt and clicking the Add Layer Mask button. A black mask hides the entire layer by default. Now, with a soft white brush at around 50-70% opacity, paint over the eyes only. What you are doing is revealing the sharp, original version of just the eyes through the blurred layer. The eyes hold the viewer’s attention, and having them in focus while the rest of the subject blurs out creates a sense of shallow depth of field that reads as very intentional.
Step 6: Add a Color Blur Texture with Screen Blend Mode
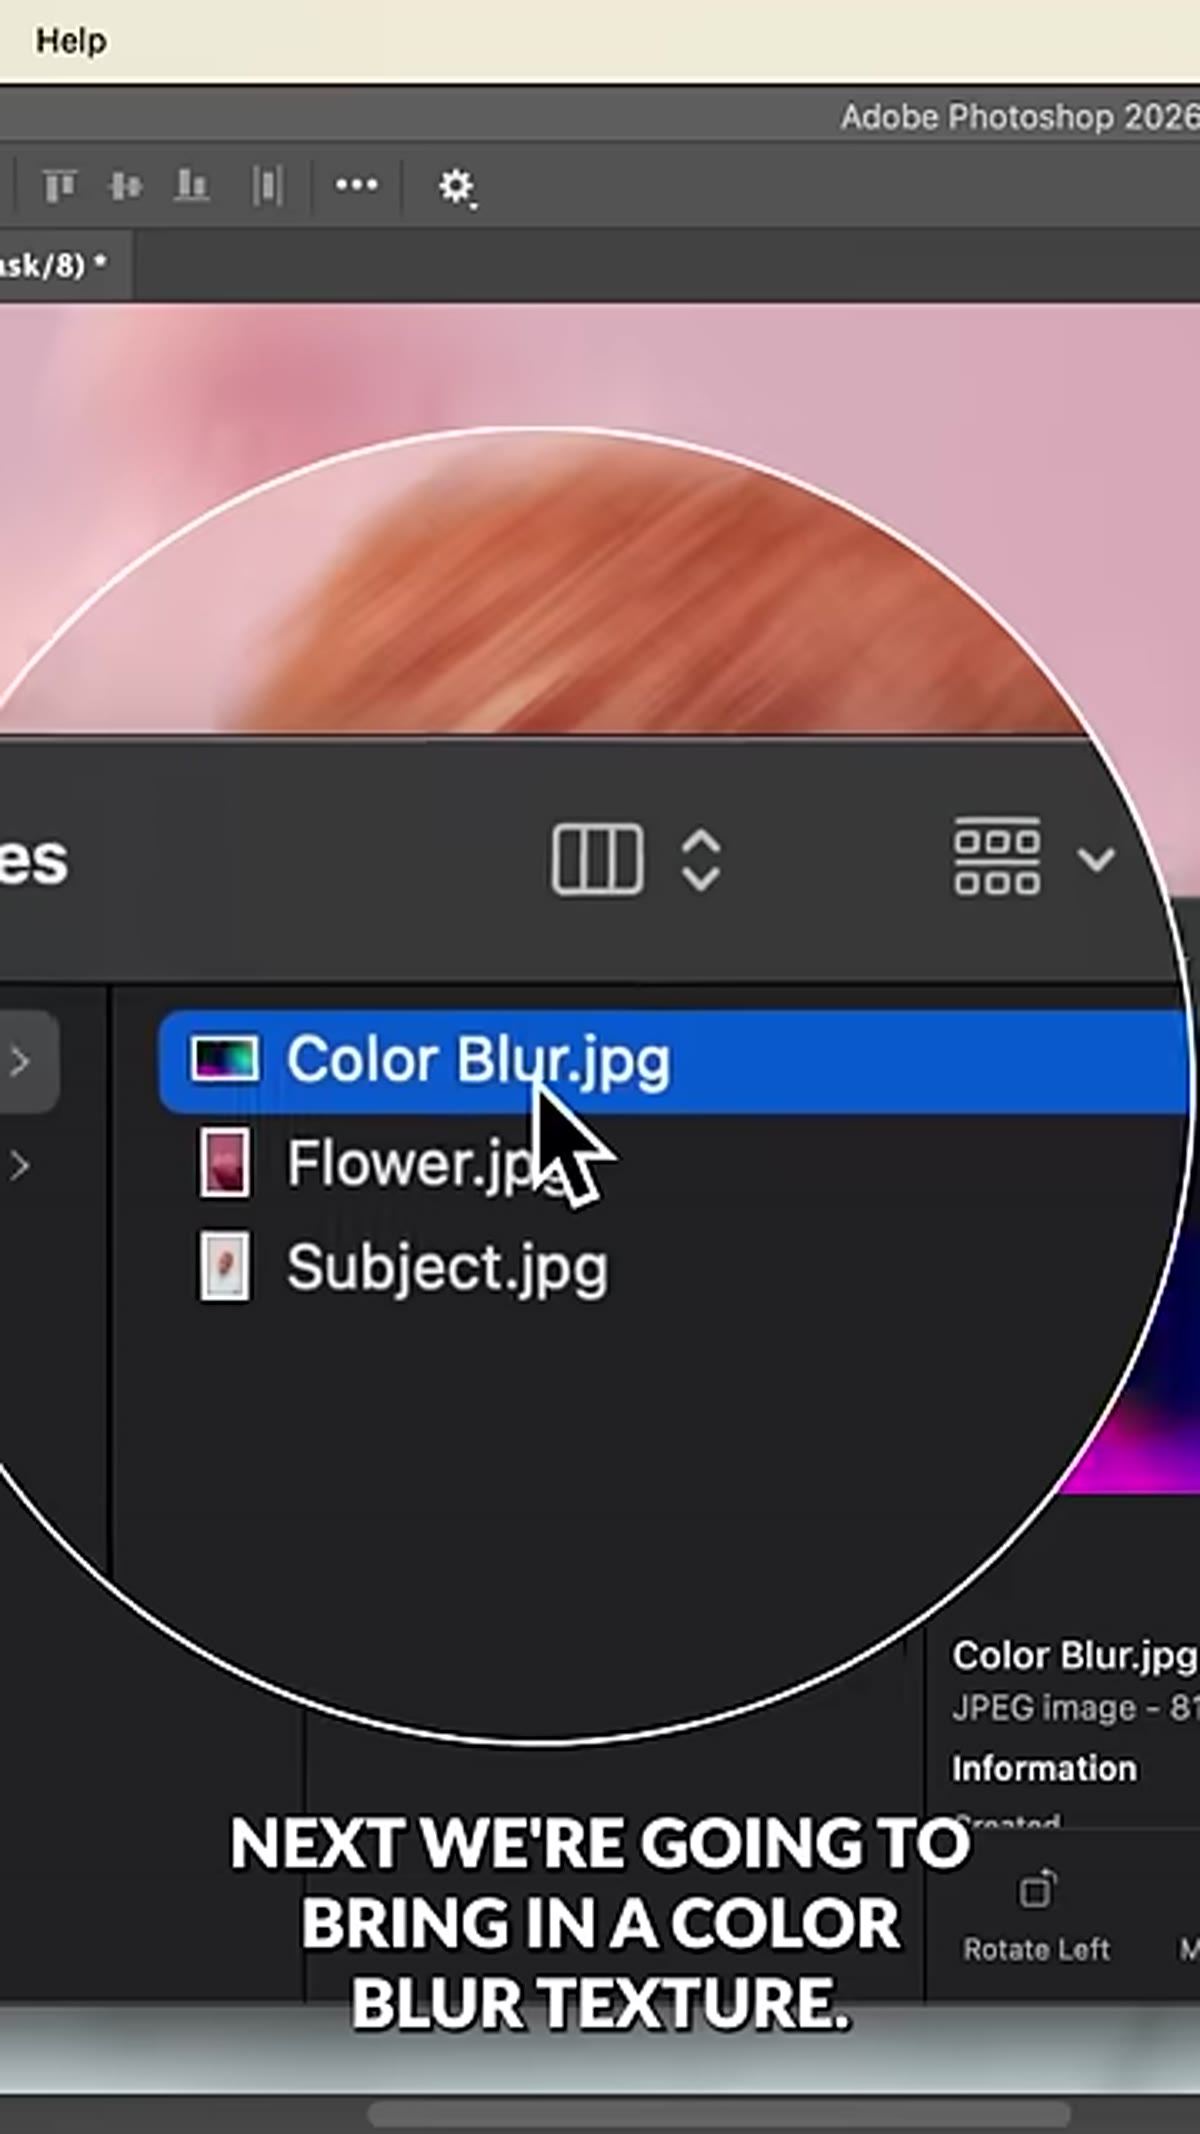 Color blur texture layer set to Screen blend mode over the composite
Drop a color blur texture image into the document above all other layers. These are widely available as free downloads, or you can create your own by defocusing a macro shot of lights or flowers. Scale it up to fill the canvas. Change the blend mode from Normal to Screen. Screen mode drops all the dark pixels and lets only the light and color from the texture layer show through. Use a Hue/Saturation adjustment layer clipped to the texture to shift the color without changing the texture itself. Sliding the Hue value left or right lets you match the color cast to your background image in seconds.
Color blur texture layer set to Screen blend mode over the composite
Drop a color blur texture image into the document above all other layers. These are widely available as free downloads, or you can create your own by defocusing a macro shot of lights or flowers. Scale it up to fill the canvas. Change the blend mode from Normal to Screen. Screen mode drops all the dark pixels and lets only the light and color from the texture layer show through. Use a Hue/Saturation adjustment layer clipped to the texture to shift the color without changing the texture itself. Sliding the Hue value left or right lets you match the color cast to your background image in seconds.
Step 7: Add a Grain Adjustment Layer
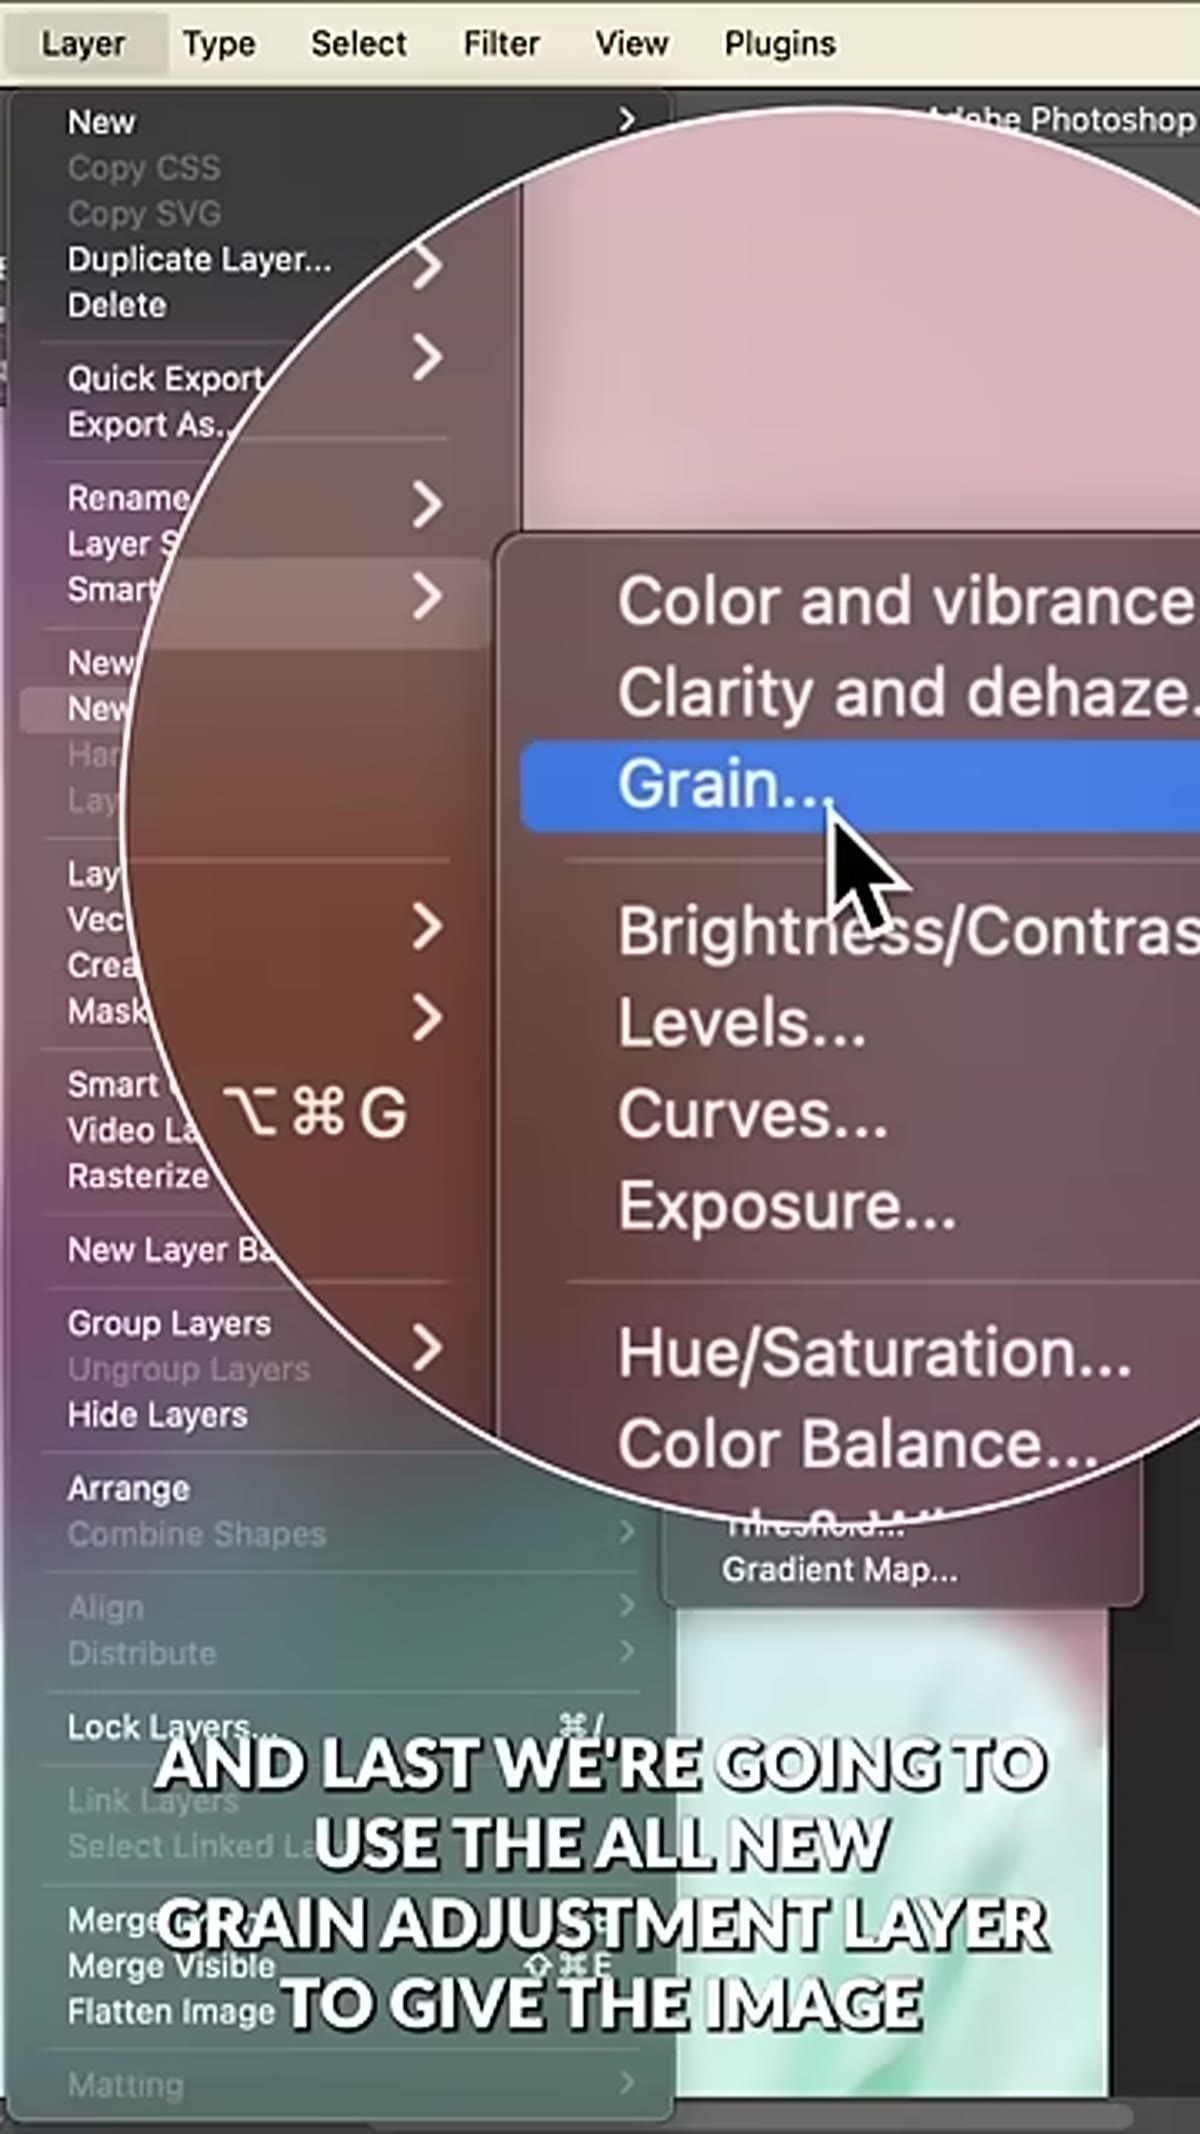 Grain adjustment layer panel with settings applied to the full composite
At the top of the stack, add Photoshop’s Grain adjustment layer. This is a relatively recent addition to Photoshop and does a much cleaner job than the legacy Noise filter. Keep the grain subtle: enough that you can see it at 100% zoom, but not so much that it reads as a filter. The function here is to unify all the layers visually. When everything has the same grain structure, the brain reads it as a single photograph rather than a composite.
Grain adjustment layer panel with settings applied to the full composite
At the top of the stack, add Photoshop’s Grain adjustment layer. This is a relatively recent addition to Photoshop and does a much cleaner job than the legacy Noise filter. Keep the grain subtle: enough that you can see it at 100% zoom, but not so much that it reads as a filter. The function here is to unify all the layers visually. When everything has the same grain structure, the brain reads it as a single photograph rather than a composite.
How I Use This in Commercial Work
The non-destructive structure of this workflow is what makes it actionable for client jobs rather than just a nice experiment. Because every blur is applied to a Smart Object, I can hand the file off as a layered PSD and make changes in a follow-up round without rebuilding anything. In practice, I have started saving a stripped-down version of this layer stack as a Photoshop action that handles Steps 1, 3, and 7 automatically, letting me focus creative attention on the path blur direction and the color grading, which are the steps that actually require judgment. If you are doing any volume of composite portrait work, even setting up a partial action for the repetitive parts of this process will pay back the setup time quickly.
One caveat: the Remove Background tool handles clean portraits well but struggles with wispy hair or complex edges against detailed backgrounds. For those cases, use the tool to get you most of the way there, then spend three to five minutes in Select and Mask to clean up the fringe. The rest of this workflow is solid enough that the mask quality is what will determine how good the final image looks.
The biggest thing I took from this tutorial is how much the blurred subject layer does for integration. Most people stop at blurring the background, which still leaves the subject looking separate. Blurring the subject slightly and then selectively restoring the eyes is the move that makes this feel like a camera effect rather than a Photoshop effect. That single idea is worth building into your workflow.
Watch the full tutorial on YouTube to see the effect in motion. Seeing the path blur paths being dragged in real time is useful context that a written breakdown can only partially replicate.
Comments (6)
I keep coming back to this article. It's that useful.
Tried this technique this morning. Game changer for real.
Great article! I actually covered something related on my site — the business angle is really complementary to this.
I've been looking for exactly this kind of tutorial. Perfect timing.
Just subscribed. If the rest of your content is this good, I'm in.
My workflow just got 10x faster. Not even kidding.
Leave a Comment