If you do any volume of editing, you have probably felt the friction of applying a LUT-based look to still photos. LUTs live comfortably in Premiere and DaVinci, but getting them to behave inside Lightroom has historically required workarounds that feel more like duct tape than a real system. That problem gets worse when you work with clients who want their product photography and video content to feel like they came from the same shoot. Matching the color grade across both formats is not optional. It is part of the deliverable.
I came across this Mango Street tutorial recently and it solved two problems at once: getting LUTs into Lightroom cleanly, and unlocking intensity control for any preset using the profile system. That second part is the one that genuinely surprised me. Watch the full tutorial on YouTube and then follow along below with the expanded walkthrough.
One thing worth flagging before you start: this workflow requires Lightroom 7.3 or later. The profile browser and the underlying profile infrastructure that makes all of this possible was not available in older versions. If you are on anything current, you are covered.
Step 1: Open Your RAW File in Photoshop’s Camera Raw
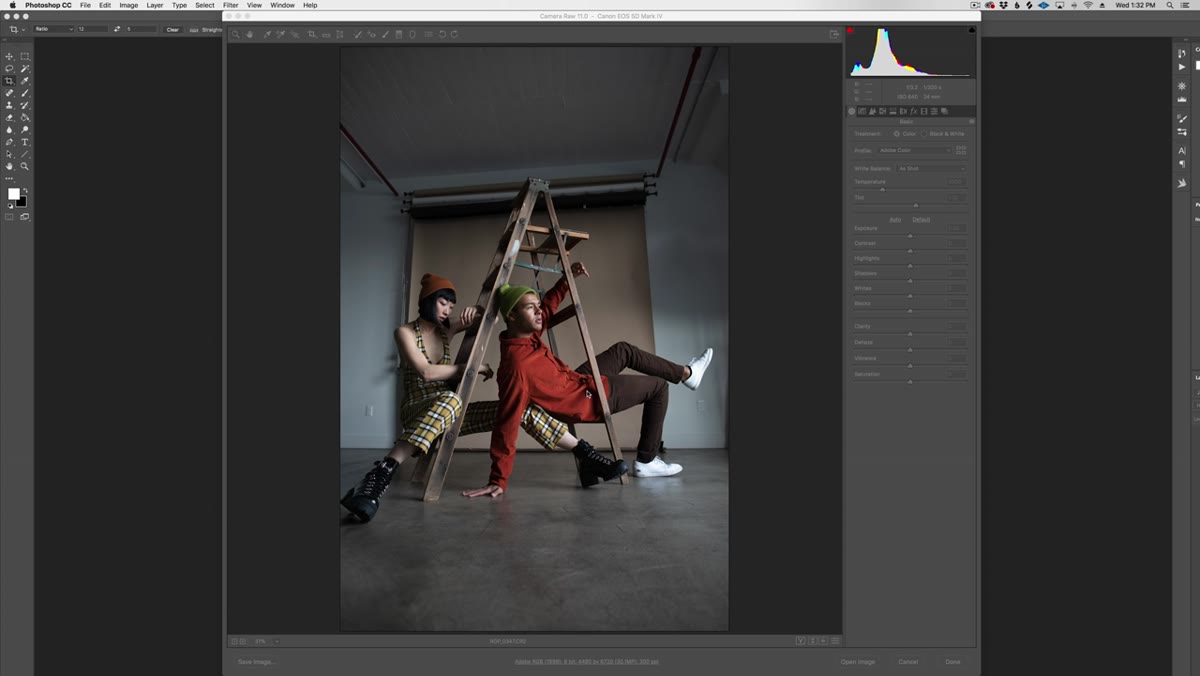
 Opening a RAW file inside Camera Raw in Photoshop
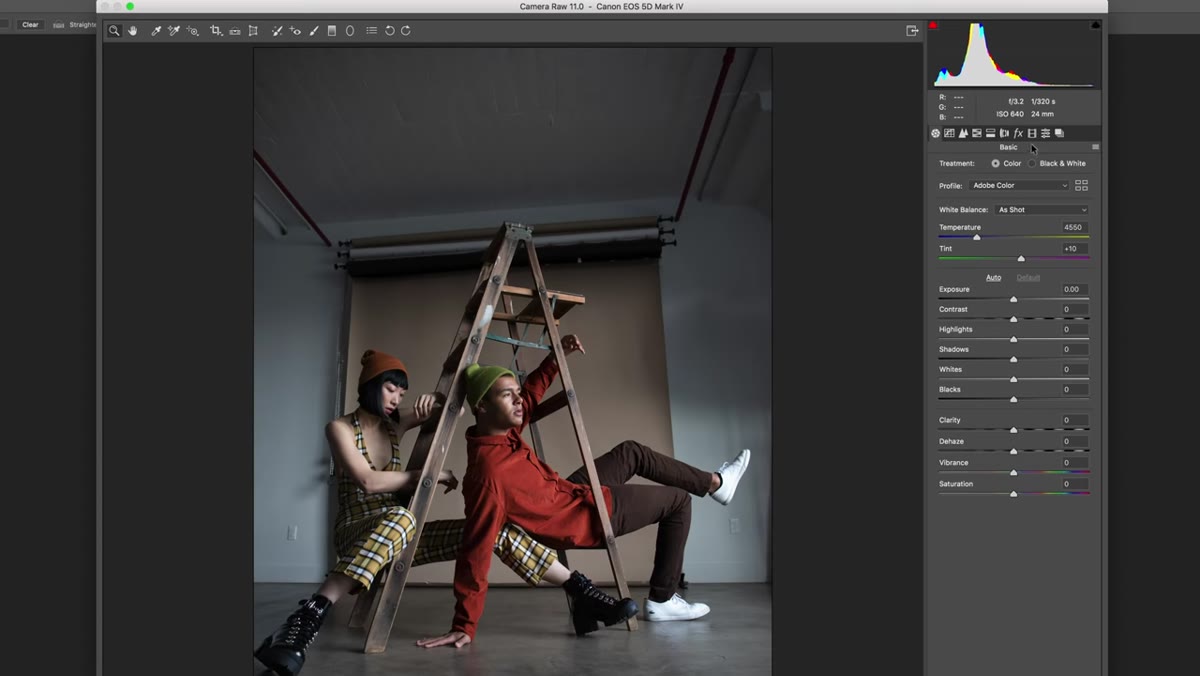
Start in Photoshop, not Lightroom. Open a RAW file directly, which will launch it in Camera Raw. This is where profiles are created, and Camera Raw is the bridge that gets those profiles into Lightroom automatically. If you try to build this workflow starting in Lightroom itself, you will hit a dead end. The profile creation tools live in Camera Raw.
Opening a RAW file inside Camera Raw in Photoshop
Start in Photoshop, not Lightroom. Open a RAW file directly, which will launch it in Camera Raw. This is where profiles are created, and Camera Raw is the bridge that gets those profiles into Lightroom automatically. If you try to build this workflow starting in Lightroom itself, you will hit a dead end. The profile creation tools live in Camera Raw.
Once your RAW file is open in Camera Raw, locate the Presets tab in the right-hand panel. This is the same tab you would use for standard Camera Raw presets, but you are going to use it differently here.
Step 2: Create a New Profile From a LUT
 Clicking the Presets tab inside Camera Raw
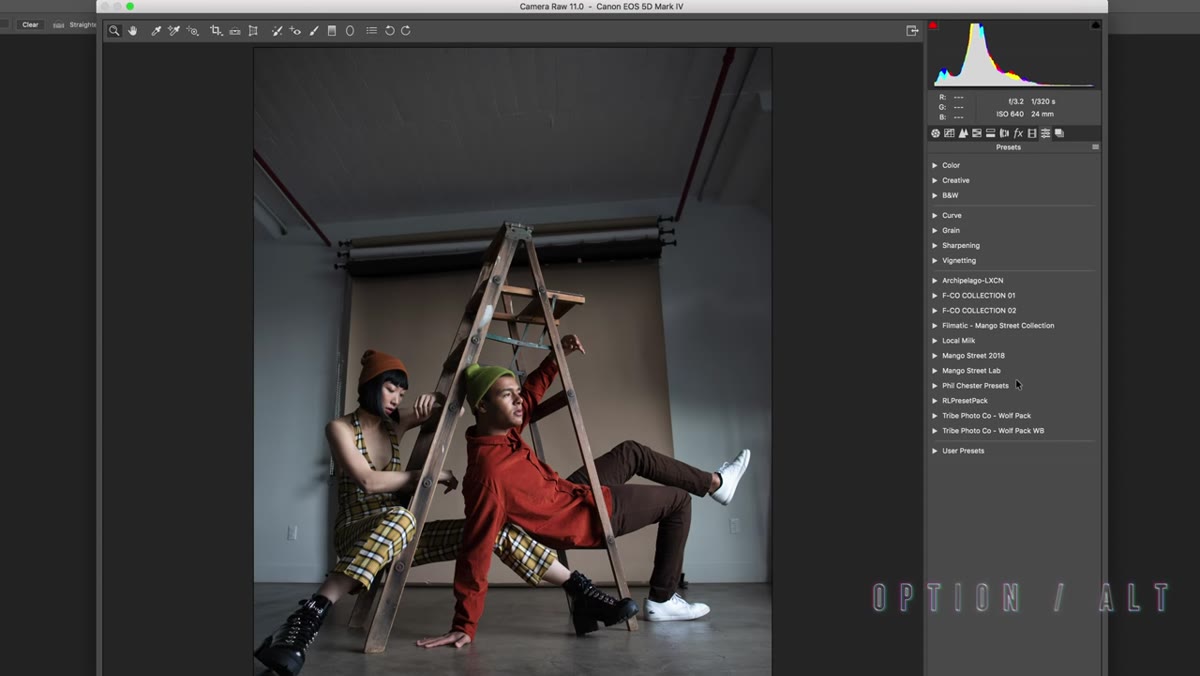
Hold Option on a Mac or Alt on a PC and click the new preset icon at the bottom of the Presets panel. That modifier key is the key. Clicking without it creates a standard preset. With it, you get the profile creation dialog instead, which is what you actually want.
Clicking the Presets tab inside Camera Raw
Hold Option on a Mac or Alt on a PC and click the new preset icon at the bottom of the Presets panel. That modifier key is the key. Clicking without it creates a standard preset. With it, you get the profile creation dialog instead, which is what you actually want.
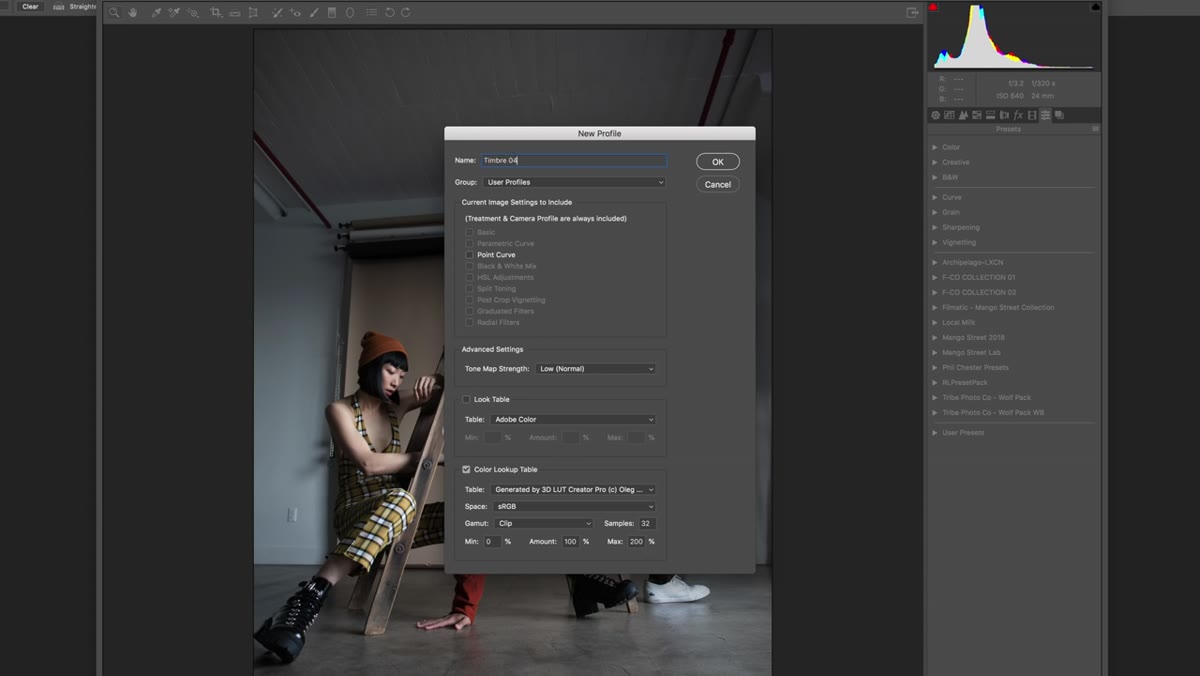
In the dialog, deselect everything that is checked by default, then check the box for Color Lookup Table. A file picker will prompt you to locate your LUT file. Select whichever LUT you want to use. The dialog will then show you three values: minimum, amount, and maximum. The minimum controls how much of the LUT is applied when the profile intensity slider is pulled all the way down. The amount value is the 100% mark. The maximum controls how far past 100% a user can push the effect. Leave these at their defaults to start. You can experiment with them once you understand how the slider behaves.
Step 3: Name and Save the Profile
 Naming the new LUT profile in the save dialog
Give your profile a clear, descriptive name. The name you assign here is exactly what will appear in Lightroom’s profile browser, so treat it like you are labeling a file for a client. Vague names cause confusion six months later. Click OK to save. The profile file is written to a shared location that both Camera Raw and Lightroom read from.
Naming the new LUT profile in the save dialog
Give your profile a clear, descriptive name. The name you assign here is exactly what will appear in Lightroom’s profile browser, so treat it like you are labeling a file for a client. Vague names cause confusion six months later. Click OK to save. The profile file is written to a shared location that both Camera Raw and Lightroom read from.
Now close Lightroom completely if it is already open. This is not optional. Lightroom loads its profile library at launch, so a running instance will not see the new profile until it restarts.
Step 4: Apply the LUT Profile in Lightroom
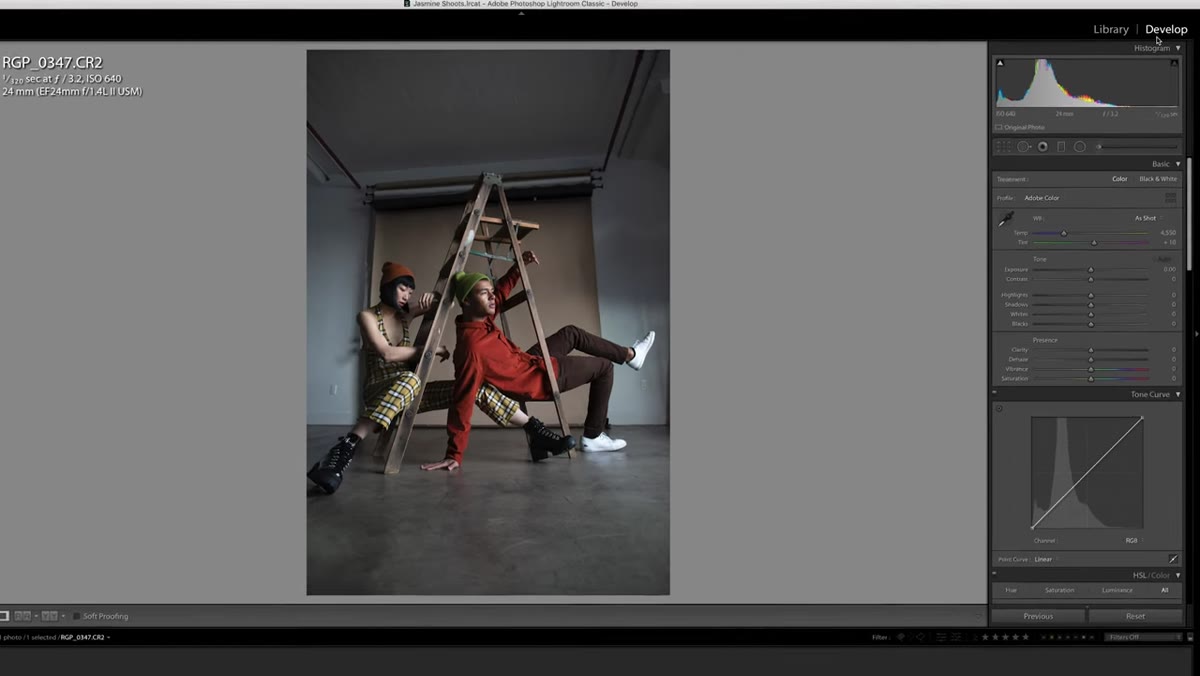 Selecting a photo in Lightroom’s Develop module
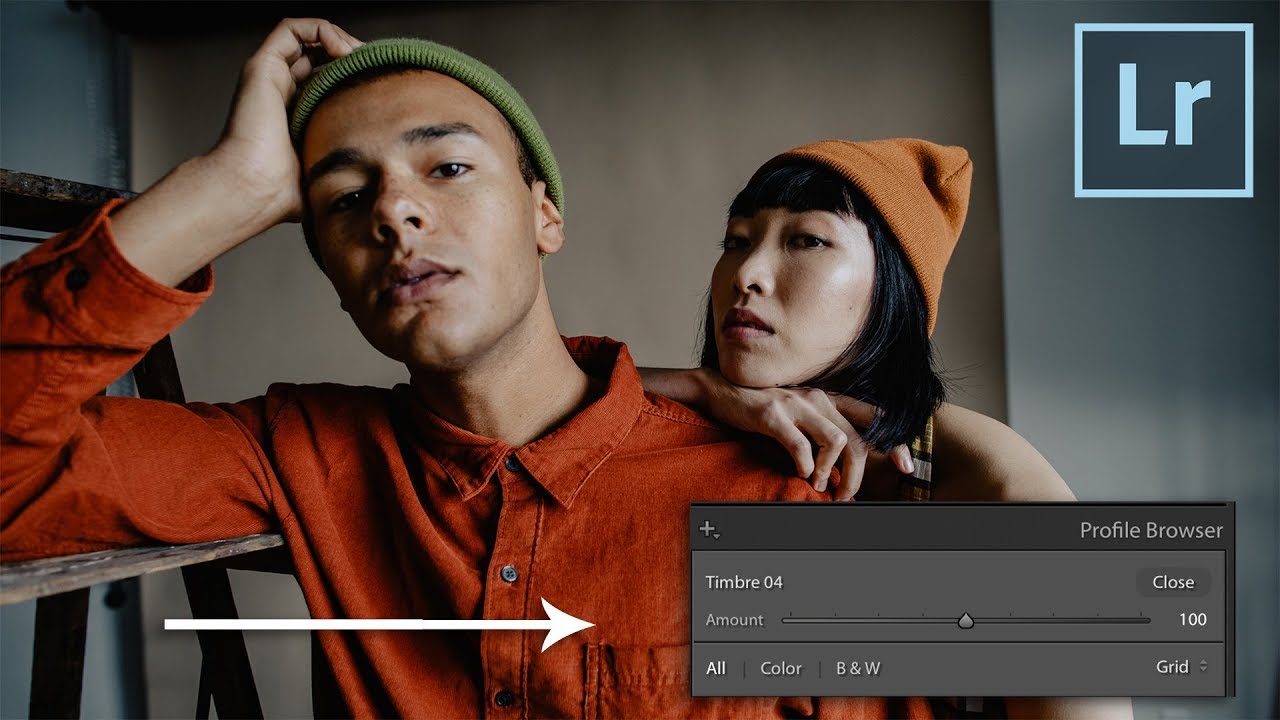
Reopen Lightroom, select a photo, and head into the Develop module. Look for the small grid icon near the top right of the panel area, just above the Basic panel. That opens the Profile Browser. Your new LUT profile should appear there, sorted into a user profiles section. Click it to apply.
Selecting a photo in Lightroom’s Develop module
Reopen Lightroom, select a photo, and head into the Develop module. Look for the small grid icon near the top right of the panel area, just above the Basic panel. That opens the Profile Browser. Your new LUT profile should appear there, sorted into a user profiles section. Click it to apply.
Once applied, you will see the Amount slider at the top of the Profile Browser panel. Drag it right to push the look harder. Drag it left to dial it back to a subtle grade. This is meaningfully different from using a LUT as a standalone preset, because you are not committing to a fixed intensity. You have a live, non-destructive control that stays editable throughout the rest of your Develop adjustments.
Step 5: Layer the Profile With Any Existing Preset
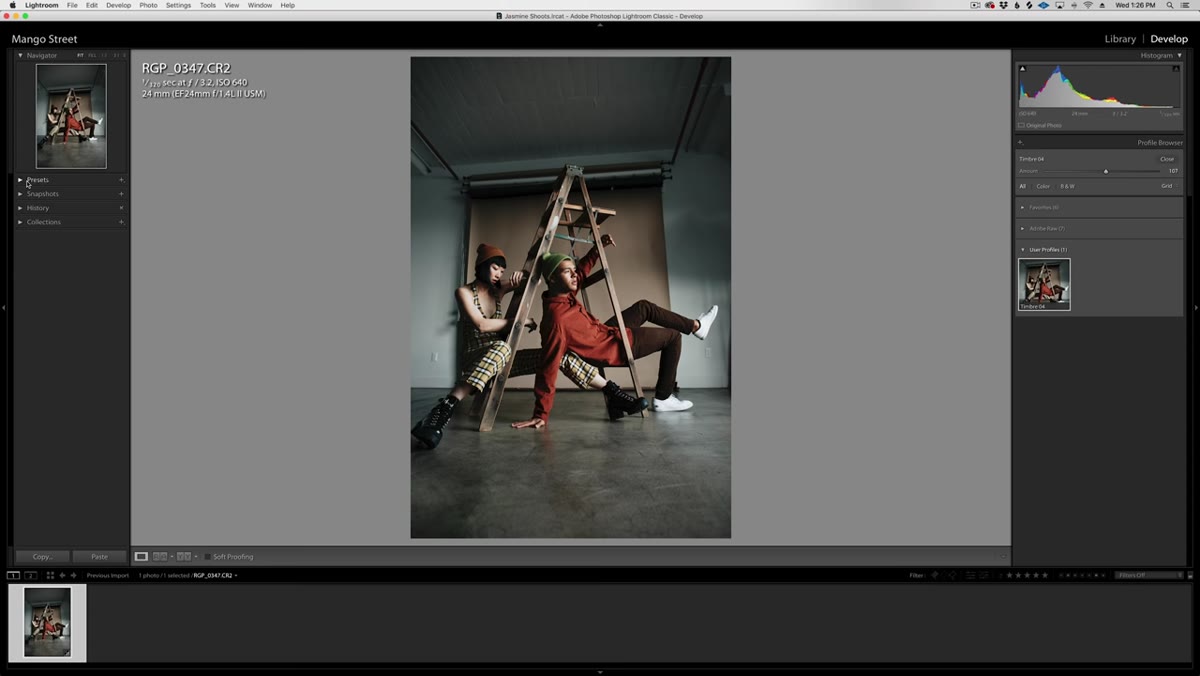 Profile applied alongside a Lightroom preset in Develop module
Because profiles operate at a layer below presets in Lightroom’s processing order, you can apply a LUT profile and then drop any of your existing Lightroom presets on top. Apply the profile first, set your intensity, then click your preset. The two stack together. This means your LUT-based color grade can sit underneath a film emulation preset, a contrast recipe, or whatever base look you have developed for your own work.
Profile applied alongside a Lightroom preset in Develop module
Because profiles operate at a layer below presets in Lightroom’s processing order, you can apply a LUT profile and then drop any of your existing Lightroom presets on top. Apply the profile first, set your intensity, then click your preset. The two stack together. This means your LUT-based color grade can sit underneath a film emulation preset, a contrast recipe, or whatever base look you have developed for your own work.
One important note: when you save a new preset after combining these two, make sure the Treatment and Profile checkbox is selected in the preset save dialog. Otherwise the profile reference will not be saved and you will lose that part of the look when the preset is applied to other images.
Step 6: Convert Any Lightroom Preset Into a Profile for Intensity Control
 Selecting an existing preset to convert into a camera profile
This is the part of the tutorial that opens up a genuinely new set of options. Back in Camera Raw’s Presets tab, select any existing Lightroom preset you already use. Then Option-click or Alt-click the new preset icon again to enter profile creation mode. This time, leave all the image settings checked and make sure Tone Map Strength is set to Low. Name the profile, click OK, restart Lightroom, and you will find your old preset now also exists as a profile with its own intensity slider.
Selecting an existing preset to convert into a camera profile
This is the part of the tutorial that opens up a genuinely new set of options. Back in Camera Raw’s Presets tab, select any existing Lightroom preset you already use. Then Option-click or Alt-click the new preset icon again to enter profile creation mode. This time, leave all the image settings checked and make sure Tone Map Strength is set to Low. Name the profile, click OK, restart Lightroom, and you will find your old preset now also exists as a profile with its own intensity slider.
The practical upside is significant. Presets are binary in normal use. Either you apply them at full strength or you reduce them manually by dialing back individual sliders. Turning a preset into a profile lets you find the 40% version, or the 70% version, without touching a single underlying setting.
What I Would Add From My Own Experience
The profile system is powerful, but organization is where it pays off over time. I keep a master Lightroom catalog specifically for profile and preset testing, separate from any client work. When I build something new, I test it there first against a range of image types: harsh sunlight, flat overcast, studio strobes, mixed ambient. A LUT that looks refined on a golden-hour portrait can break down fast on an e-commerce white-background shot. Knowing the range of a profile before it enters a live client project saves the kind of corrections that eat into margins.
Also worth noting: if you maintain LUTs from a video colorist or DIT, get the exact files they used in post rather than trying to match by eye. The whole point of this workflow is precision. An approximated LUT defeats it.
The single most transferable idea from this tutorial is that profiles give you a dimension of control that presets cannot. Presets are recipes. Profiles are ingredients. Once you start treating them that way, you can build combinations that are specific to your work rather than just applying someone else’s look at full strength and hoping it fits.
Watch the full tutorial on YouTube to see the Mango Street team walk through each step in real time. The whole thing runs just over three minutes, which is a good ratio for what it teaches.
Comments
Leave a Comment