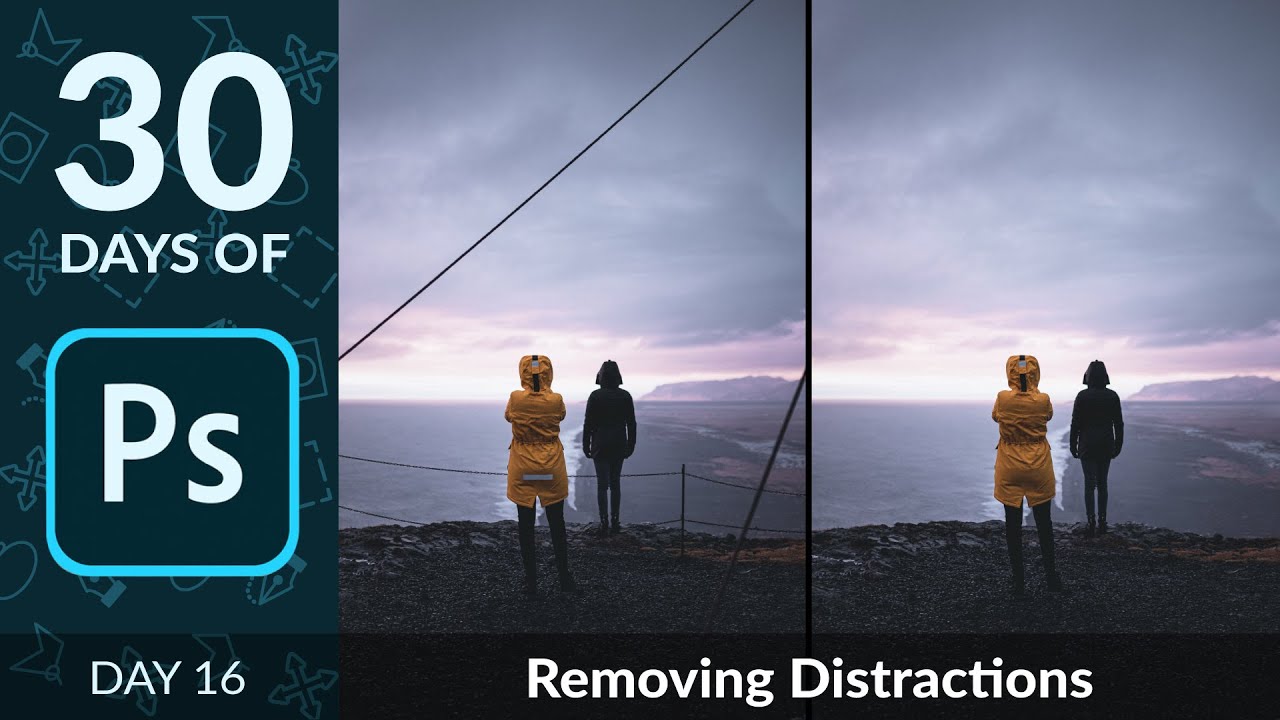
Distracting backgrounds are the silent killers of otherwise great commercial shots. I’ve been doing post-production work for ad agencies and e-commerce brands for long enough to know that a stray power line, a piece of reflective tape, or a stretch of chain-link fence can torpedo an image that the photographer spent an hour lighting perfectly. The fix usually takes less than three minutes in Photoshop, but only if you reach for the right tools in the right order.
In this Aaron Nace (PHLEARN) tutorial - part of his excellent 30 Days of Photoshop series - Aaron walks through exactly that workflow using a street portrait cluttered with poles, fencing, and other urban debris. Watch the full tutorial on YouTube if you want to follow along with his sample image. What I want to do here is break down each step so you can apply this directly to your own work, with or without the video running.
The thing that makes this tutorial worth your time is the sequencing. Aaron’s approach is not “throw tools at it and hope.” It’s a deliberate hierarchy: start with the fastest automated tool, identify where it falls short, then step up to the manual tool that gives you real control. That’s exactly how I approach it in a production environment, and it’s the habit that separates fast, clean retouching from the kind that takes forever and still looks patchy.
Step 1: Create a New Empty Layer Before You Touch Anything
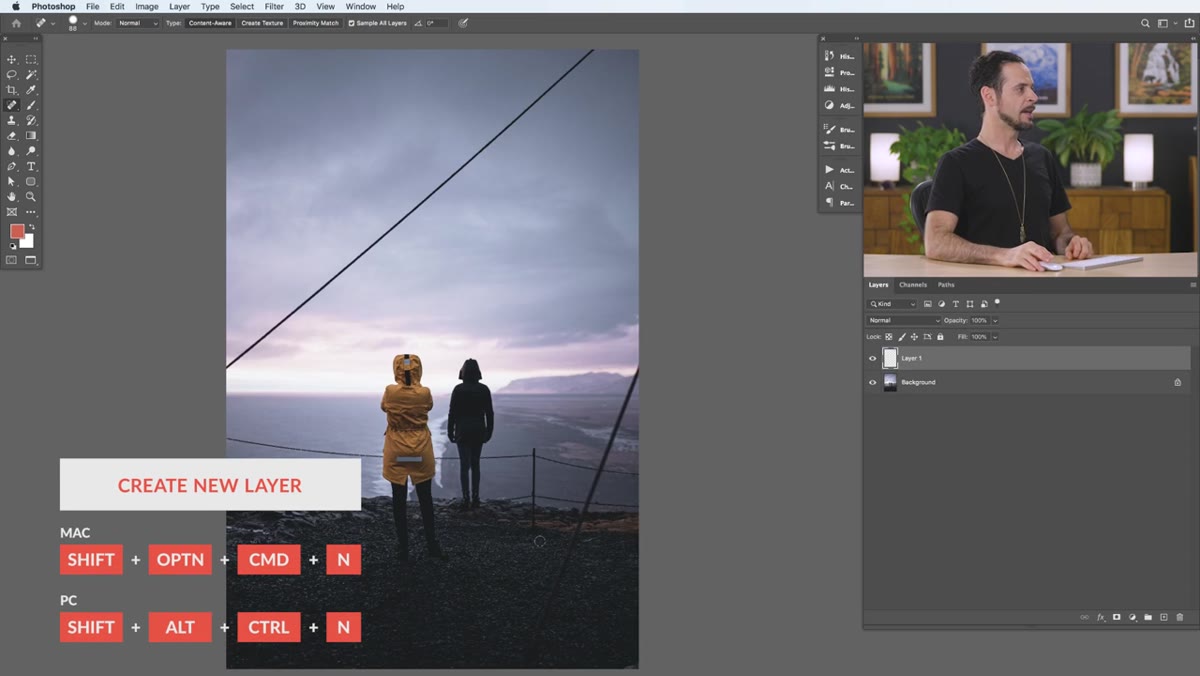 Creating a new layer above the background image layer
Before you pick up any retouching tool, add a new blank layer above your image. This is non-negotiable in a production workflow. Working on a separate layer means your original pixel data stays completely intact, and you can toggle your retouching on and off to show a client the before and after without duplicating the entire file. It also means you can selectively erase or repaint corrections without starting over. Name the layer something obvious like “Cleanup” so future-you doesn’t have to guess.
Creating a new layer above the background image layer
Before you pick up any retouching tool, add a new blank layer above your image. This is non-negotiable in a production workflow. Working on a separate layer means your original pixel data stays completely intact, and you can toggle your retouching on and off to show a client the before and after without duplicating the entire file. It also means you can selectively erase or repaint corrections without starting over. Name the layer something obvious like “Cleanup” so future-you doesn’t have to guess.
Step 2: Set Up the Spot Healing Brush Correctly
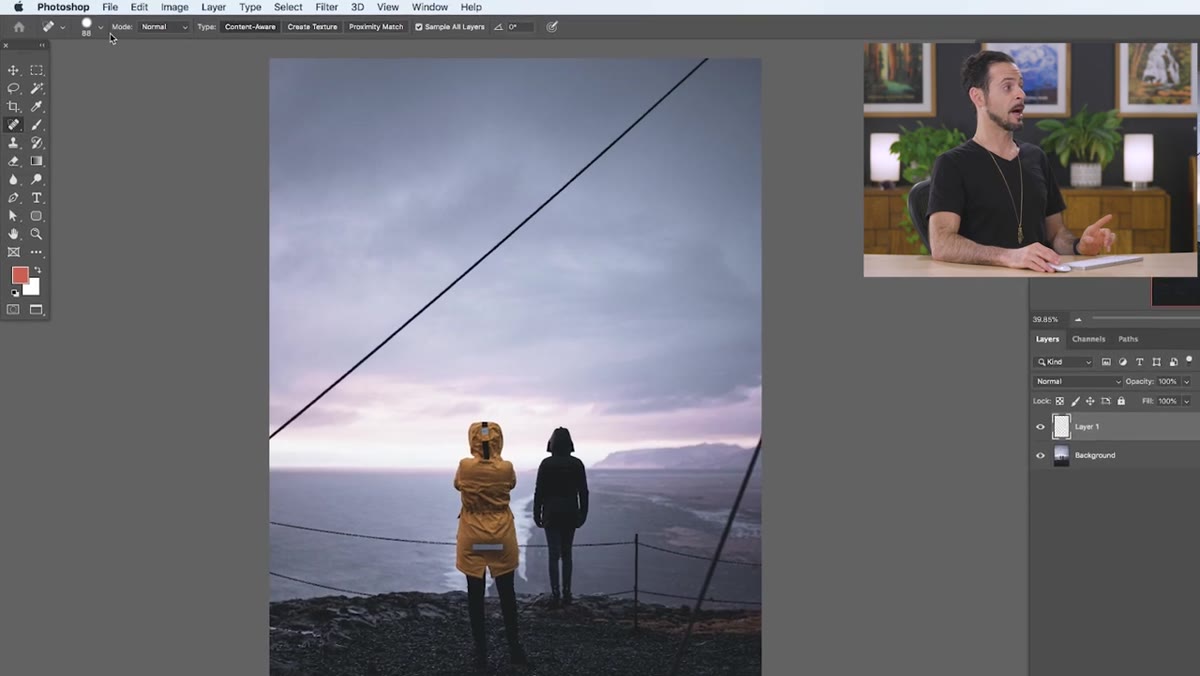 Spot Healing Brush options bar showing Content-Aware and Sample All Layers settings
Grab the Spot Healing Brush from the toolbar (keyboard shortcut: J). Up in the options bar, confirm that Mode is set to Normal and Type is set to Content-Aware. The critical checkbox here is “Sample All Layers.” Without that active, the brush will only read the empty layer you just created, find nothing, and produce garbage results. With it checked, Photoshop samples the actual image data below and uses that to calculate its fill. This is what makes the non-destructive layer setup actually work.
Spot Healing Brush options bar showing Content-Aware and Sample All Layers settings
Grab the Spot Healing Brush from the toolbar (keyboard shortcut: J). Up in the options bar, confirm that Mode is set to Normal and Type is set to Content-Aware. The critical checkbox here is “Sample All Layers.” Without that active, the brush will only read the empty layer you just created, find nothing, and produce garbage results. With it checked, Photoshop samples the actual image data below and uses that to calculate its fill. This is what makes the non-destructive layer setup actually work.
Brush hardness is worth adjusting too. A softer brush blends edges more naturally on complex backgrounds like foliage or textured walls. A harder brush works better on surfaces with clean lines - painted walls, skies, or anything with a defined edge. Right-click anywhere on the canvas to pull up the brush picker and adjust hardness on the fly.
Step 3: Paint Over Distractions in Small Passes
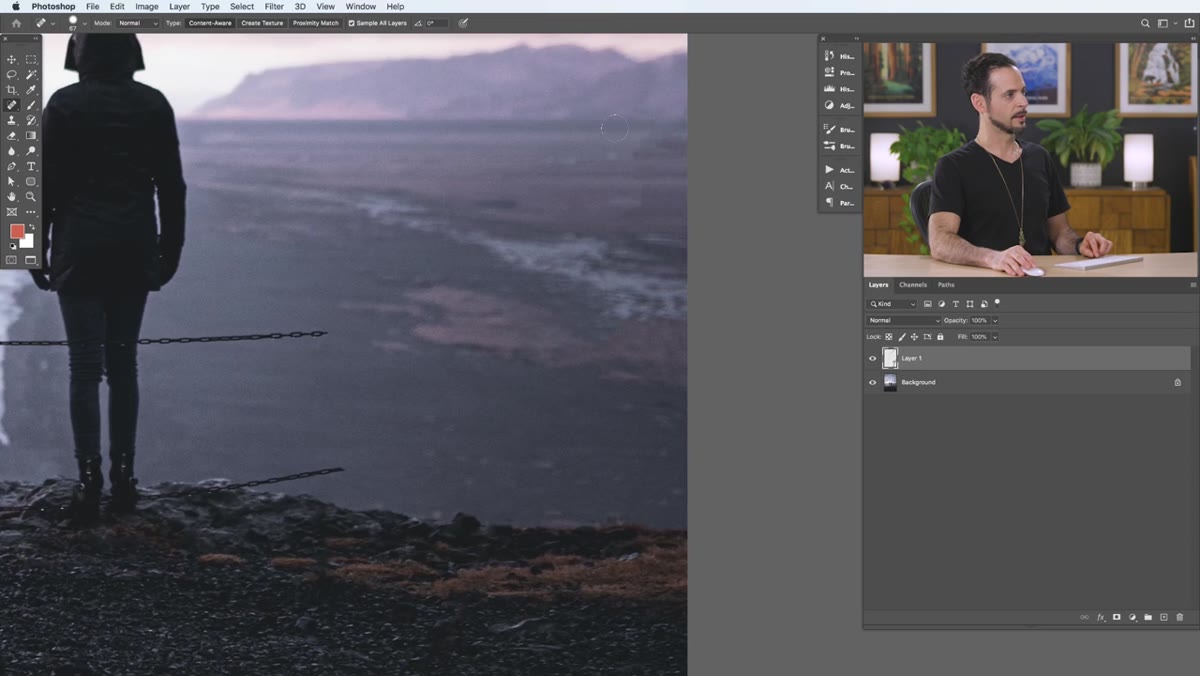
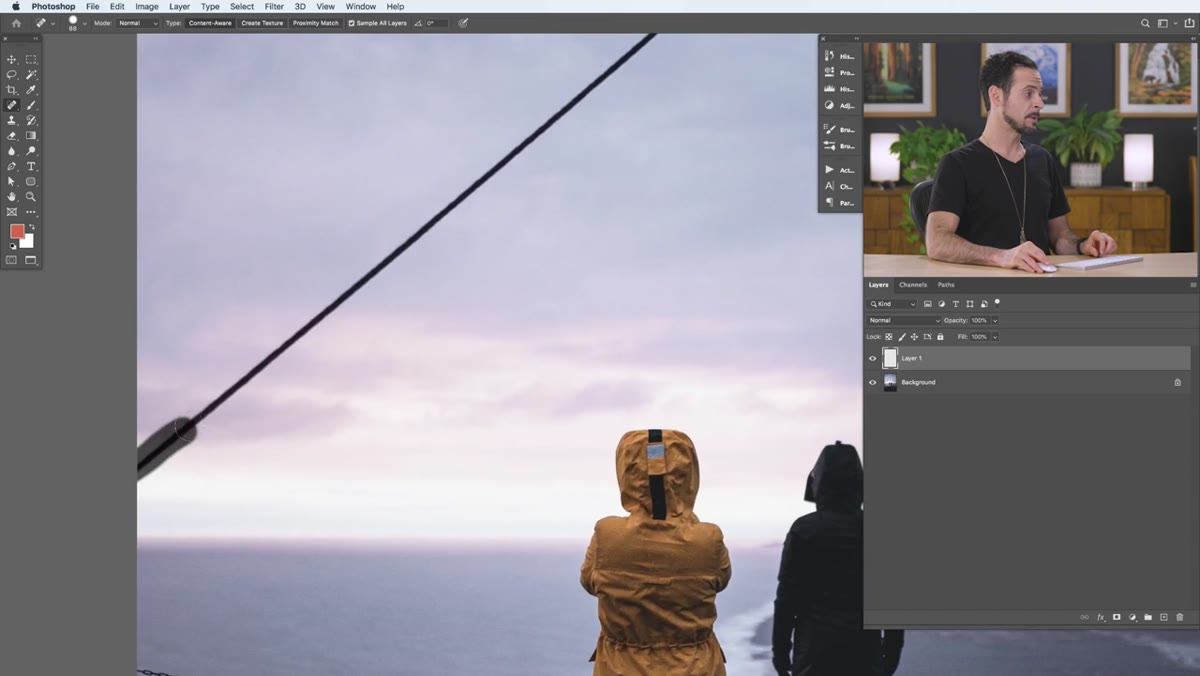 Painting over a vertical pole with the Spot Healing Brush on a blank layer
With your empty layer selected and the brush configured, start painting directly over whatever you want removed. Photoshop analyzes the surrounding pixels and synthesizes a replacement. For simple, repetitive backgrounds like open sky or pavement, the results are often close to perfect on the first stroke.
Painting over a vertical pole with the Spot Healing Brush on a blank layer
With your empty layer selected and the brush configured, start painting directly over whatever you want removed. Photoshop analyzes the surrounding pixels and synthesizes a replacement. For simple, repetitive backgrounds like open sky or pavement, the results are often close to perfect on the first stroke.
The key technique Aaron demonstrates here is working in smaller sections rather than trying to cover a large object in one sweeping pass. If you paint over a tall pole in one drag, Content-Aware fill has to make a lot of guesses across a long distance, and the result often looks smeared or misaligned. Break it into shorter strokes. Let Photoshop process each section. You’ll get cleaner output and you’ll have a clearer sense of where the algorithm is struggling before you’ve committed to a messy result.
Step 4: Change Stroke Direction When Results Look Off
 Re-painting a previously corrected area using horizontal brush strokes
Sometimes a first pass leaves a visible seam or a color shift that reads as “something was here.” Before reaching for a different tool, try repainting the same area with strokes running perpendicular to your first attempt. If you dragged vertically the first time, try a horizontal stroke. The Content-Aware algorithm weights surrounding texture differently depending on the direction of your input, and a simple direction change can resolve an artifact without any extra steps.
Re-painting a previously corrected area using horizontal brush strokes
Sometimes a first pass leaves a visible seam or a color shift that reads as “something was here.” Before reaching for a different tool, try repainting the same area with strokes running perpendicular to your first attempt. If you dragged vertically the first time, try a horizontal stroke. The Content-Aware algorithm weights surrounding texture differently depending on the direction of your input, and a simple direction change can resolve an artifact without any extra steps.
This is a small thing Aaron mentions almost in passing, but in practice it solves probably 30 percent of the cases where I’d otherwise feel compelled to switch to a slower manual tool. Worth trying every time before you escalate.
Step 5: Switch to the Clone Stamp for Problem Areas
 Clone Stamp tool selected with a defined source point on clean background area
When the Spot Healing Brush produces results that are clearly wrong - repeated patterns, smudged edges, or obvious color mismatches - it’s time to bring in the Clone Stamp (keyboard shortcut: S). The difference between the two tools is fundamental: the Spot Healing Brush decides what the fill should look like. The Clone Stamp copies from wherever you tell it to.
Clone Stamp tool selected with a defined source point on clean background area
When the Spot Healing Brush produces results that are clearly wrong - repeated patterns, smudged edges, or obvious color mismatches - it’s time to bring in the Clone Stamp (keyboard shortcut: S). The difference between the two tools is fundamental: the Spot Healing Brush decides what the fill should look like. The Clone Stamp copies from wherever you tell it to.
To use it, hold Alt (Option on Mac) and click on a clean area of the image you want to use as your source. Then paint over the problem area. You’re manually placing pixels from one part of the image onto another. This takes more time than the Spot Healing Brush, but you have complete control over what the replacement looks like. On a product shot with a repeating surface texture, that control is the only way to get a result that survives close inspection.
My Take: Build This Into a Cleanup Action
After working through tutorials like this one, my instinct is always to look for what can be templated. The layer setup in particular - new layer, mode Normal, Content-Aware, Sample All Layers - is a fixed sequence I repeat at the start of every retouching job. I turned it into a Photoshop action years ago. One keystroke and I’m already painting. Over the course of a week on a high-volume e-commerce project, that kind of micro-automation compounds into real time savings.
What I’d add to Aaron’s workflow for studio or product work specifically: create two separate cleanup layers, one for Spot Healing results and one for Clone Stamp work. Keeping them separated means if a client requests a revision on one specific area, you can erase and redo just that layer without disturbing everything else. It’s a small organizational habit that has saved me from painful rework more than once.
The single most important takeaway from this tutorial is the tool hierarchy: Spot Healing Brush first, Clone Stamp second. Resist the urge to jump straight to the manual tool because it feels more precise. The automated tool handles the easy 80 percent quickly, and reserving the Clone Stamp for genuine problem areas keeps your retouching sessions fast without sacrificing quality where it actually counts.
Watch the full tutorial on YouTube to follow along with Aaron’s sample image and see each tool in action.
Comments
Leave a Comment