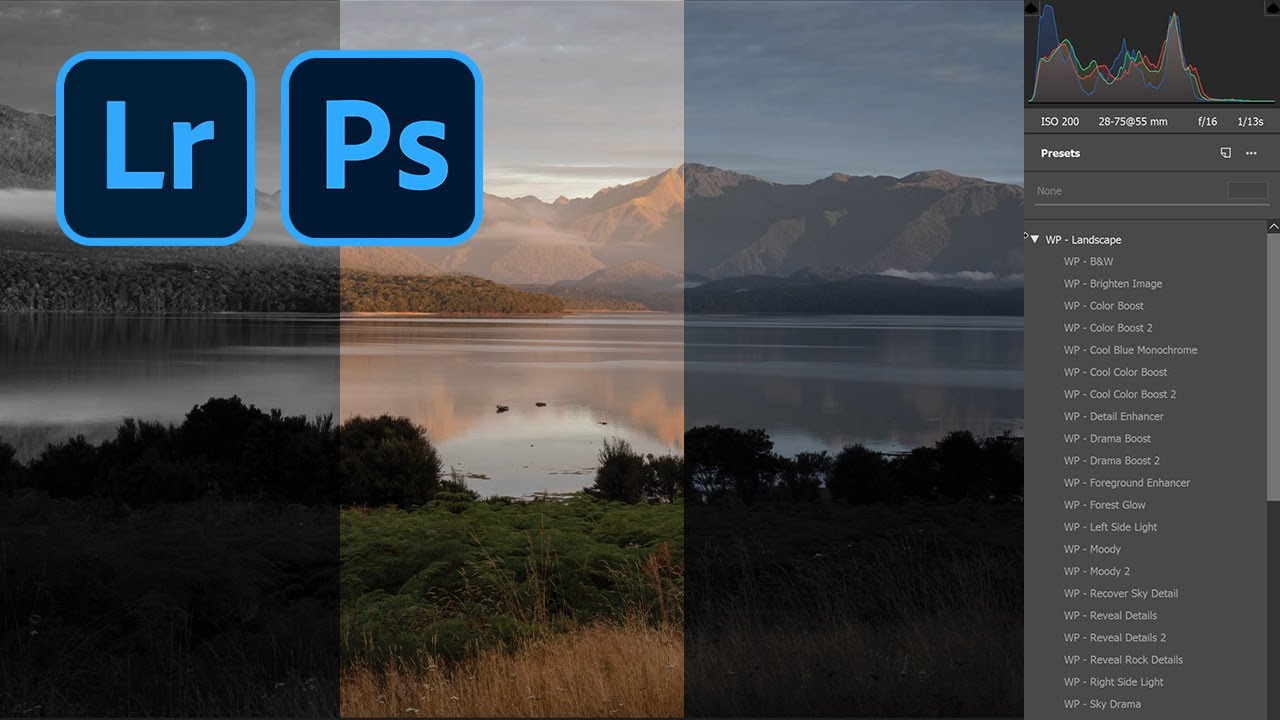
I have a spreadsheet that tracks every hour saved by automated tools in my post-production workflow. After fifteen years running shoots for ad agencies and e-commerce brands, I am obsessive about this. Presets are one of the reasons that number keeps climbing. They are not a shortcut for people who don’t know what they’re doing. They’re a starting point that compresses hours of trial and error into a single click, and then they get out of your way so you can make the image your own.
The problem most photographers hit isn’t finding presets. It’s the installation step. I’ve watched junior retouchers waste twenty minutes hunting through menus because the import workflow in Lightroom isn’t obvious, and Adobe Camera Raw hides it somewhere slightly different. In this William Patino tutorial, he walks through both environments back to back in a few clean minutes, which is exactly the kind of no-nonsense breakdown I wish existed when I was starting out. Watch the full tutorial on YouTube if you want to follow along with the video while you work through these steps.
Here’s the full walkthrough, expanded with context from my own experience in commercial post-production.
Step 1: Open Your Raw File in Lightroom’s Develop Module
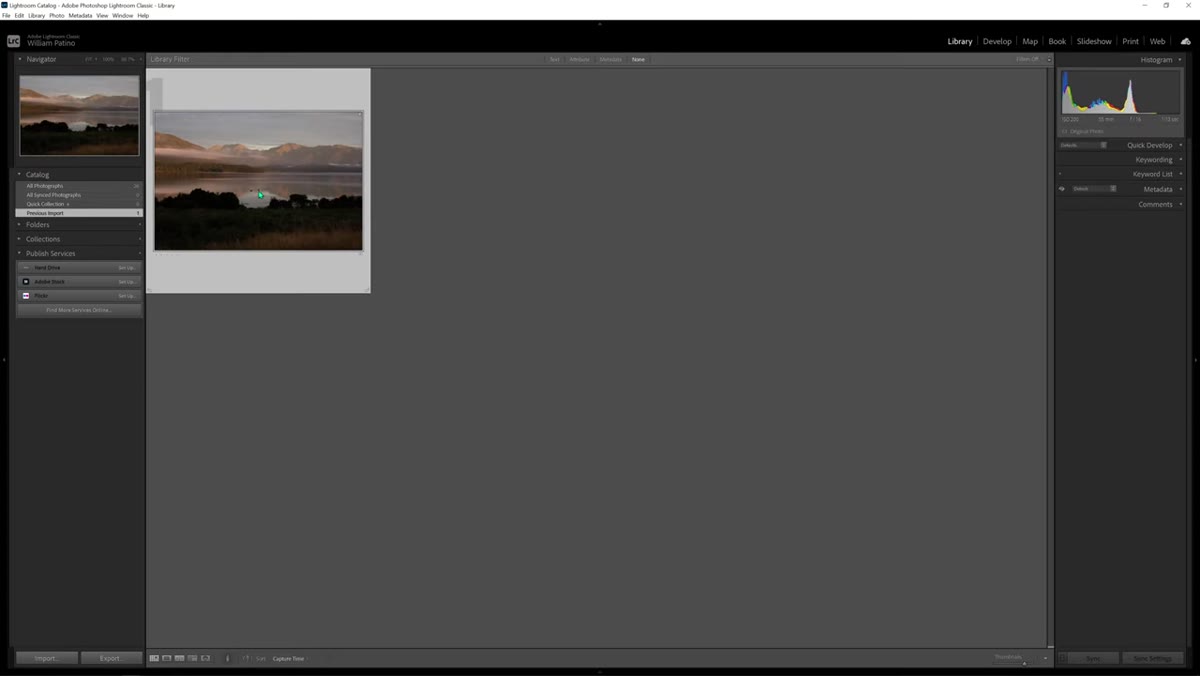 Lightroom Develop module open with a raw landscape file
Start in Lightroom with your raw file loaded. The key here is that you need to be in the Develop module, not Library. The presets panel only appears on the left-hand side once you’re in Develop. If you’re staring at a grid of thumbnails and wondering where the presets went, that’s why. Click the Develop tab at the top, and the left panel will show a Presets section that you can expand.
Lightroom Develop module open with a raw landscape file
Start in Lightroom with your raw file loaded. The key here is that you need to be in the Develop module, not Library. The presets panel only appears on the left-hand side once you’re in Develop. If you’re staring at a grid of thumbnails and wondering where the presets went, that’s why. Click the Develop tab at the top, and the left panel will show a Presets section that you can expand.
Lightroom ships with a solid library of built-in presets, but the real value comes from importing your own. The presets panel is where you’ll do that.
Step 2: Import Presets Using the Plus Icon
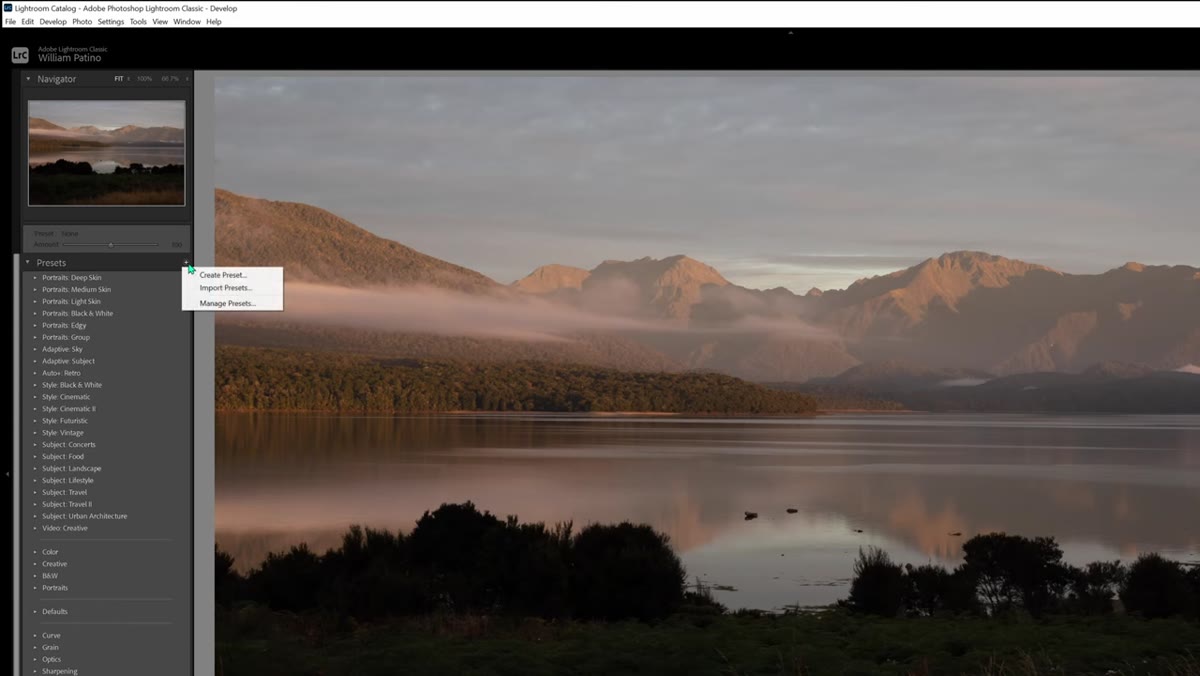 Lightroom presets panel with plus icon highlighted
In the Presets panel header, hit the plus (+) icon on the right side. A small dropdown appears. Choose “Import Presets” from that list. A file browser opens, and you navigate to wherever your preset files are stored, typically your Downloads folder if you just grabbed a free pack.
Lightroom presets panel with plus icon highlighted
In the Presets panel header, hit the plus (+) icon on the right side. A small dropdown appears. Choose “Import Presets” from that list. A file browser opens, and you navigate to wherever your preset files are stored, typically your Downloads folder if you just grabbed a free pack.
One important note: Lightroom accepts both unzipped .lrtemplate or .xmp files and, in most current versions, will handle a zip file directly without you needing to extract it first. William confirms this in the tutorial. Select the folder or zip, click Import, and Lightroom does the work. You’ll see the new preset folder appear in your panel immediately.
Step 3: Preview and Apply a Preset
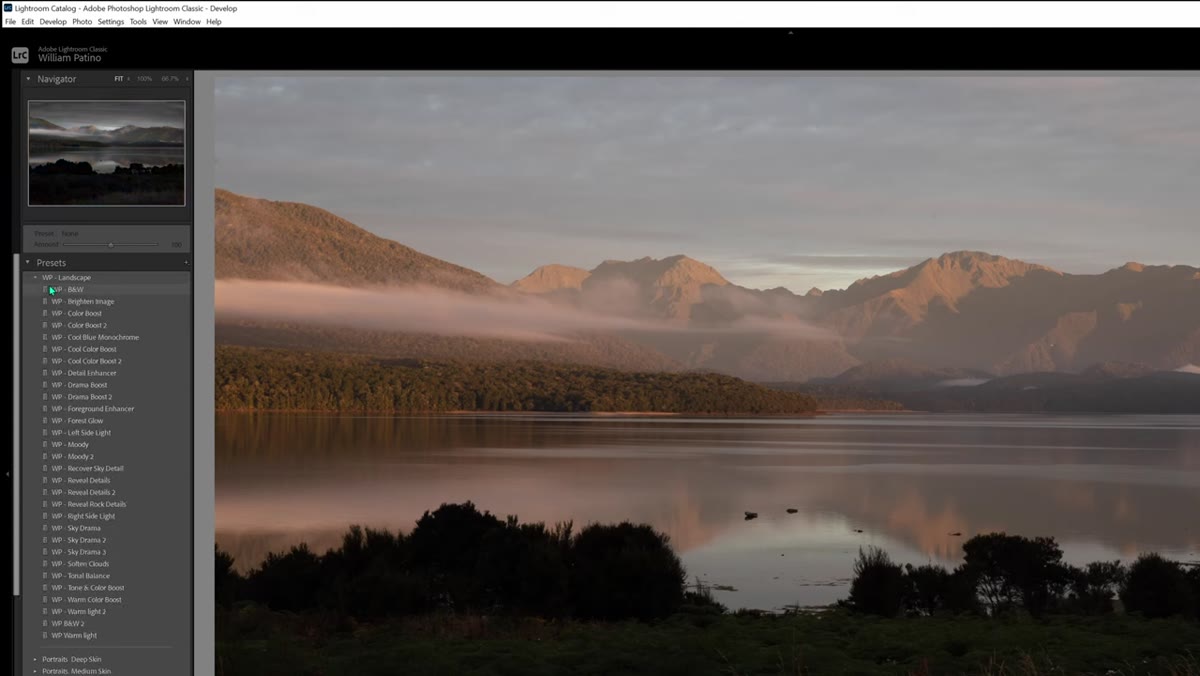 Presets panel showing newly imported WP Landscape folder expanded
Once imported, expand the new preset folder in the panel. As you hover your cursor over each preset name, the main image preview updates in real time. You don’t need to click anything to see the effect. This live preview is genuinely useful for moving quickly through a set without committing to anything.
Presets panel showing newly imported WP Landscape folder expanded
Once imported, expand the new preset folder in the panel. As you hover your cursor over each preset name, the main image preview updates in real time. You don’t need to click anything to see the effect. This live preview is genuinely useful for moving quickly through a set without committing to anything.
For a landscape image with darker tones and shadow detail you want to recover, look for presets labeled around reveal or detail recovery. These tend to lift shadows and add contrast in the midtones rather than blowing out highlights, which is what you want for scenes with a wide dynamic range.
Step 4: Use the Amount Slider to Dial In the Intensity
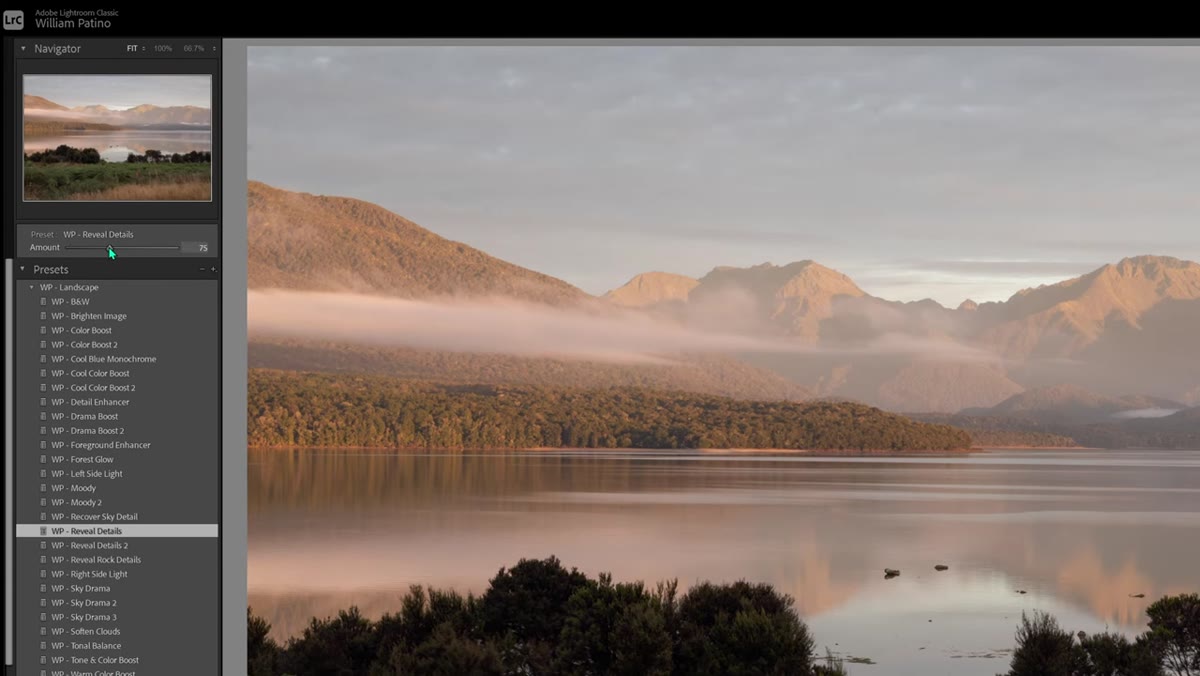 Amount slider at top of Develop module panel being adjusted
This feature was added in a relatively recent Lightroom update and it changes everything about how presets work in practice. At the top of the Develop panel, there’s an Amount slider that controls the opacity of the preset effect, essentially blending it against your unprocessed image. Zero is no preset, 100 is the full effect, and you can push it past 100 if you want an exaggerated version.
Amount slider at top of Develop module panel being adjusted
This feature was added in a relatively recent Lightroom update and it changes everything about how presets work in practice. At the top of the Develop panel, there’s an Amount slider that controls the opacity of the preset effect, essentially blending it against your unprocessed image. Zero is no preset, 100 is the full effect, and you can push it past 100 if you want an exaggerated version.
In real-world use, I almost never apply a preset at full strength. Landing somewhere between 60 and 85 tends to give you the look without it reading as over-processed. Dial it back until the image feels right, then move to your manual sliders to finish.
Step 5: Read the Preset’s Settings to Learn the Technique
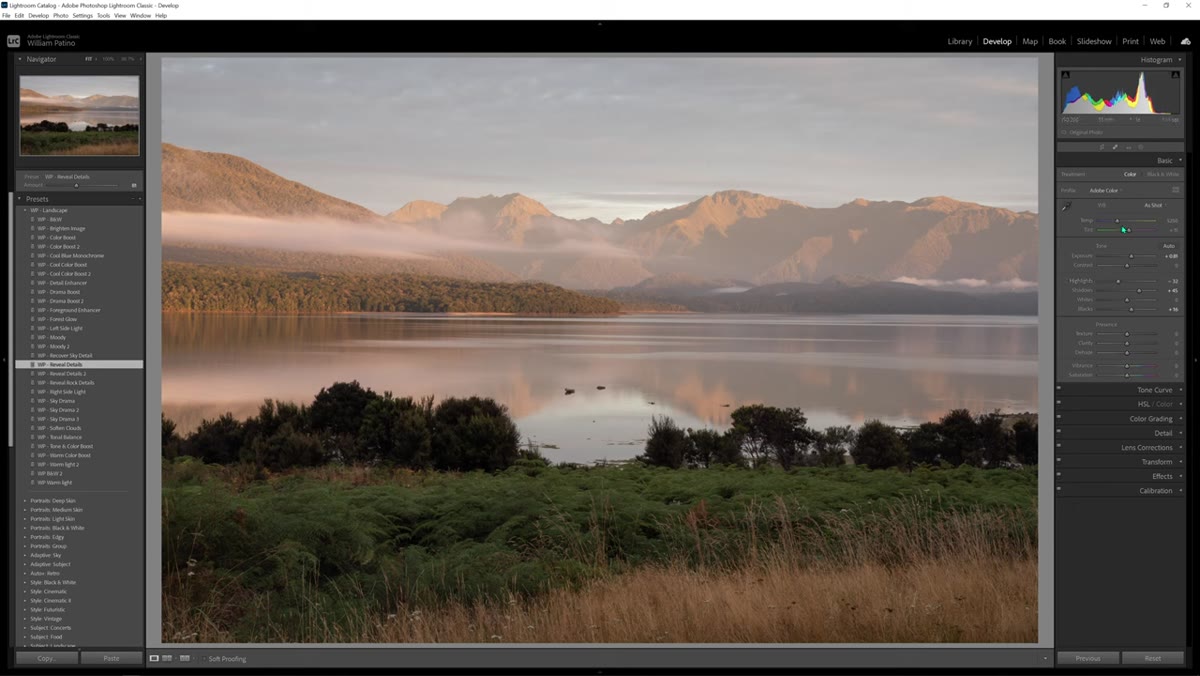 Lightroom editing panel showing sliders adjusted by the preset
After applying a preset, click over to the standard editing panel on the right side. Every slider that the preset touched will show you its value. This is one of the most underrated learning tools in Lightroom. Instead of just consuming a preset as a black box, you can reverse-engineer exactly what it’s doing: how much the highlights were pulled down, where the shadows were lifted, what happened to the HSL panel.
Lightroom editing panel showing sliders adjusted by the preset
After applying a preset, click over to the standard editing panel on the right side. Every slider that the preset touched will show you its value. This is one of the most underrated learning tools in Lightroom. Instead of just consuming a preset as a black box, you can reverse-engineer exactly what it’s doing: how much the highlights were pulled down, where the shadows were lifted, what happened to the HSL panel.
I’ve built entire adjustment frameworks from studying well-made presets this way. If something looks good, figure out why it looks good. That knowledge transfers to every image you work on after.
Step 6: Open the File in Photoshop as a Smart Object
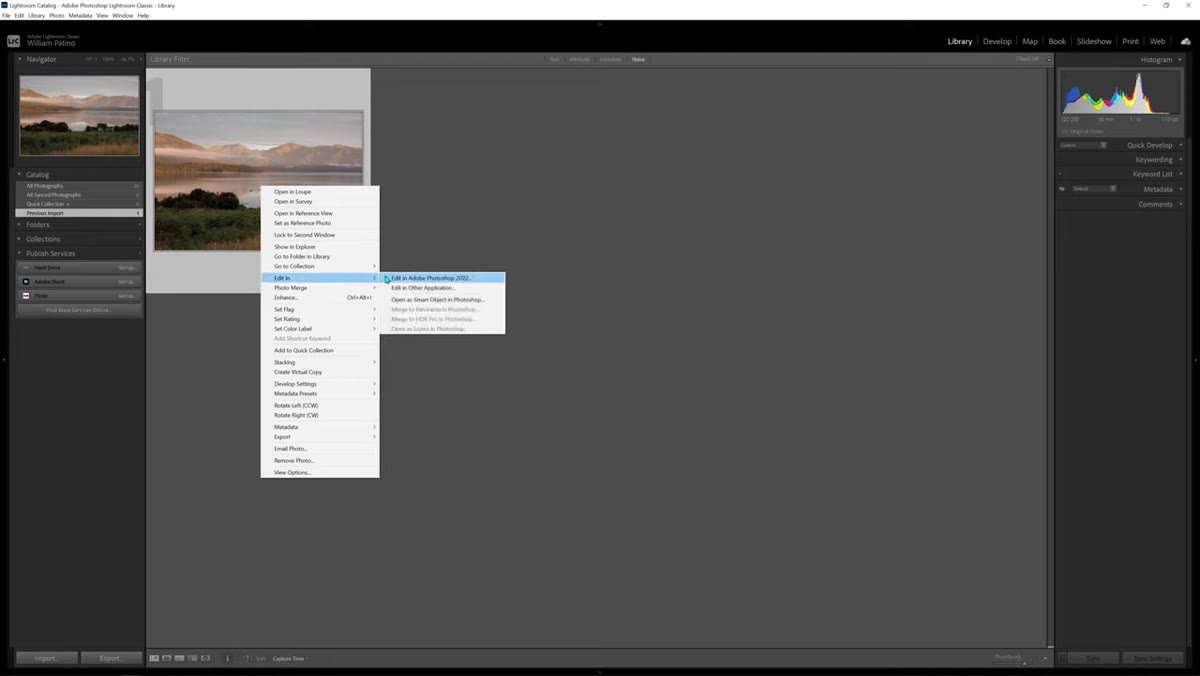 Lightroom right-click menu showing Edit in Photoshop as Smart Object option
If your workflow moves into Photoshop, right-click the image in Lightroom and choose “Edit in Photoshop as Smart Object.” This is the correct way to do it if you want to keep raw editing access. It opens the file in Photoshop with the raw data intact, embedded in a smart object layer. Do not flatten it. Do not rasterize it. Leave it as a smart object.
Lightroom right-click menu showing Edit in Photoshop as Smart Object option
If your workflow moves into Photoshop, right-click the image in Lightroom and choose “Edit in Photoshop as Smart Object.” This is the correct way to do it if you want to keep raw editing access. It opens the file in Photoshop with the raw data intact, embedded in a smart object layer. Do not flatten it. Do not rasterize it. Leave it as a smart object.
In Photoshop, double-click that smart object layer thumbnail in the Layers panel. This opens Adobe Camera Raw.
Step 7: Import and Apply Presets in Adobe Camera Raw
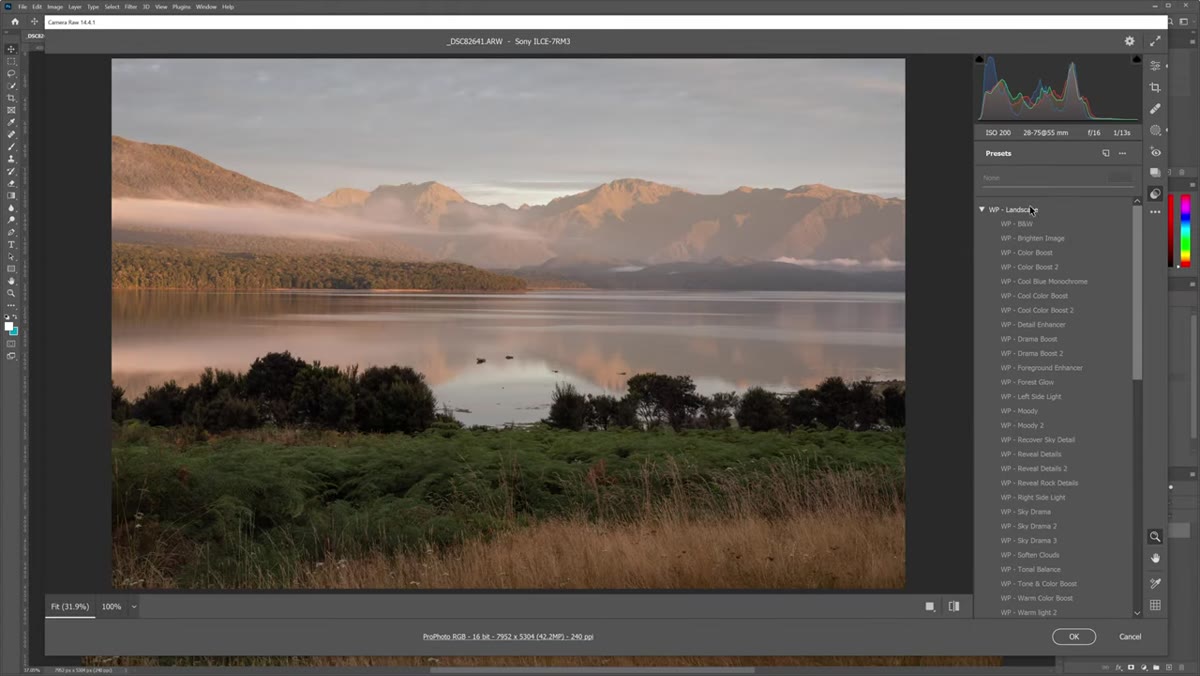 Adobe Camera Raw interface with preset panel open on right side
Adobe Camera Raw, or ACR, is Photoshop’s raw processing engine and it runs essentially the same preset system as Lightroom. On the right side of the ACR interface, look for the two overlapping circles icon. That’s the Presets tab. Click it and your presets panel appears.
Adobe Camera Raw interface with preset panel open on right side
Adobe Camera Raw, or ACR, is Photoshop’s raw processing engine and it runs essentially the same preset system as Lightroom. On the right side of the ACR interface, look for the two overlapping circles icon. That’s the Presets tab. Click it and your presets panel appears.
If your presets aren’t already there, click the three-dot menu at the top of that panel and choose “Import Profiles and Presets.” Navigate to your preset folder, hit Open, and they’ll load in. Hover to preview exactly as in Lightroom, and use the same opacity slider to control the intensity. The interface is close enough that once you know one, you know both.
One Thing the Tutorial Doesn’t Cover: Building a Preset from Your Own Edits
William’s tutorial focuses on installation and application, which is exactly what it sets out to do. What I’d add from experience is the reverse process: saving your own adjustments as a preset once you’ve finished refining an image. In both Lightroom and ACR, you can click that same plus icon and save the current state of your sliders as a new preset.
For commercial work, this is where presets earn their value. I have presets built from specific campaigns, consistent with a brand’s color language, that I can apply across hundreds of images in a catalog. That’s not laziness. That’s a system. If you’re shooting recurring clients or product lines, even one session of building a custom preset pays you back for months.
The single most important thing to take from this walkthrough: presets are editable. They are not final looks. They are a calibrated starting point, and the Amount slider plus your manual adjustments are what actually produce professional results. Anyone treating a preset as a one-click finish is leaving image quality on the table.
Watch the full tutorial on YouTube to see William demonstrate the whole process live, including the free landscape presets he offers for download.
Comments (4)
My workflow just got 10x faster. Not even kidding.
Love this. I referenced a similar technique in one of my recent posts. Always good to see other perspectives.
Just used this on a wedding shoot edit. Client was thrilled.
This is going in my reference folder. Incredibly useful.
Leave a Comment