
I spend a lot of time building systems so I don’t have to think twice on a deadline. Presets are a big part of that. Over the years I’ve developed a library of custom Lightroom adjustments tuned specifically for the kind of work I do – product photography, e-commerce, the occasional ad campaign. They live in Lightroom Classic, which is where I do all my serious editing. But more and more, clients want quick turnaround on selects reviewed from a phone, or they want me to make a light pass on tethered shots while I’m still on location. That means I need those presets available on mobile, and for a long time the path to get them there was either unclear or felt like it required more cloud storage commitment than I wanted to make.
In this Scott Kelby tutorial from the Kelby One educational community (Watch the full tutorial on YouTube), the whole thing turns out to be a straightforward three-step process that uses a free app most of us already have installed. No extra storage subscription. No complicated export dance. Once I saw how it worked, I felt a little embarrassed I hadn’t figured it out sooner.
The key insight Kelby offers is this: Adobe Lightroom CC (the cloud-based desktop version, not Classic) acts as a bridge. You import your presets there, and they automatically sync to Lightroom on your mobile device. That’s it. The cloud-based desktop app becomes a free relay station, not a replacement for your Classic workflow.
Step 1: Locate Your Preset Files in Lightroom Classic
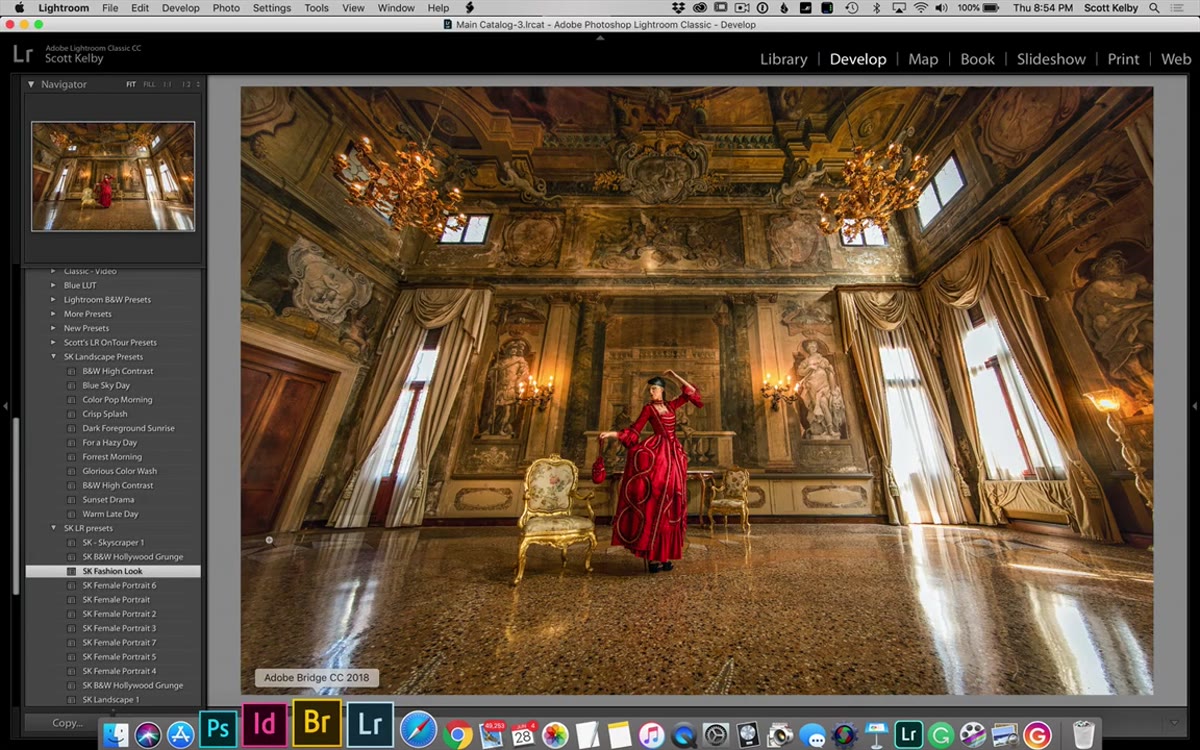 Right-clicking a preset in Lightroom Classic panel
Open Lightroom Classic and navigate to the Develop module. In the Presets panel on the left, find the preset or preset group you want to move to mobile. Right-click on the specific preset you want to export. On a Mac, choose “Show in Finder.” On Windows, choose “Show in Explorer.” This opens the folder where that preset’s actual file lives on your hard drive.
Right-clicking a preset in Lightroom Classic panel
Open Lightroom Classic and navigate to the Develop module. In the Presets panel on the left, find the preset or preset group you want to move to mobile. Right-click on the specific preset you want to export. On a Mac, choose “Show in Finder.” On Windows, choose “Show in Explorer.” This opens the folder where that preset’s actual file lives on your hard drive.
You’re looking for the .xmp file that corresponds to your preset. This is the physical file you’ll be moving in the next step, so take note of where it is.
Step 2: Copy Your Presets to a Staging Folder
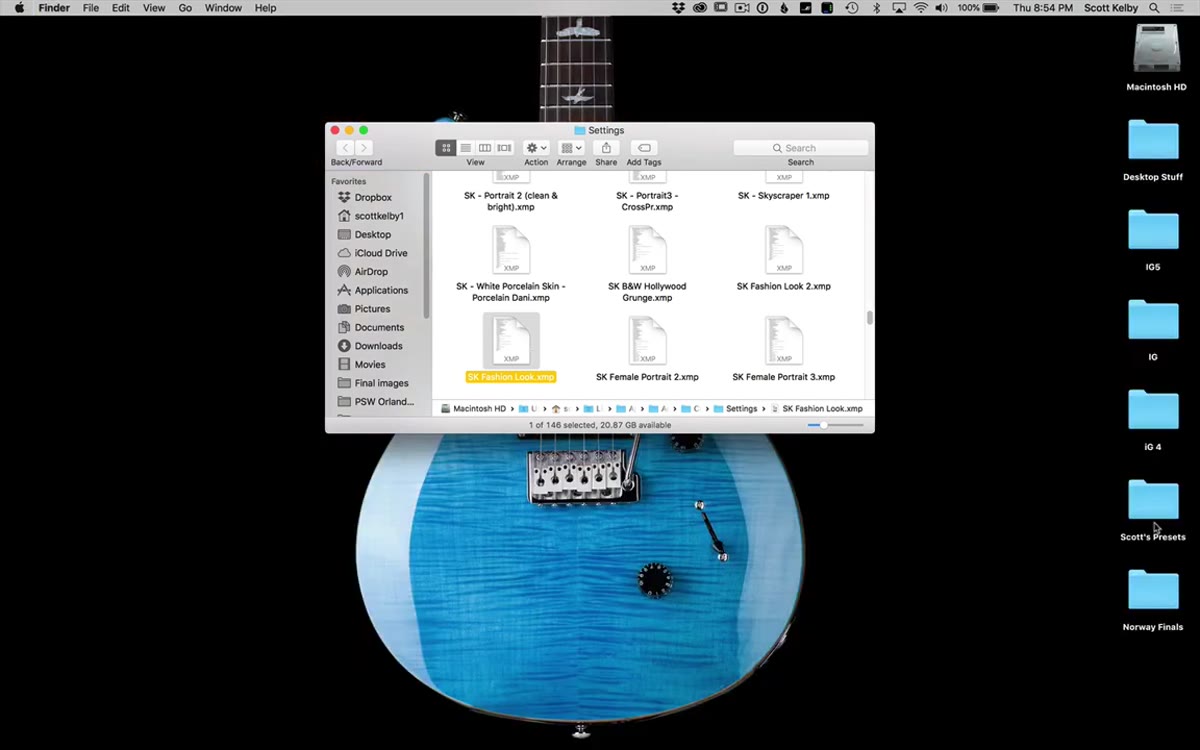 Desktop folder containing copied preset XMP files
Rather than hunting down each preset file one at a time when you’re in the middle of an import, Kelby recommends creating a simple folder on your desktop to stage everything. Call it whatever makes sense to you – something like “Presets for Mobile” or your own name followed by “presets.” Drag copies of all the
Desktop folder containing copied preset XMP files
Rather than hunting down each preset file one at a time when you’re in the middle of an import, Kelby recommends creating a simple folder on your desktop to stage everything. Call it whatever makes sense to you – something like “Presets for Mobile” or your own name followed by “presets.” Drag copies of all the .xmp preset files you want to sync into that folder.
This step exists purely for convenience. If you only have one or two presets to move, you can skip the staging folder. But if you’re moving a full set, having them collected in one place before you open Lightroom CC saves you from jumping back and forth between windows. I usually batch this process so I’m only doing it once every few months when I’ve built up a new set worth syncing.
Step 3: Open Adobe Lightroom CC (the Cloud Version) on Your Desktop
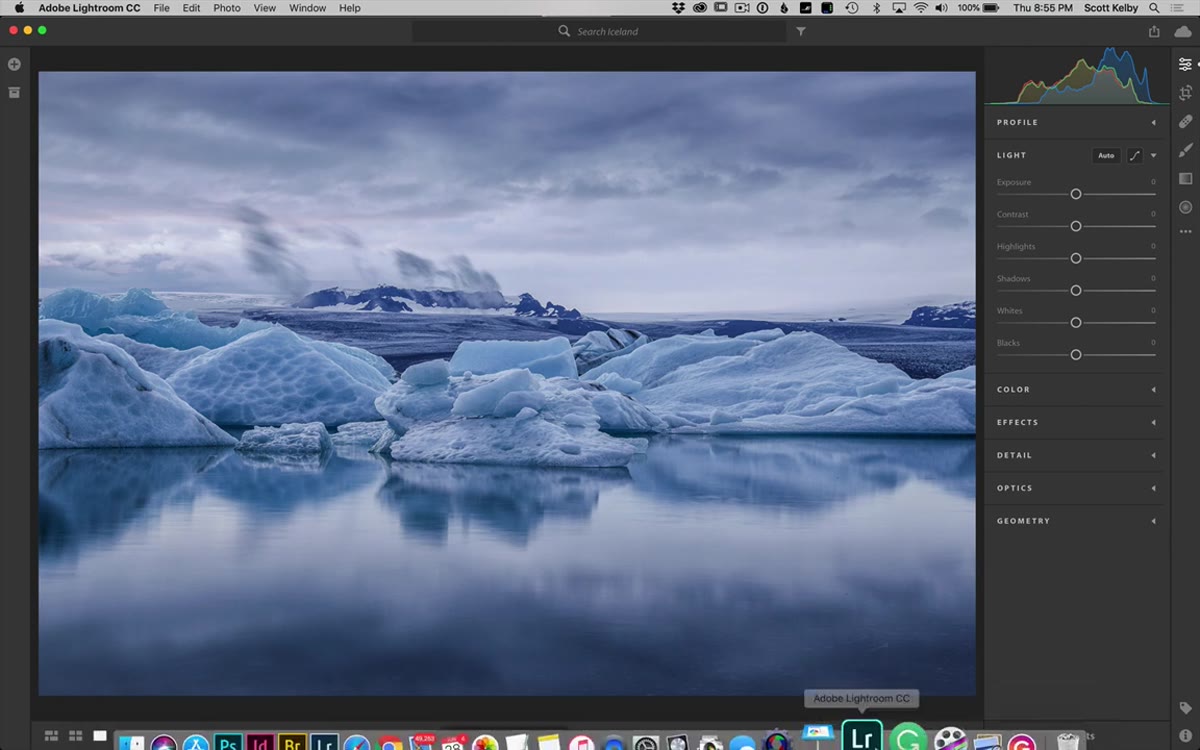 Adobe Lightroom CC desktop app with rounded-corner icon
Here’s where people get tripped up – there are two different desktop Lightroom applications and they look similar. The one you want is Adobe Lightroom CC, which has a rounded square icon. Lightroom Classic uses a square icon with no rounding. If you have a Creative Cloud subscription that includes Lightroom or the Photography Plan, Lightroom CC is already available to you at no additional cost. Open Creative Cloud and install it if you haven’t yet.
Adobe Lightroom CC desktop app with rounded-corner icon
Here’s where people get tripped up – there are two different desktop Lightroom applications and they look similar. The one you want is Adobe Lightroom CC, which has a rounded square icon. Lightroom Classic uses a square icon with no rounding. If you have a Creative Cloud subscription that includes Lightroom or the Photography Plan, Lightroom CC is already available to you at no additional cost. Open Creative Cloud and install it if you haven’t yet.
Once it’s open, you do not need to import any photos, set up cloud storage, or configure anything. You’re using this application for one purpose only.
Step 4: Import Your Presets into Lightroom CC
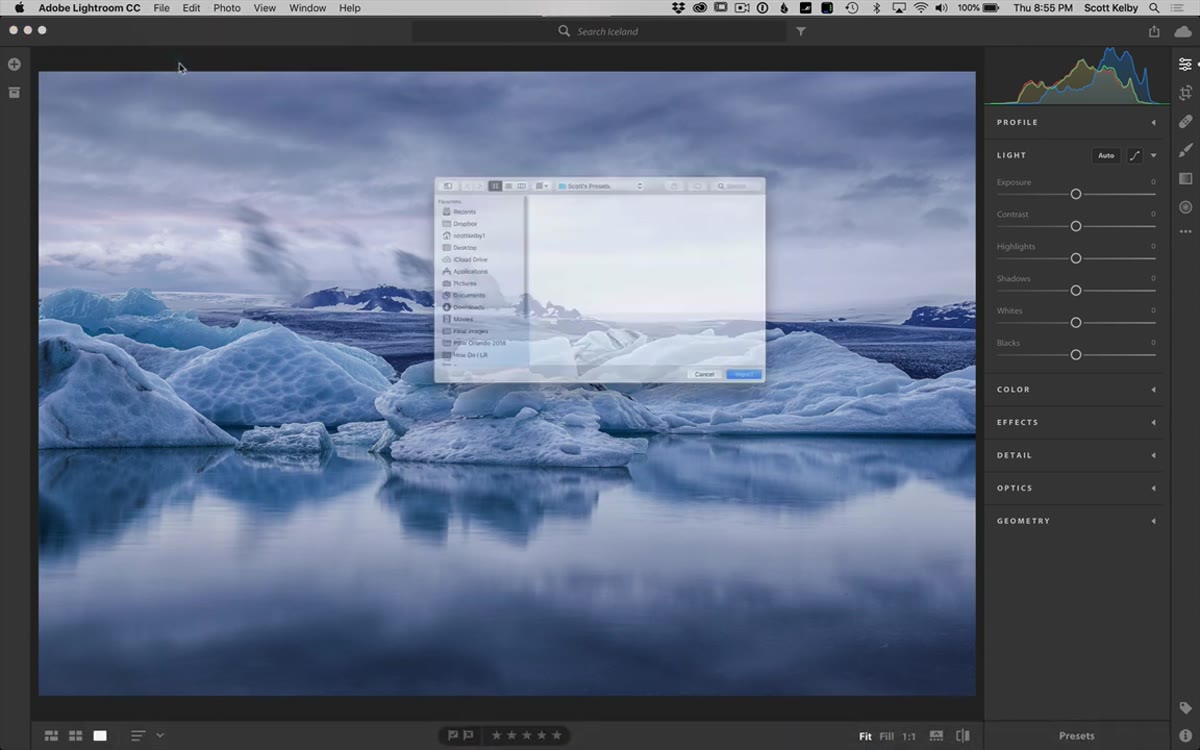 File menu open in Lightroom CC showing import profiles and presets option
In Lightroom CC on the desktop, go to the File menu and choose “Import Profiles and Presets.” A file browser dialog will open. Navigate to the staging folder you created on your desktop, select the preset files you want to import, and click Import.
File menu open in Lightroom CC showing import profiles and presets option
In Lightroom CC on the desktop, go to the File menu and choose “Import Profiles and Presets.” A file browser dialog will open. Navigate to the staging folder you created on your desktop, select the preset files you want to import, and click Import.
Lightroom CC will pull those presets in and they’ll appear in the Presets panel inside the app. You can verify they’re there by opening the panel and scrolling to find them. At this point the presets are living inside the Lightroom CC ecosystem, which means Adobe’s sync engine takes over from here.
Step 5: Let the Sync Do the Work
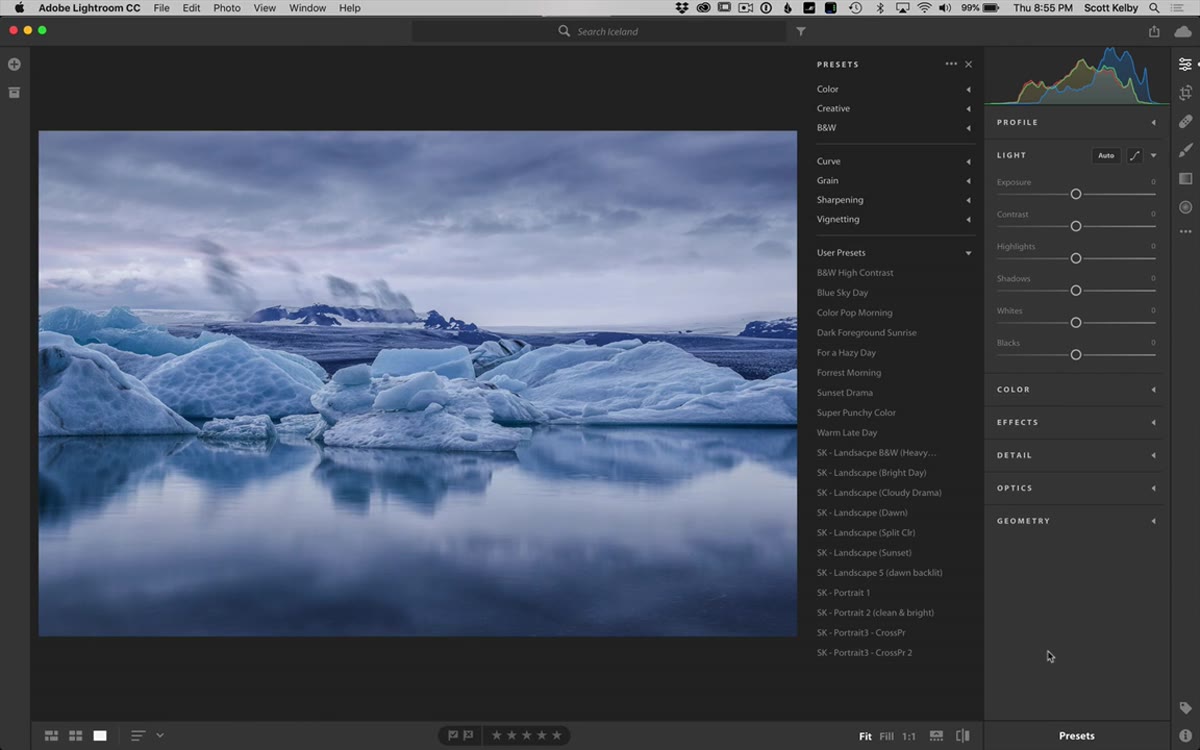 Presets visible in Lightroom CC desktop preset panel
Once the presets are imported into Lightroom CC on the desktop, they will automatically sync to Lightroom on your mobile device. You don’t trigger this manually. As long as you’re signed into the same Adobe ID on both your desktop and your phone or tablet, and both apps have access to an internet connection, the sync happens in the background.
Presets visible in Lightroom CC desktop preset panel
Once the presets are imported into Lightroom CC on the desktop, they will automatically sync to Lightroom on your mobile device. You don’t trigger this manually. As long as you’re signed into the same Adobe ID on both your desktop and your phone or tablet, and both apps have access to an internet connection, the sync happens in the background.
Open Lightroom on your mobile device, navigate to the Presets section in the editing panel, and your newly imported presets should appear. Depending on your connection and how many presets you synced, this could take anywhere from a few seconds to a few minutes.
One Thing Worth Knowing Before You Start
Lightroom CC is a different application with a different catalog structure than Lightroom Classic. Kelby is clear that you don’t need to use it for anything other than this transfer purpose, and that’s good advice. Don’t feel pressure to migrate your Classic catalog into CC or reorganize how you work. I keep Lightroom CC installed specifically for this relay function and nothing else.
The one friction point I’ve run into is preset organization. When presets sync to mobile, they may not carry over the same folder grouping you had in Classic. On mobile, you might find your presets in a flat list or under a generic group name. It’s not a dealbreaker, but if you’re like me and color-code and organize everything obsessively, take a few minutes after syncing to rename and reorder them inside the mobile app. A little setup once saves confusion later.
Also worth noting: this same method works for profiles, not just presets. If you’ve built or purchased any custom camera profiles or creative profiles in Classic, the same import route through Lightroom CC’s File menu will bring those over too.
The most important thing this workflow gave me was consistency. The same look I apply in a full desktop edit is now one tap away when I’m showing a client a quick pass on location. Kelby’s framing of Lightroom CC as a “free transfer app” is exactly the right mental model – it removes the hesitation about signing up for something you don’t need.
Watch the full tutorial on YouTube to see Scott walk through each step with his own preset library. The whole thing runs under five minutes and the technique will stick after one watch.
Comments (4)
Quality content like this is rare. Keep it up.
Finally someone explains this in a way that actually makes sense.
This is the kind of content that keeps me coming back.
Excellent tutorial. I'd add that from a retouching standpoint, this technique is incredibly versatile.
Leave a Comment