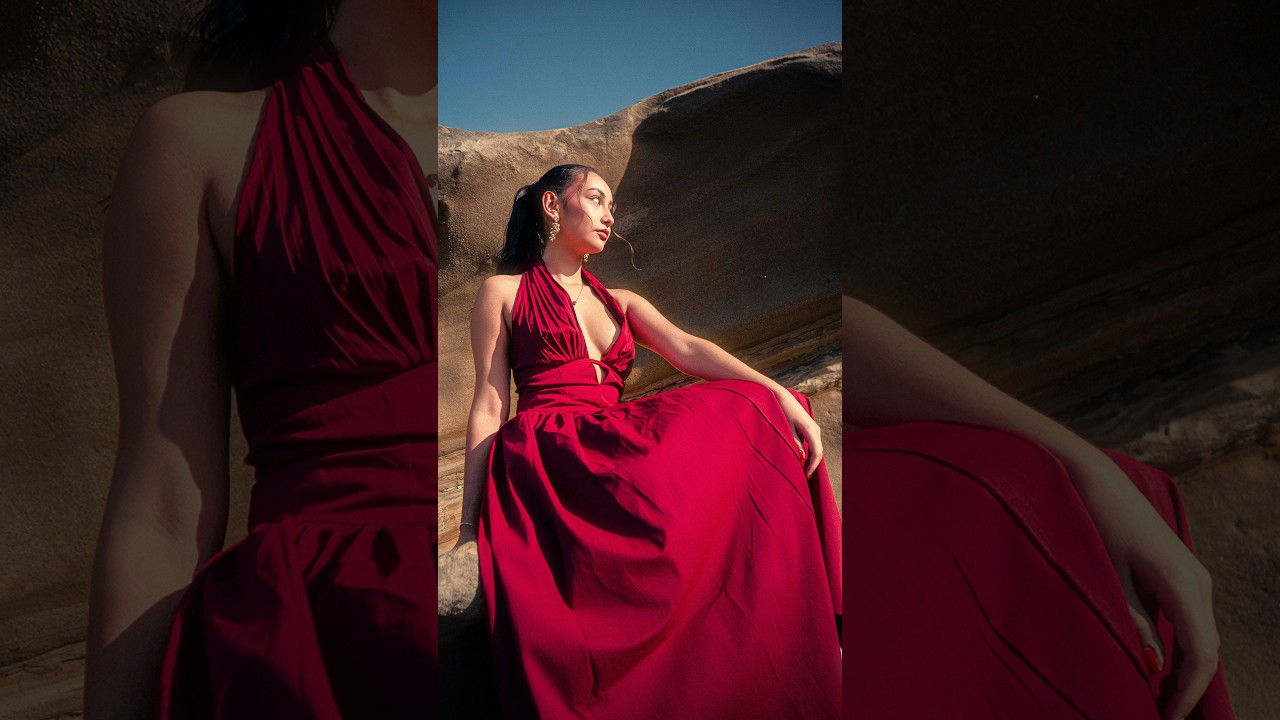
Clients have been asking me for that grainy, washed-out, early-2000s point-and-shoot look for about two years now. It started showing up in fashion e-commerce briefs, then lifestyle campaigns, and now I see it on Instagram ads from brands that would never have touched anything this lo-fi five years ago. The Y2K digicam aesthetic is genuinely everywhere, and if you’re doing commercial post-production work, you need a reliable way to produce it without spending an afternoon fiddling with sliders from scratch every single time.
That’s why I was glad to find this short but dense tutorial from Aaron Nace over at PHLEARN. Watch the full tutorial on YouTube and you’ll see he packs a complete, production-ready workflow into just over a minute. What I want to do here is slow that down, explain the reasoning behind each decision, and add a few notes from my own experience running this kind of retouching at scale.
The core insight driving the whole technique is that a digicam photo isn’t just a low-resolution image. It’s a specific combination of characteristics: cool shadows, warm highlights, visible grain, heavy vignetting, and that telltale on-camera flash bloom that blows out the center of the frame. Hit all five, and your brain reads it as authentic. Miss even one, and it reads as Photoshop. Nace’s workflow hits all five, in a logical order, using tools most Photoshop users already have open.
Step 1: Convert to Smart Object and Open in Camera Raw
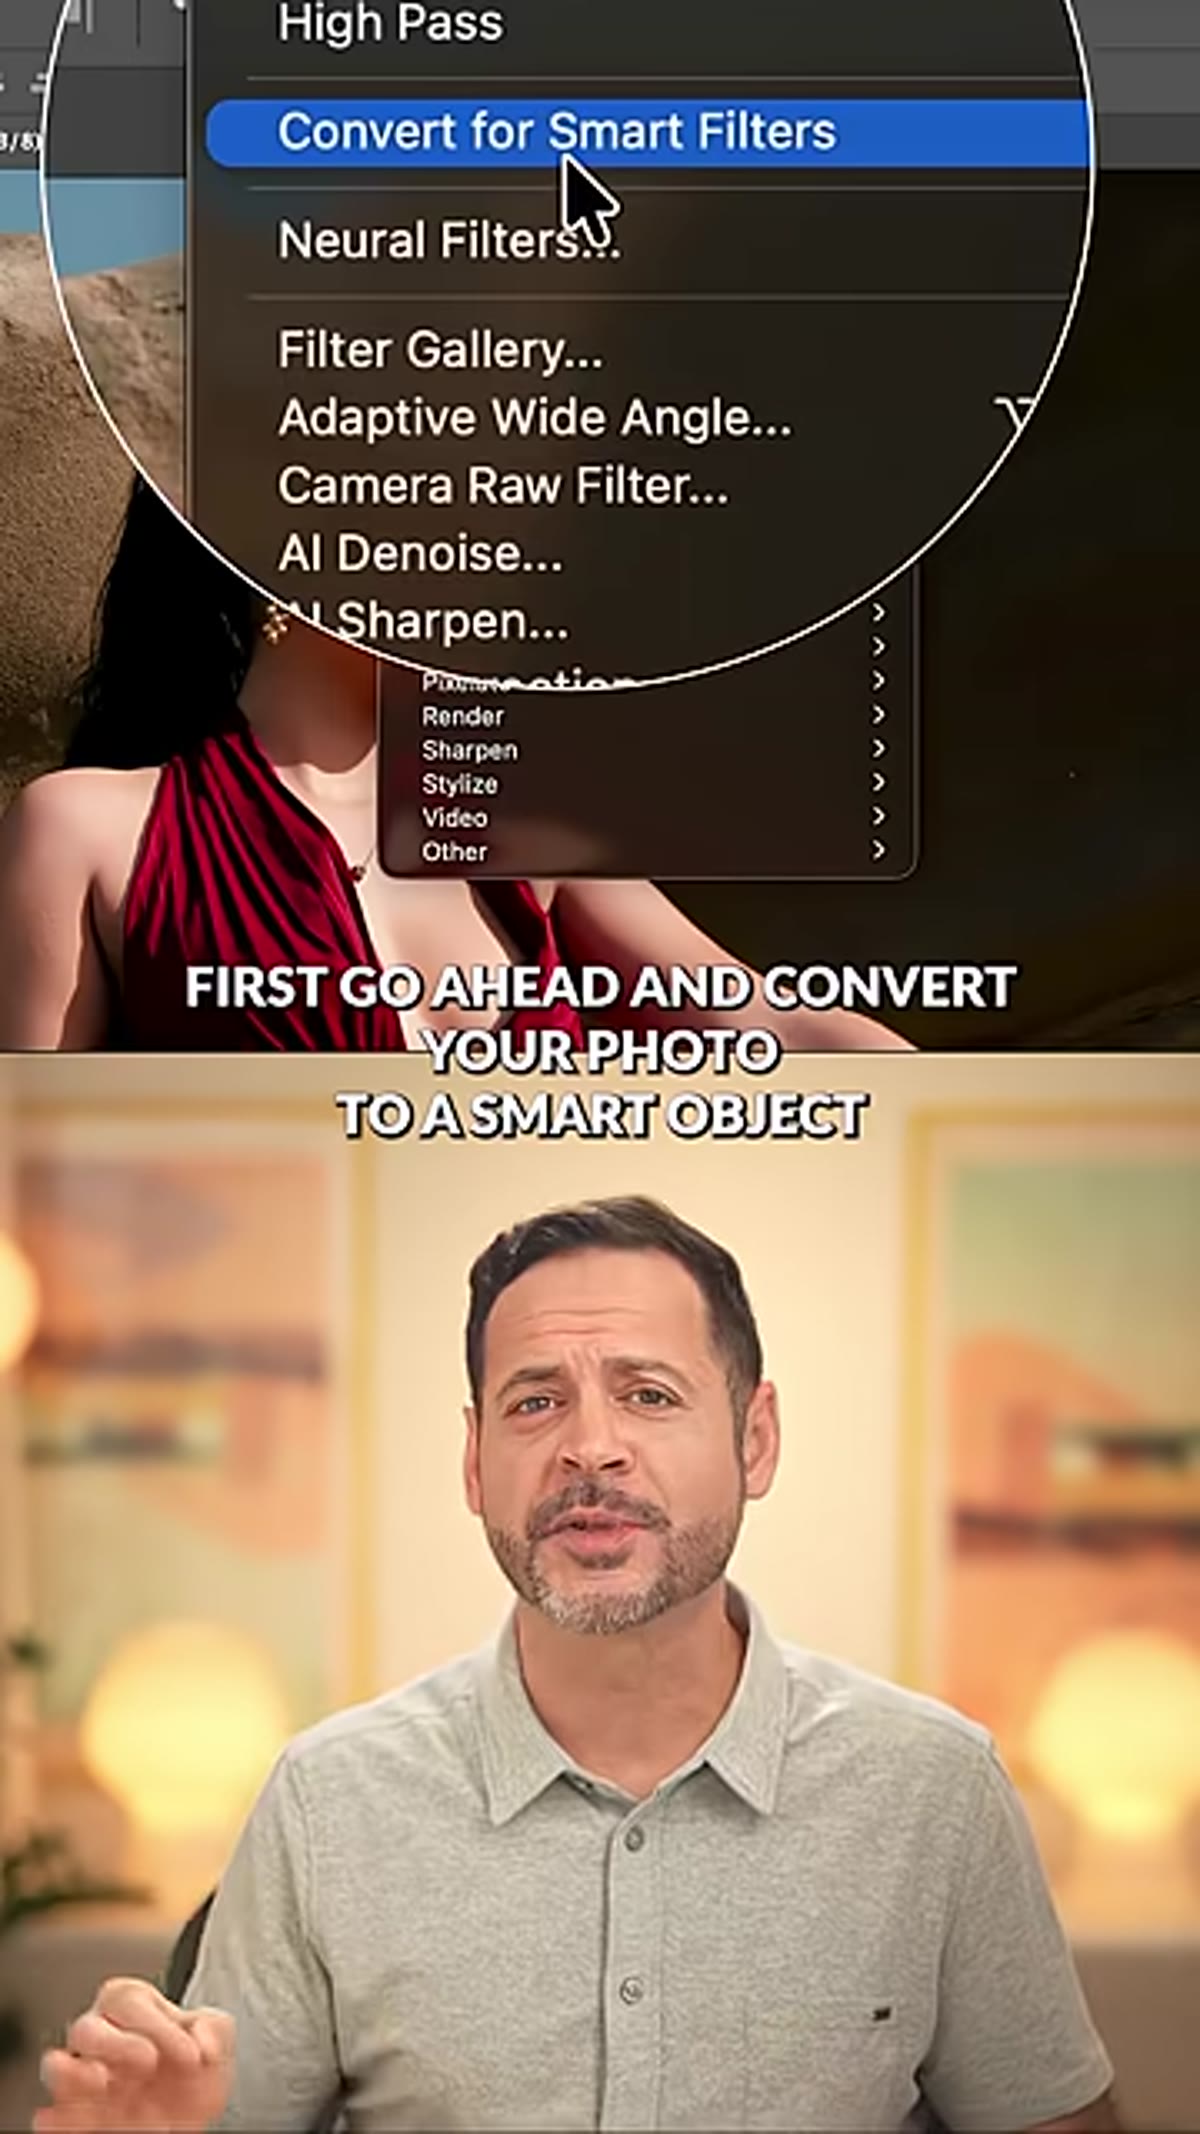 Converting layer to Smart Object in Layers panel
Before touching a single slider, convert your photo layer to a Smart Object. Right-click the layer in the Layers panel and choose “Convert to Smart Object.” This is non-negotiable if you want to keep your workflow editable. Once it’s a Smart Object, go to Filter > Camera Raw Filter. Everything that follows happens inside Camera Raw, and having it applied as a Smart Filter means you can double-click to reopen it and tweak settings later without degrading your image.
Converting layer to Smart Object in Layers panel
Before touching a single slider, convert your photo layer to a Smart Object. Right-click the layer in the Layers panel and choose “Convert to Smart Object.” This is non-negotiable if you want to keep your workflow editable. Once it’s a Smart Object, go to Filter > Camera Raw Filter. Everything that follows happens inside Camera Raw, and having it applied as a Smart Filter means you can double-click to reopen it and tweak settings later without degrading your image.
Step 2: Add Color Grading - Cool Shadows, Warm Highlights
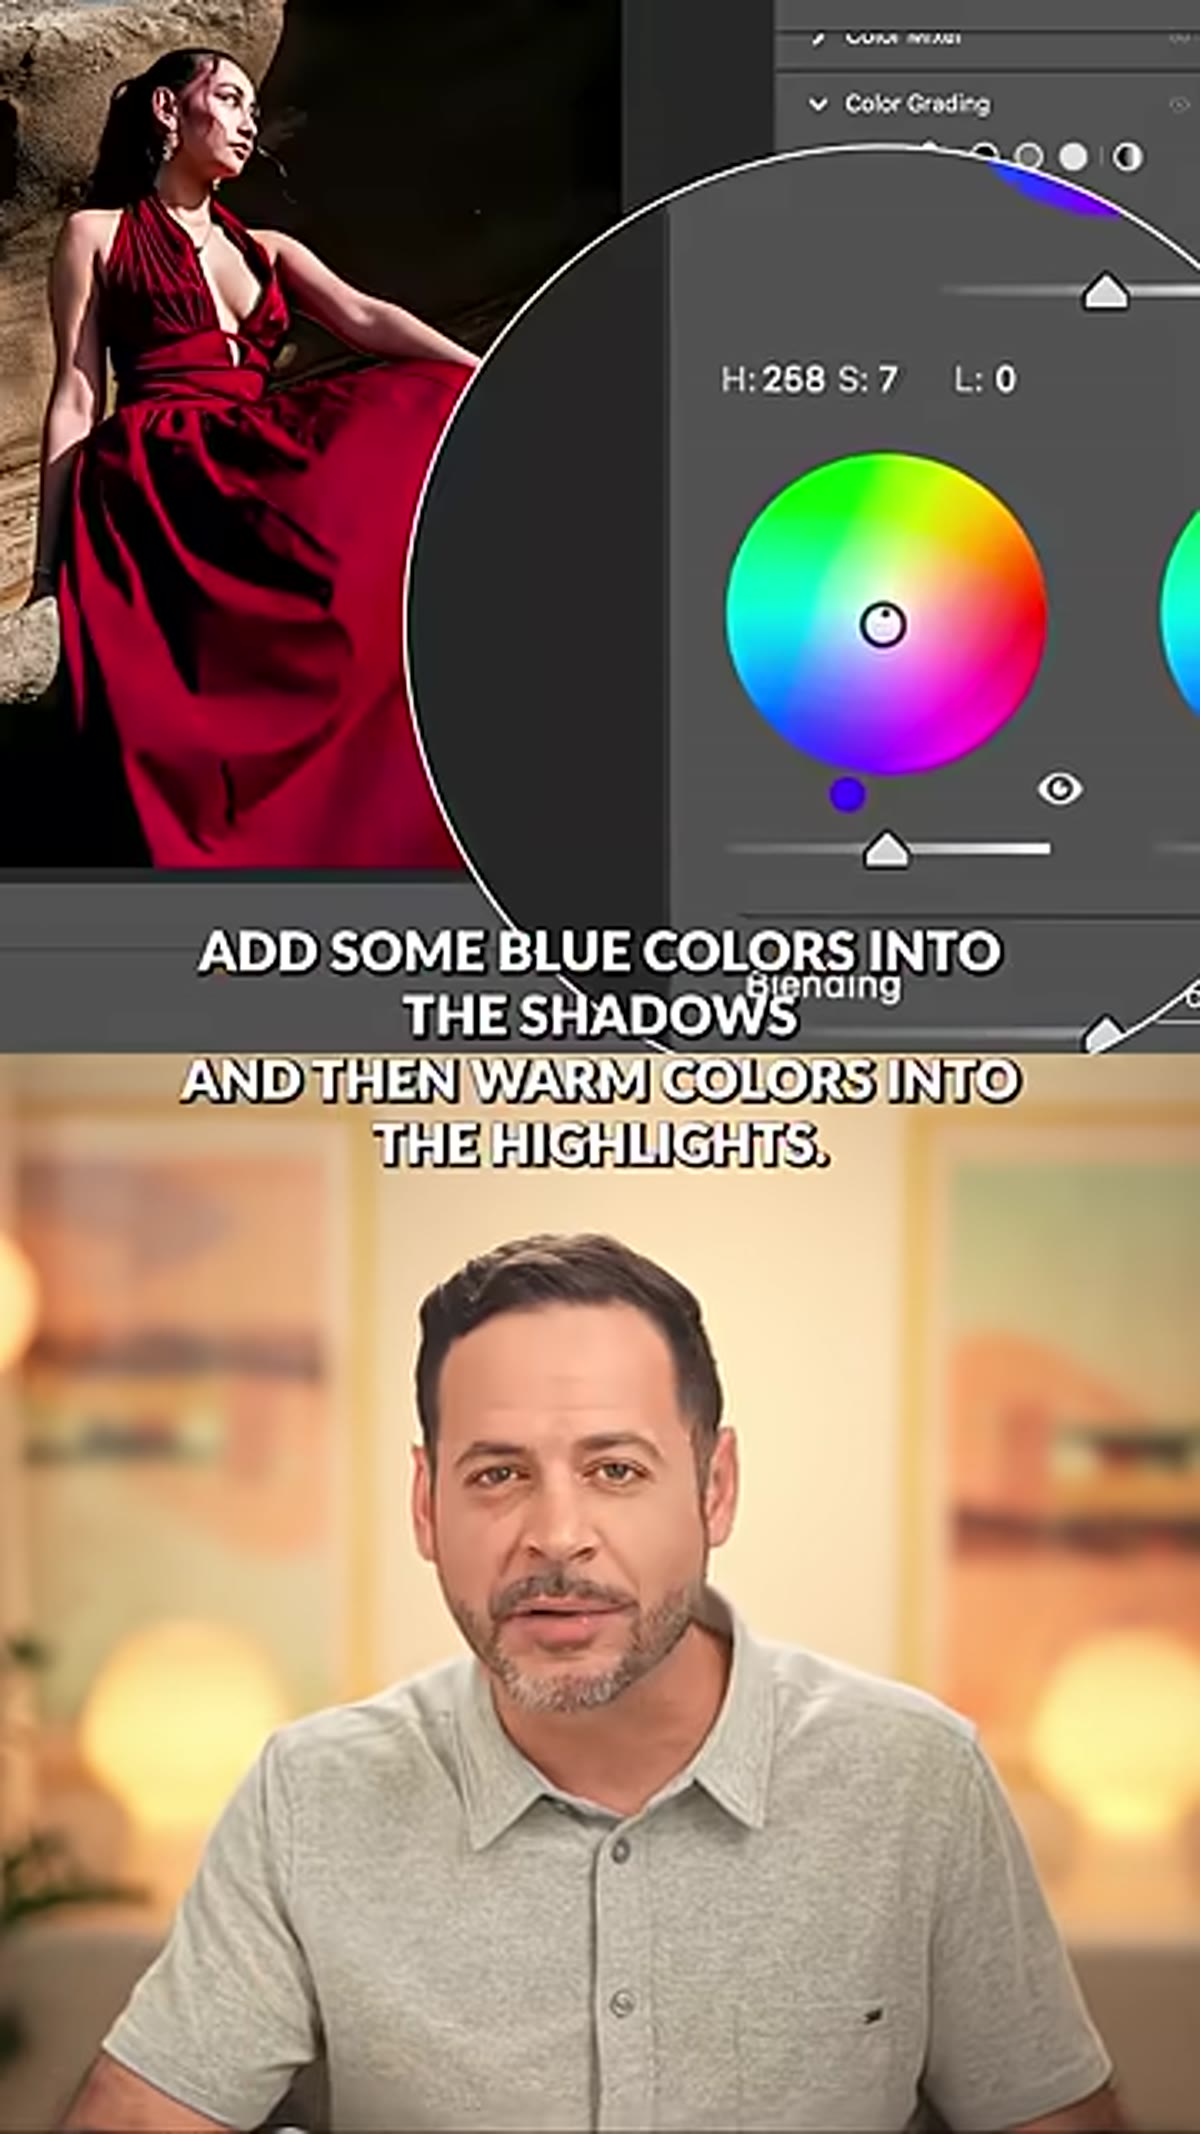 Camera Raw Color Grading panel showing shadow and highlight wheels
Inside Camera Raw, navigate to the Color Grading panel. This is where the foundational digicam color character gets built. Pull the Shadows hue wheel toward blue and lift the saturation slightly – you’re targeting that underexposed, slightly cold look you get in the dark areas of a photo taken with a cheap sensor. Then move to the Highlights wheel and push toward orange or amber. Early 2000s digicams had warm, clipped highlights, especially when a flash was involved. The contrast between cool shadows and warm highlights does a lot of heavy lifting before any other effect is applied.
Camera Raw Color Grading panel showing shadow and highlight wheels
Inside Camera Raw, navigate to the Color Grading panel. This is where the foundational digicam color character gets built. Pull the Shadows hue wheel toward blue and lift the saturation slightly – you’re targeting that underexposed, slightly cold look you get in the dark areas of a photo taken with a cheap sensor. Then move to the Highlights wheel and push toward orange or amber. Early 2000s digicams had warm, clipped highlights, especially when a flash was involved. The contrast between cool shadows and warm highlights does a lot of heavy lifting before any other effect is applied.
Don’t overdo either adjustment. A subtle shift reads as authentic. A heavy-handed one reads as a filter.
Step 3: Add Film Grain
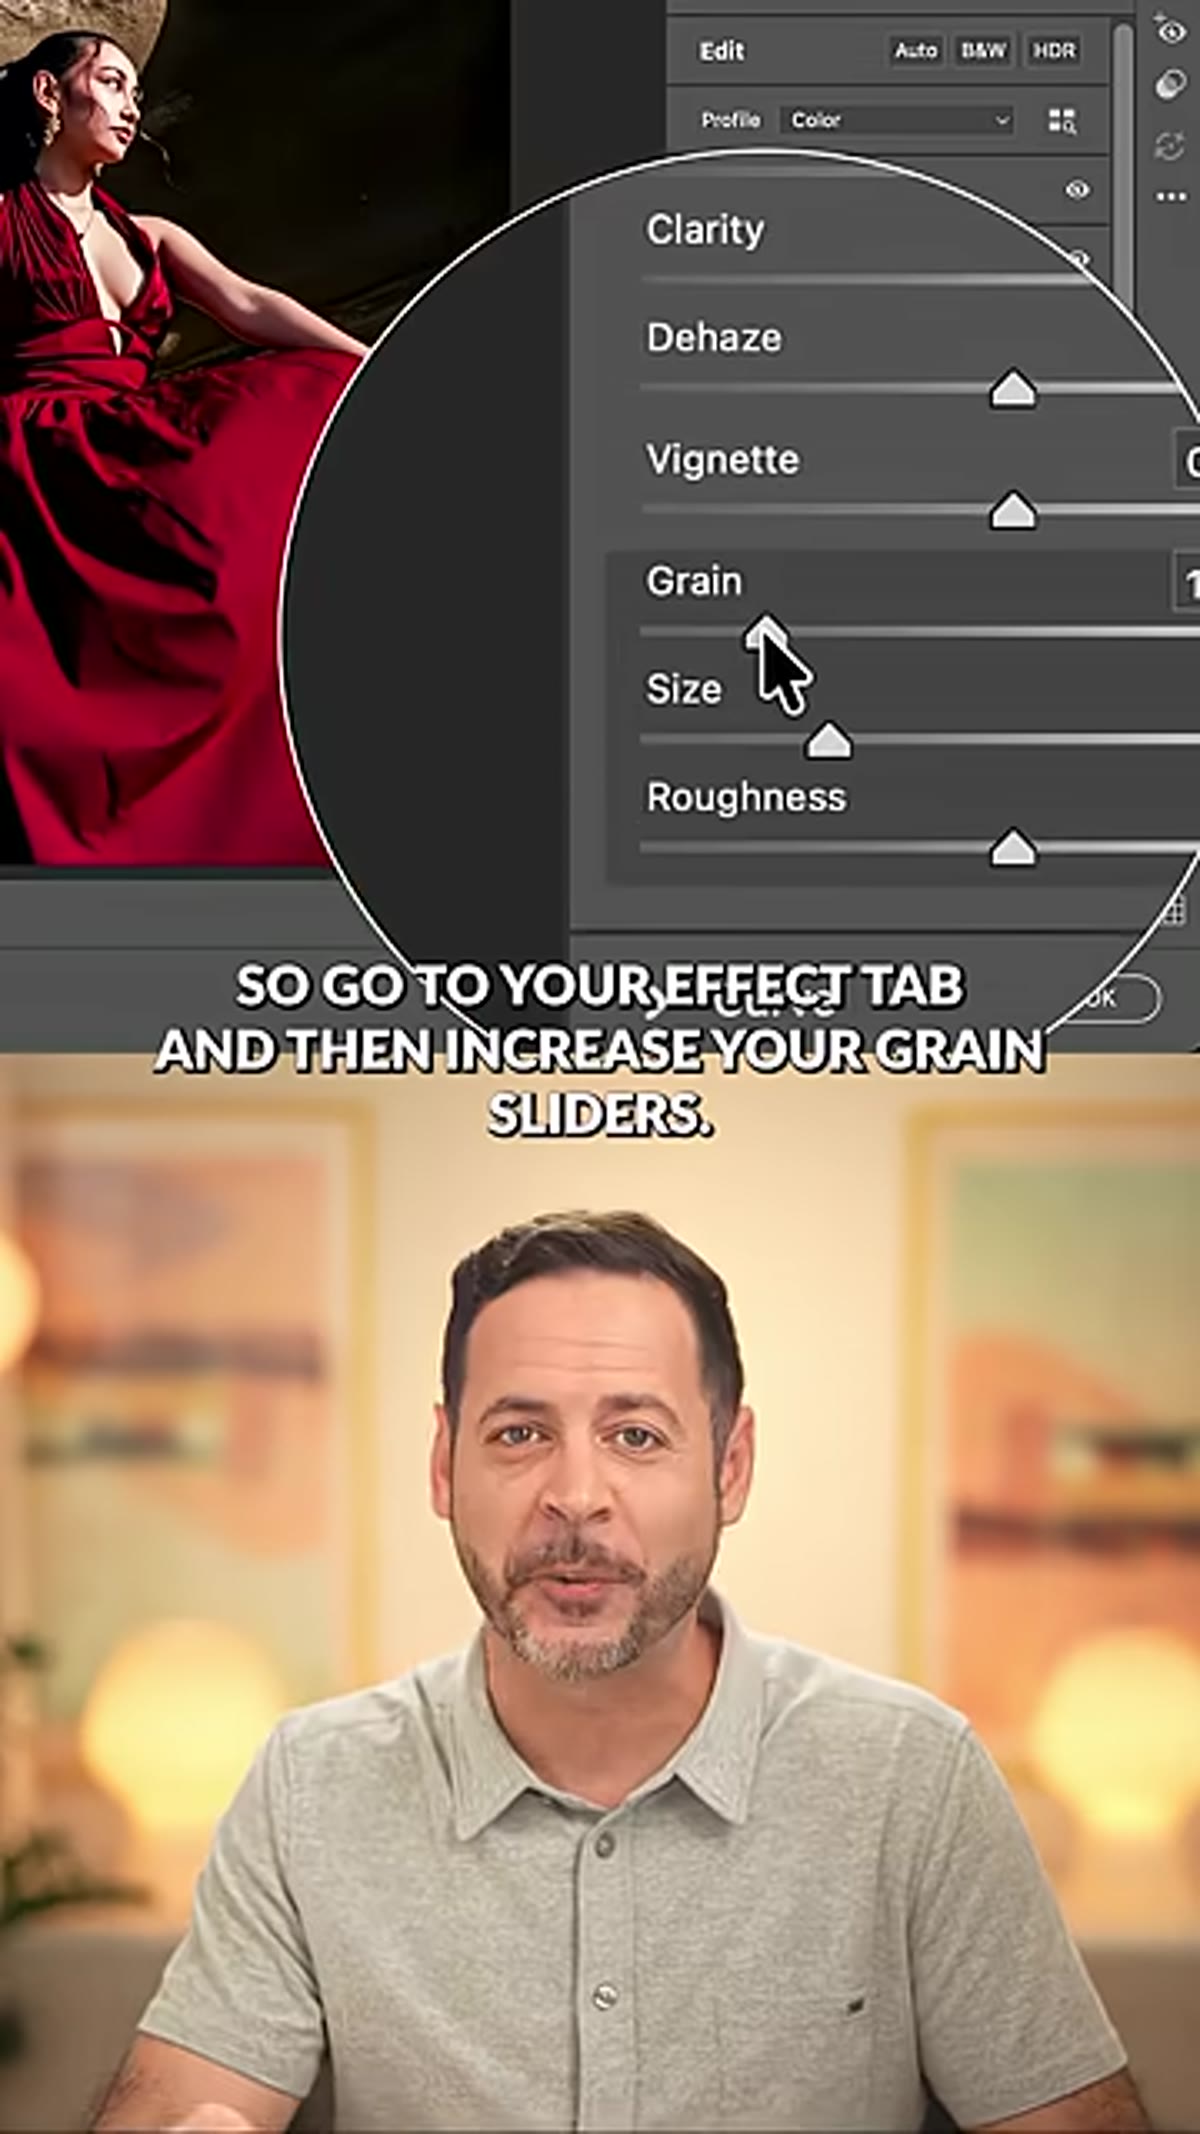 Camera Raw Effects panel with Grain sliders increased
Go to the Effects panel in Camera Raw and find the Grain section. Increase the Amount slider to add visible texture – this is one of the places where people are tempted to be conservative, but digicam grain is genuinely coarse. Push the Size slider up slightly as well, because digital camera noise from that era was chunky compared to film grain. Roughness controls how irregular the grain pattern looks; keeping it mid-to-high makes it feel less uniform and more like actual sensor noise.
Camera Raw Effects panel with Grain sliders increased
Go to the Effects panel in Camera Raw and find the Grain section. Increase the Amount slider to add visible texture – this is one of the places where people are tempted to be conservative, but digicam grain is genuinely coarse. Push the Size slider up slightly as well, because digital camera noise from that era was chunky compared to film grain. Roughness controls how irregular the grain pattern looks; keeping it mid-to-high makes it feel less uniform and more like actual sensor noise.
Grain is one of those things that’s easier to add than to explain. The goal is that when you zoom out to 100%, you can clearly see texture in the midtones and shadows.
Step 4: Apply a Vignette Using the Optics Panel
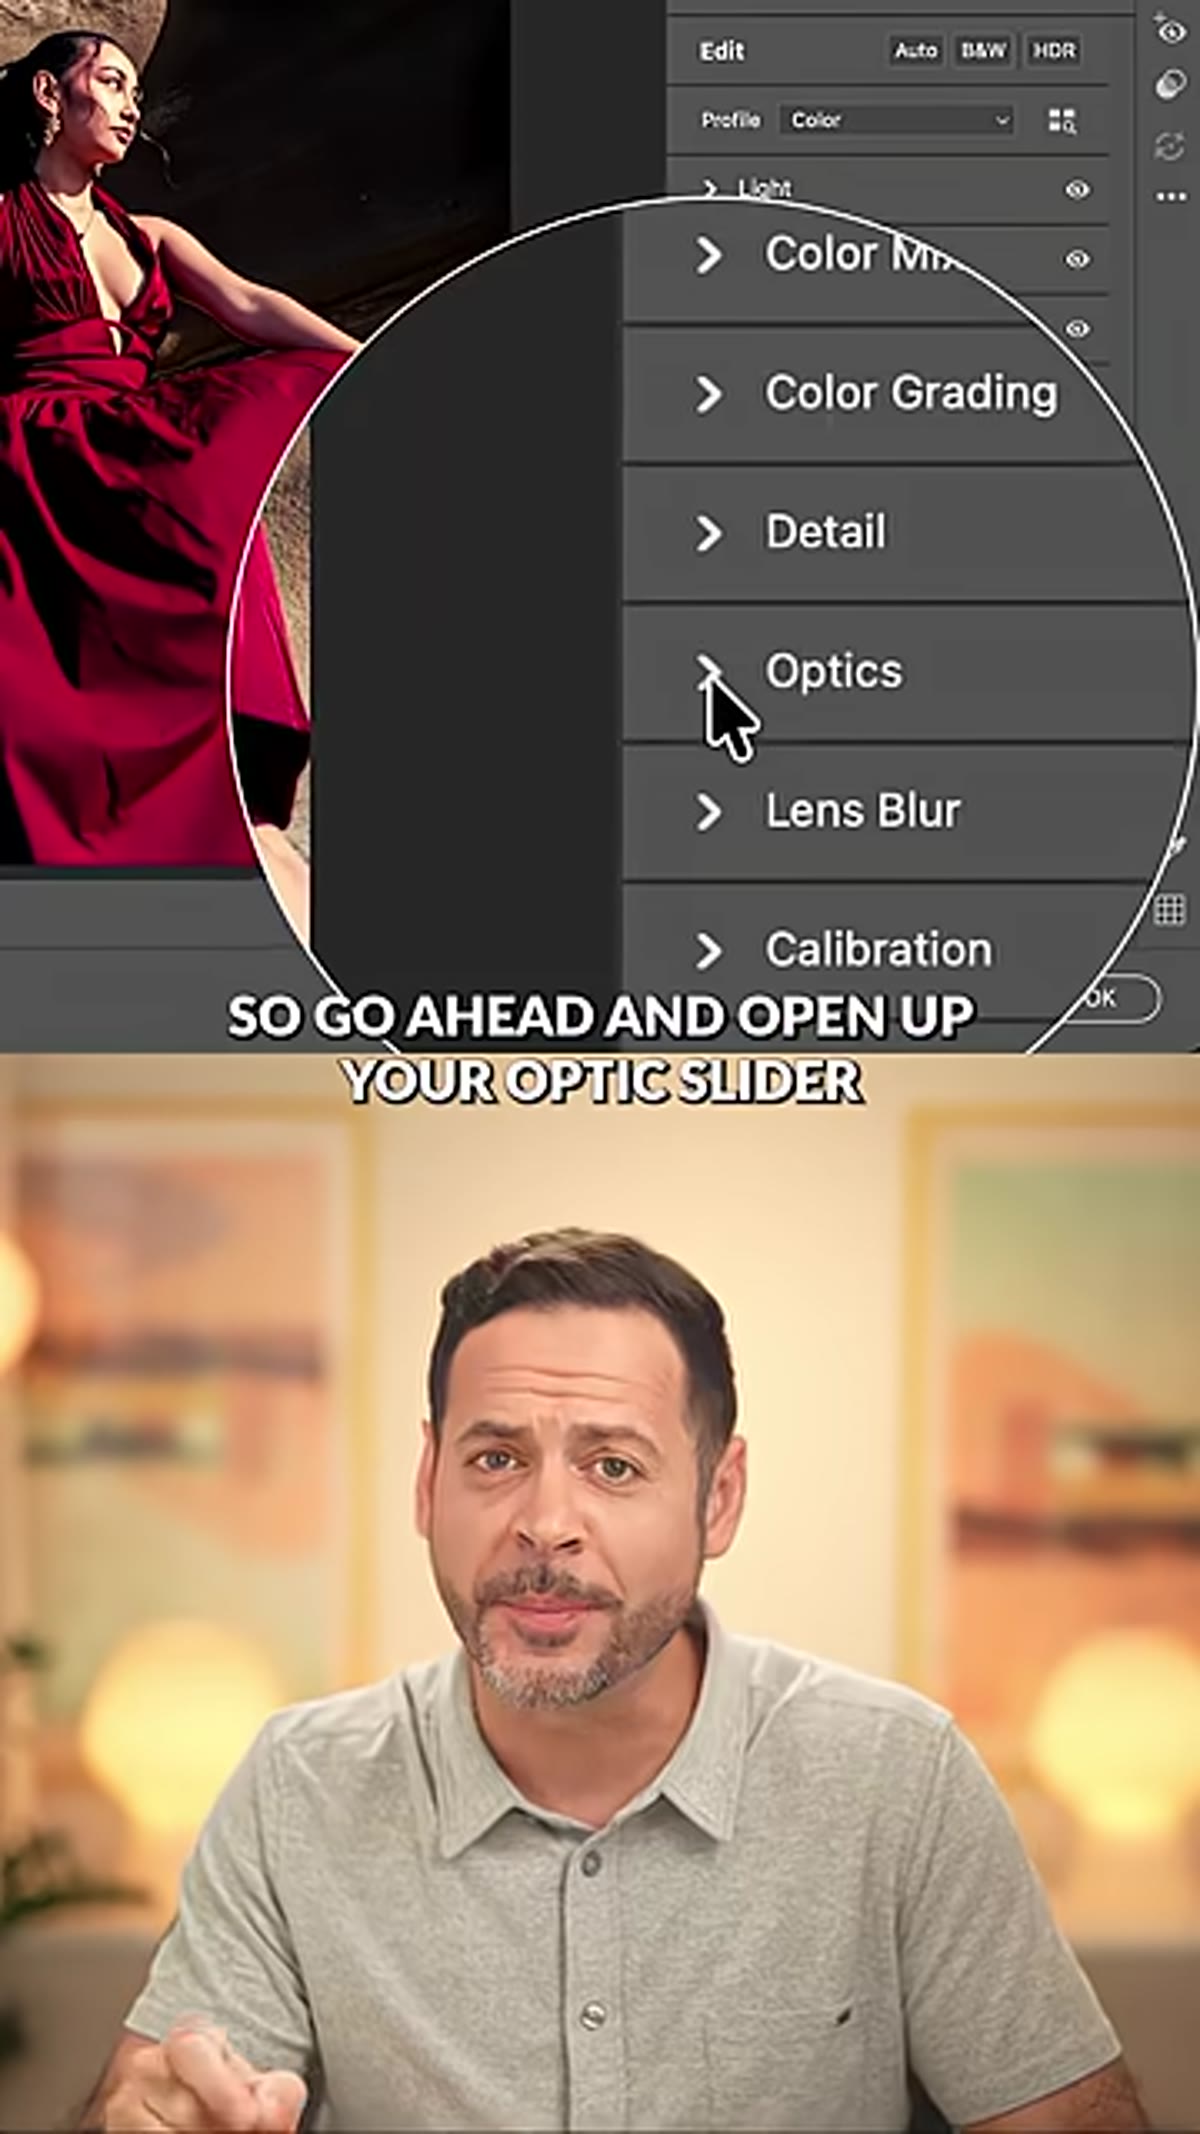 Camera Raw Optics panel with Vignetting slider pulled right
Still inside Camera Raw, open the Optics panel. You’ll find a Vignetting slider here – and yes, there’s also a vignette in the Effects panel, but the Optics vignette behaves differently and tends to produce a more natural, lens-like falloff. Pull the slider to the right to brighten the edges rather than darken them. Wait – this seems backwards from what you’d expect. The reason is that the on-camera flash on a digicam actually overexposes the center of the frame, making the edges look relatively darker by comparison. A positive vignette in the Optics panel creates that center-bright, edge-dark relationship naturally.
Camera Raw Optics panel with Vignetting slider pulled right
Still inside Camera Raw, open the Optics panel. You’ll find a Vignetting slider here – and yes, there’s also a vignette in the Effects panel, but the Optics vignette behaves differently and tends to produce a more natural, lens-like falloff. Pull the slider to the right to brighten the edges rather than darken them. Wait – this seems backwards from what you’d expect. The reason is that the on-camera flash on a digicam actually overexposes the center of the frame, making the edges look relatively darker by comparison. A positive vignette in the Optics panel creates that center-bright, edge-dark relationship naturally.
Step 5: Use a Radial Gradient Mask to Boost the Center Brightness
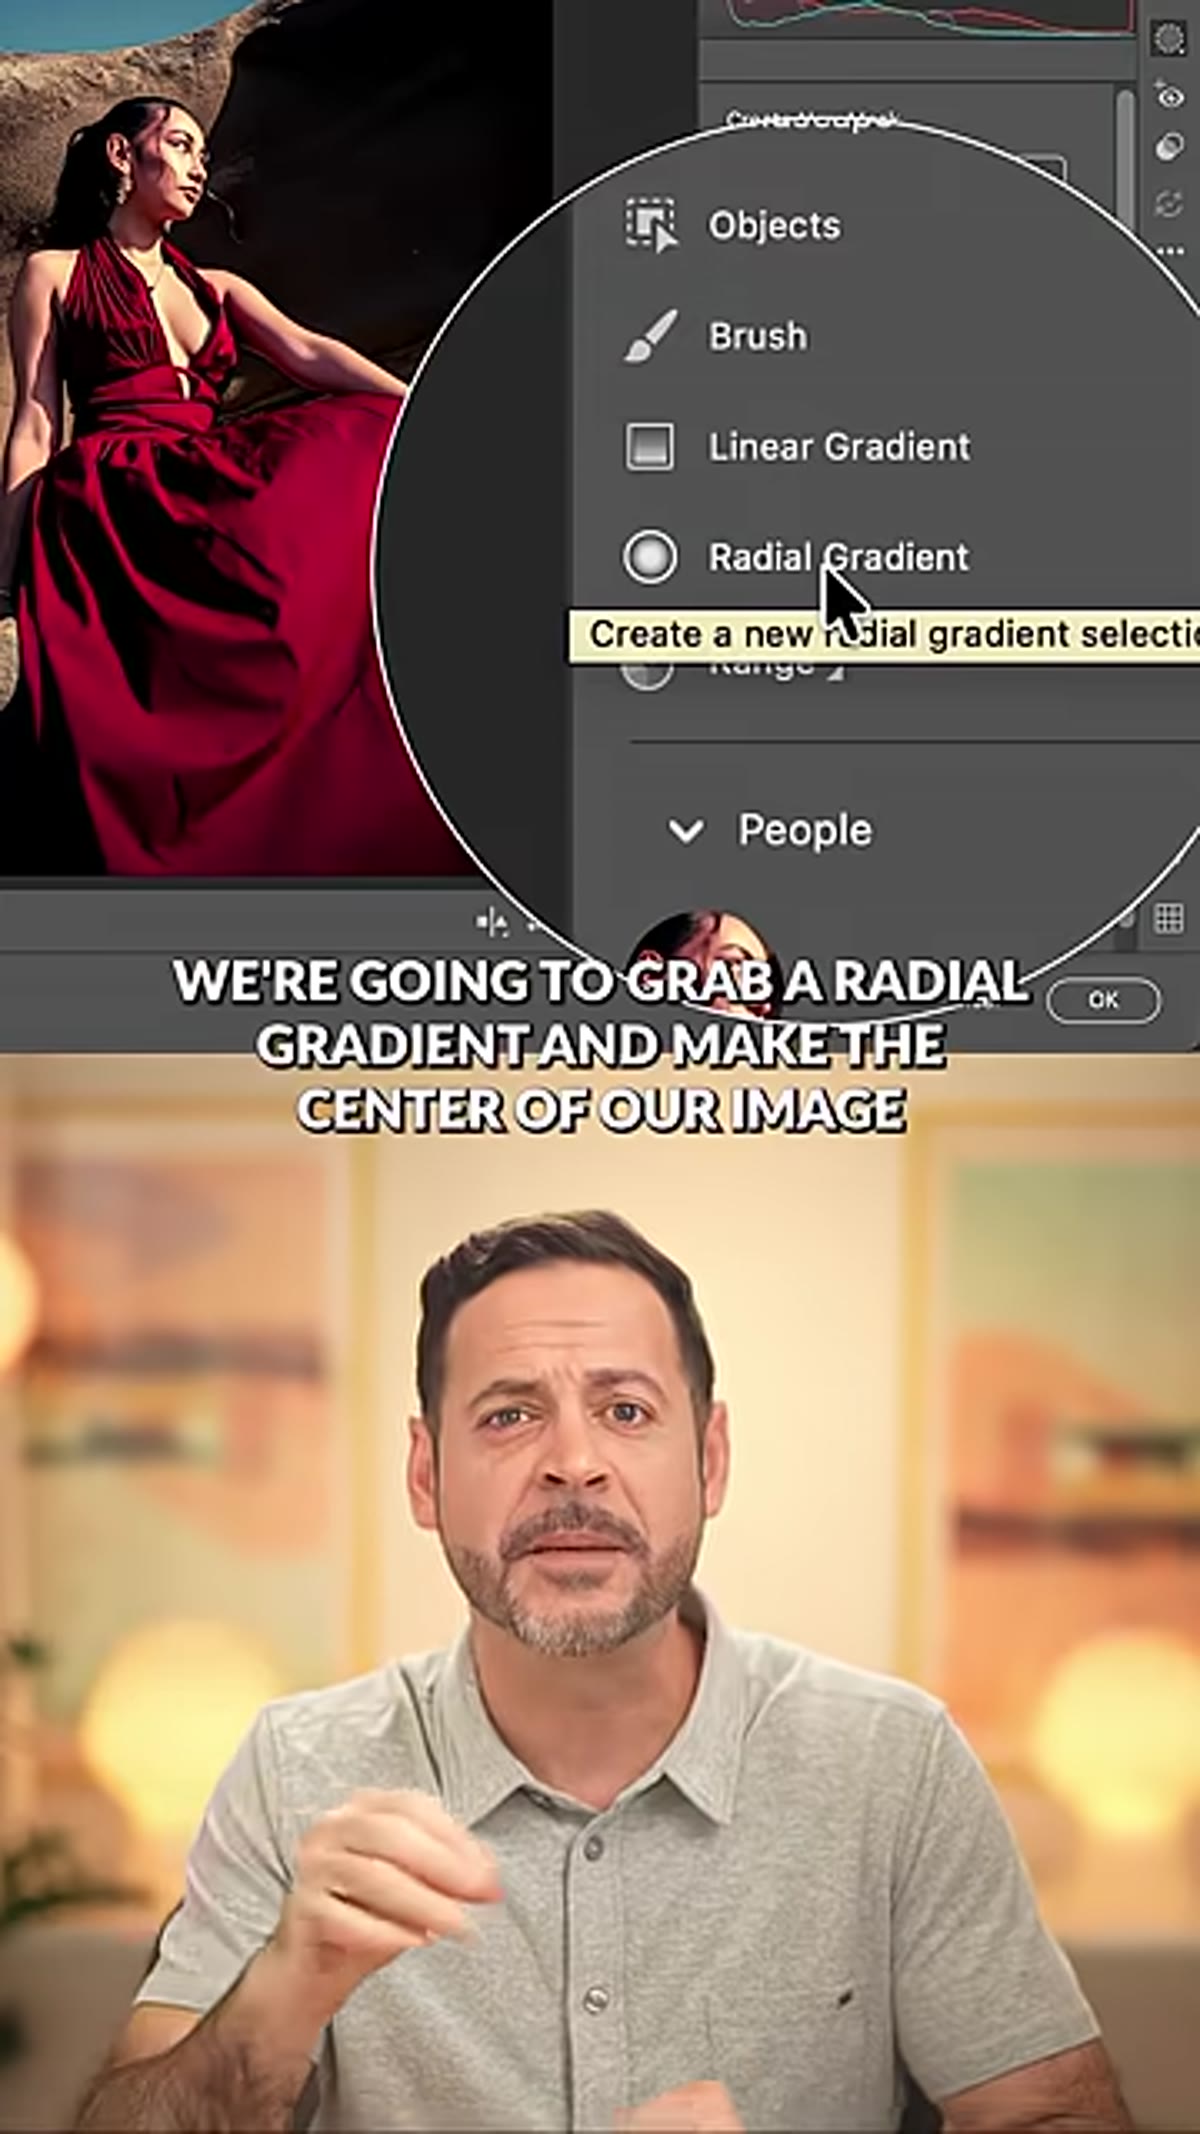 Camera Raw Masking panel with Radial Gradient placed over center of image
Open the Masking panel in Camera Raw and select the Radial Gradient tool. Draw a gradient from the center of your subject outward. Inside this mask, increase the Exposure slider significantly. This simulates the harsh, blown-out quality of an on-camera flash – the center of the frame gets hit hardest, and the light falls off toward the edges. The effect is exaggerated compared to what you’d do in a normal portrait retouch, and that exaggeration is the point. The flash glow is one of the most immediately recognizable markers of the digicam look.
Camera Raw Masking panel with Radial Gradient placed over center of image
Open the Masking panel in Camera Raw and select the Radial Gradient tool. Draw a gradient from the center of your subject outward. Inside this mask, increase the Exposure slider significantly. This simulates the harsh, blown-out quality of an on-camera flash – the center of the frame gets hit hardest, and the light falls off toward the edges. The effect is exaggerated compared to what you’d do in a normal portrait retouch, and that exaggeration is the point. The flash glow is one of the most immediately recognizable markers of the digicam look.
Hit OK to apply all your Camera Raw changes and return to Photoshop.
Step 6: Duplicate the Layer and Apply a Lighten Blend + Gaussian Blur for Highlight Glow
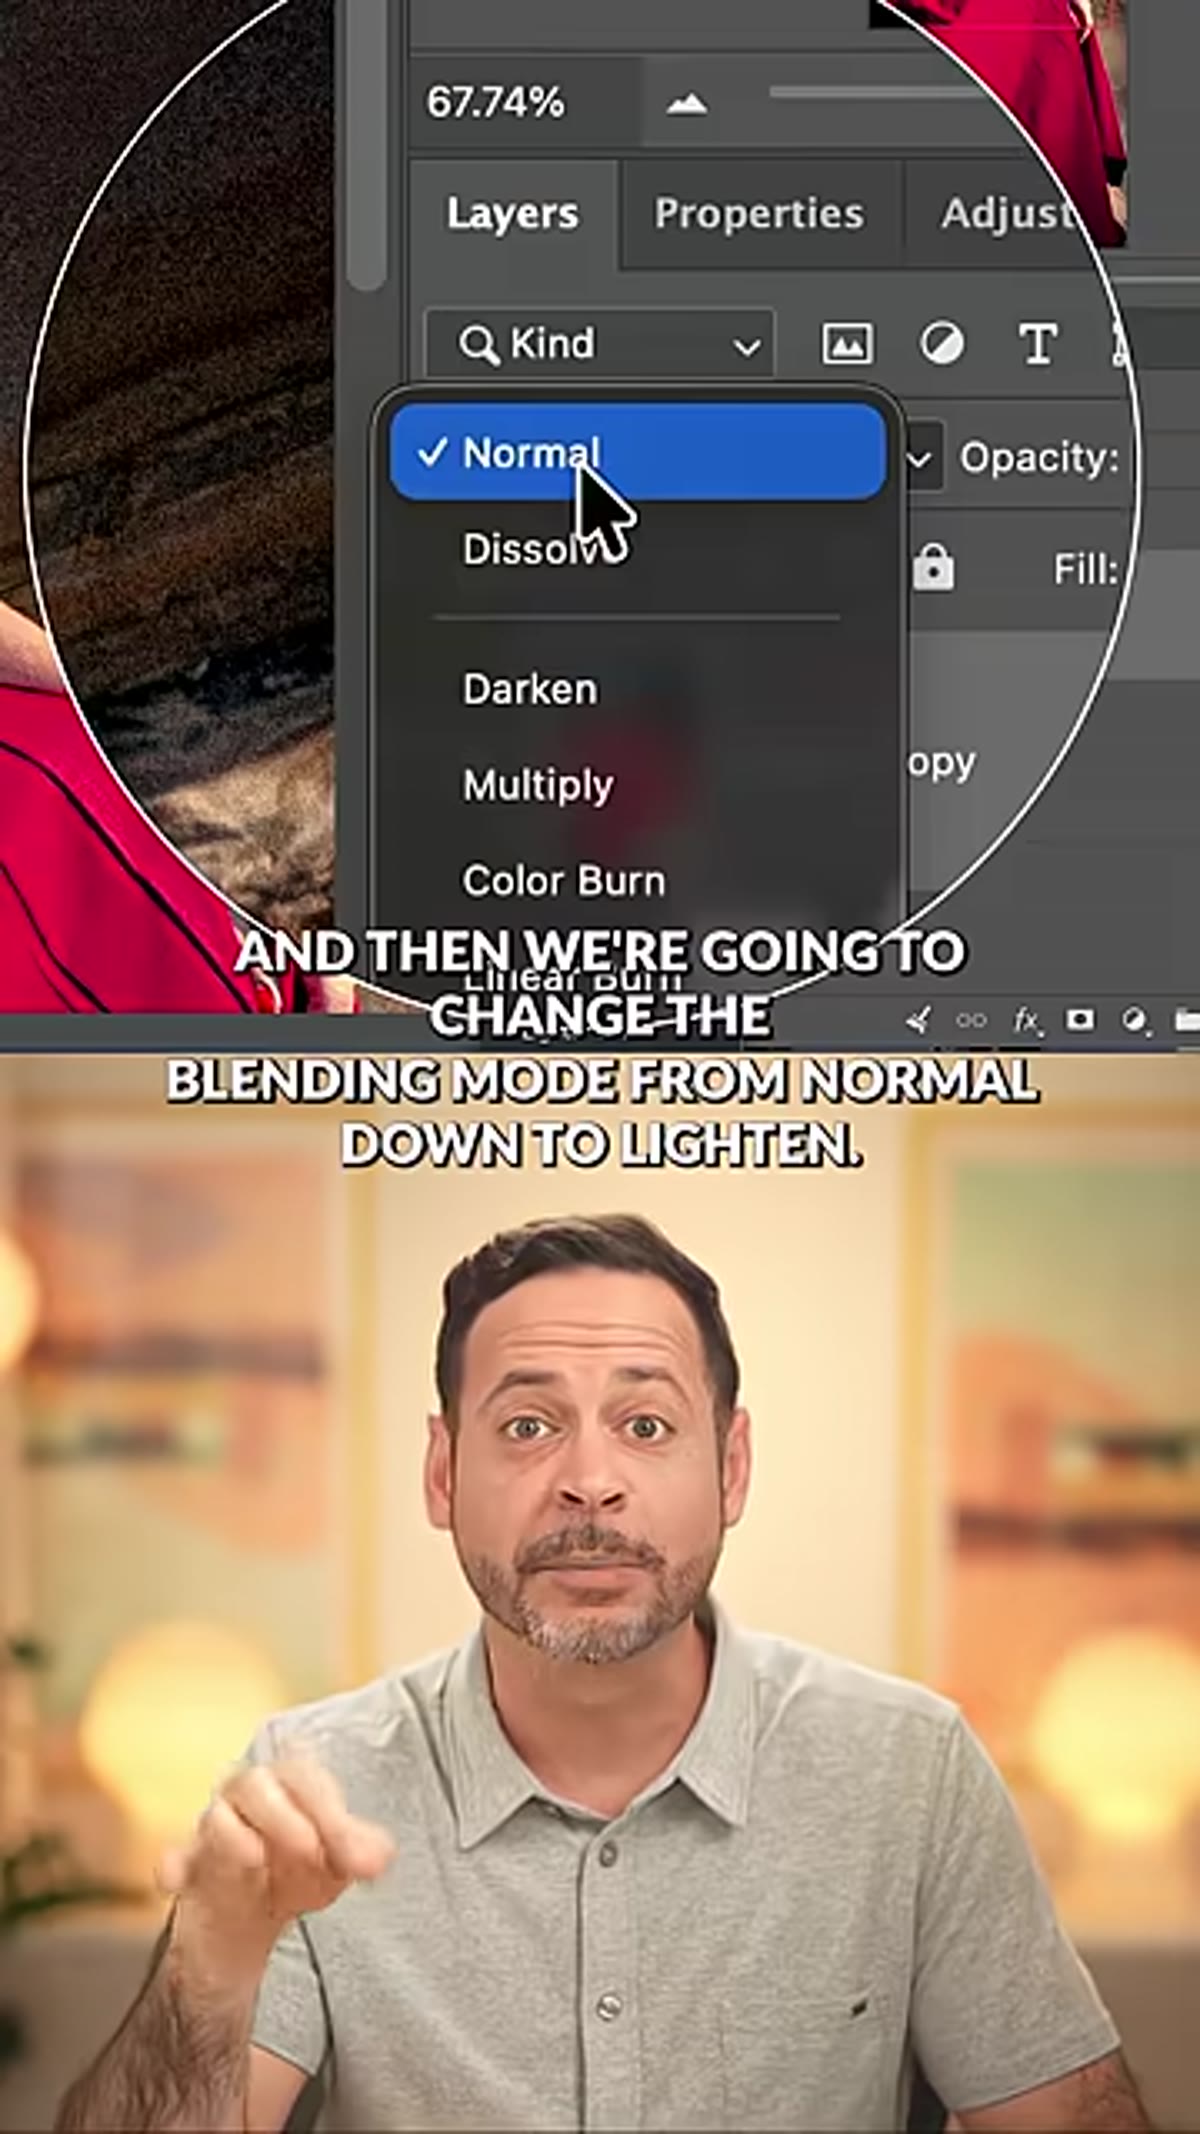 Layers panel showing duplicated Smart Object with Lighten blend mode selected
Back in the Layers panel, duplicate your Smart Object layer. On the duplicate, change the blending mode from Normal to Lighten. Lower the opacity – somewhere between 40% and 65% is a good starting range, depending on your image. Then go to Filter > Blur > Gaussian Blur and apply a moderate blur, somewhere between 15 and 30 pixels. Because you’re using Lighten mode, the blur only affects areas where the duplicate layer is brighter than the layer beneath it. The result is that your highlights bloom outward softly, which mimics the lens flare and halation you’d get from a cheap camera with a basic plastic lens and no coating.
Layers panel showing duplicated Smart Object with Lighten blend mode selected
Back in the Layers panel, duplicate your Smart Object layer. On the duplicate, change the blending mode from Normal to Lighten. Lower the opacity – somewhere between 40% and 65% is a good starting range, depending on your image. Then go to Filter > Blur > Gaussian Blur and apply a moderate blur, somewhere between 15 and 30 pixels. Because you’re using Lighten mode, the blur only affects areas where the duplicate layer is brighter than the layer beneath it. The result is that your highlights bloom outward softly, which mimics the lens flare and halation you’d get from a cheap camera with a basic plastic lens and no coating.
This step is where the effect goes from “looks like film grain was added” to “looks like an actual digicam photo.” The glow is subtle but decisive.
One Caveat From My Own Workflow
I run retouching at volume – sometimes dozens of images in a single job that all need consistent treatment. The thing I’d add to Nace’s tutorial is this: once you’ve dialed in the Camera Raw settings for your first image, save them as a preset immediately. Camera Raw lets you save the entire panel state as a named preset, so you can apply the same color grading, grain, and vignette to every other image in a batch with a single click. The Gaussian blur layer and the blending mode setup can be saved as a Photoshop Action that runs on any open document. Combined, these two tools turn a five-minute manual process into something that takes seconds per image.
I’ve also found that the right grain Amount varies significantly depending on the image’s base exposure. Brighter images need more grain to read correctly; darker images can get by with less. Build a few preset variations if you’re working across different lighting conditions.
The single biggest takeaway from this technique is that the Y2K digicam look is a system, not a single filter. Each of the six steps above addresses a specific visual characteristic of early digital cameras, and the effect only lands when all of them work together. Camera Raw’s Color Grading and Effects panels do most of the structural work. The Radial Gradient mask and the Lighten-mode blur layer add the flash realism that sells it.
If you want to follow along with Aaron’s original walkthrough, PHLEARN also has a full-length version of this tutorial with a free downloadable preset and sample PSD at phlearn.com. But start here: Watch the full tutorial on YouTube and use this breakdown as your reference while you work.
Comments
Leave a Comment