There’s a specific kind of frustration that comes from nailing an edit, closing the app, and then spending twenty minutes trying to reconstruct the same adjustments on the next shoot. I’ve done it more times than I’d like to admit, usually on deadline, usually at 11pm. The whole point of a preset workflow is to capture the decision once and stop making it over and over again. That principle is what drives everything I do in post-production, whether I’m working in Photoshop, Lightroom, or Aperture.
In this CreativeLive tutorial, the instructor walks through exactly how to create your own presets inside Aperture, starting from a live edit and saving it as a reusable effect. It’s a short, practical demonstration, and it filled in a few gaps I had around Aperture’s preset management specifically. Watch the full tutorial on YouTube before or after you read this, depending on how you learn best.
The scenario in the tutorial is a video light shoot where skin tones are pulling red and the sky needs a cooler cast. That’s a real-world problem with a specific solution, and it’s a better teaching frame than abstract sliders in a vacuum. Here’s the full walkthrough.
Step 1: Find Where Presets Live in Aperture
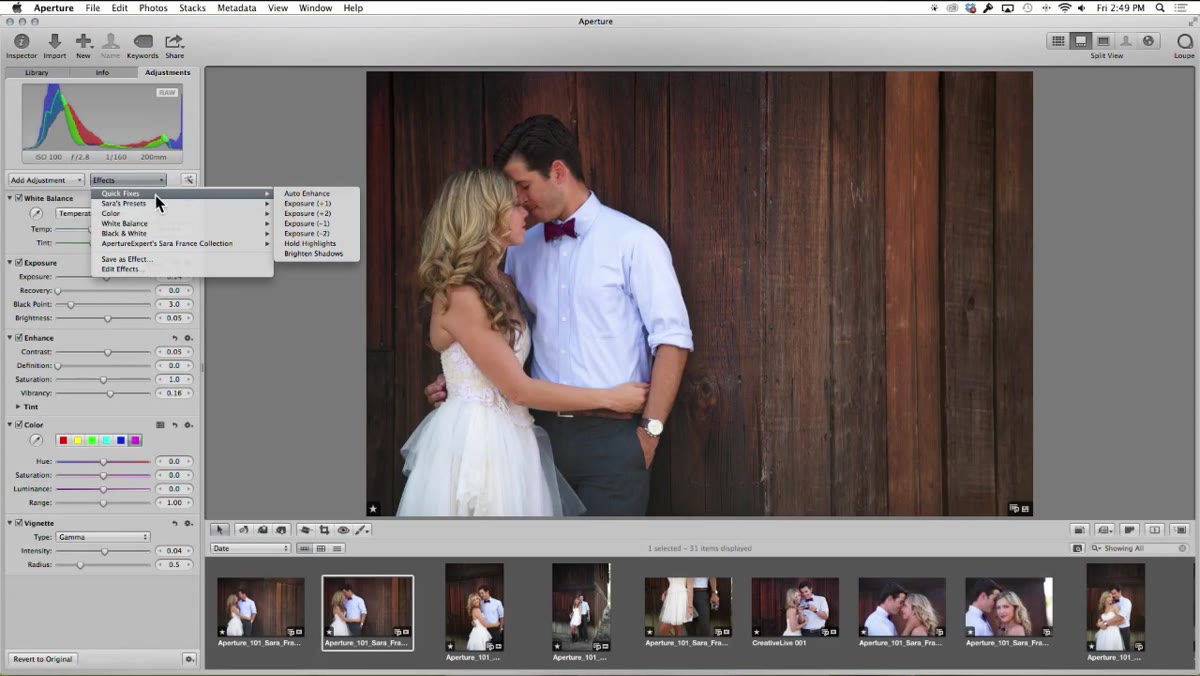 The Effects panel open showing existing saved presets
Before you can save anything, you need to know where Aperture stores presets. They live under the Effects panel, which is your central hub for both imported presets and anything you create yourself. If you’ve already imported third-party presets, you’ll see them here. If you haven’t touched this panel yet, it may look sparse. Either way, this is where you’re working. Get familiar with navigating here before anything else, because you’ll be coming back to it constantly once you build a library of your own.
The Effects panel open showing existing saved presets
Before you can save anything, you need to know where Aperture stores presets. They live under the Effects panel, which is your central hub for both imported presets and anything you create yourself. If you’ve already imported third-party presets, you’ll see them here. If you haven’t touched this panel yet, it may look sparse. Either way, this is where you’re working. Get familiar with navigating here before anything else, because you’ll be coming back to it constantly once you build a library of your own.
Step 2: Start With a Real Edit - Don’t Build Presets in the Abstract
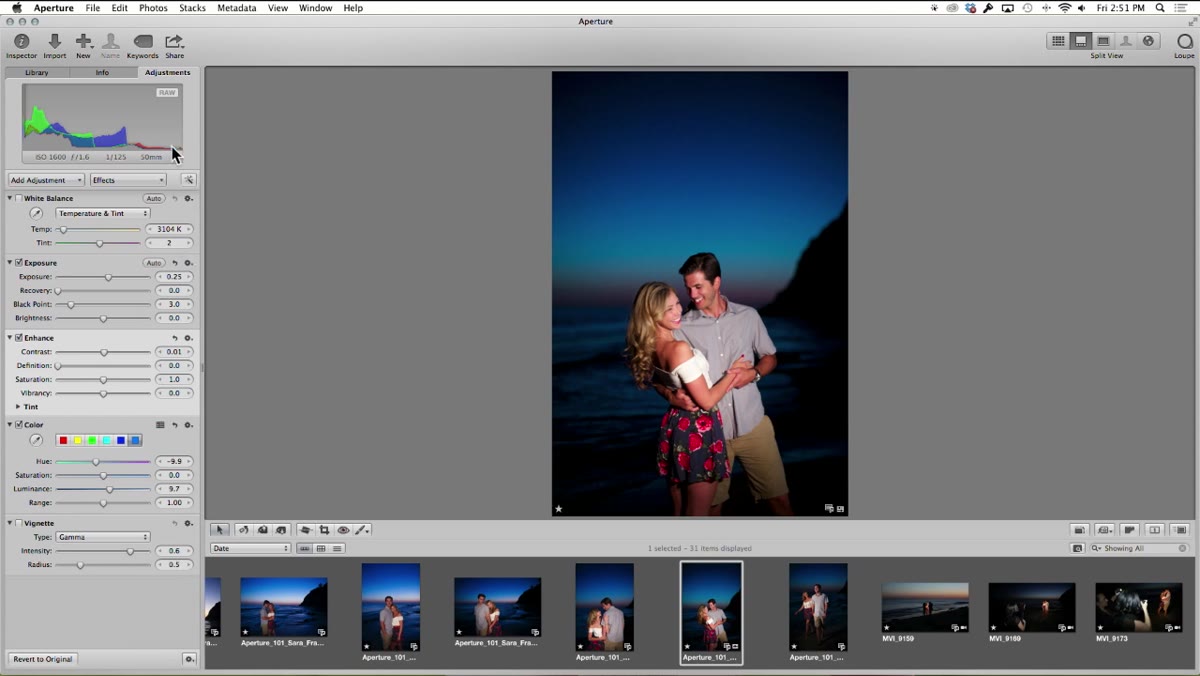
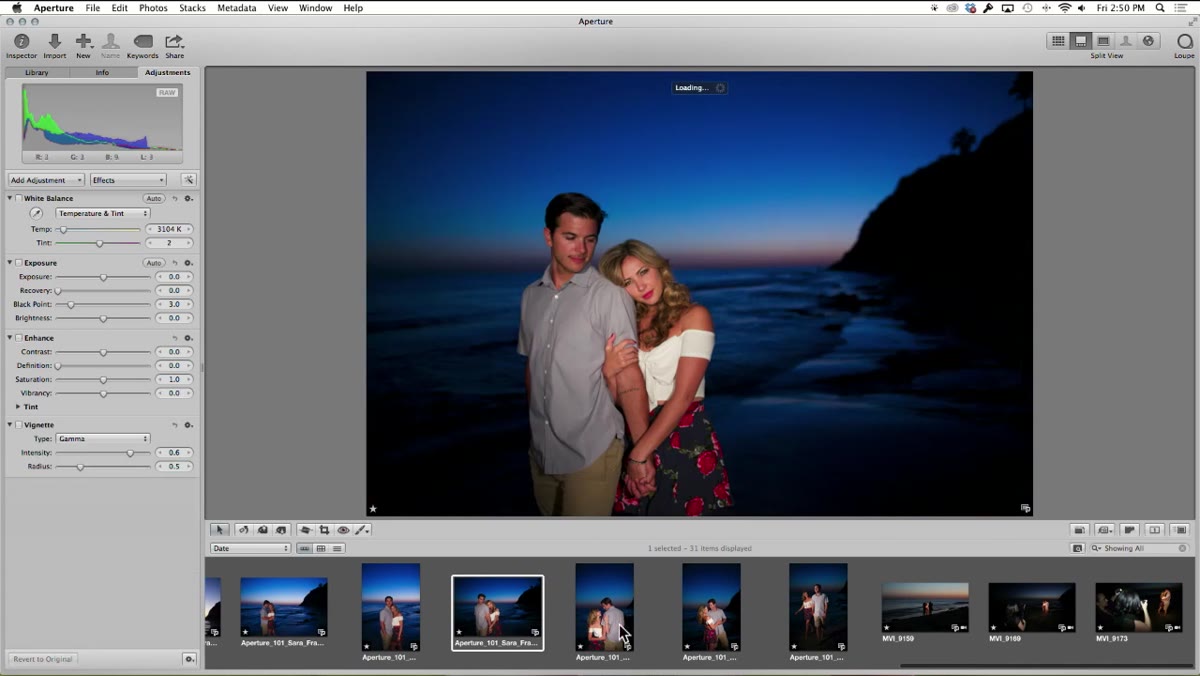 Adjustments panel open on a video light portrait shot
The instructor’s approach here is smart: he starts with an actual image and an actual problem rather than a demo file. He’s working with a video light portrait where the exposure needs a small lift and the contrast could use a slight push. Open your Adjustments panel and begin with the basics. Bring exposure up just enough to open the shadows without blowing highlights, and nudge contrast to add some definition back into the midtones. These are conservative moves, not dramatic ones. You’re setting a foundation, not making an artistic statement.
Adjustments panel open on a video light portrait shot
The instructor’s approach here is smart: he starts with an actual image and an actual problem rather than a demo file. He’s working with a video light portrait where the exposure needs a small lift and the contrast could use a slight push. Open your Adjustments panel and begin with the basics. Bring exposure up just enough to open the shadows without blowing highlights, and nudge contrast to add some definition back into the midtones. These are conservative moves, not dramatic ones. You’re setting a foundation, not making an artistic statement.
The goal at this stage is to define what “my starting point for this type of shot” looks like. For me, that mental framing is what separates a useful preset from a one-off edit I’ll never touch again.
Step 3: Use the Color Picker to Target Specific Hues
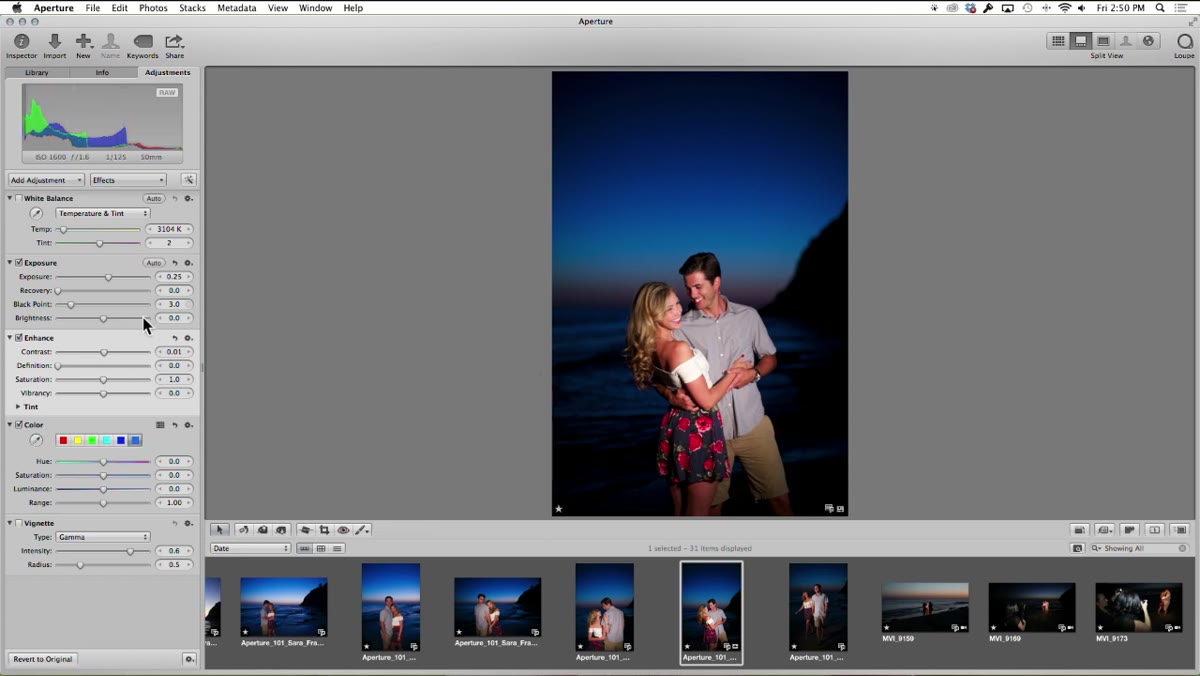 Color picker selecting a hue in the sky area of the image
With the base exposure dialed in, the instructor moves into color work using Aperture’s color adjustment tool. He clicks into the sky area of the image to sample the color there, then pulls the hue slider toward blue-green to cool the tone down. He also adjusts the luminance for that specific color range to brighten it slightly without affecting the rest of the image.
Color picker selecting a hue in the sky area of the image
With the base exposure dialed in, the instructor moves into color work using Aperture’s color adjustment tool. He clicks into the sky area of the image to sample the color there, then pulls the hue slider toward blue-green to cool the tone down. He also adjusts the luminance for that specific color range to brighten it slightly without affecting the rest of the image.
This is targeted color adjustment, not a global color grade. Aperture lets you pick a color from the image itself rather than guessing at a hue value, which is a significant advantage when you’re trying to fix something specific like an overcooked blue-sky channel. Make your adjustment, check it against the image, and be conservative. You can always go further, but a preset that overcooks the color is a preset you’ll override every time, which defeats the entire purpose.
Step 4: Save the Adjustment Set as a New Effect
 Save As Effect dialog box open with a name being typed
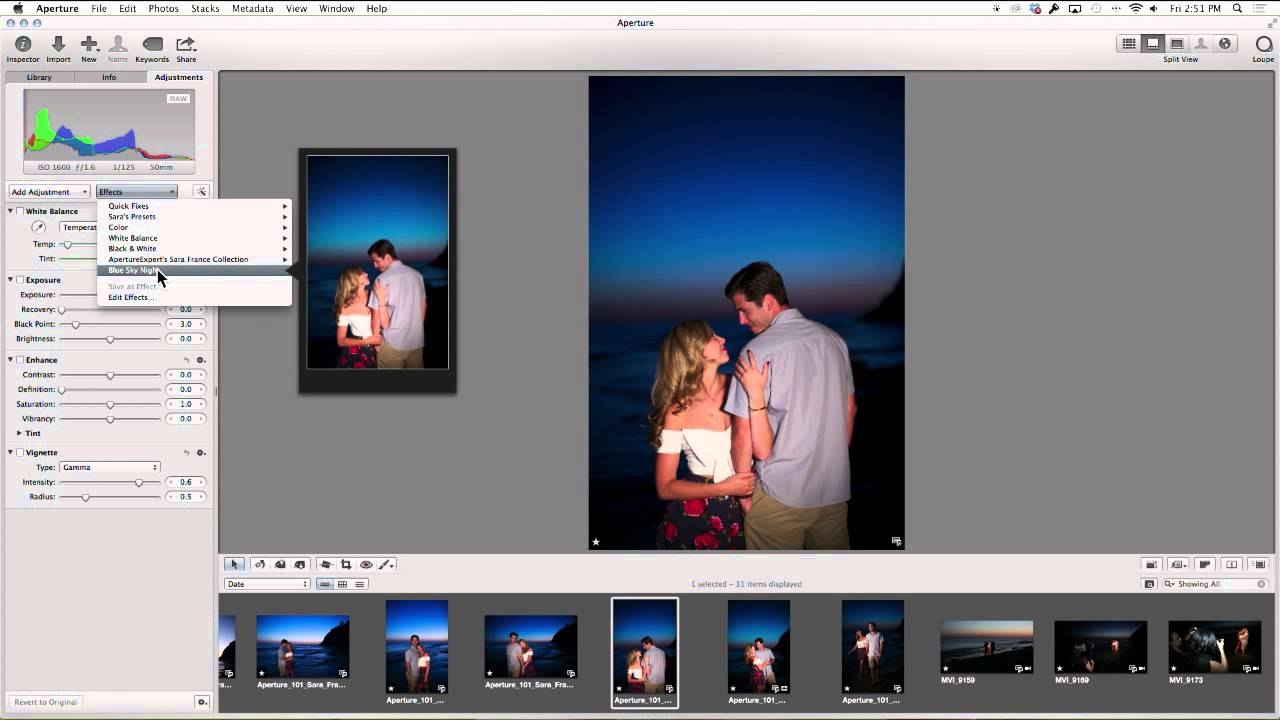
Once you’re happy with the adjustment stack, go up to the menu and select “Save As Effect.” Aperture will prompt you to name it. The instructor calls his “Blue Sky Night,” which is specific enough to be useful and short enough to scan quickly in a list. This is a naming convention worth thinking about. I color-code my preset categories in other tools, and in Aperture I try to use names that describe the shooting condition rather than the mood, something like “Overcast Product” or “Window Light Portrait.” Names based on vibes fade. Names based on conditions stay useful.
Save As Effect dialog box open with a name being typed
Once you’re happy with the adjustment stack, go up to the menu and select “Save As Effect.” Aperture will prompt you to name it. The instructor calls his “Blue Sky Night,” which is specific enough to be useful and short enough to scan quickly in a list. This is a naming convention worth thinking about. I color-code my preset categories in other tools, and in Aperture I try to use names that describe the shooting condition rather than the mood, something like “Overcast Product” or “Window Light Portrait.” Names based on vibes fade. Names based on conditions stay useful.
Once saved, you can immediately apply the preset to the next image. Jump to a different photo, open Effects, find your new preset by name, and apply it. The adjustments transfer instantly.
Step 5: Refine and Overwrite the Preset
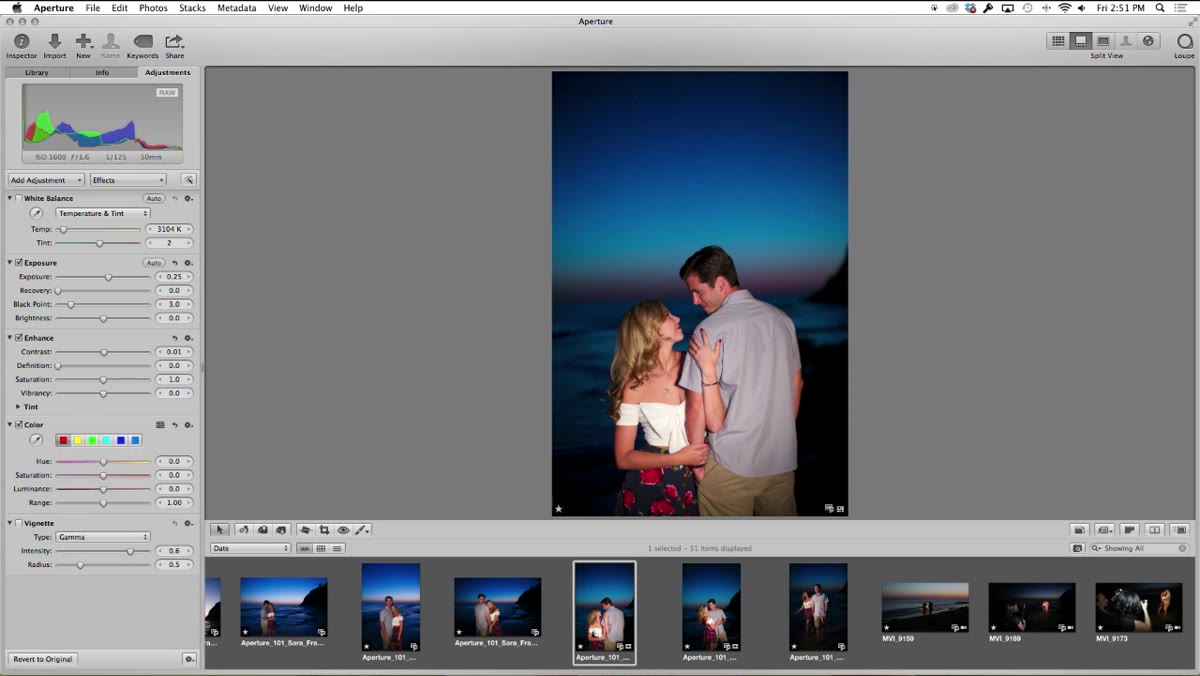 Color adjustments panel open targeting skin tone saturation
The tutorial includes a step that a lot of beginner preset guides skip: going back and updating a preset after you’ve tested it on a second image. In this case, the instructor notices that the skin tone on another photo is pulling too saturated and slightly red after the preset is applied. He samples the skin tone, brings down the saturation, pulls the red channel back a touch, and then saves again using the same preset name, effectively overwriting the original with the improved version.
Color adjustments panel open targeting skin tone saturation
The tutorial includes a step that a lot of beginner preset guides skip: going back and updating a preset after you’ve tested it on a second image. In this case, the instructor notices that the skin tone on another photo is pulling too saturated and slightly red after the preset is applied. He samples the skin tone, brings down the saturation, pulls the red channel back a touch, and then saves again using the same preset name, effectively overwriting the original with the improved version.
This is how presets should work in practice. Version one is a draft. You apply it to a few images, see where it breaks, adjust, and save again. Treat your preset library like living files, not finished products. I’ve gone back and revised presets I built years ago because my clients’ lighting setups changed or I switched studios.
Step 6: Organize Your Presets Into Groups Using Edit Effects
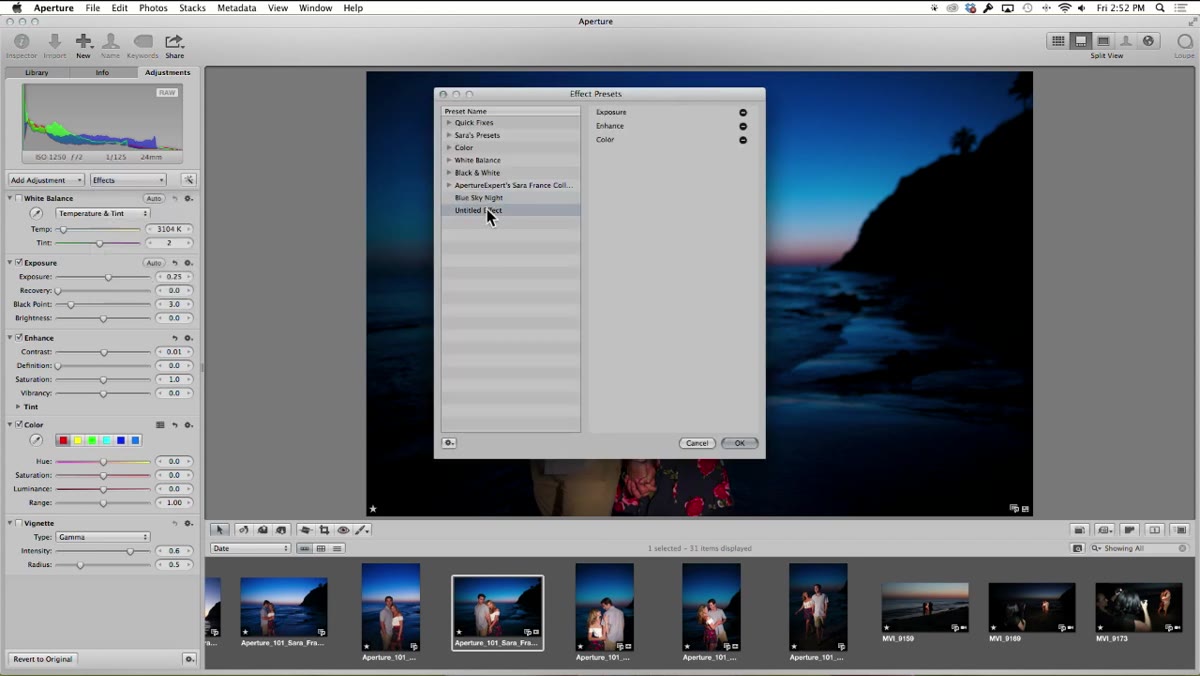 Edit Effects panel open with option to create a new preset group
Once you have a few presets saved, the organizational layer becomes important. The instructor points to the “Edit Effects” menu, where you can remove presets you no longer use and bundle related ones into named groups. Creating a new preset group is the key move here: give the group a descriptive name that reflects the category of shooting it covers.
Edit Effects panel open with option to create a new preset group
Once you have a few presets saved, the organizational layer becomes important. The instructor points to the “Edit Effects” menu, where you can remove presets you no longer use and bundle related ones into named groups. Creating a new preset group is the key move here: give the group a descriptive name that reflects the category of shooting it covers.
If you let your preset list grow without organizing it, you end up with a flat, unsorted list that takes longer to scan than just doing the adjustment manually. Group by shoot type, by client type, or by lighting condition. The specific system matters less than having one.
A Note From My Own Workflow
I don’t use Aperture as my primary post-production environment anymore, but the logic in this tutorial is identical to how I manage actions and presets across every tool I use. The discipline of saving an edit before you close the file, naming it specifically, and then revisiting it after you’ve tested it on real work. that’s the whole game.
If you’re building a preset library from scratch, I’d suggest starting narrow: pick one common shooting scenario, build a preset for exactly that scenario, and use it on ten images before you build anything else. The instinct is to build twenty presets in one session. The reality is that three well-tested presets will save you more time than twenty untested ones.
The single most important idea in this tutorial is that a preset is not a finished product the moment you save it. It’s a hypothesis. You apply it, you see what it does to real images, and then you go back and correct it. Build that revision step into your process and your preset library will actually improve over time instead of becoming a graveyard of good intentions.
Watch the full tutorial on YouTube to see the full edit and the Effects panel walkthrough in real time.
Comments
Leave a Comment