
Every December I get at least three client requests for “wintery” versions of images that were shot in July. Ad agencies love a good seasonal pivot, and nothing says “we planned this last minute” like asking your retoucher to add snow to a product shot of a pickup truck in front of a parking garage. I’ve used stock overlays, third-party plugins, and some truly embarrassing workarounds over the years. But a clean, convincing, layered snow effect built from scratch inside Photoshop? That took me longer to nail than it should have.
In this Tony & Chelsea Northrup tutorial, Watch the full tutorial on YouTube, Tony walks through two methods for generating snow: one using Photoshop’s Add Noise filter combined with the Filter Gallery, and a second approach using a custom brush. The layered approach he demonstrates, using separate noise layers at different scales for background and foreground snow, is exactly the kind of thinking I wish someone had spelled out for me a decade ago. Here’s how it works, step by step.
Step 1: Create a New Layer and Fill It with Black
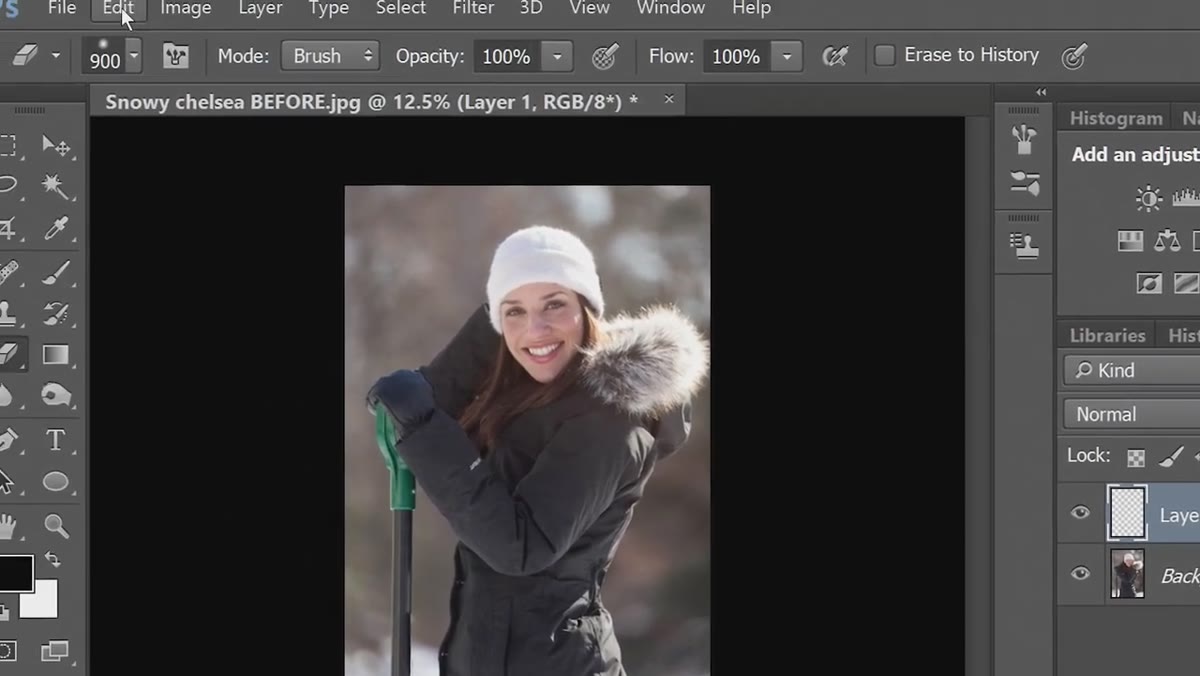 New layer filled with black in Layers panel
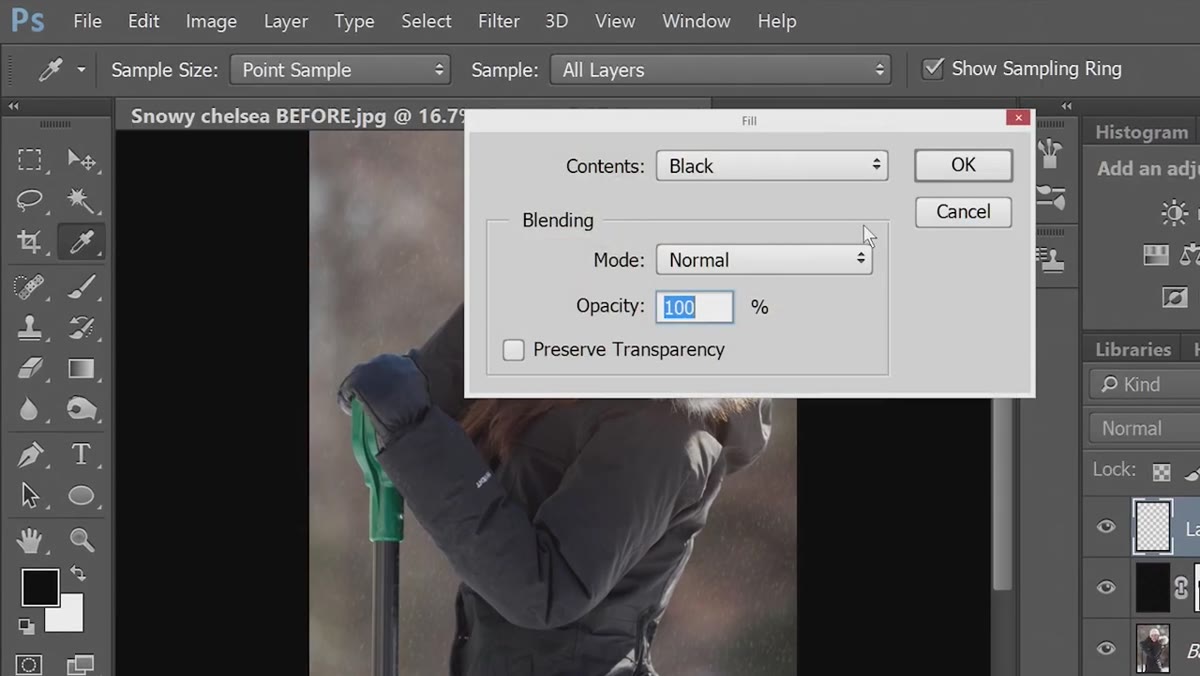
Add a new layer above your base image. Go to Edit, then Fill, and select Black as the fill color. This black layer is the canvas your noise will live on. The reason you start with black is that you’ll later change the layer’s blend mode to Screen, which makes black invisible and lets only the lighter speckles show through. If you skip this step and try to add noise to a transparent layer, the Screen mode trick won’t work the same way.
New layer filled with black in Layers panel
Add a new layer above your base image. Go to Edit, then Fill, and select Black as the fill color. This black layer is the canvas your noise will live on. The reason you start with black is that you’ll later change the layer’s blend mode to Screen, which makes black invisible and lets only the lighter speckles show through. If you skip this step and try to add noise to a transparent layer, the Screen mode trick won’t work the same way.
Step 2: Add Noise to the Layer
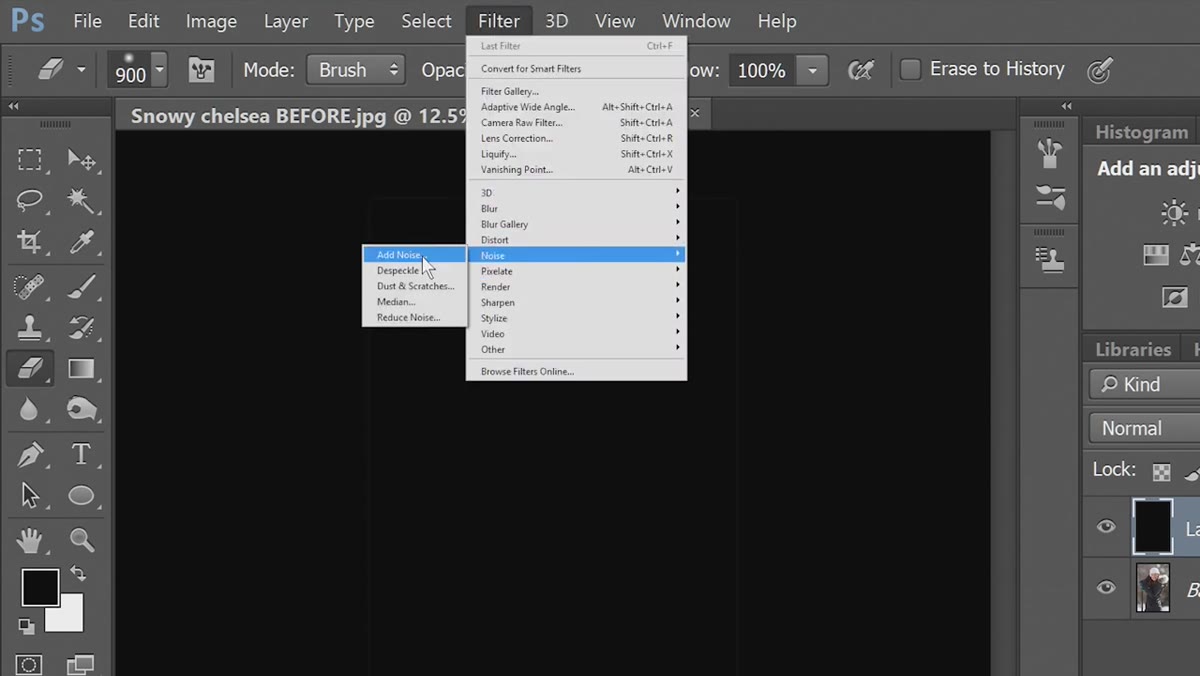 Add Noise dialog box with Gaussian and Monochromatic options
With the black layer selected, navigate to Filter, then Noise, then Add Noise. In the dialog, switch the distribution to Gaussian and check Monochromatic. Monochromatic is the key checkbox here. Without it, the noise comes out with color fringing that looks nothing like snow. The amount you choose depends on the scale of snow you want. For distant, fine-grained background snow, keep the percentage moderate. You’ll scale things up later if needed, so it’s better to start a little finer and adjust from there.
Add Noise dialog box with Gaussian and Monochromatic options
With the black layer selected, navigate to Filter, then Noise, then Add Noise. In the dialog, switch the distribution to Gaussian and check Monochromatic. Monochromatic is the key checkbox here. Without it, the noise comes out with color fringing that looks nothing like snow. The amount you choose depends on the scale of snow you want. For distant, fine-grained background snow, keep the percentage moderate. You’ll scale things up later if needed, so it’s better to start a little finer and adjust from there.
One important note: if the Filter Gallery is grayed out in your menu after this step, go to Image, then Mode, and confirm your file is set to 8-bit RGB. This catches a lot of people off guard, especially if you’re working on a file that came in as 16-bit from Lightroom.
Step 3: Refine the Noise in the Filter Gallery
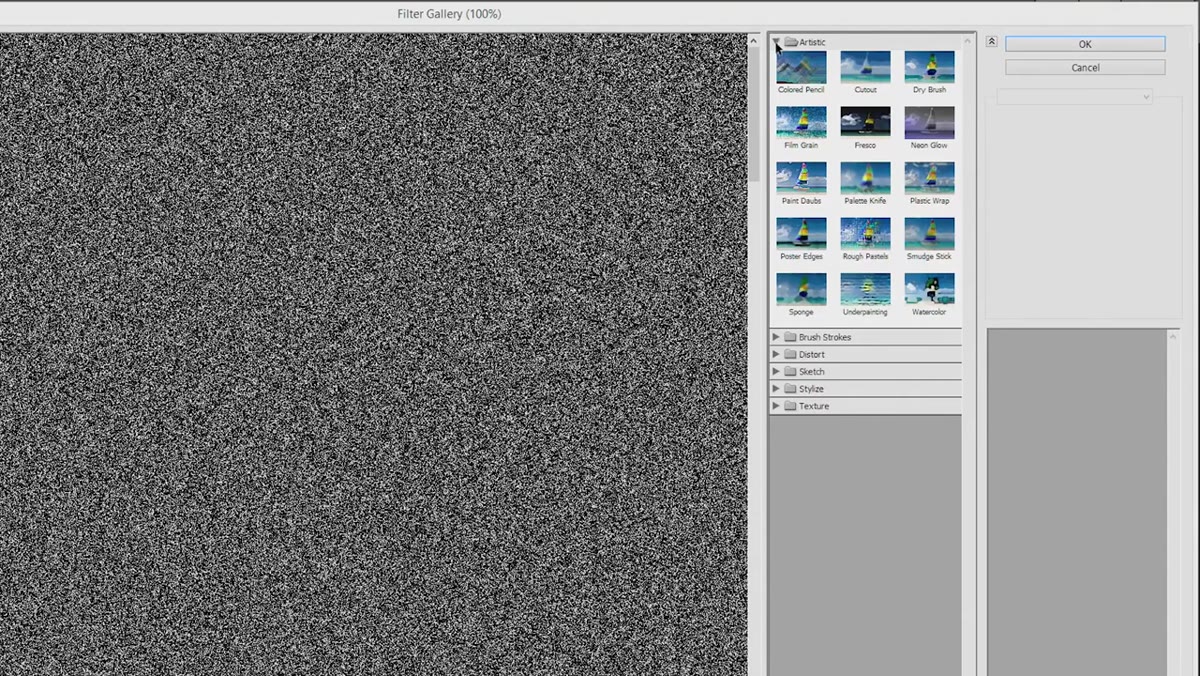 Filter Gallery open with Chalk and Charcoal effect applied
Go to Filter, then Filter Gallery. This is where you shape the random noise into something that reads as snow. Tony experiments with several options here, and that’s the right instinct. Dry Brush, Chalk and Charcoal, and a few others in the Sketch and Artistic categories all produce different cluster shapes and densities. The goal is to get irregular white flecks that don’t look like a pattern.
Filter Gallery open with Chalk and Charcoal effect applied
Go to Filter, then Filter Gallery. This is where you shape the random noise into something that reads as snow. Tony experiments with several options here, and that’s the right instinct. Dry Brush, Chalk and Charcoal, and a few others in the Sketch and Artistic categories all produce different cluster shapes and densities. The goal is to get irregular white flecks that don’t look like a pattern.
Zoom out to fit the whole image in the preview window before you commit. What looks appropriately sized at 100% can turn into an overwhelming blizzard at full view. Adjust the stroke pressure or grain sliders until the speckles feel sparse and natural. For background snow, you want density. For foreground layers, you’ll want less.
Step 4: Set the Layer to Screen Mode and Scale If Needed
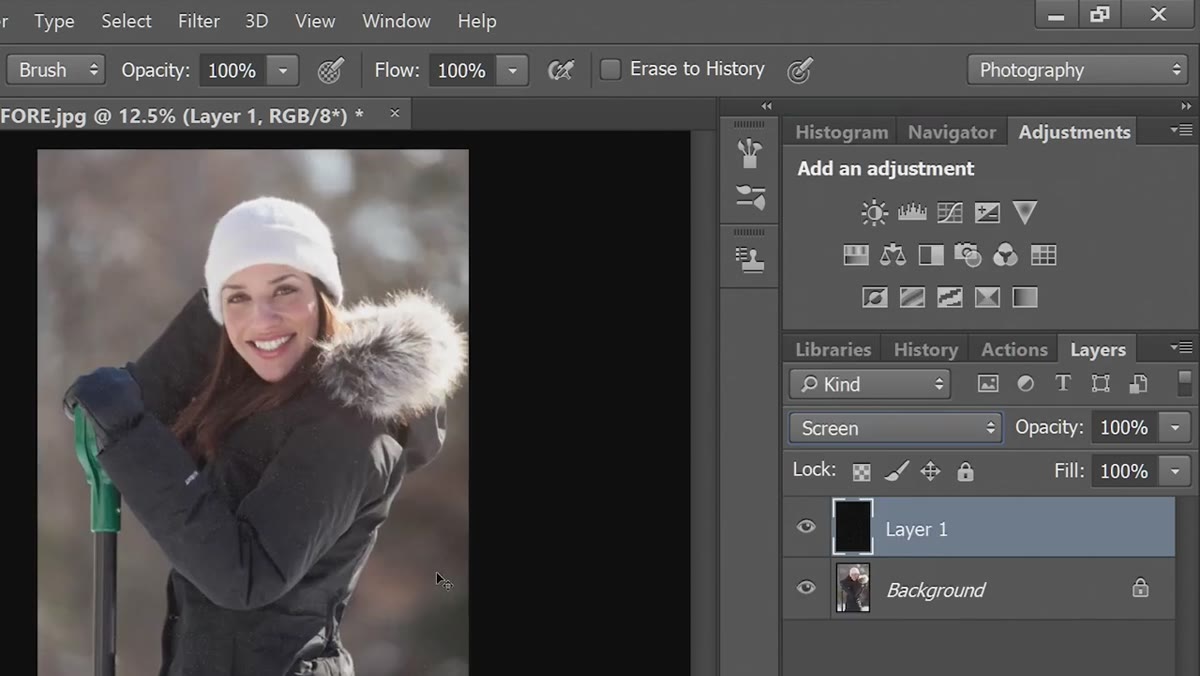 Layer blend mode changed to Screen, snow visible over image
Change the layer blend mode from Normal to Screen. This is the moment the effect snaps into place. The black disappears and only the white noise remains, sitting over your image like actual falling snow. If the flakes look too small, use Edit, Transform, Free Transform to scale the layer up. Because the noise is soft and will be blurred anyway, scaling it up doesn’t introduce any hard edges or pixelation that would break the illusion.
Layer blend mode changed to Screen, snow visible over image
Change the layer blend mode from Normal to Screen. This is the moment the effect snaps into place. The black disappears and only the white noise remains, sitting over your image like actual falling snow. If the flakes look too small, use Edit, Transform, Free Transform to scale the layer up. Because the noise is soft and will be blurred anyway, scaling it up doesn’t introduce any hard edges or pixelation that would break the illusion.
This is also a good time to think about your image’s depth. Tony makes the point that snow closer to the camera appears sparser because you’re only seeing individual flakes, while background snow appears denser because you’re integrating flakes across a longer distance. Keep that visual logic in mind as you build your layers.
Step 5: Add Gaussian Blur and Motion Blur
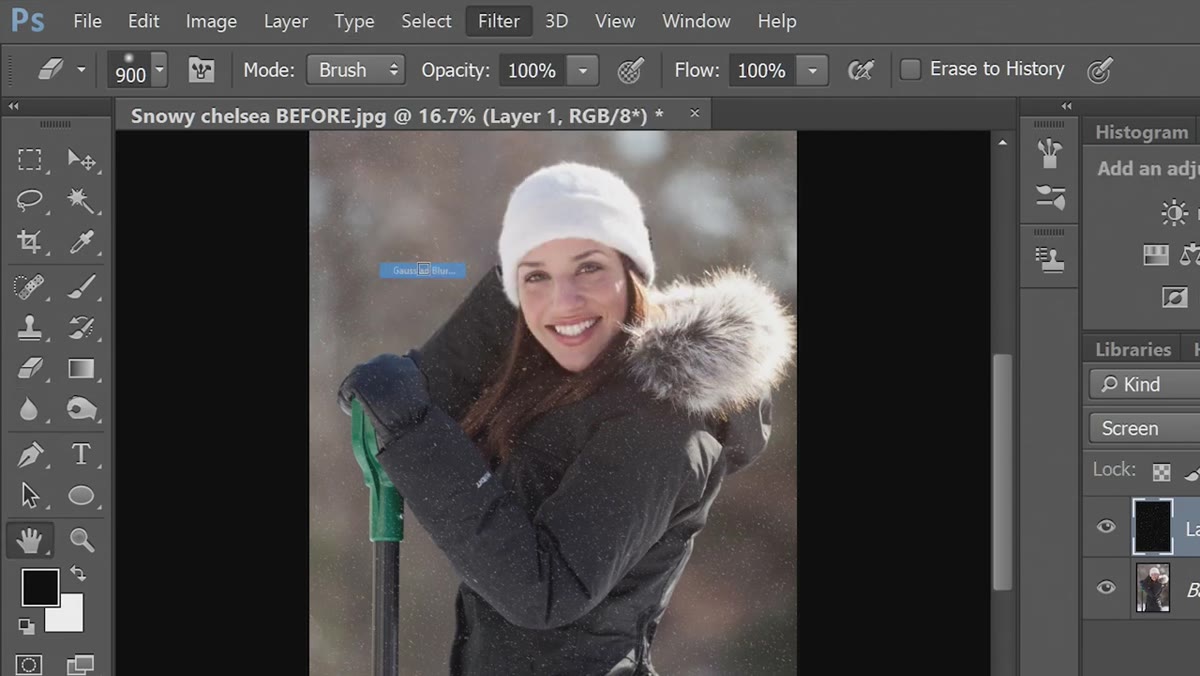 Gaussian Blur dialog applied to snow layer
Apply a Gaussian Blur to soften the flakes slightly. The amount is subtle. You don’t want perfectly sharp-edged noise circles, but you also don’t want blobs. A small radius keeps the flakes readable while making them feel like they have some atmospheric depth.
Gaussian Blur dialog applied to snow layer
Apply a Gaussian Blur to soften the flakes slightly. The amount is subtle. You don’t want perfectly sharp-edged noise circles, but you also don’t want blobs. A small radius keeps the flakes readable while making them feel like they have some atmospheric depth.
After the Gaussian Blur, add a Motion Blur at a slight diagonal angle. Snow falling straight down looks artificial. A gentle angle, somewhere between 5 and 20 degrees, suggests wind and movement without screaming “blizzard.” Keep the distance value low. Too much motion blur turns your snow into streaks that look more like rain than snow.
Step 6: Mask the Layer to Protect the Subject
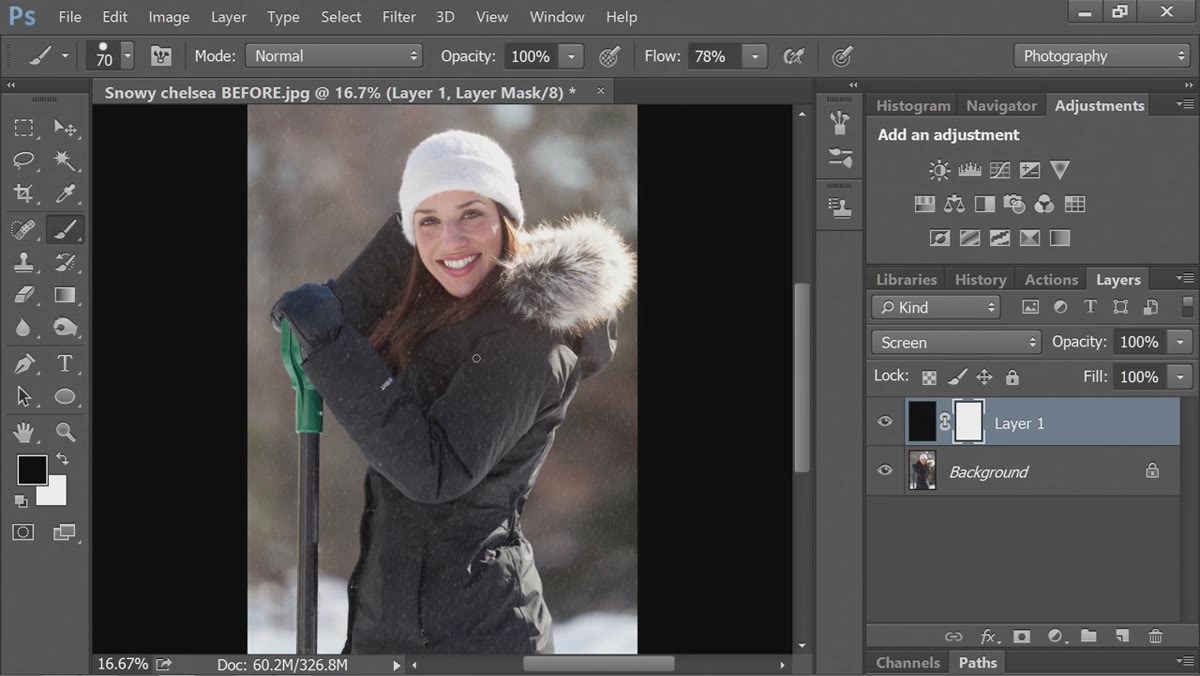 Layer mask added, brush erasing snow from foreground subject
Add a layer mask to the snow layer. With a soft black brush and the mask selected, paint over any areas where snow shouldn’t appear. For background snow layers, this typically means masking out the subject in the foreground so the snow sits behind them rather than plastered across their face. This is the step that separates a convincing composite from one that looks pasted on.
Layer mask added, brush erasing snow from foreground subject
Add a layer mask to the snow layer. With a soft black brush and the mask selected, paint over any areas where snow shouldn’t appear. For background snow layers, this typically means masking out the subject in the foreground so the snow sits behind them rather than plastered across their face. This is the step that separates a convincing composite from one that looks pasted on.
Step 7: Repeat for Foreground Snow at a Larger Scale
 Second snow layer with larger, sparser noise pattern
Duplicate your process with a second noise layer, but this time push the scale of the noise up significantly using Free Transform before applying any blurs. The foreground snow should use bigger, more separated flakes and a less dense distribution. Add another layer mask and this time erase snow from the background areas so the two layers work together to create genuine depth. Two layers is usually enough for most images. For wide landscape shots with strong perspective, three layers can be worth the extra time.
Second snow layer with larger, sparser noise pattern
Duplicate your process with a second noise layer, but this time push the scale of the noise up significantly using Free Transform before applying any blurs. The foreground snow should use bigger, more separated flakes and a less dense distribution. Add another layer mask and this time erase snow from the background areas so the two layers work together to create genuine depth. Two layers is usually enough for most images. For wide landscape shots with strong perspective, three layers can be worth the extra time.
One Addition I’d Make to This Workflow
The technique Tony demonstrates is solid, and I use a version of it regularly. Where I’ve taken it further is turning the whole thing into a Photoshop action with a dialog stop built in at the Filter Gallery step. That stop lets me tweak the look on each image without manually rebuilding the effect from scratch. For one-off editorial work, the manual method is fine. But if you’re processing a batch of images for a campaign and every one needs custom snow density, an action with a pause point saves a meaningful amount of time. I’d also recommend saving your preferred noise and blur settings in a note or a snippet, because “what did I use last time” is a real question you’ll ask yourself in March when the next winter reshoots land.
The most important thing to take away from this technique is the layering logic: background snow is dense and fine, foreground snow is sparse and large, and the whole effect lives on Screen-mode layers that blend invisibly with your image. That principle holds whether you’re adding snow, rain, dust, or any other atmospheric particle. Master the logic, and the specific filter settings become secondary.
Watch the full tutorial on YouTube to see Tony walk through each step with his own footage, including his approach to the custom brush method which pairs well with everything covered above.
Comments (4)
The before and after really sells it. Incredible difference.
Shared this with my photography group. Everyone loved it.
Love how you break down complex stuff into manageable steps.
Quality content like this is rare. Keep it up.
Leave a Comment