
Most of my work lives inside repeatable systems. Actions, batch exports, preset pipelines built to survive a Monday morning with 300 product shots due by noon. But every so often a client brief lands that needs something handcrafted-looking, something with texture and physicality that a gradient overlay just cannot fake. That’s when brush work and pattern techniques become genuinely useful, not decorative exercises.
This particular workflow came across my radar through Watch the full tutorial on YouTube from Kelvin Designs, where Kelvin walks through creating a seamless rope pattern in Photoshop and then applying it along a vector path in Illustrator. The cross-app handoff is what makes this interesting. Illustrator CC 2014 introduced the ability to use a raster pattern as a brush stroke along a path, and that combination opens up a lot of possibilities for anyone doing work that blends photography with illustration or graphic design.
What follows is my breakdown of the technique, rewritten from the perspective of someone who values speed and repeatability. I’ve added context where I think it helps.
Step 1: Source Your Texture Image
 Google Images search for rope texture in browser
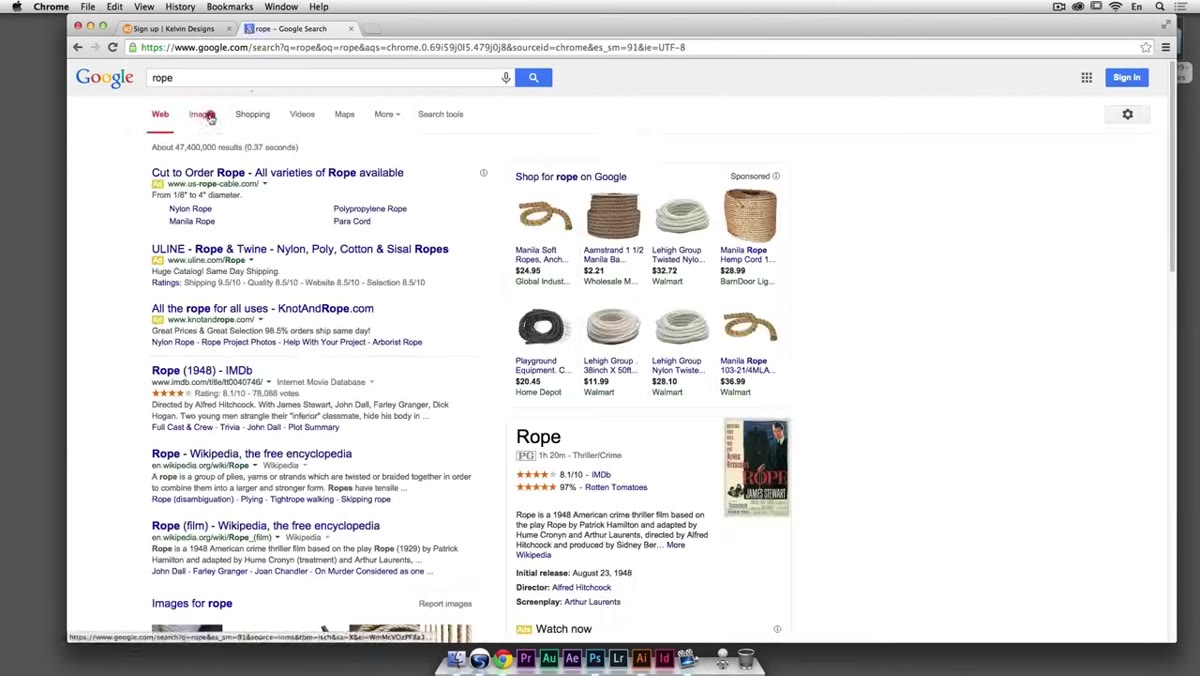
Start with a photo of rope that has clean edges and consistent detail along its length. Kelvin searches Google Images directly, which works fine for learning the technique. For production use, grab something from a stock library with a clear license. What you’re looking for specifically is a rope shot where the background is simple and the strand runs relatively straight across the frame. Diagonal or curved rope adds unnecessary complexity during the seamless-tile step. Avoid images with fraying edges or dramatic shadows, those are harder to extract cleanly.
Google Images search for rope texture in browser
Start with a photo of rope that has clean edges and consistent detail along its length. Kelvin searches Google Images directly, which works fine for learning the technique. For production use, grab something from a stock library with a clear license. What you’re looking for specifically is a rope shot where the background is simple and the strand runs relatively straight across the frame. Diagonal or curved rope adds unnecessary complexity during the seamless-tile step. Avoid images with fraying edges or dramatic shadows, those are harder to extract cleanly.
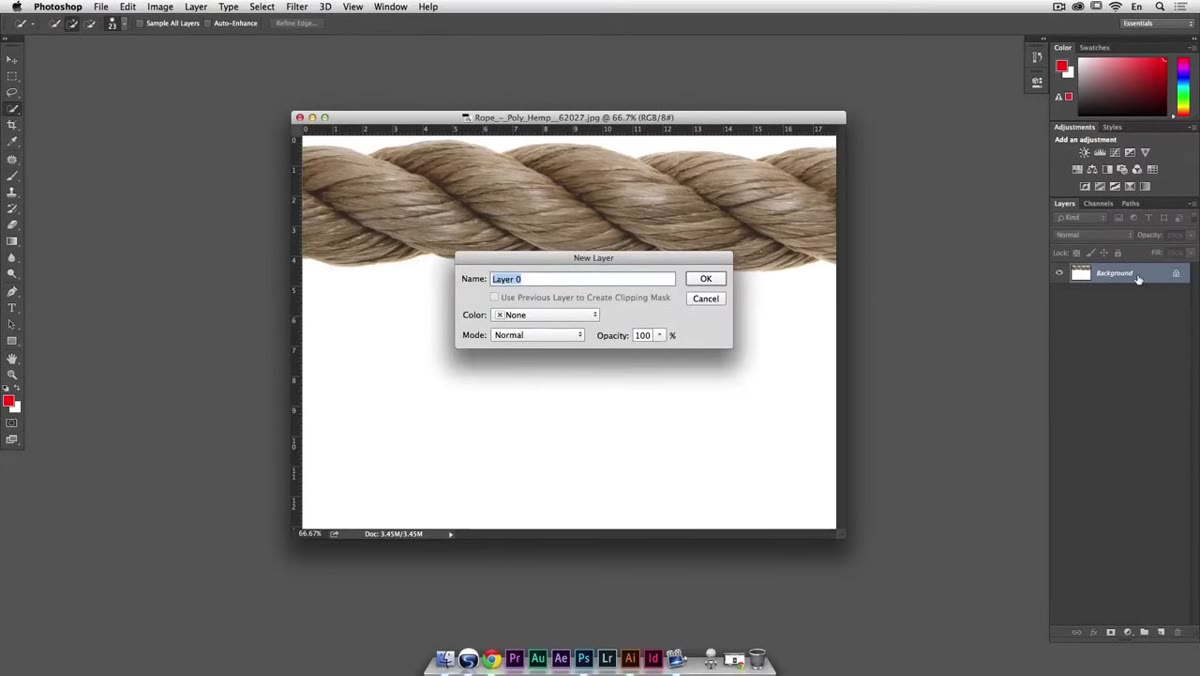
Step 2: Open in Photoshop and Convert the Background Layer
 Double-clicking background layer in Photoshop Layers panel
Once the image is open in Photoshop, the first order of business is converting the locked background layer into a regular editable layer. Double-click the layer thumbnail in the Layers panel and accept the default name. This unlocks the layer so you can move and manipulate it freely in the steps ahead. It’s a small thing, but skipping it causes frustrating errors later when you try to cut from the layer.
Double-clicking background layer in Photoshop Layers panel
Once the image is open in Photoshop, the first order of business is converting the locked background layer into a regular editable layer. Double-click the layer thumbnail in the Layers panel and accept the default name. This unlocks the layer so you can move and manipulate it freely in the steps ahead. It’s a small thing, but skipping it causes frustrating errors later when you try to cut from the layer.
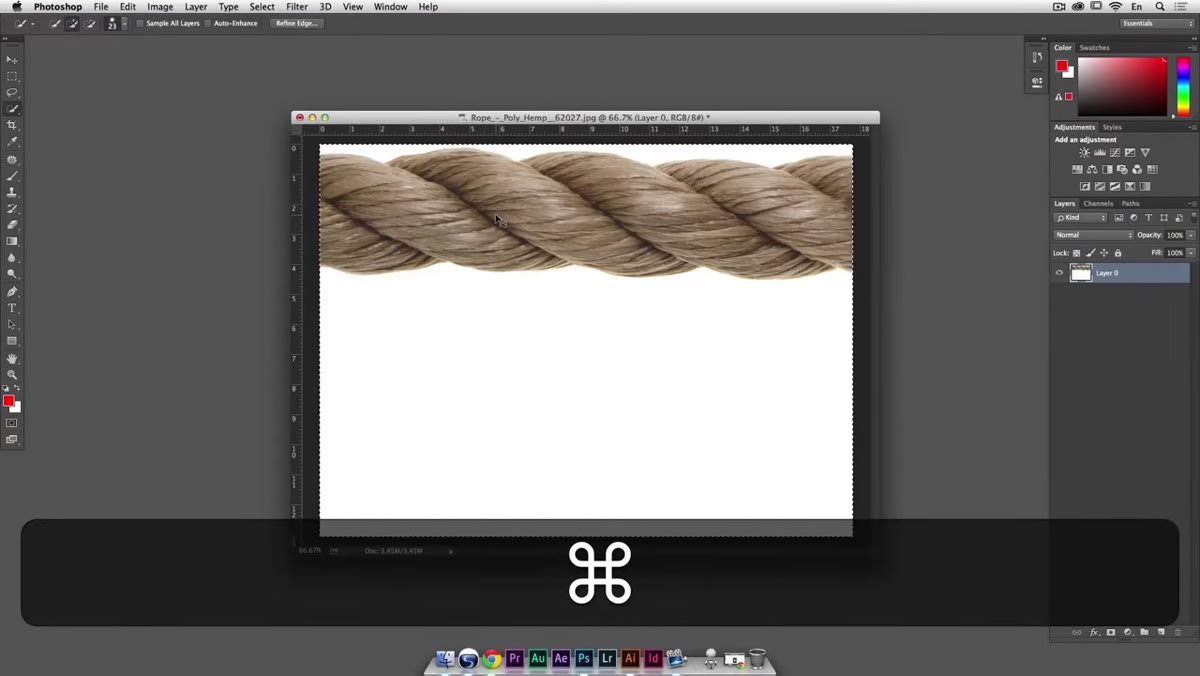
Step 3: Add a Center Guide and Make a Marquee Selection
 Free transform bounding box centered on rope image with guide visible
Turn on rulers with Command-R (or Ctrl-R on Windows). Then select all with Command-A and immediately invoke Free Transform with Command-T. This isn’t about transforming anything. The reason for this step is that the Free Transform bounding box shows you the exact center of the canvas, allowing you to drag a guide from the ruler straight to that midpoint and have it snap precisely. Hit Escape to exit Free Transform without applying any changes, then deselect.
Free transform bounding box centered on rope image with guide visible
Turn on rulers with Command-R (or Ctrl-R on Windows). Then select all with Command-A and immediately invoke Free Transform with Command-T. This isn’t about transforming anything. The reason for this step is that the Free Transform bounding box shows you the exact center of the canvas, allowing you to drag a guide from the ruler straight to that midpoint and have it snap precisely. Hit Escape to exit Free Transform without applying any changes, then deselect.
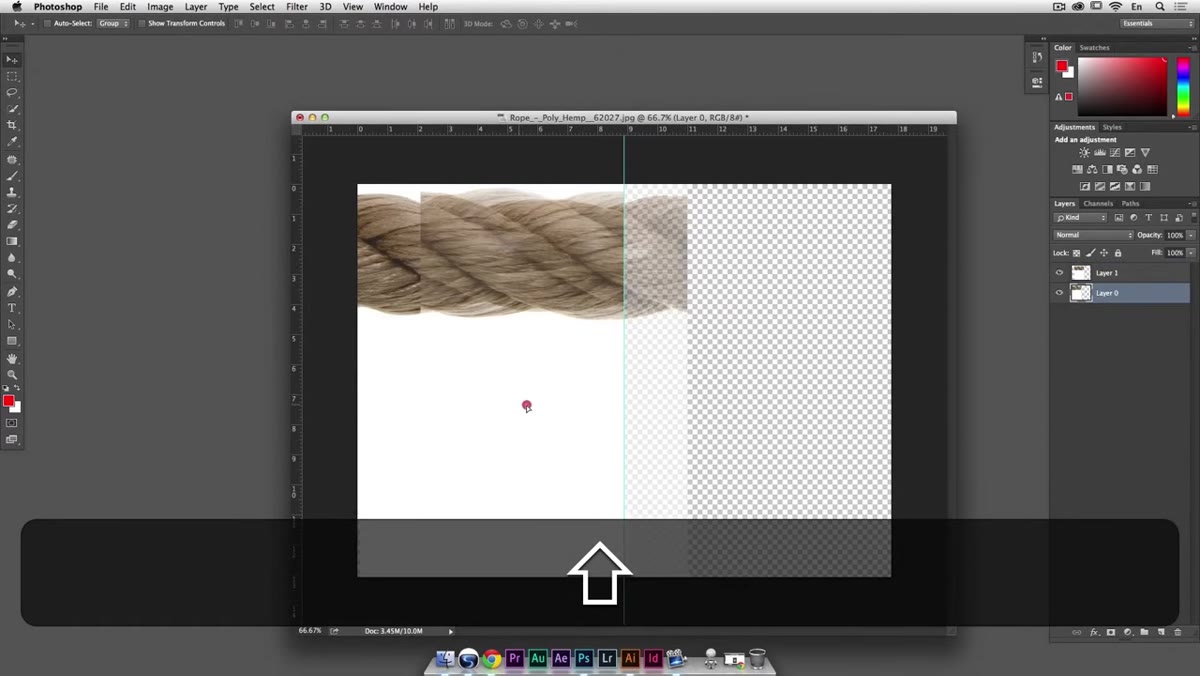
Now grab the Rectangular Marquee tool and draw a selection from one side of the image to the center guide. The guide will snap the selection edge cleanly to the midpoint. This is the foundation of the seamless tile trick.
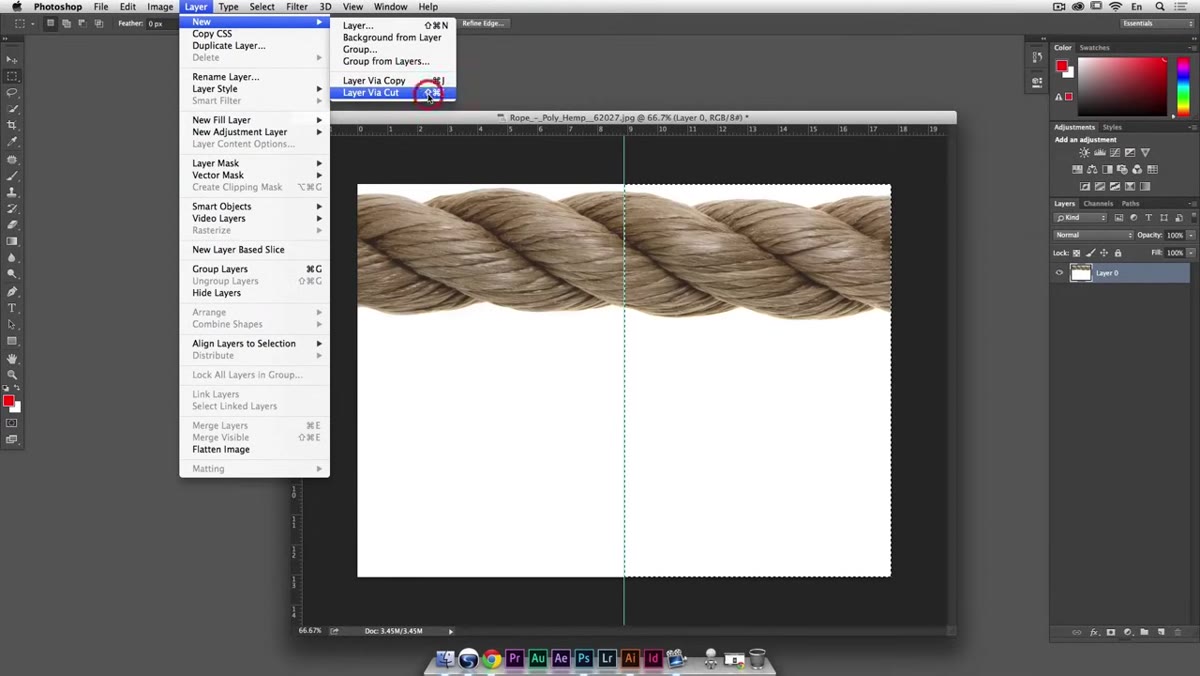
Step 4: Create a New Layer via Cut
 Two layers in Layers panel after Layer via Cut command
With your marquee selection still active, go to Layer, then New, then Layer via Cut, or use the shortcut Command-Shift-J (Ctrl-Shift-J on Windows). This action cuts the selected half of the rope out of the original layer and places it on its own new layer directly above. You now have two layers: the right half of the rope on the bottom layer, the left half on the top layer.
Two layers in Layers panel after Layer via Cut command
With your marquee selection still active, go to Layer, then New, then Layer via Cut, or use the shortcut Command-Shift-J (Ctrl-Shift-J on Windows). This action cuts the selected half of the rope out of the original layer and places it on its own new layer directly above. You now have two layers: the right half of the rope on the bottom layer, the left half on the top layer.
This split is what makes the seamless join possible. Because you’re working with a single continuous photo of rope, the two halves already share the same texture properties, tone, and lighting. When you flip their positions and bring the edges together, the transition reads as natural rather than stitched.
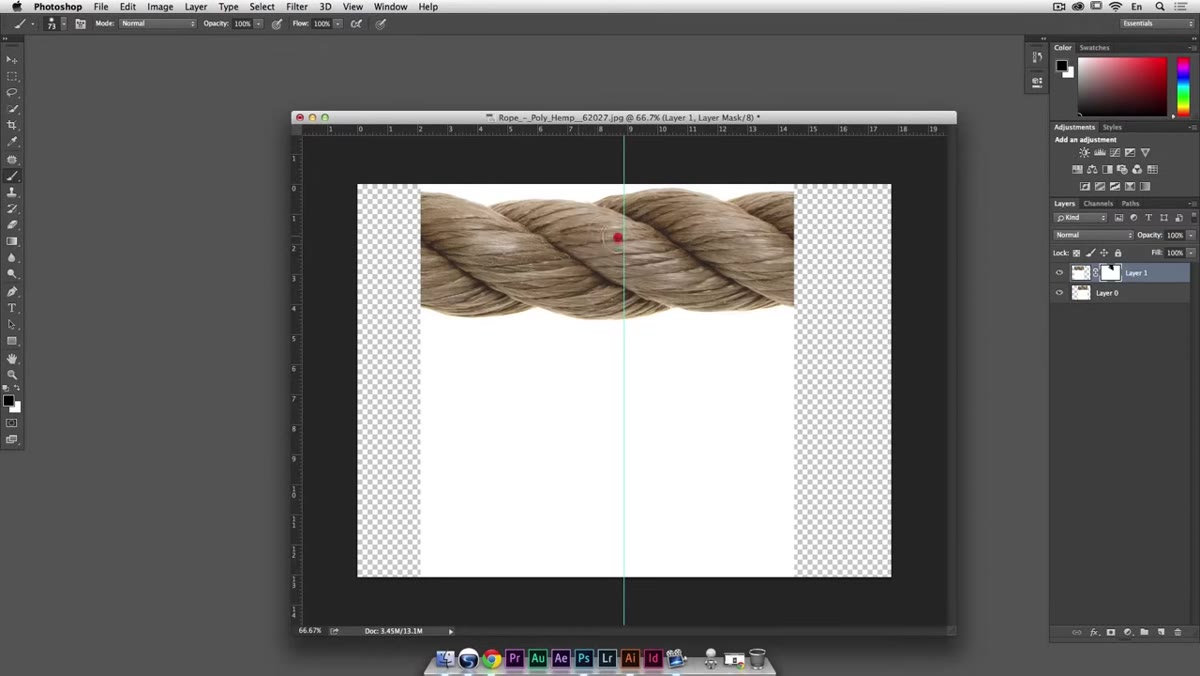
Step 5: Reposition and Align the Two Halves for a Seamless Join
 Two rope halves overlapping with reduced layer opacity for alignment
Temporarily reduce the opacity of the top layer to around 50 percent so you can see through it. Then use the Move tool to slide each half so they overlap slightly and you can evaluate where the textures line up. Use the arrow keys for fine adjustments. You’re looking for a point where the rope fibers on one edge continue convincingly into the other without a visible seam or a doubling of texture that looks artificial.
Two rope halves overlapping with reduced layer opacity for alignment
Temporarily reduce the opacity of the top layer to around 50 percent so you can see through it. Then use the Move tool to slide each half so they overlap slightly and you can evaluate where the textures line up. Use the arrow keys for fine adjustments. You’re looking for a point where the rope fibers on one edge continue convincingly into the other without a visible seam or a doubling of texture that looks artificial.
Once you’ve found that alignment, bring the top layer opacity back to 100 percent. At this point you should have a tile that, when repeated horizontally, reads as a continuous strand of rope. Zoom out and squint at it. If anything feels off, nudge one layer a few pixels at a time until the join disappears.
Step 6: Define the Pattern and Bring It into Illustrator
 Edit menu open with Define Pattern option highlighted
Flatten or merge your two rope layers once you’re satisfied with the alignment. Select all, then go to Edit and choose Define Pattern. Give it a clear name you’ll recognize later, something like “Rope-Seamless-01.” This saves the tile to your Photoshop pattern library.
Edit menu open with Define Pattern option highlighted
Flatten or merge your two rope layers once you’re satisfied with the alignment. Select all, then go to Edit and choose Define Pattern. Give it a clear name you’ll recognize later, something like “Rope-Seamless-01.” This saves the tile to your Photoshop pattern library.
In Illustrator, create or open a path you want to apply the pattern to. Through the Brushes panel, create a new Pattern Brush and load your saved Photoshop pattern as the source. Apply it to the path, and Illustrator tiles the texture along the stroke automatically. Adjust scale in the brush options to get the rope proportions feeling right relative to your artwork.
A Note on Workflow Efficiency
This is genuinely a technique you build once and reuse many times. Once you have a clean seamless rope tile defined as a pattern and saved as a brush, applying it to any future path takes under a minute. If you work with brand assets or recurring design elements that need textured strokes, that kind of upfront investment pays back consistently.
The area where I’d push this further for production use: once you have your seamless tile, run it through Photoshop’s Offset filter (Filter, Other, Offset) to test whether the edges truly repeat without artifacts. Wrap both horizontally and vertically at half the tile dimensions. Anything that doesn’t line up will show as a visible line. Fixing it at this stage is far easier than discovering it after you’ve applied the brush to a complex Illustrator path.
One other consideration: if you’re building this for clients, document the settings. Canvas size of the original tile, the exact pixel offset you used for alignment, the pattern name in your library. That spreadsheet habit of mine exists for exactly this reason. Six months from now, when a client wants a matching texture for a new campaign, you’ll thank yourself.
The single most important insight from this workflow is that the seamless tile is everything. Get that wrong and no amount of careful Illustrator work saves you. Get it right, and you have a flexible, reusable asset that works across both apps indefinitely.
Watch the full tutorial on YouTube to see Kelvin walk through each of these steps in real time, including the Illustrator side of the handoff in more detail.
Comments (3)
The tip about from rope photo to pattern bru was the missing piece for me. Thank you.
Simple but effective. Sometimes that's all you need.
Couldn't agree more. I've seen this make a huge difference in landscape work specifically.
Leave a Comment