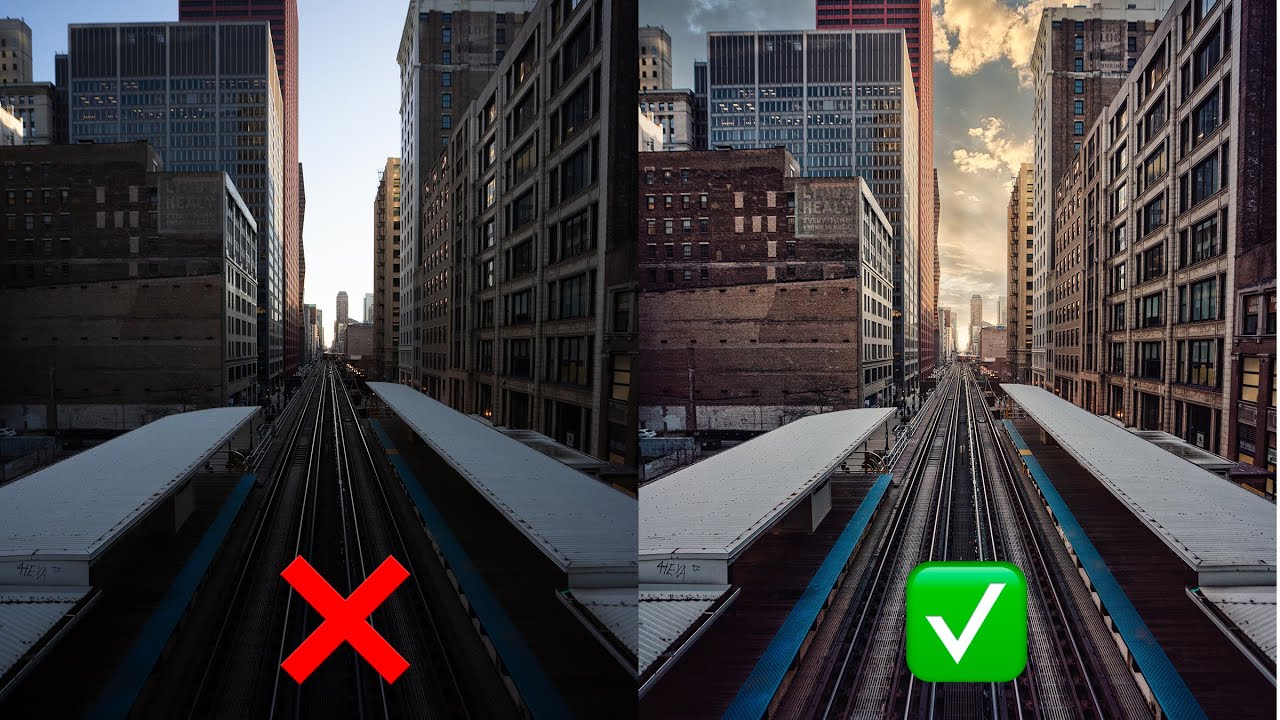
I track everything. I have a spreadsheet that currently sits at 2,400-plus hours saved through Photoshop actions and batch scripts I’ve built over the years. So when I say a tutorial genuinely challenged the way I think about editing speed, that’s not a throwaway compliment. That’s a data point.
Watch the full tutorial on YouTube
In this Pierre T. Lambert tutorial, he demonstrates how he transformed a flat, ordinary cityscape into a dramatic, print-worthy image in under two minutes, without Photoshop, without presets, and without any of the usual heavy lifting. The tool he’s using is Luminar, an AI-driven photo editor that was already on my radar but sitting low on my priority list. After watching this, it moved up fast. What got my attention wasn’t the result itself, impressive as it was. It was the decision-making the software was doing automatically, the kind of work I usually delegate to a well-built action set or spend an embarrassing amount of time doing by hand in Camera Raw.
The reason this matters beyond landscape photographers is simple: any time a piece of software can intelligently separate regions of an image and apply targeted adjustments without manual masking, that changes the math on what’s possible in a short session. I spend most of my week on commercial work, product shots and ad composites, but I shoot cityscapes and architecture for myself. I know exactly how long it takes to match sky luminosity to a foreground in Photoshop. It takes longer than two minutes. A lot longer.
Step 1: Open the Image in Luminar via Right-Click
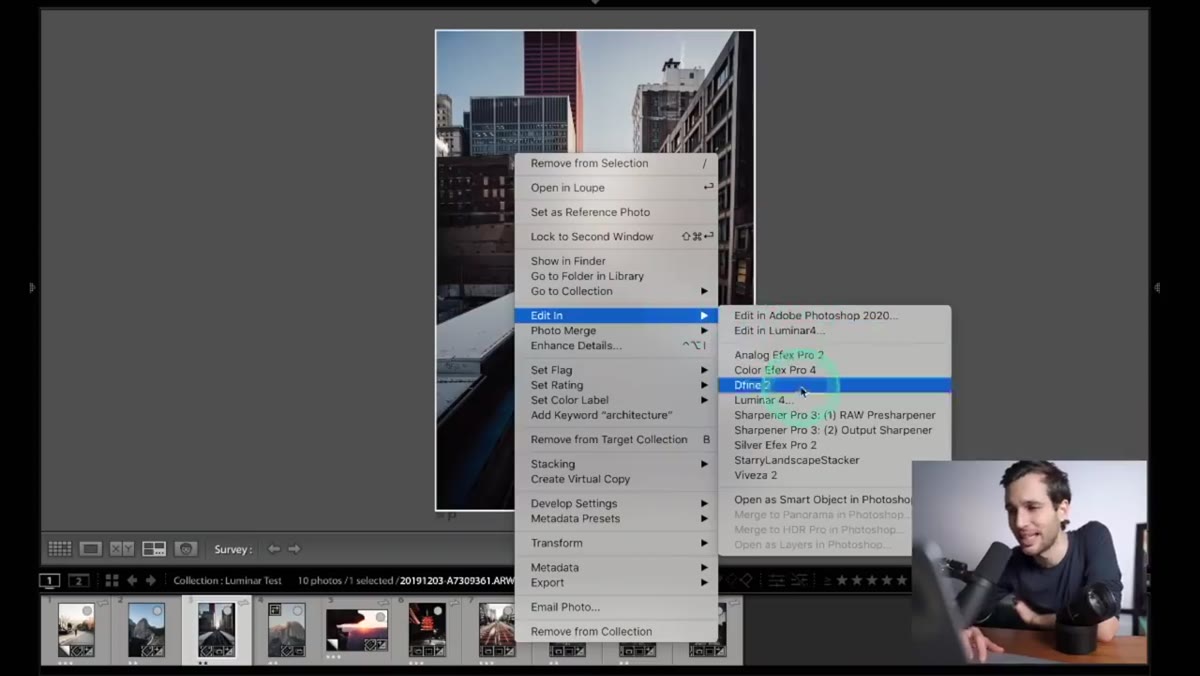 Right-clicking a photo and selecting “Edit in Luminar”
Skip the Luminar interface entirely for your import step. Lambert goes straight from his file browser, right-clicking the image and selecting “Edit in Luminar” rather than launching the application separately and dragging the file in. This keeps the handoff clean and is worth building into your muscle memory if you’re using Luminar alongside a DAM tool like Lightroom or Capture One. On the Mac, this option appears in the contextual menu once Luminar is installed. On Windows, the same workflow applies through the right-click context menu after installation.
Right-clicking a photo and selecting “Edit in Luminar”
Skip the Luminar interface entirely for your import step. Lambert goes straight from his file browser, right-clicking the image and selecting “Edit in Luminar” rather than launching the application separately and dragging the file in. This keeps the handoff clean and is worth building into your muscle memory if you’re using Luminar alongside a DAM tool like Lightroom or Capture One. On the Mac, this option appears in the contextual menu once Luminar is installed. On Windows, the same workflow applies through the right-click context menu after installation.
The image he’s working with is a city street scene shot at what looks like golden hour, or near it, with decent light but no real drama. It’s the kind of shot that’s technically solid but doesn’t stop anyone. You probably have fifty of them on your drive right now.
Step 2: Let the AI Accent Filter Do the Initial Heavy Lifting
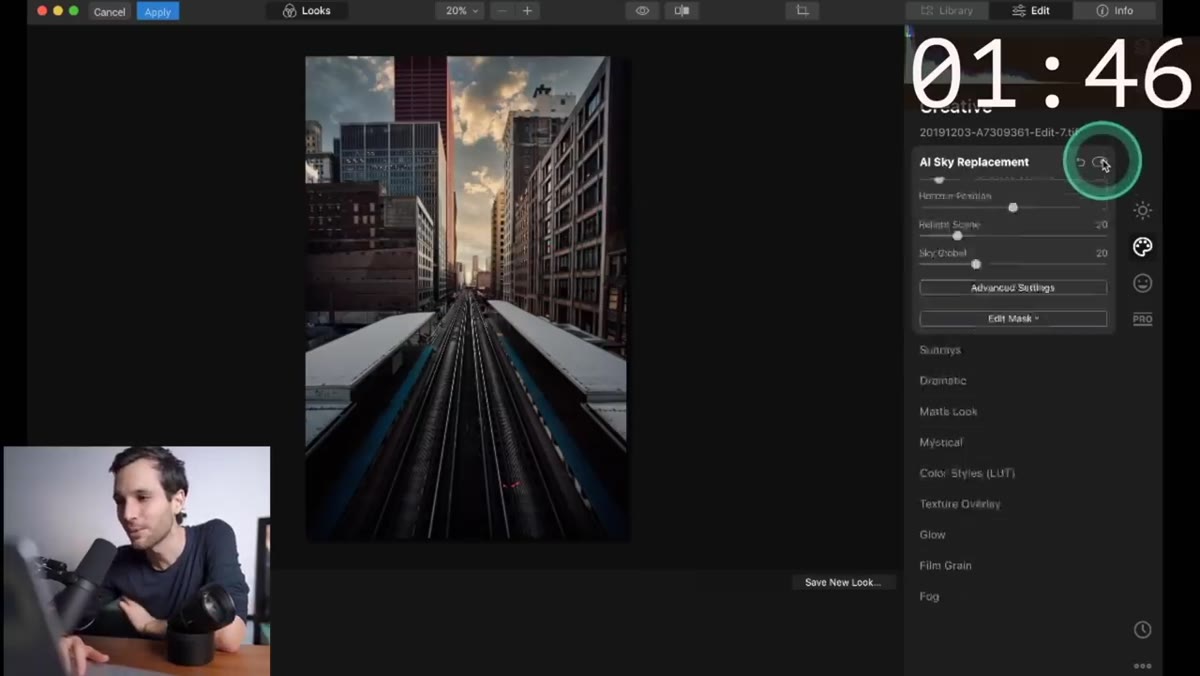 Luminar’s AI Accent slider being pulled to the right
Luminar’s AI Accent tool, which functions almost like a global smart contrast and color balance layer, is where Lambert starts. Rather than manually adjusting highlights, shadows, white balance, and saturation separately, he pushes a single slider and the software analyzes the scene regions independently, sky, buildings, shadows, and applies context-aware corrections to each. The result he gets in seconds would require at minimum a luminosity mask workflow in Photoshop, possibly a sky-specific Hue/Saturation layer and a gradient adjustment on top of that.
Luminar’s AI Accent slider being pulled to the right
Luminar’s AI Accent tool, which functions almost like a global smart contrast and color balance layer, is where Lambert starts. Rather than manually adjusting highlights, shadows, white balance, and saturation separately, he pushes a single slider and the software analyzes the scene regions independently, sky, buildings, shadows, and applies context-aware corrections to each. The result he gets in seconds would require at minimum a luminosity mask workflow in Photoshop, possibly a sky-specific Hue/Saturation layer and a gradient adjustment on top of that.
What the software is doing under the hood is detecting edges and tonal regions and applying non-uniform adjustments. That distinction matters. A global contrast pull in Lightroom treats the sky and the foreground as one thing. This doesn’t. For one-off personal images where you don’t need the granular control of a full manual edit, this approach gets you 80 percent of the way there in about ten seconds.
Step 3: Add Sun Rays with Content-Aware Placement
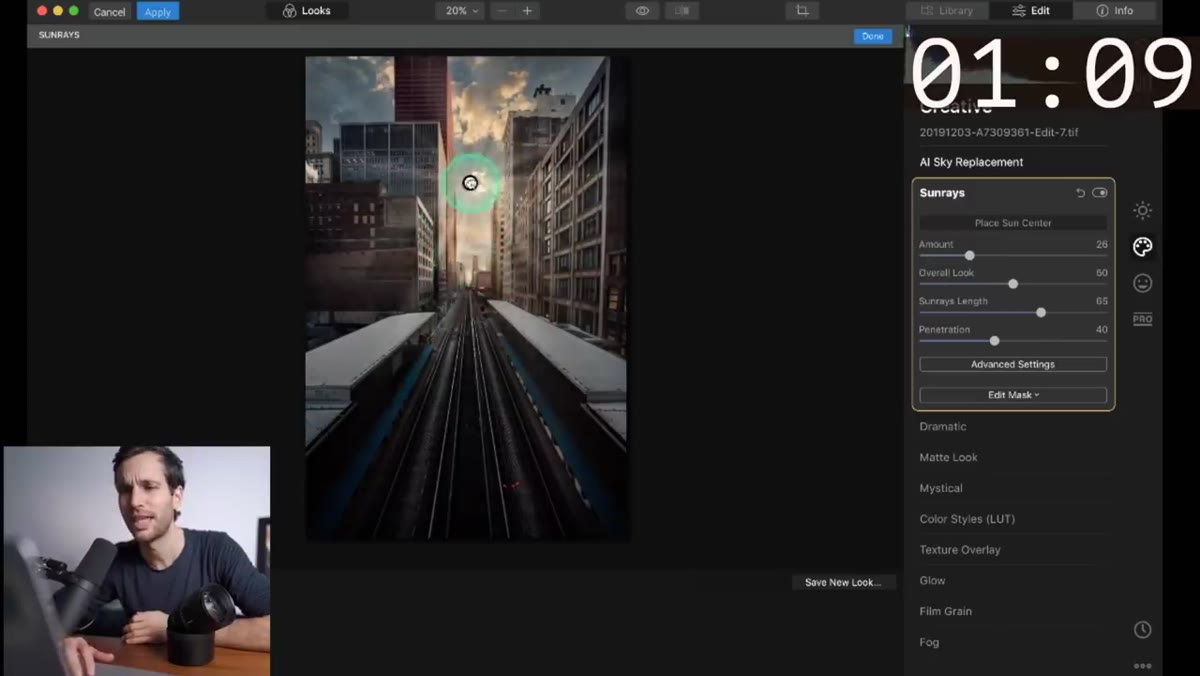 Sun rays appearing behind buildings with masking intact
This is the step that made me sit up straight. Lambert adds a sun ray effect, which sounds immediately like a recipe for disaster, the kind of cheesy overlay that makes photographers cringe. But Luminar’s implementation is content-aware. When he positions the light source behind a building, the software masks the rays to the architecture automatically. They don’t blow through solid objects. The occlusion is handled without any manual masking work.
Sun rays appearing behind buildings with masking intact
This is the step that made me sit up straight. Lambert adds a sun ray effect, which sounds immediately like a recipe for disaster, the kind of cheesy overlay that makes photographers cringe. But Luminar’s implementation is content-aware. When he positions the light source behind a building, the software masks the rays to the architecture automatically. They don’t blow through solid objects. The occlusion is handled without any manual masking work.
He adjusts penetration, which controls how far the rays push through shaded areas, and positions the light source low on the horizon to keep the effect physically plausible. The key settings to play with here are the sun radius (controls spread of the source point), glow (controls the soft halo around the origin), and penetration (controls how aggressively rays cut through shadow regions). Keep penetration low for a subtle result. Lambert dials it back considerably to land somewhere that reads as believable rather than overly processed.
Step 4: Warm the Light to Sell the Golden Hour Feel
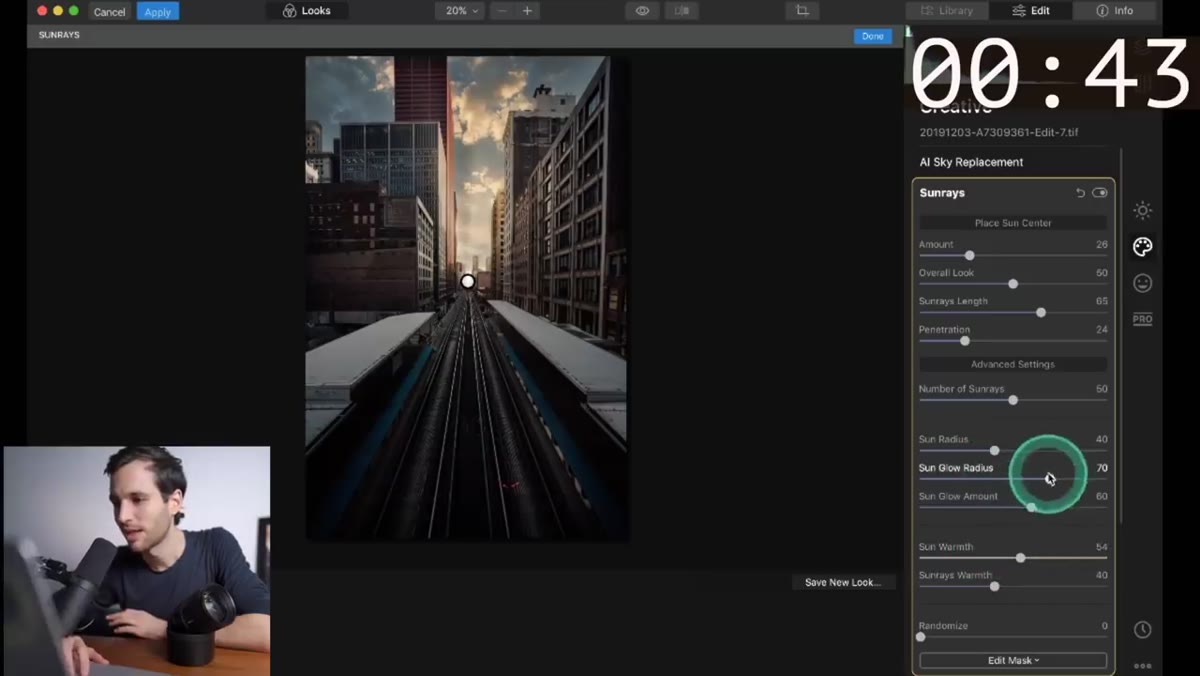 Glow and warmth sliders being increased in the sun rays panel
Once the sun ray geometry is set, Lambert adds warmth through the glow settings within the same panel. He increases the glow intensity slightly and adjusts the radius to soften the effect, then brings the overall sun intensity down from wherever he landed during placement. The goal is an image that feels like it was shot at a specific moment in the day, not one that looks like a sun ray filter was applied to it.
Glow and warmth sliders being increased in the sun rays panel
Once the sun ray geometry is set, Lambert adds warmth through the glow settings within the same panel. He increases the glow intensity slightly and adjusts the radius to soften the effect, then brings the overall sun intensity down from wherever he landed during placement. The goal is an image that feels like it was shot at a specific moment in the day, not one that looks like a sun ray filter was applied to it.
This is a small but important step. The warmth adjustment here isn’t a global white balance shift. It’s localized to the light source and its spread, which means your shadow regions don’t go orange along with your highlights. That kind of localized warmth is something you’d normally handle with a color grade in a separate layer in Photoshop, masked to the highlights channel. Here, it’s one slider.
Step 5: Compare and Commit
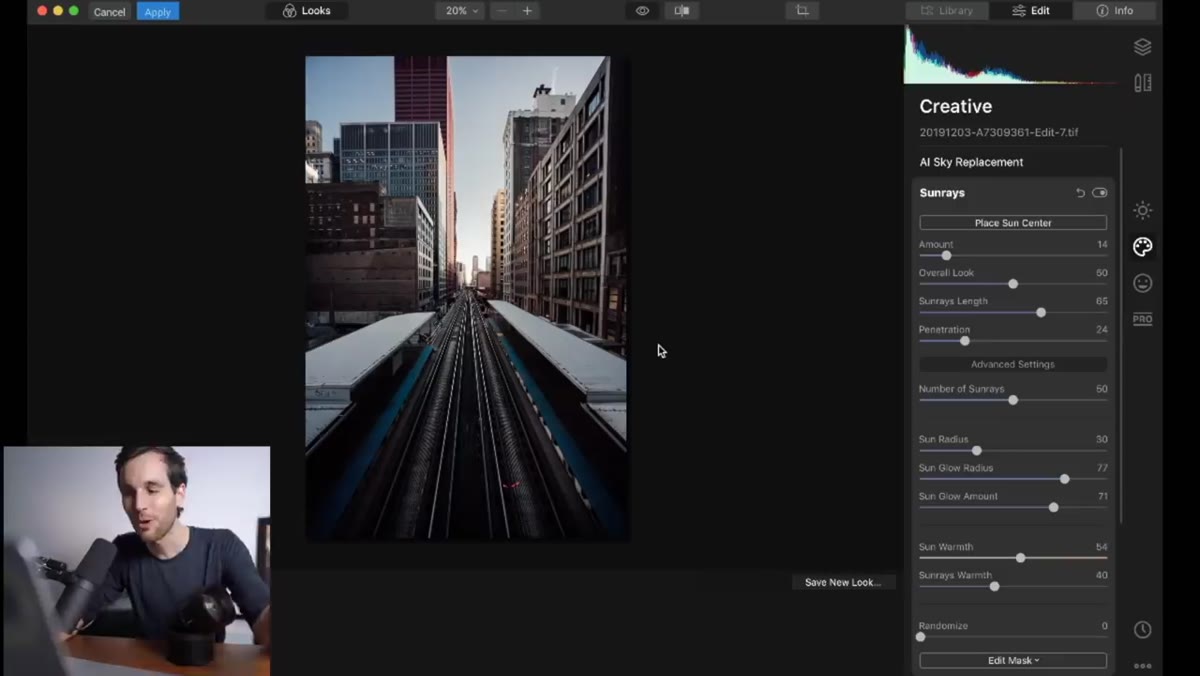 Before and after comparison of the cityscape image
Lambert toggles between the before and after to make his call. The original image, while well-composed, reads flat. The edited version has defined depth, a light source, and a mood. He mentions printing the result, which is the most honest endorsement I can think of. You don’t commit an image to a wall print if you’re not confident in it.
Before and after comparison of the cityscape image
Lambert toggles between the before and after to make his call. The original image, while well-composed, reads flat. The edited version has defined depth, a light source, and a mood. He mentions printing the result, which is the most honest endorsement I can think of. You don’t commit an image to a wall print if you’re not confident in it.
This comparison step is less about Luminar and more about editorial discipline. Know when to stop. The two-minute version Lambert arrives at doesn’t need more work. One of the skills experienced editors develop is recognizing when additional adjustments are subtracting rather than adding.
What I’d Add from My Own Experience
If you’re coming at this from a Photoshop-heavy workflow like mine, Luminar isn’t a replacement for your full toolkit. I still use actions for batch commercial work and compositing stays in Photoshop. But for personal landscape and cityscape images where I want a strong result without a two-hour masking session, Luminar’s AI tools solve a real problem.
One thing to watch: the AI Accent slider can oversaturate certain color ranges, particularly blues in skies and greens in foliage, if you push it past the midpoint. Pull it to around 60-70 percent and use a separate saturation control to fine-tune. You’ll get a cleaner result than going full slider.
The single most important thing Lambert demonstrates here isn’t a specific tool or technique. It’s that intelligent, region-aware adjustments have changed what’s achievable in a short editing window. The time cost of a polished landscape edit has dropped, and that changes how you can think about your post-processing backlog.
Watch the full tutorial on YouTube to see the full before-and-after and Pierre’s real-time walkthrough of each adjustment.
Comments (1)
This is exactly what I needed today. Been struggling with this for weeks.
Leave a Comment