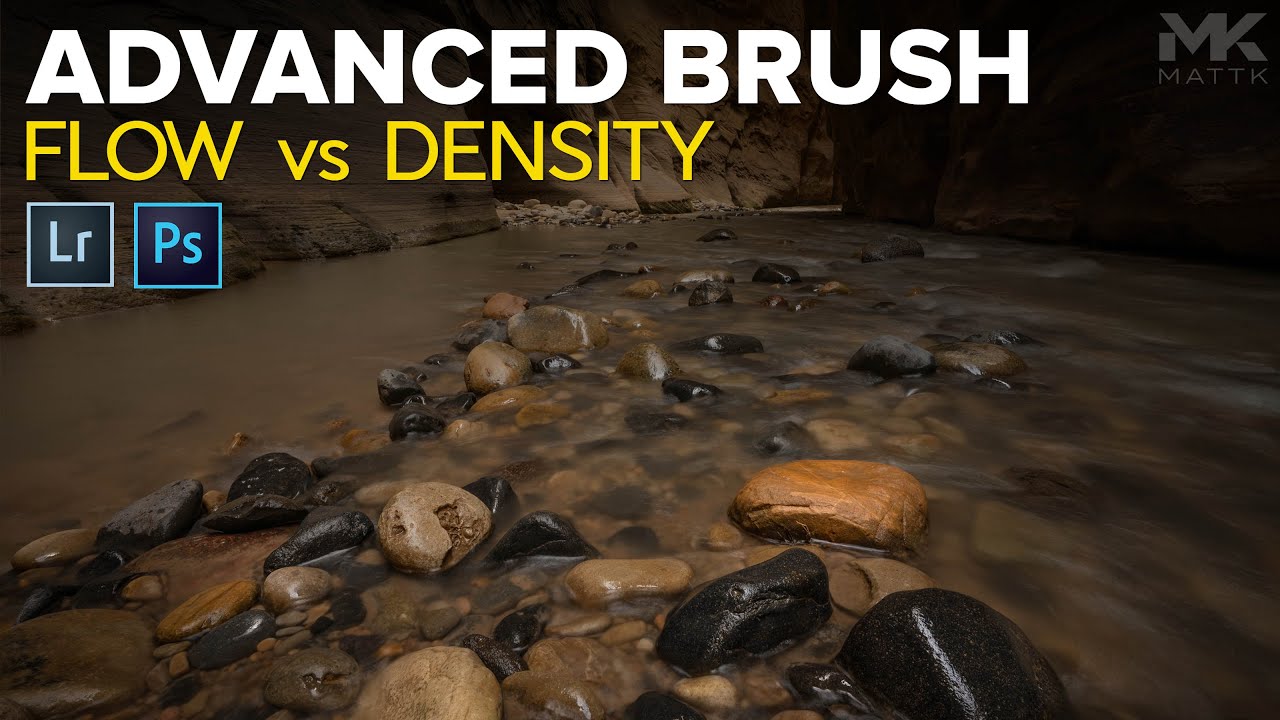
Most of my retouching errors over the years haven’t come from bad taste. They’ve come from blunt tools applied too broadly. Global sliders are fast, but they’re indiscriminate, and when you’re delivering product shots to an art director who will absolutely notice that the shadow recovery made the background go muddy, “I moved the Shadows slider” is not a great defense. Local adjustments saved my work more times than I can count, but for a long time I was using the brush tool in Lightroom like a blunt instrument too, mostly because I didn’t have a solid mental model for Flow and Density.
In this Matt Kloskowski tutorial, those two settings finally get a proper explanation. Watch the full tutorial on YouTube if you want to follow along with the video. What I want to do here is walk through the technique step by step, translate the concepts into plain terms, and add a few notes from how I actually apply this in a commercial retouching context.
One thing worth noting before we start: everything covered here applies equally to Photoshop users working in Camera Raw. The sliders are identical, just accessed from the brush settings panel at the bottom. Same logic, same behavior, different ZIP code.
Step 1: Identify What Global Sliders Can’t Fix
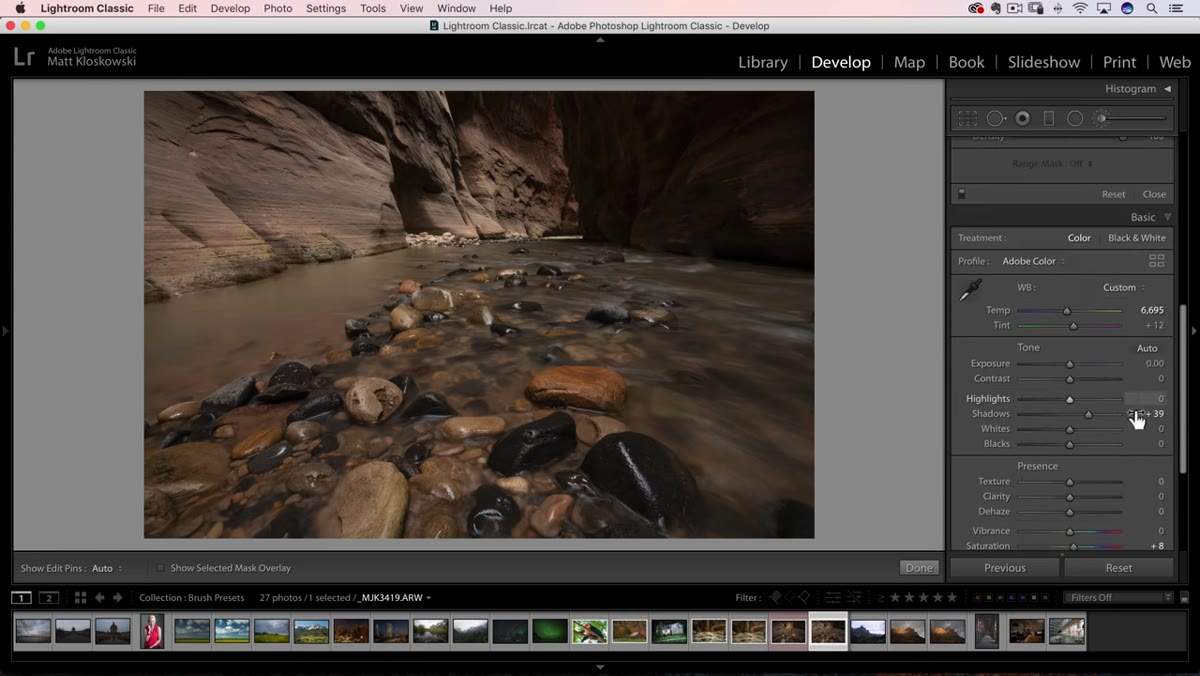 Basic panel open with Shadows and Highlights sliders visible
Before you reach for the brush, you need to recognize the problem. In the Basic panel, Shadows, Highlights, Exposure, and so on all operate across the entire image. When you have a photo where one region is too dark but the rest of the image is balanced, dragging the global Shadows slider up helps that dark area but also lifts tones you didn’t want to touch. That’s the moment to switch to the Masking brush (keyboard shortcut K in Lightroom’s Develop module). The brush lets you paint an adjustment onto a specific region only.
Basic panel open with Shadows and Highlights sliders visible
Before you reach for the brush, you need to recognize the problem. In the Basic panel, Shadows, Highlights, Exposure, and so on all operate across the entire image. When you have a photo where one region is too dark but the rest of the image is balanced, dragging the global Shadows slider up helps that dark area but also lifts tones you didn’t want to touch. That’s the moment to switch to the Masking brush (keyboard shortcut K in Lightroom’s Develop module). The brush lets you paint an adjustment onto a specific region only.
Step 2: Select the Brush Tool and Set Your Exposure Target
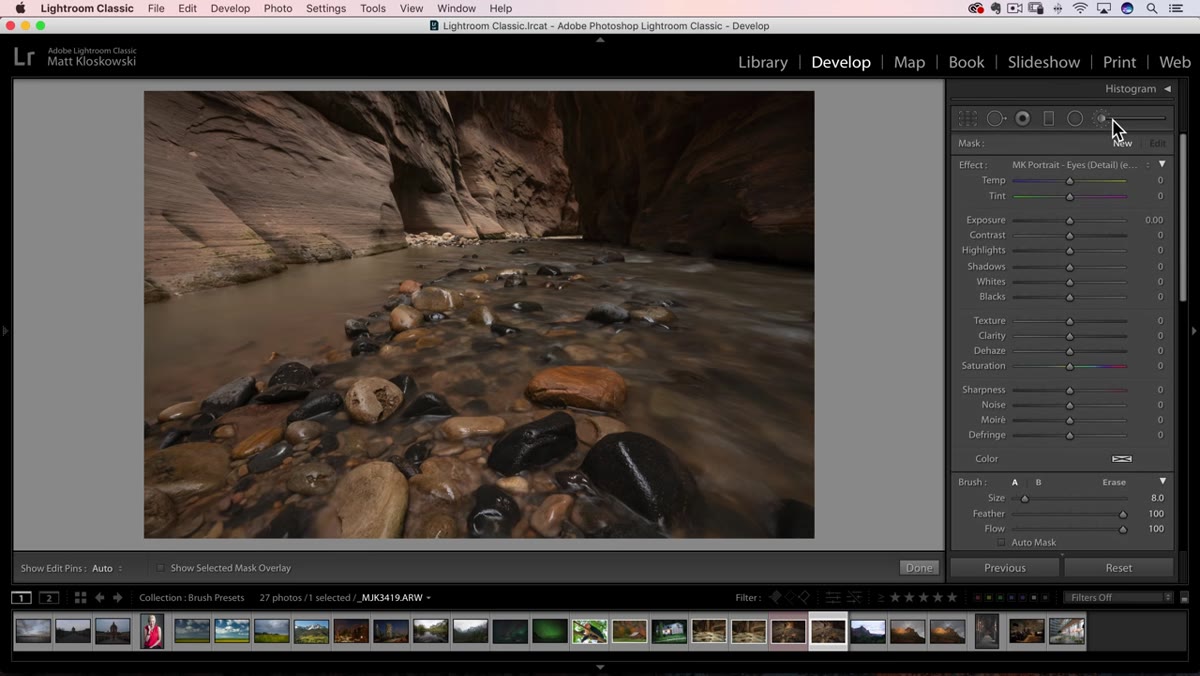 Brush tool selected in Develop module, Exposure slider cranked up
Once you’re in the brush panel, set the adjustment you want to paint before you paint it. In the tutorial, Matt sets Exposure to a high positive value, around +3, as a demonstration. In practice, I usually set my exposure target to something closer to what the final result should actually look like. Decide what you want the adjusted area to look like at full strength. That value becomes the ceiling for your brush. It’s the maximum the adjustment will ever reach, regardless of how many times you paint over the area.
Brush tool selected in Develop module, Exposure slider cranked up
Once you’re in the brush panel, set the adjustment you want to paint before you paint it. In the tutorial, Matt sets Exposure to a high positive value, around +3, as a demonstration. In practice, I usually set my exposure target to something closer to what the final result should actually look like. Decide what you want the adjusted area to look like at full strength. That value becomes the ceiling for your brush. It’s the maximum the adjustment will ever reach, regardless of how many times you paint over the area.
Step 3: Understand Flow as a Paintable Opacity
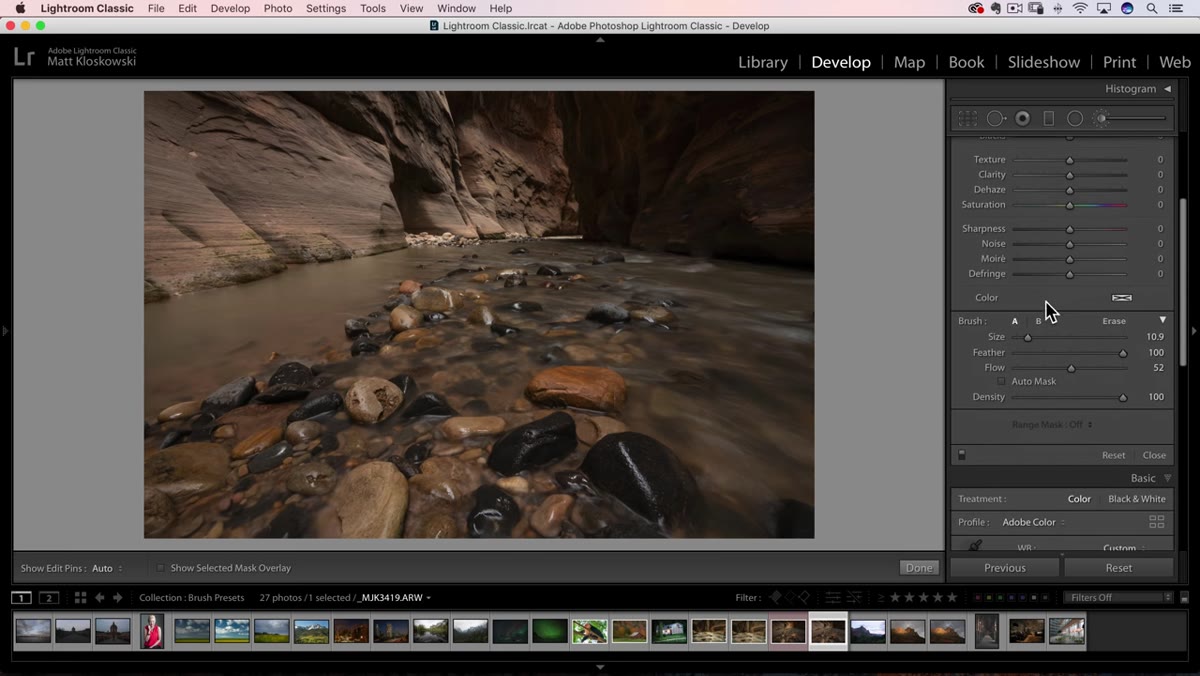 Two brush strokes compared, one at 100% flow, one at 50% flow
Flow is the setting most people ignore or leave at 100 and then wonder why their adjustments feel heavy-handed. Think of it as the opacity of each individual brush pass. At 100%, one stroke delivers the full strength of your adjustment. At 50%, one stroke delivers half. The key behavior: if you paint over the same area multiple times with a lower Flow setting, the adjustment builds incrementally, up to but never exceeding that ceiling value you set in Step 2. It will not blow past your +3 exposure setting no matter how many times you pass over the area. You are controlling how quickly you arrive at the maximum, not whether you can exceed it.
Two brush strokes compared, one at 100% flow, one at 50% flow
Flow is the setting most people ignore or leave at 100 and then wonder why their adjustments feel heavy-handed. Think of it as the opacity of each individual brush pass. At 100%, one stroke delivers the full strength of your adjustment. At 50%, one stroke delivers half. The key behavior: if you paint over the same area multiple times with a lower Flow setting, the adjustment builds incrementally, up to but never exceeding that ceiling value you set in Step 2. It will not blow past your +3 exposure setting no matter how many times you pass over the area. You are controlling how quickly you arrive at the maximum, not whether you can exceed it.
Step 4: Use Low Flow for Gradual, Controlled Brightening
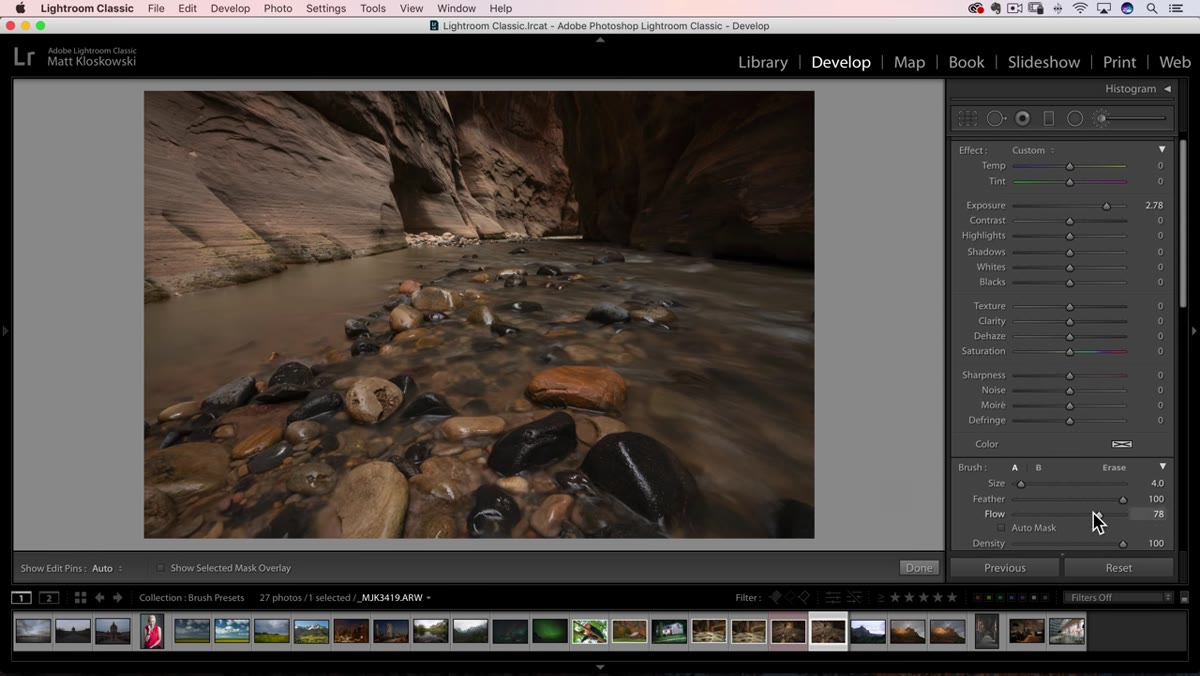 Brush set to 40% flow, painting selectively over a dark region
Here’s where this becomes practically useful. Matt drops Flow down to around 40-50% and paints over a dark section of the image. The first pass lightens it subtly. A second pass builds on that. You can stop at any point when the area looks right, without committing to the full blast of your exposure setting. I use this constantly on product shots with reflective surfaces where I want to coax out detail in a shadow without torching the highlight on a curved edge nearby. Low flow gives you room to be thoughtful. You’re not clicking once and hoping for the best.
Brush set to 40% flow, painting selectively over a dark region
Here’s where this becomes practically useful. Matt drops Flow down to around 40-50% and paints over a dark section of the image. The first pass lightens it subtly. A second pass builds on that. You can stop at any point when the area looks right, without committing to the full blast of your exposure setting. I use this constantly on product shots with reflective surfaces where I want to coax out detail in a shadow without torching the highlight on a curved edge nearby. Low flow gives you room to be thoughtful. You’re not clicking once and hoping for the best.
Step 5: Match Your Exposure Ceiling to What You Actually Need
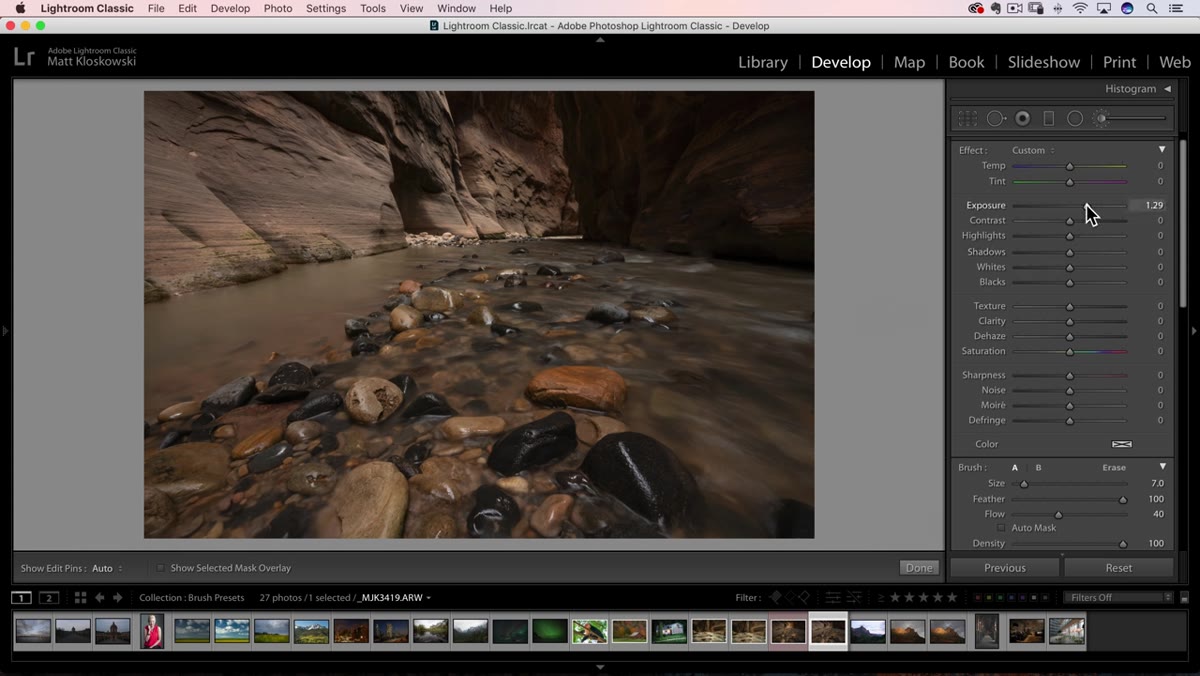 Exposure slider adjusted down to +1.5 to match realistic target
If you know you’re never going to want to brighten a specific area all the way to +3, don’t set the ceiling there. Matt adjusts his target down to about +1.5 when he recognizes +3 is unrealistic for that particular shot. This is a small habit with a real payoff. If your ceiling is set too high and you accidentally paint too many times in a row, you can overshoot your intent and not realize it until you compare before and after. Set the ceiling to the realistic maximum you’d ever want, then use Flow to dial in how you build toward it.
Exposure slider adjusted down to +1.5 to match realistic target
If you know you’re never going to want to brighten a specific area all the way to +3, don’t set the ceiling there. Matt adjusts his target down to about +1.5 when he recognizes +3 is unrealistic for that particular shot. This is a small habit with a real payoff. If your ceiling is set too high and you accidentally paint too many times in a row, you can overshoot your intent and not realize it until you compare before and after. Set the ceiling to the realistic maximum you’d ever want, then use Flow to dial in how you build toward it.
Step 6: Note That the Same Controls Live in Photoshop Camera Raw
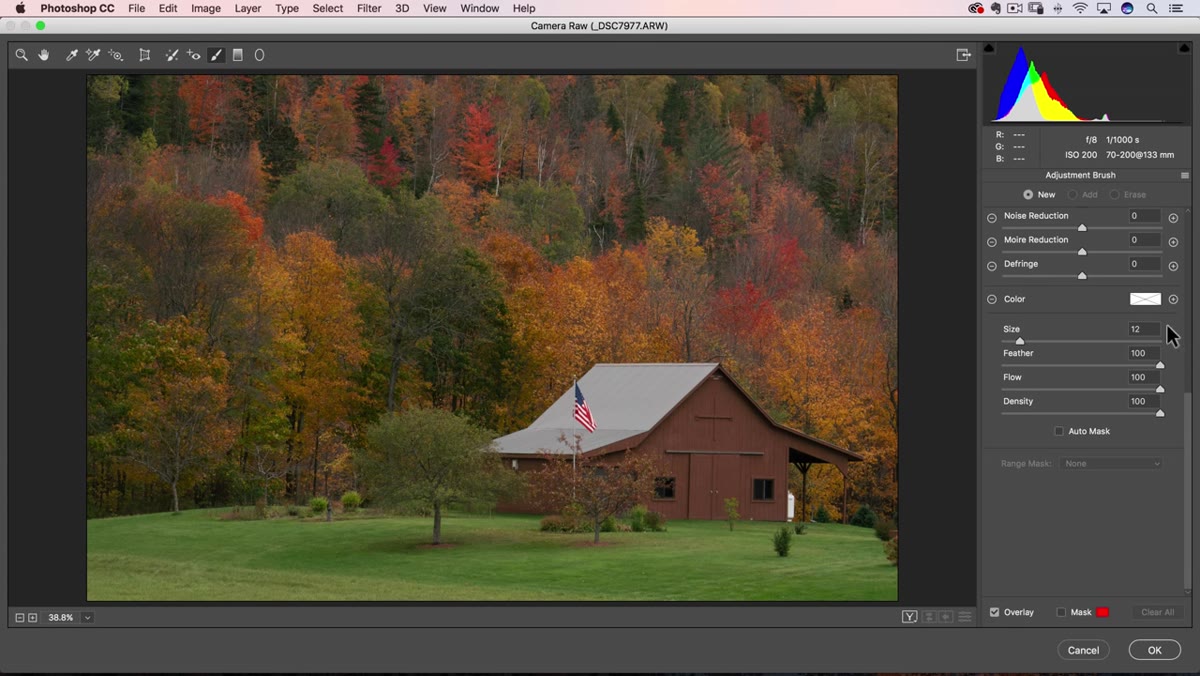 Camera Raw brush panel with Flow and Density sliders at the bottom
If your workflow runs through Photoshop rather than Lightroom, open any raw file in Camera Raw, select the brush tool, and scroll to the bottom of the brush settings. Flow and Density are sitting right there, behaving identically to their Lightroom counterparts. This matters for people like me who sometimes move between both environments depending on what a project demands. A composite job might have me in Photoshop for the heavy lifting, but I’ll still use Camera Raw for initial raw processing with exactly these brush techniques.
Camera Raw brush panel with Flow and Density sliders at the bottom
If your workflow runs through Photoshop rather than Lightroom, open any raw file in Camera Raw, select the brush tool, and scroll to the bottom of the brush settings. Flow and Density are sitting right there, behaving identically to their Lightroom counterparts. This matters for people like me who sometimes move between both environments depending on what a project demands. A composite job might have me in Photoshop for the heavy lifting, but I’ll still use Camera Raw for initial raw processing with exactly these brush techniques.
How I Apply This on Commercial Work
The tutorial covers Flow in depth, but I want to add a note on how this pairs with selective retouching across large batches. When I’m processing e-commerce imagery, consistency is everything. If I build a preset or action that includes a brush adjustment, I almost always build it with Flow set lower than 100. The reason is simple: when you’re painting the same type of adjustment across different products, the shapes and shadow depths vary. A lower Flow setting means I can paint loosely, make multiple passes where I need them, and fewer passes where I don’t, without the result looking uneven across the batch. It’s a small setting that buys you a lot of flexibility when you’re not hand-crafting every single file from scratch.
The single most useful thing to take from this technique is the mental model: Flow controls speed of arrival, not the destination. Set your destination first, set your ceiling at a realistic target value, then use Flow to control how gradually you get there. That one shift in thinking will change how you use every brush adjustment going forward.
Watch the full tutorial on YouTube to see Matt walk through the live painting demonstration, which makes the comparison between flow levels immediately obvious on screen.
Comments (2)
Tried this technique this morning. Game changer for real.
This should be required reading for anyone starting out.
Leave a Comment