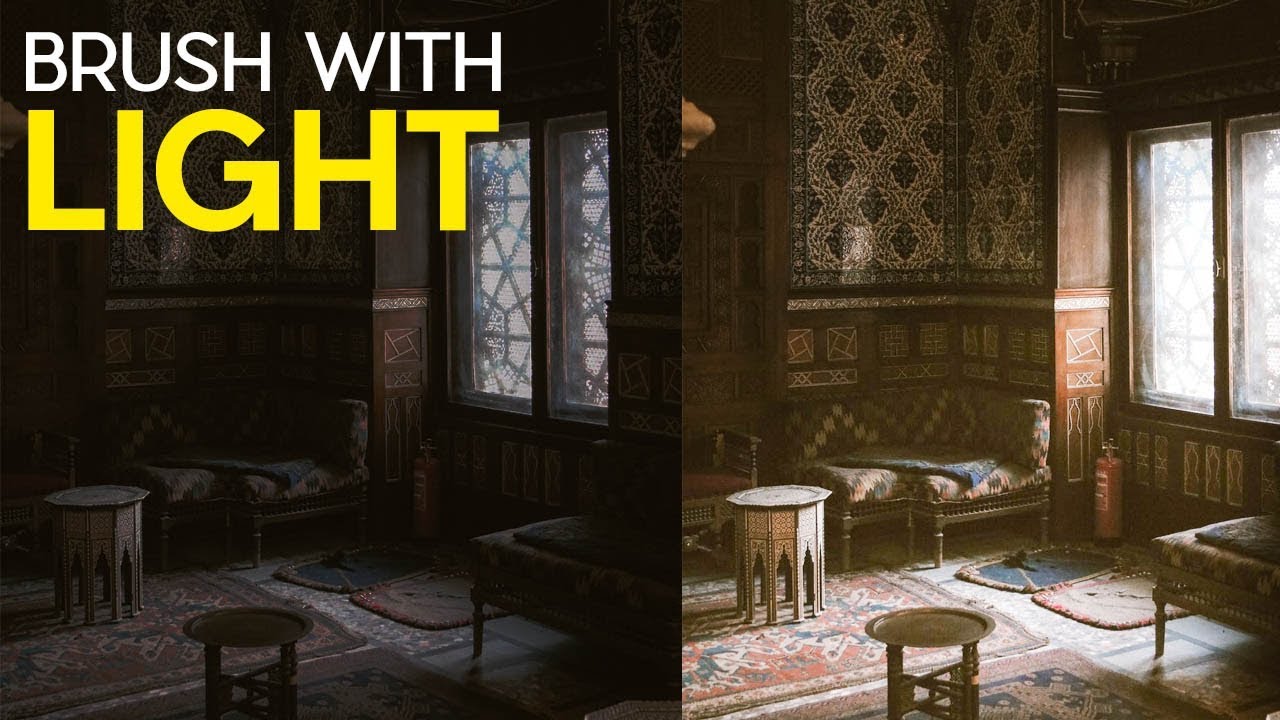
Most of my work lands in front of art directors who’ve seen every Photoshop trick in the book. When I show them a before-and-after with added light rays, the question is never “did you add that?” It’s “how did you do it so fast?” That’s the bar I care about: techniques that look intentional and take almost no time to execute. I came across this one in a Matt Kloskowski tutorial on painting light with Lightroom’s adjustment brush, and it earned a permanent spot in my toolkit within about ten minutes of watching it. Watch the full tutorial on YouTube
The core trick is deceptively simple. Most people think of the adjustment brush as a tool for painting flat corrections across a region. What Matt demonstrates is something more interesting: using the brush’s size change between two clicks to simulate the way light actually fans out from a source. The technique works in Lightroom, Adobe Camera Raw, and partially in On1. Once you understand the mechanic, you’ll find yourself reaching for it on anything from golden-hour landscapes to product shots where the lighting feels a little flat.
One thing worth saying up front: this is a creative technique, not a correction. If your entire philosophy is strictly documentary, it probably isn’t for you. For everyone else, here’s exactly how it works.
Step 1: Grab the Adjustment Brush and Set Your Exposure High
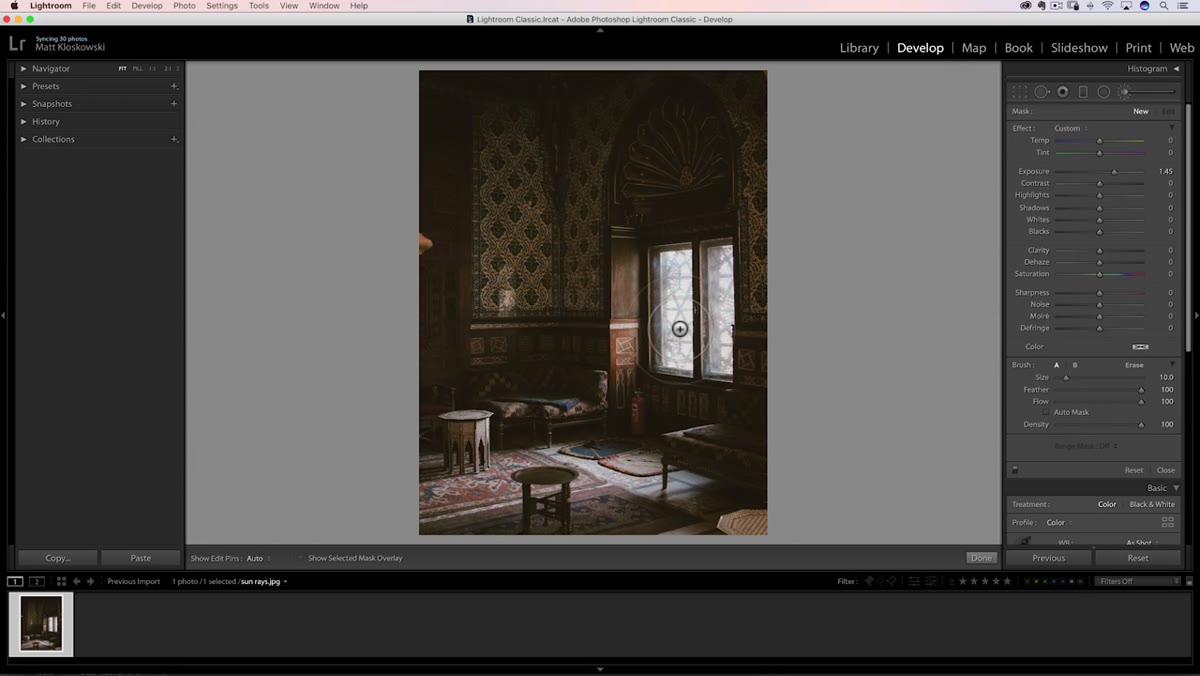 Adjustment brush selected with exposure cranked up in panel
Open your image in Lightroom’s Develop module and select the Adjustment Brush. Before you paint anything, push the Exposure slider up significantly, further than you think looks good. Matt’s approach here is smart: set it overbearingly obvious first so you can clearly see what you’re building, then dial it back once the ray shapes are in place. A setting somewhere around +1.5 to +2.0 works well for visibility. You’ll reduce this later, so don’t second-guess it now.
Adjustment brush selected with exposure cranked up in panel
Open your image in Lightroom’s Develop module and select the Adjustment Brush. Before you paint anything, push the Exposure slider up significantly, further than you think looks good. Matt’s approach here is smart: set it overbearingly obvious first so you can clearly see what you’re building, then dial it back once the ray shapes are in place. A setting somewhere around +1.5 to +2.0 works well for visibility. You’ll reduce this later, so don’t second-guess it now.
Step 2: Make the Brush Small and Set Feather to 100
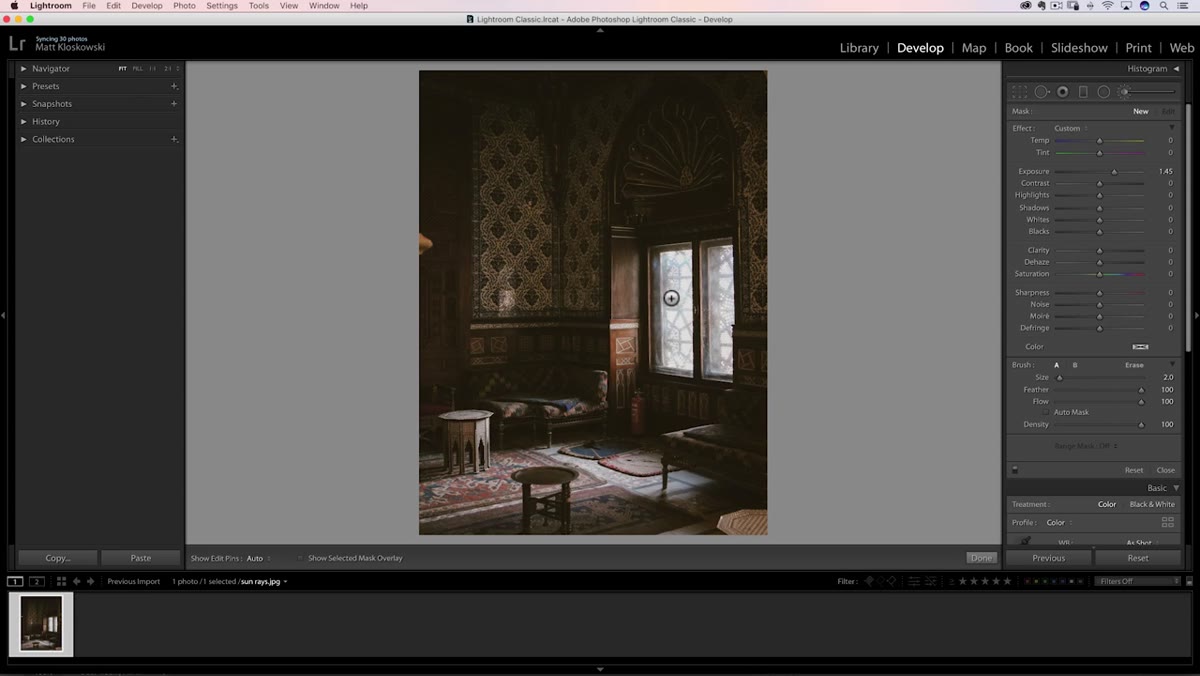 Small brush with full feather setting visible
Use the left bracket key to shrink your brush down to a small size. This is where you’ll click first, at the origin point of the light ray, simulating the narrow end closest to the light source. Equally important: set your Feather to 100%. A hard-edged brush will make the rays look pasted on. Full feather ensures the light blends softly into the surrounding tones, which is what gives this effect its credibility.
Small brush with full feather setting visible
Use the left bracket key to shrink your brush down to a small size. This is where you’ll click first, at the origin point of the light ray, simulating the narrow end closest to the light source. Equally important: set your Feather to 100%. A hard-edged brush will make the rays look pasted on. Full feather ensures the light blends softly into the surrounding tones, which is what gives this effect its credibility.
Step 3: Click Once at the Light Source Origin
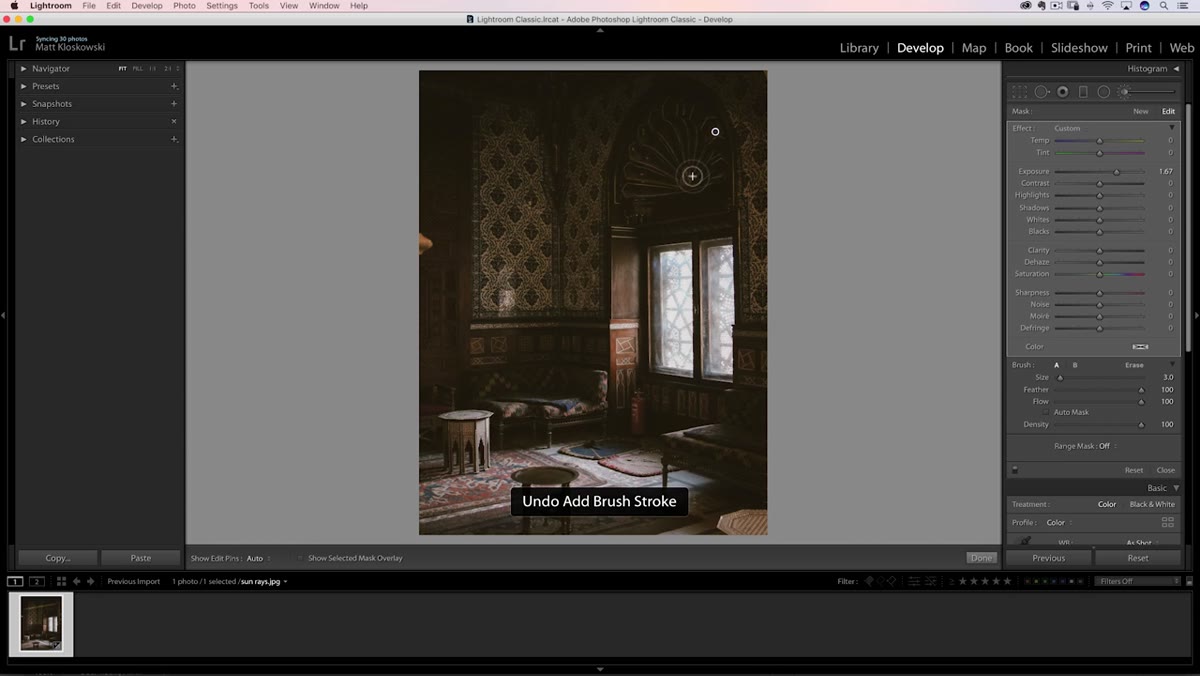 Single click placed near the top of the frame as ray origin
Position your small, heavily feathered brush near where you want the light to appear to originate, typically toward the top of the frame if you’re simulating sunlight coming down, or at a window edge, a gap in clouds, or any other logical light source in the scene. Click once. Don’t drag. That single click is the narrow tip of your light ray.
Single click placed near the top of the frame as ray origin
Position your small, heavily feathered brush near where you want the light to appear to originate, typically toward the top of the frame if you’re simulating sunlight coming down, or at a window edge, a gap in clouds, or any other logical light source in the scene. Click once. Don’t drag. That single click is the narrow tip of your light ray.
Step 4: Switch to a Large Brush, Then Shift-Click at the Ray’s End
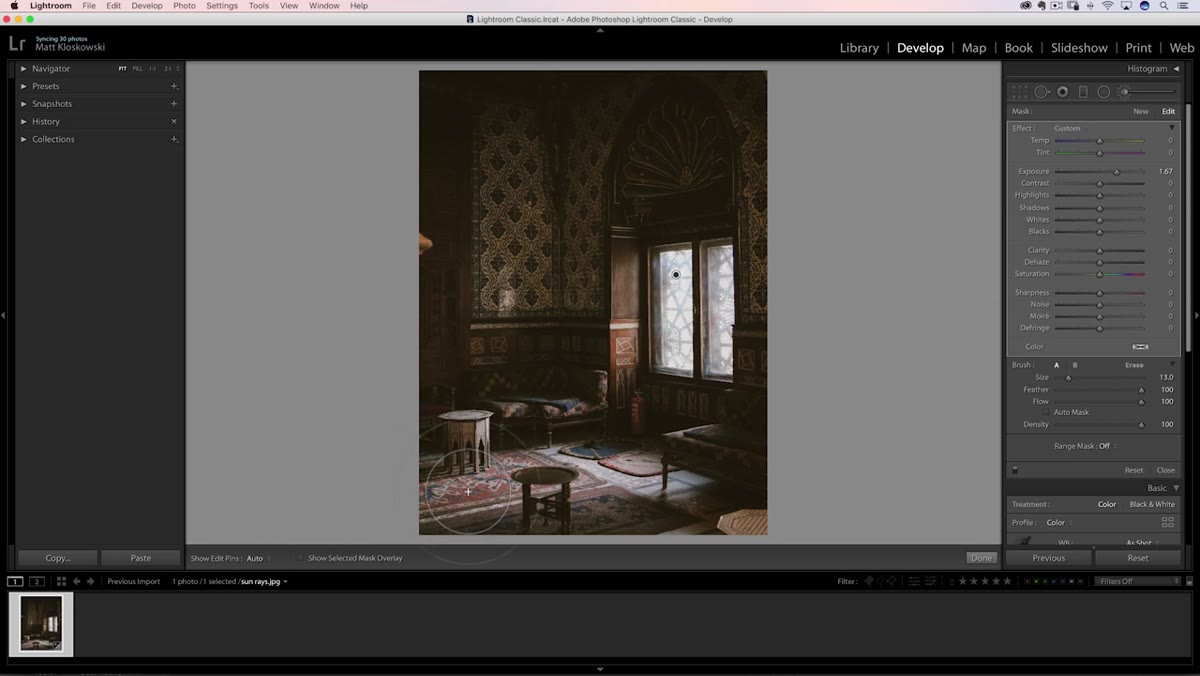 Large brush shift-clicked at base of frame creating the ray line
Here’s the mechanic that makes the whole thing work. After your single click at the top, press the right bracket key to make the brush significantly larger, then hold Shift and click at the point where you want the ray to end, further down the frame. Lightroom draws a straight stroke between those two points, and because the brush size changed between them, the stroke tapers: narrow at the top, wide at the bottom. That taper is exactly how real light rays fan out from a source. The larger you make the ending brush relative to the starting brush, the more dramatic the spread.
Large brush shift-clicked at base of frame creating the ray line
Here’s the mechanic that makes the whole thing work. After your single click at the top, press the right bracket key to make the brush significantly larger, then hold Shift and click at the point where you want the ray to end, further down the frame. Lightroom draws a straight stroke between those two points, and because the brush size changed between them, the stroke tapers: narrow at the top, wide at the bottom. That taper is exactly how real light rays fan out from a source. The larger you make the ending brush relative to the starting brush, the more dramatic the spread.
Step 5: Repeat for Additional Rays Without Creating a New Pin
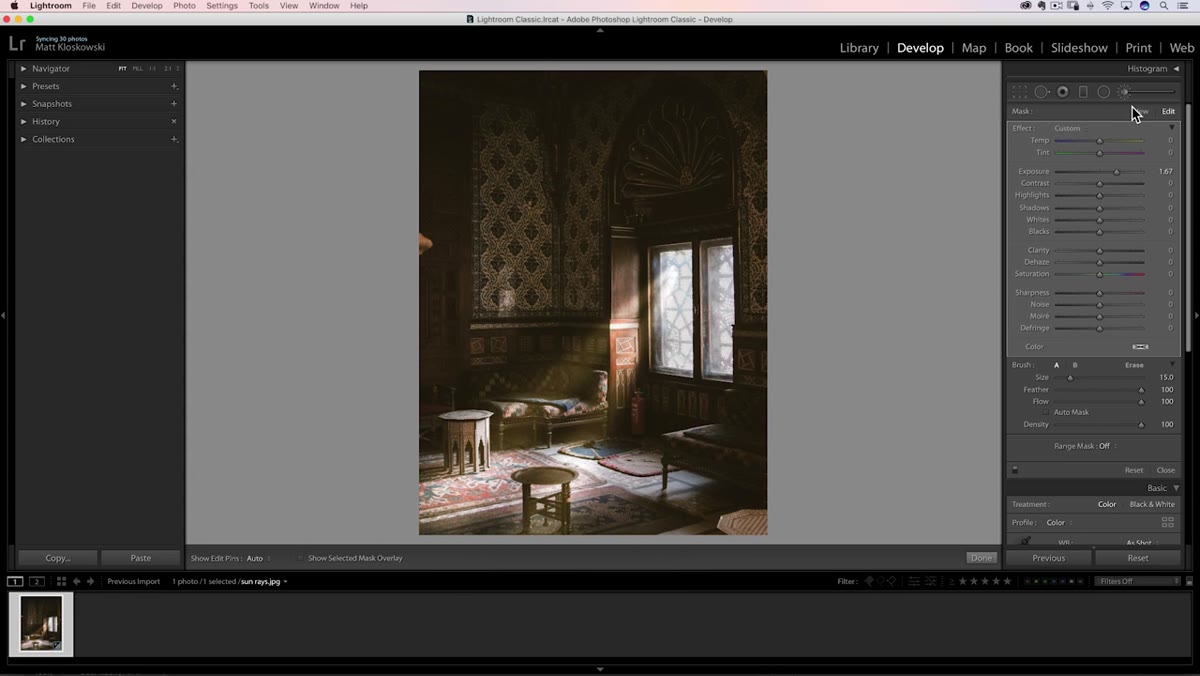 Multiple rays painted under the same adjustment pin
This is the part most people miss. Don’t click “New” to start a fresh adjustment brush for each ray. Instead, keep working within the same brush adjustment. Make your brush small again, click near the same origin point you used before, switch to a large brush, and Shift-click at a slightly different angle below. Each new ray gets added to the same adjustment pin. The payoff: when you click on that pin and drag it, all the rays move together as a single unit. Keeping everything on one pin also means one slider controls the exposure across all the rays simultaneously, which is exactly the kind of clean workflow I want.
Multiple rays painted under the same adjustment pin
This is the part most people miss. Don’t click “New” to start a fresh adjustment brush for each ray. Instead, keep working within the same brush adjustment. Make your brush small again, click near the same origin point you used before, switch to a large brush, and Shift-click at a slightly different angle below. Each new ray gets added to the same adjustment pin. The payoff: when you click on that pin and drag it, all the rays move together as a single unit. Keeping everything on one pin also means one slider controls the exposure across all the rays simultaneously, which is exactly the kind of clean workflow I want.
Step 6: Dial Back the Exposure and Add Warmth
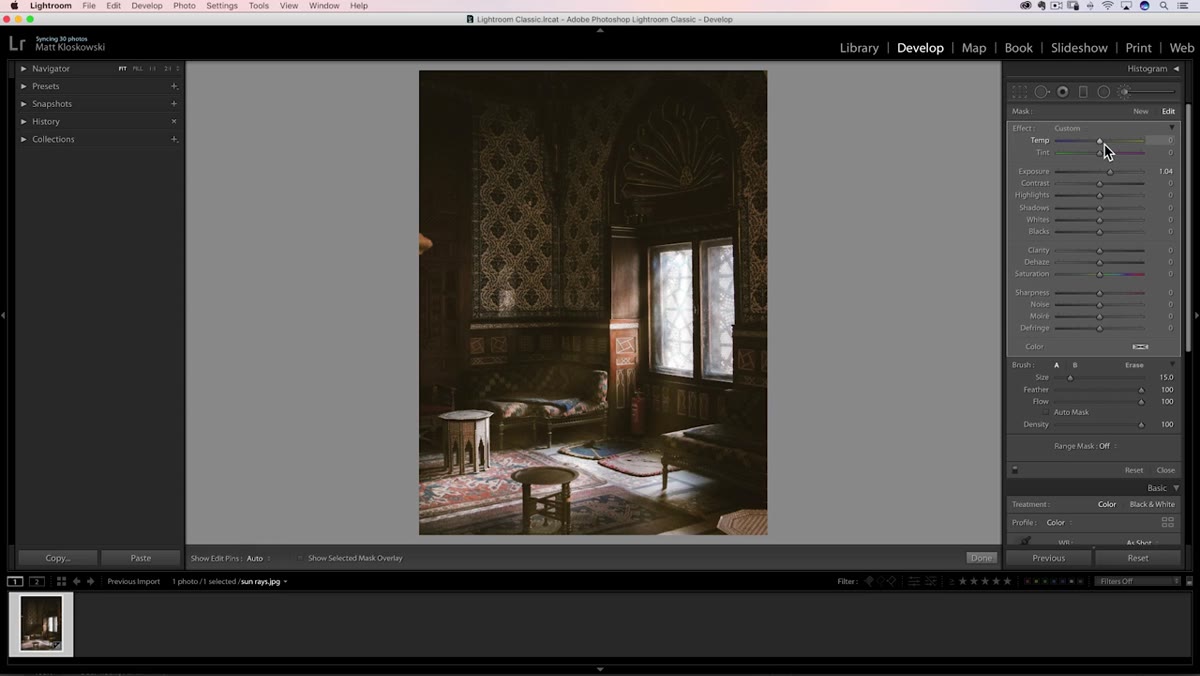 Exposure reduced and temperature slider adjusted for warm light
Now that the ray shapes are built, pull the Exposure back to something believable. What that number is depends on the image, but somewhere between +0.5 and +0.8 tends to read as realistic rather than theatrical. From there, nudge the Temperature slider toward warm. Real sunlight and most artificial light sources have a yellow-orange quality. A cool, white ray of light reads as artificial almost immediately. A small temperature bump, even just 10 to 15 points, closes that gap quickly.
Exposure reduced and temperature slider adjusted for warm light
Now that the ray shapes are built, pull the Exposure back to something believable. What that number is depends on the image, but somewhere between +0.5 and +0.8 tends to read as realistic rather than theatrical. From there, nudge the Temperature slider toward warm. Real sunlight and most artificial light sources have a yellow-orange quality. A cool, white ray of light reads as artificial almost immediately. A small temperature bump, even just 10 to 15 points, closes that gap quickly.
Step 7: Erase the Hard Edges to Soften the Ray Endings
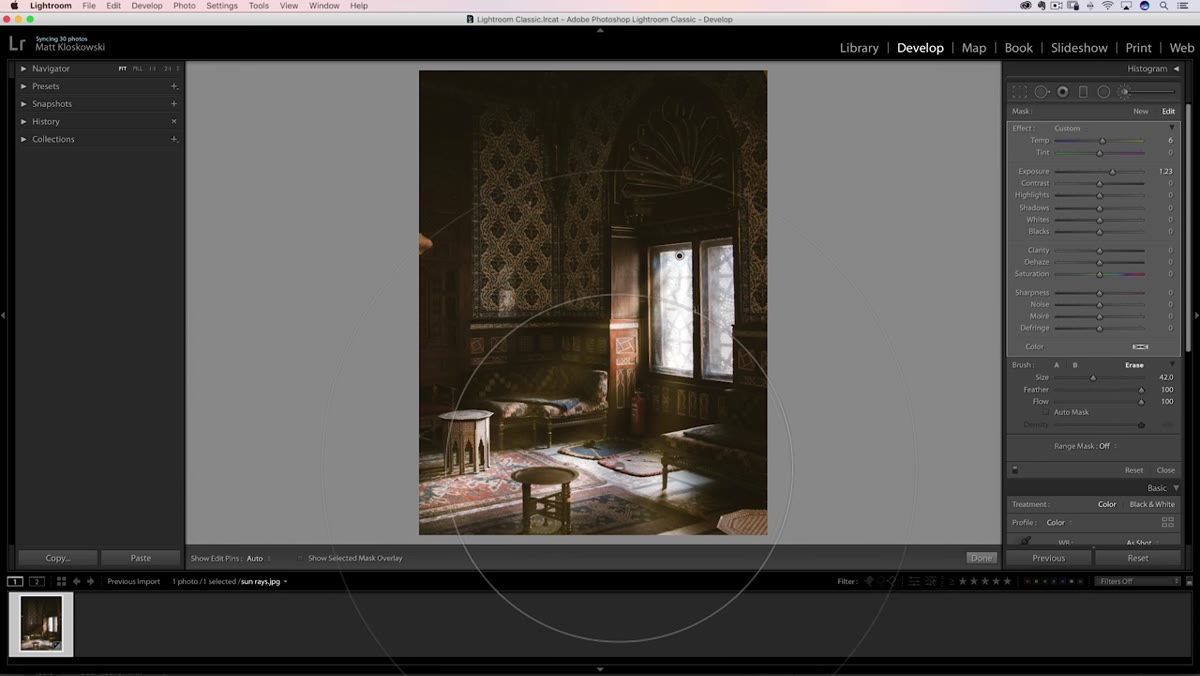 Erase mode active with large soft brush fading ray ends
Switch the brush to Erase mode. Use a large, soft brush to gently fade the ends of the rays, particularly where they terminate at the bottom of the frame. Actual light rays don’t stop with a clean edge. They dissolve. A few light passes with the eraser in the lower portion of each ray removes that artificial cutoff and blends everything into the image naturally.
Erase mode active with large soft brush fading ray ends
Switch the brush to Erase mode. Use a large, soft brush to gently fade the ends of the rays, particularly where they terminate at the bottom of the frame. Actual light rays don’t stop with a clean edge. They dissolve. A few light passes with the eraser in the lower portion of each ray removes that artificial cutoff and blends everything into the image naturally.
What I’d Add From My Own Experience
This technique transfers directly to product photography in ways that aren’t obvious at first. I’ve used it on flat-lay shots where the studio lighting was even but boring, adding a suggestion of directional window light that gives the image some visual depth without looking like a composite. The key adjustment I make for product work is keeping the rays off the product itself. I’ll paint them into the background only, then use the Erase brush carefully along any edge where the ray would cross onto the subject. It keeps the product color-accurate while the background gets the mood.
The other thing worth experimenting with is using multiple adjustment pins at different angles. Two or three separate groups of rays at different positions, each with slightly different exposure values, can simulate complex window-light situations. Keep each group on its own pin so you can fine-tune them independently, but build each group’s individual rays on a shared pin using the same Shift-click method above.
The single most important thing this technique teaches isn’t the trick itself: it’s that the adjustment brush in Lightroom is far more capable of creative work than most people use it for. Brush size variation between clicks is something I’d never thought to exploit deliberately before watching Matt’s tutorial, and it’s one of those workflow additions that once you see it, you start seeing applications everywhere.
Watch the full tutorial on YouTube to see Matt walk through the technique across multiple images, including the On1 version he demonstrates toward the end.
Comments (2)
Clear and practical. No fluff. Appreciate that.
Bookmarked. Coming back to this one for sure.
Leave a Comment