I have a bad habit of not cleaning my sensor often enough. Fifteen years of commercial work and I still catch myself delivering a first round of selects to an ad agency only to get an email back with a screenshot circled in red: “What’s that blob in the sky?” Every photographer I know has a version of that story. The frustrating part is that most of those dust spots are invisible at shooting apertures and only reveal themselves when you shoot at f/11 or tighter for a landscape. By that point, you’ve got 300 frames to fix.
In this KelbyOne tutorial, ON1 software educator Dylan Kotecki walks through a focused, practical approach to pulling distractions out of landscape photos using ON1 Photo RAW. Watch the full tutorial on YouTube before reading or follow along here. The workflow he demonstrates covers everything from single dust spots to more complex scene distractions, and it’s organized in a way that translates directly to a repeatable editing habit, which is exactly the kind of thing I can get behind.
What I appreciate about Kotecki’s approach is that he starts simple and layers complexity, so you’re not overwhelmed before you’ve even made your first correction. Here’s how the workflow breaks down.
Step 1: Open Your Image in the Edit Module
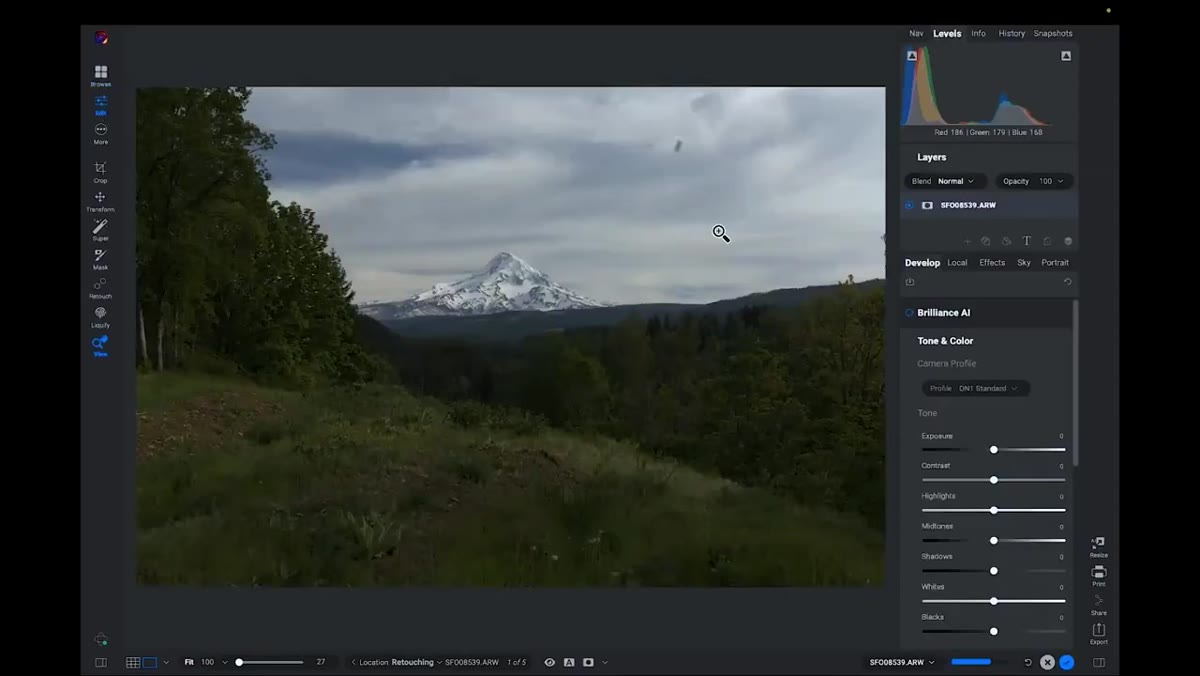 Image loaded in ON1 Photo RAW edit module
Once you have your photo selected in ON1 Photo RAW, bring it into the Edit module. Kotecki’s demo image has a fairly obvious dust spot visible right in the sky, the kind of thing that’s easy to spot on a plain, even-toned background. If your distraction shows up immediately on a plain sky or smooth water, that’s your cue to address it before you do any other editing. Contrast, clarity, and texture adjustments will make those spots significantly worse, so catching them early saves you from doubling back later.
Image loaded in ON1 Photo RAW edit module
Once you have your photo selected in ON1 Photo RAW, bring it into the Edit module. Kotecki’s demo image has a fairly obvious dust spot visible right in the sky, the kind of thing that’s easy to spot on a plain, even-toned background. If your distraction shows up immediately on a plain sky or smooth water, that’s your cue to address it before you do any other editing. Contrast, clarity, and texture adjustments will make those spots significantly worse, so catching them early saves you from doubling back later.
Step 2: Select the Retouching Tools and Activate the Healing Brush
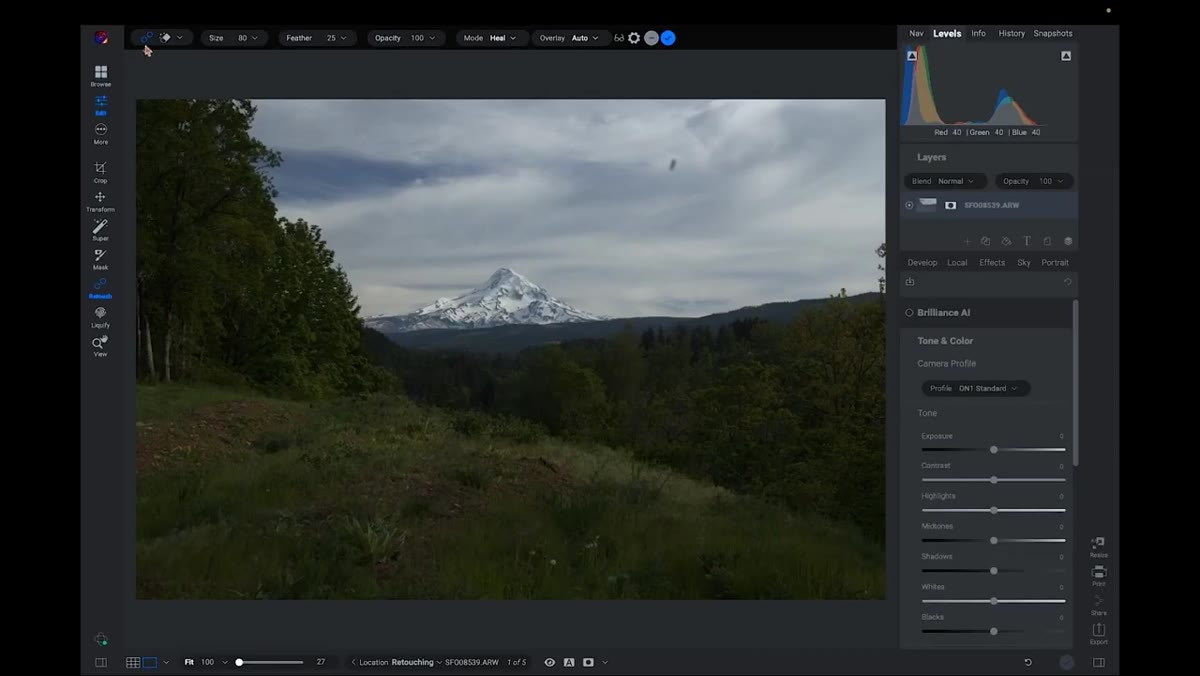 Retouching tools panel open on left side of screen
On the left-hand side of the Edit module, you’ll find the Retouching tools panel. Inside it, select the Healing Brush. Kotecki mentions he reaches for this tool about 90% of the time for this kind of work, and I’d second that. You can also activate it with the keyboard shortcut Q, which is worth memorizing if you’re going to make this part of your regular post-processing routine. The Healing Brush works by letting you paint over a problem area and then pull in texture and tone from a neighboring region to blend the correction seamlessly.
Retouching tools panel open on left side of screen
On the left-hand side of the Edit module, you’ll find the Retouching tools panel. Inside it, select the Healing Brush. Kotecki mentions he reaches for this tool about 90% of the time for this kind of work, and I’d second that. You can also activate it with the keyboard shortcut Q, which is worth memorizing if you’re going to make this part of your regular post-processing routine. The Healing Brush works by letting you paint over a problem area and then pull in texture and tone from a neighboring region to blend the correction seamlessly.
Step 3: Use Visualize Dust to Find Hidden Problem Areas
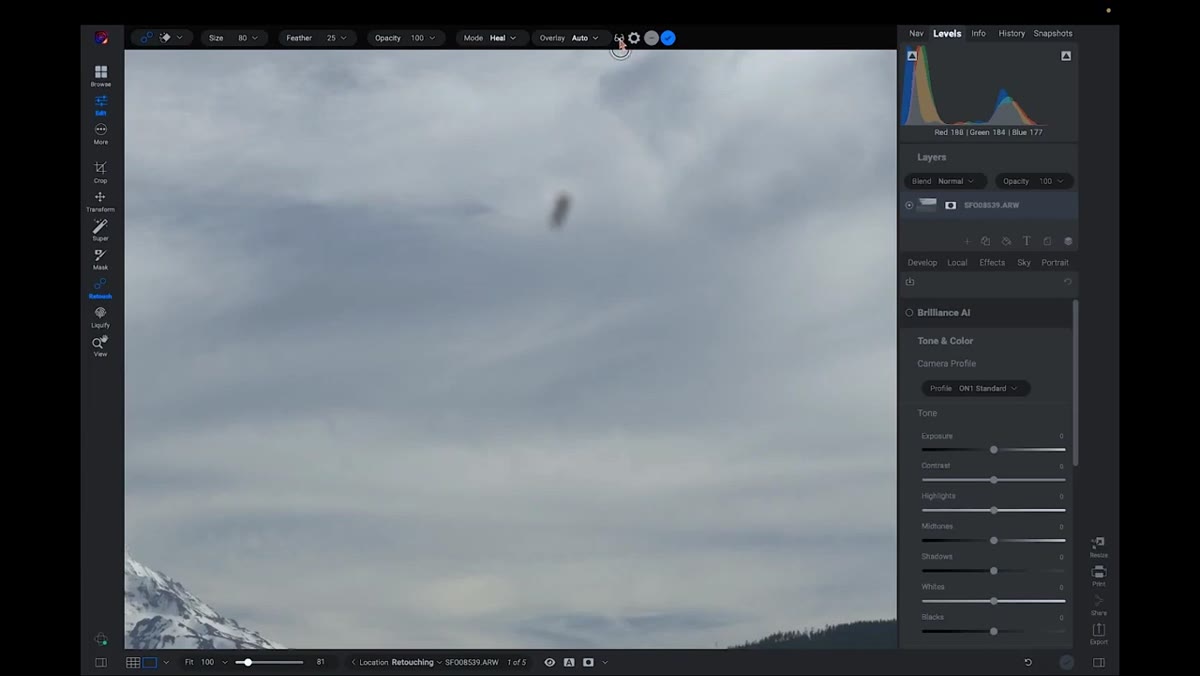 Visualize Dust mode showing multiple dust spots on screen
This is the step most people skip, and it’s the one that costs them time later. In the top tool modifier bar, there’s a small eyeglasses icon that activates Visualize Dust mode. Toggle it on. What you’ll see is a high-contrast inverted view of your image that makes dust spots and sensor artifacts pop as bright marks against a dark background. Kotecki’s image had one obvious spot and two others he hadn’t noticed. Those secondary spots were subtle in the regular view but would have become visible after boosting contrast or adding texture to the sky. Catching them here, before any tonal work, is the smarter play.
Visualize Dust mode showing multiple dust spots on screen
This is the step most people skip, and it’s the one that costs them time later. In the top tool modifier bar, there’s a small eyeglasses icon that activates Visualize Dust mode. Toggle it on. What you’ll see is a high-contrast inverted view of your image that makes dust spots and sensor artifacts pop as bright marks against a dark background. Kotecki’s image had one obvious spot and two others he hadn’t noticed. Those secondary spots were subtle in the regular view but would have become visible after boosting contrast or adding texture to the sky. Catching them here, before any tonal work, is the smarter play.
Step 4: Set Your Feathering and Confirm Heal Mode
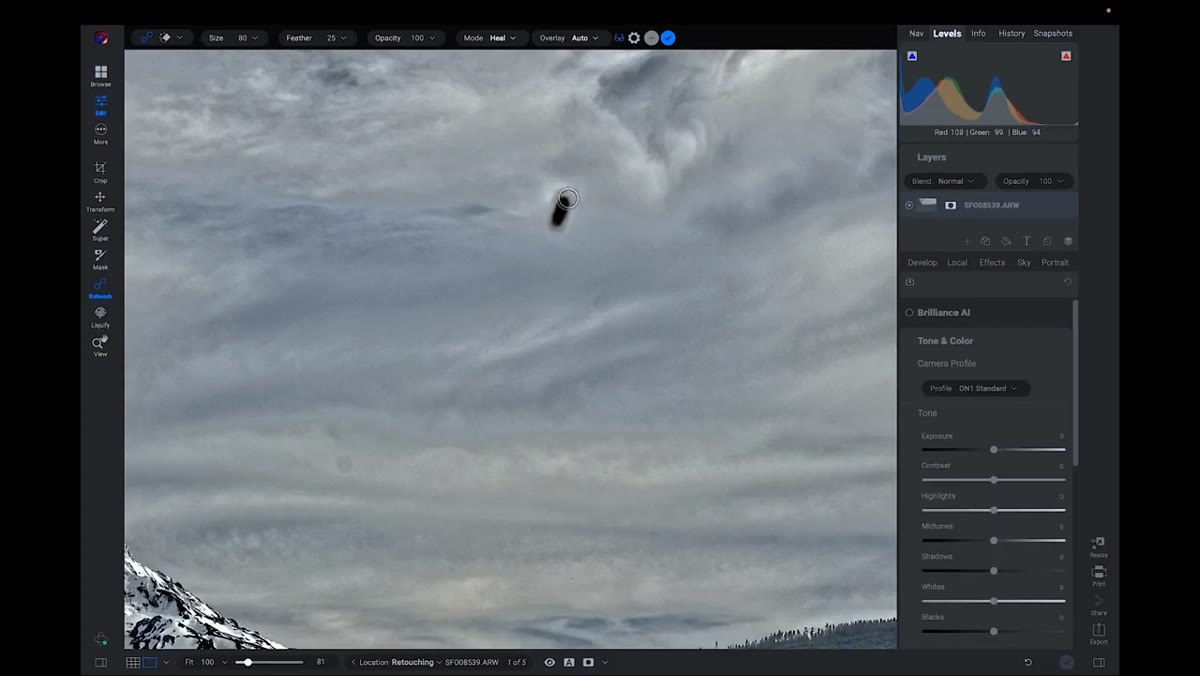 Healing brush settings panel showing feathering at 25
Before you start painting, dial in your brush settings. Kotecki recommends setting Feathering to around 25, which is also the default. Feathering controls how soft the edge of your healing correction appears. More feathering blends more aggressively toward the center of the stroke, which can soften corrections on sharper-edged details. For plain sky spots and smooth-toned areas, 25 is the right call. Make sure the mode is set to Heal, not Clone. Heal blends color and tone from the surrounding area rather than doing a straight copy, which gives you much cleaner results on anything with gradients or uneven lighting.
Healing brush settings panel showing feathering at 25
Before you start painting, dial in your brush settings. Kotecki recommends setting Feathering to around 25, which is also the default. Feathering controls how soft the edge of your healing correction appears. More feathering blends more aggressively toward the center of the stroke, which can soften corrections on sharper-edged details. For plain sky spots and smooth-toned areas, 25 is the right call. Make sure the mode is set to Heal, not Clone. Heal blends color and tone from the surrounding area rather than doing a straight copy, which gives you much cleaner results on anything with gradients or uneven lighting.
Step 5: Paint Over Each Dust Spot and Sample a Clean Area
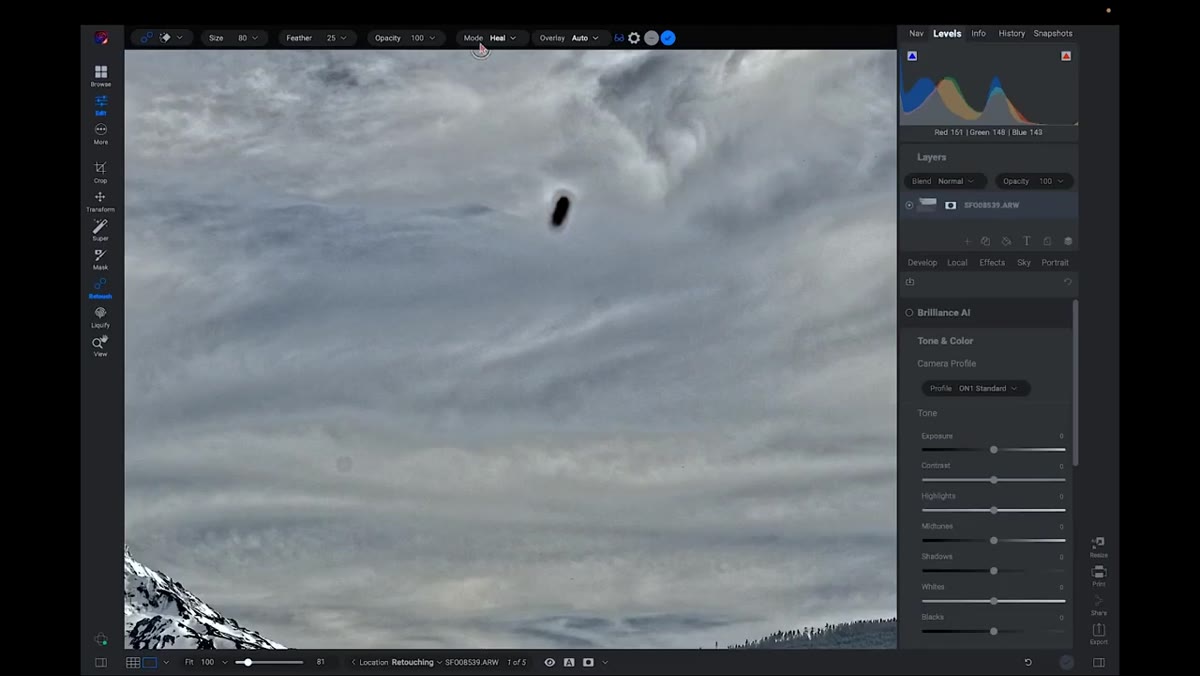 Healing brush being painted over a dust spot in the sky
With Visualize Dust still active so you can see exactly what you’re targeting, paint a stroke over each dust spot or imperfection. Keep your brush size just slightly larger than the spot itself. After you paint, ON1 will automatically sample a nearby region to complete the heal. If the auto-selected source area doesn’t look right, you can manually drag the source point to a cleaner part of the image. Work through all the spots the Visualize Dust view revealed before turning it off. Once you toggle back to the normal view, run a quick check to make sure the corrections blend cleanly.
Healing brush being painted over a dust spot in the sky
With Visualize Dust still active so you can see exactly what you’re targeting, paint a stroke over each dust spot or imperfection. Keep your brush size just slightly larger than the spot itself. After you paint, ON1 will automatically sample a nearby region to complete the heal. If the auto-selected source area doesn’t look right, you can manually drag the source point to a cleaner part of the image. Work through all the spots the Visualize Dust view revealed before turning it off. Once you toggle back to the normal view, run a quick check to make sure the corrections blend cleanly.
Step 6: Turn Off Visualize Dust and Review
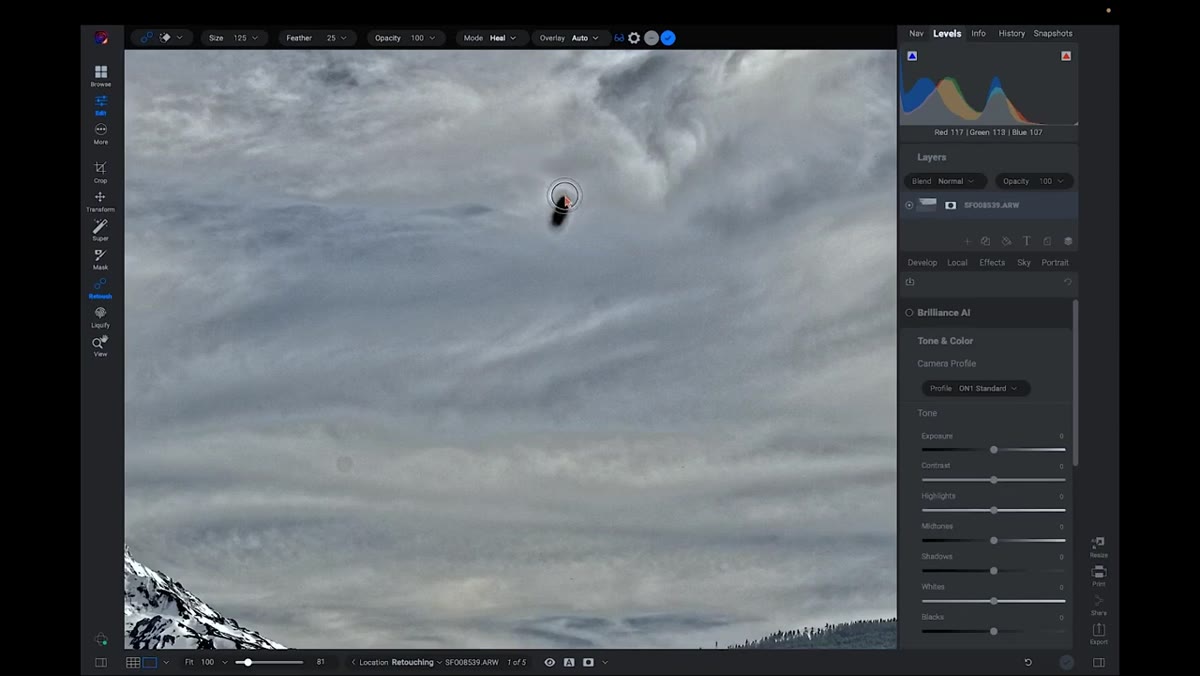 Normal image view after healing corrections applied
Toggle Visualize Dust off and look at the image in its standard view. Zoom in to your sky areas, especially anywhere you plan to increase contrast or apply local adjustments later. If a correction looks slightly off, you can click on that healing point and either adjust the source location or delete it and redo the stroke. Kotecki’s corrections in the demo look clean enough that you wouldn’t know the spots were ever there. That’s the goal: invisible work, not noticeable repair.
Normal image view after healing corrections applied
Toggle Visualize Dust off and look at the image in its standard view. Zoom in to your sky areas, especially anywhere you plan to increase contrast or apply local adjustments later. If a correction looks slightly off, you can click on that healing point and either adjust the source location or delete it and redo the stroke. Kotecki’s corrections in the demo look clean enough that you wouldn’t know the spots were ever there. That’s the goal: invisible work, not noticeable repair.
What I’d Add From Commercial Work
Dust spots are the simple case. Where this workflow pays bigger dividends is when you start applying it to more complex distractions: a person standing on a beach you can’t ask to move, a power line cutting across a mountain ridge, a reflection you didn’t notice in a product shot until delivery. The Healing Brush handles a lot of those situations, but knowing when to switch modes, or when to reach for a different tool entirely, is where you earn your retouching credibility. Kotecki signals that he covers those other modes later in the tutorial, and that’s worth watching in full because the simple case teaches the muscle memory, and the harder cases are where the muscle memory actually matters.
I’d also suggest building a pre-editing checklist habit around this: sensor check before any tonal work, always. I color-code my Lightroom and ON1 workflows by phase, and “retouching cleanup” is always the first colored flag. It’s a small thing, but doing it consistently means I’ve stopped getting those circled-screenshot emails.
The single most important takeaway here is this: do your dust and distraction removal before any tonal editing, not after. Contrast and sharpening amplify sensor artifacts, and fixing them on top of heavy edits is harder and looks worse. Kotecki’s Visualize Dust step makes it easy to find every problem in under a minute, so there’s no excuse to skip it.
Watch the full tutorial on YouTube to see Dylan Kotecki cover more complex distraction removal cases beyond dust spots, including how to handle the other healing modes inside ON1 Photo RAW.
Comments (2)
Just subscribed. If the rest of your content is this good, I'm in.
Quality content like this is rare. Keep it up.
Leave a Comment