I have a bad habit of over-engineering things. Fifteen years in commercial studios will do that to you. I’ve built Photoshop action sets with 40 steps, color-coded folder structures across four backup drives, and batch pipelines that could process half a year’s worth of product shots before lunch. So when I come across a landscape photographer who strips a complex editing process down to only what actually matters, I pay attention. That’s exactly what William Patino does in his Lightroom landscape tutorial. Watch the full tutorial on YouTube
The core argument he makes is one I’ve had to remind myself of more than once: Lightroom has over 100 tools, and most landscape photographers need fewer than 10 of them. The trap is spending editing sessions poking at sliders that don’t serve the actual image. Patino’s workflow cuts straight to the four things that matter most for landscapes – revealing shadow detail, recovering highlights, restoring color, and building depth. That’s the whole game. The steps below follow his tutorial in order, with enough specifics that you can run through your own RAW files right alongside.
Step 1: Start With Lens Corrections
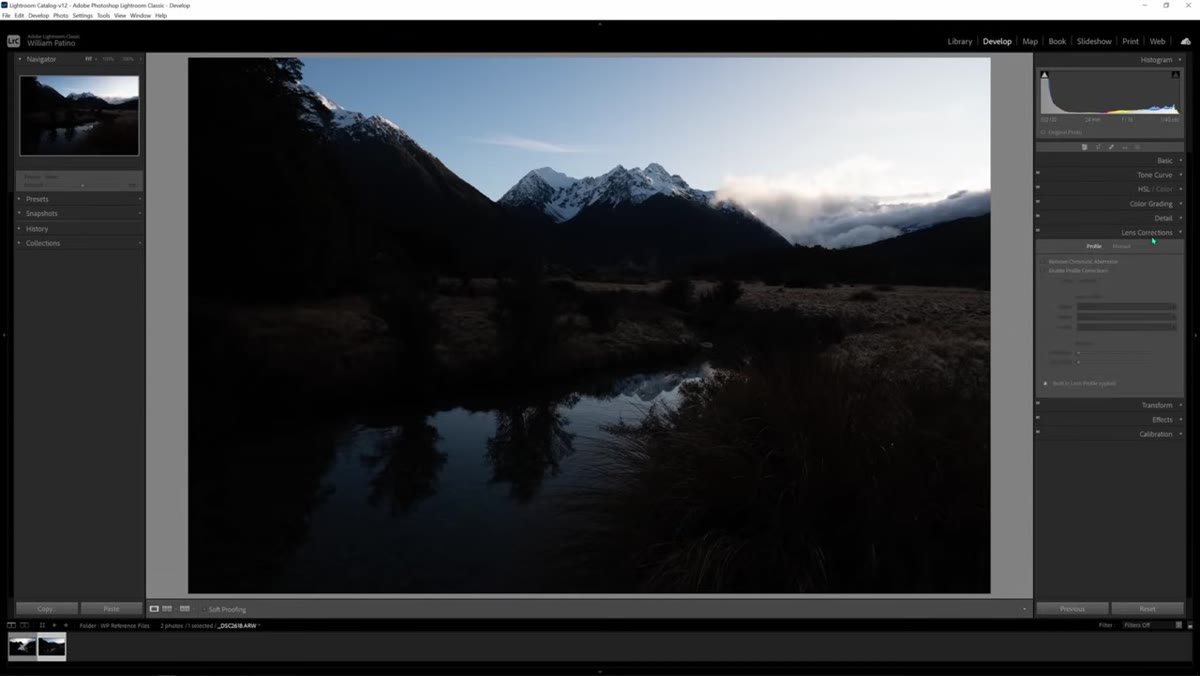 Lens Correction panel open with profile correction enabled
Before touching a single tonal slider, open the Lens Correction panel on the right-hand side of Lightroom’s Develop module. It’s easy to skip this step, and Patino admits he forgets it himself roughly half the time. But it earns its place in a repeatable workflow. Check “Remove Chromatic Aberration” first – this clears up those neon green, purple, or blue fringe colors that appear along high-contrast edges depending on your lens and shooting conditions. Then enable “Profile Corrections,” which lets Lightroom read the lens metadata from your RAW file and automatically correct for distortion and vignetting. This is especially useful for seascape or wide-horizon shots where lens barrel distortion can bow a perfectly flat horizon line.
Lens Correction panel open with profile correction enabled
Before touching a single tonal slider, open the Lens Correction panel on the right-hand side of Lightroom’s Develop module. It’s easy to skip this step, and Patino admits he forgets it himself roughly half the time. But it earns its place in a repeatable workflow. Check “Remove Chromatic Aberration” first – this clears up those neon green, purple, or blue fringe colors that appear along high-contrast edges depending on your lens and shooting conditions. Then enable “Profile Corrections,” which lets Lightroom read the lens metadata from your RAW file and automatically correct for distortion and vignetting. This is especially useful for seascape or wide-horizon shots where lens barrel distortion can bow a perfectly flat horizon line.
Step 2: Set Your Exposure Intention Before Touching Any Slider
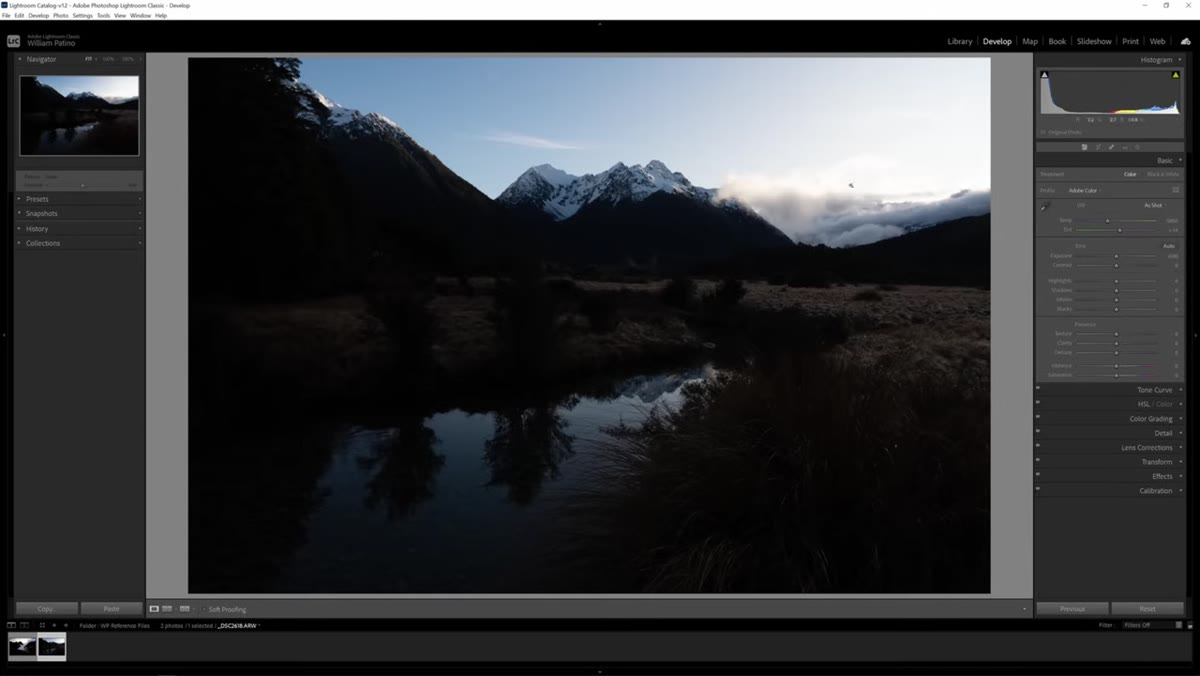
 Before-state of landscape RAW file loaded in Develop module
This is less a Lightroom step and more a mindset step, but it shapes every decision that follows. Before dragging anything, Patino recommends deciding what you’re actually trying to achieve with the image. For most landscape RAWs, the goals are predictable: lift the shadows so the foreground has definition, pull back the sky so you don’t lose cloud or gradient detail, recover color saturation the camera compressed, and create a sense of distance in the scene. Writing those goals down, or at least holding them consciously, keeps you from chasing your tail with the sliders. Think of it as previsualization applied to post-processing rather than to the shoot itself.
Before-state of landscape RAW file loaded in Develop module
This is less a Lightroom step and more a mindset step, but it shapes every decision that follows. Before dragging anything, Patino recommends deciding what you’re actually trying to achieve with the image. For most landscape RAWs, the goals are predictable: lift the shadows so the foreground has definition, pull back the sky so you don’t lose cloud or gradient detail, recover color saturation the camera compressed, and create a sense of distance in the scene. Writing those goals down, or at least holding them consciously, keeps you from chasing your tail with the sliders. Think of it as previsualization applied to post-processing rather than to the shoot itself.
Step 3: Lift Global Exposure to Open Up the Shadows
 Exposure slider being dragged right in the Basic panel
Jump into the Basic panel. This is where the majority of the work happens. Start with the Exposure slider and pull it to the right until the shadow areas in your foreground and midground start showing real detail. For a typical underexposed landscape RAW, this often means pushing somewhere between +0.5 and +1.5 stops depending on the file. Watch the histogram as you drag – you want the left side of the distribution to move toward center, but you’ll likely see the right side start clipping into the highlights. That’s expected, and it’s exactly what the next step addresses. Don’t try to find a single “correct” exposure value here. Just lift until the dark areas breathe.
Exposure slider being dragged right in the Basic panel
Jump into the Basic panel. This is where the majority of the work happens. Start with the Exposure slider and pull it to the right until the shadow areas in your foreground and midground start showing real detail. For a typical underexposed landscape RAW, this often means pushing somewhere between +0.5 and +1.5 stops depending on the file. Watch the histogram as you drag – you want the left side of the distribution to move toward center, but you’ll likely see the right side start clipping into the highlights. That’s expected, and it’s exactly what the next step addresses. Don’t try to find a single “correct” exposure value here. Just lift until the dark areas breathe.
Step 4: Recover the Sky With the Highlights Slider
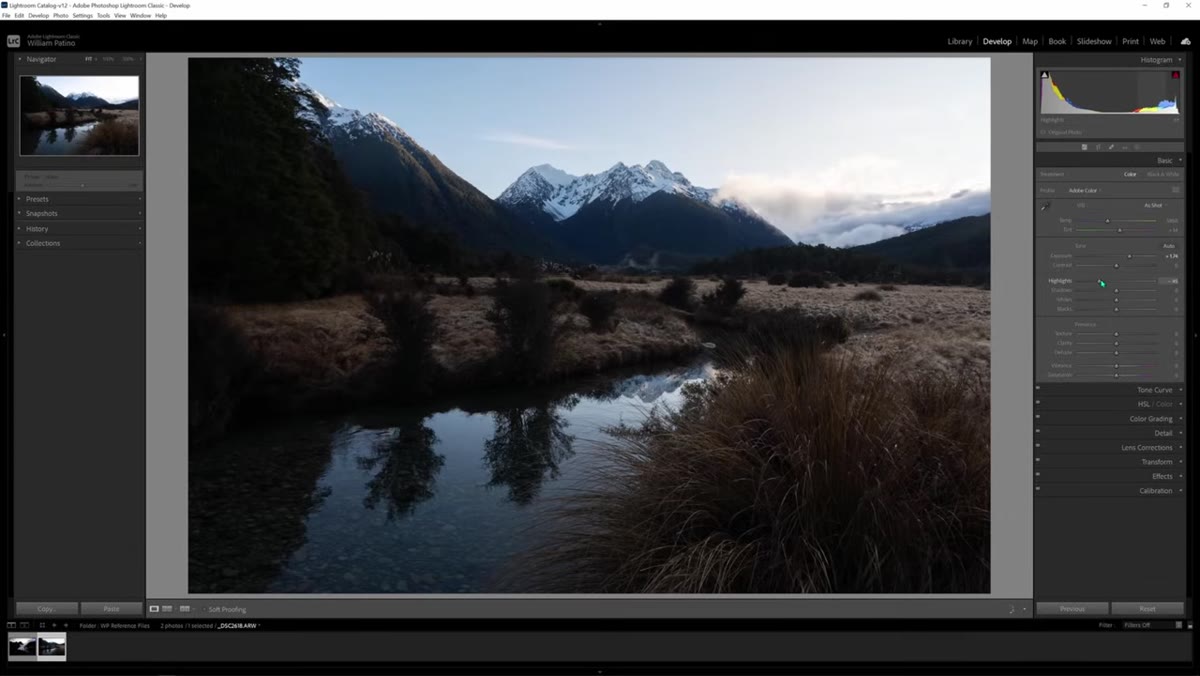 Highlights slider pulled left while sky detail returns
Once the shadows are open, the sky is almost certainly blown out. Grab the Highlights slider and pull it left – sometimes significantly, down to -70 or -80 – until you see cloud texture and gradient color return in the upper portion of the frame. Patino makes a point here that I think gets lost in a lot of beginner tutorials: you don’t want to recover every last photon. Real skies are bright. The sun is genuinely intense. Pulling highlights all the way to -100 to “save” every detail often produces a flat, grey sky that looks processed rather than photographed. Leave some luminosity in there. The goal is believable, not technically complete.
Highlights slider pulled left while sky detail returns
Once the shadows are open, the sky is almost certainly blown out. Grab the Highlights slider and pull it left – sometimes significantly, down to -70 or -80 – until you see cloud texture and gradient color return in the upper portion of the frame. Patino makes a point here that I think gets lost in a lot of beginner tutorials: you don’t want to recover every last photon. Real skies are bright. The sun is genuinely intense. Pulling highlights all the way to -100 to “save” every detail often produces a flat, grey sky that looks processed rather than photographed. Leave some luminosity in there. The goal is believable, not technically complete.
Step 5: Use Shadows and Whites to Fine-Tune the Tonal Balance
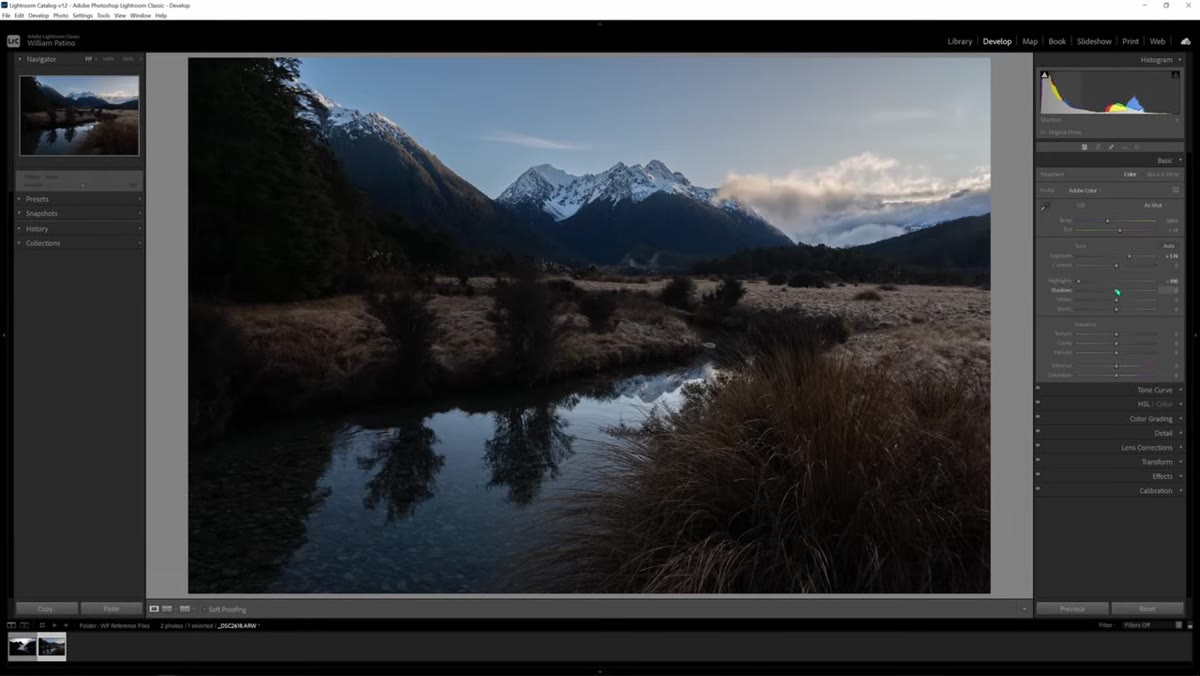 Shadows and Whites sliders adjusted in Basic panel
With exposure and highlights set, use the Shadows slider to do a secondary lift on the darker areas that didn’t fully respond to the global exposure push. This is different from Exposure – it targets only the lower tonal range without affecting the midtones as broadly. Similarly, the Whites slider controls the brightest non-clipping tones and can add punch and contrast to the overall image when nudged slightly right. Think of these four sliders – Exposure, Highlights, Shadows, Whites – as a balancing act rather than independent adjustments. Moving one affects how the others read visually, so go back and check each one after adjusting the others.
Shadows and Whites sliders adjusted in Basic panel
With exposure and highlights set, use the Shadows slider to do a secondary lift on the darker areas that didn’t fully respond to the global exposure push. This is different from Exposure – it targets only the lower tonal range without affecting the midtones as broadly. Similarly, the Whites slider controls the brightest non-clipping tones and can add punch and contrast to the overall image when nudged slightly right. Think of these four sliders – Exposure, Highlights, Shadows, Whites – as a balancing act rather than independent adjustments. Moving one affects how the others read visually, so go back and check each one after adjusting the others.
Step 6: Keep Shadows Naturally Dark
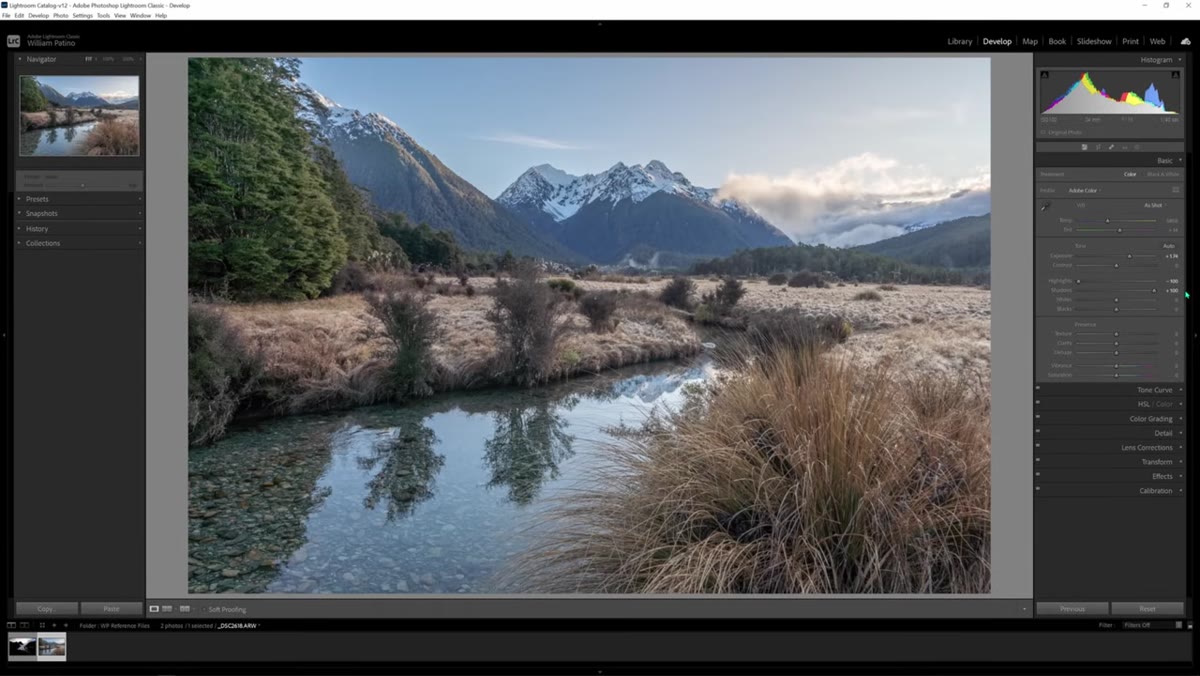 Over-lifted shadows showing flat, unrealistic dynamic range
Patino flags something that a lot of editing tutorials gloss over. There’s a temptation, especially when you first discover the Shadows slider, to lift shadow areas until every detail in the frame is fully visible. The problem is that this destroys the sense of depth and atmosphere that makes a landscape image feel immersive. Shadows in the foreground, especially in golden hour or blue hour scenes, are naturally quite dark. Preserving that darkness is what separates a landscape that feels three-dimensional from one that looks like a flat HDR composite from 2012. If your shadows look muddy or grey rather than deep and rich, bring that slider back down.
Over-lifted shadows showing flat, unrealistic dynamic range
Patino flags something that a lot of editing tutorials gloss over. There’s a temptation, especially when you first discover the Shadows slider, to lift shadow areas until every detail in the frame is fully visible. The problem is that this destroys the sense of depth and atmosphere that makes a landscape image feel immersive. Shadows in the foreground, especially in golden hour or blue hour scenes, are naturally quite dark. Preserving that darkness is what separates a landscape that feels three-dimensional from one that looks like a flat HDR composite from 2012. If your shadows look muddy or grey rather than deep and rich, bring that slider back down.
What I’d Add From My Own Experience
Patino’s workflow is clean and I’d use it as-is for any landscape session. The one layer I’d put on top of it is building these adjustments into a Lightroom preset the moment you find settings that consistently work for your camera and typical shooting conditions. I did this years ago for product photography – built a starting-point preset for each lighting setup I use regularly – and it cut my baseline correction time by more than half. The same logic applies here. Once you’ve run through this workflow a dozen times on your landscape RAWs and you notice the Exposure is always around +0.8 and the Highlights always want to be around -65, save that as a default starting preset. You’re not locking yourself into anything. You’re just skipping the repetitive part of getting to zero, which is what any good workflow tool should do.
The other thing worth noting: this entire workflow happens before any selective adjustments, masking, or local corrections. Patino keeps the global work clean first, and that discipline matters. Trying to fix a bad global exposure with a dozen local brush corrections is like patching drywall before fixing the leak. Get the foundation right, then refine.
The single most important idea in this tutorial is also the simplest one: know what you’re trying to achieve before you touch the first slider. That intention – shadow detail, highlight recovery, color, depth – acts as a filter for every decision you make in the edit, and it’s what keeps you from spending 45 minutes on an image that needed 12 minutes of focused work.
Watch the full tutorial on YouTube to see William Patino walk through the complete edit on a real landscape RAW file.
Comments
Leave a Comment