There’s a particular kind of pressure that comes with shooting a calendar. The deadline is fixed, the concept is locked, and every image has to carry weight on its own because each one gets thirty days of eyeball time on someone’s wall. I’ve assisted on enough commercial campaigns to know that the shoots that look the most effortless in the final product were usually the most exhausting to pull off. That’s exactly why I keep coming back to behind-the-scenes footage from photographers who’ve mastered that gap between chaos and control.
Watch the full tutorial on YouTube
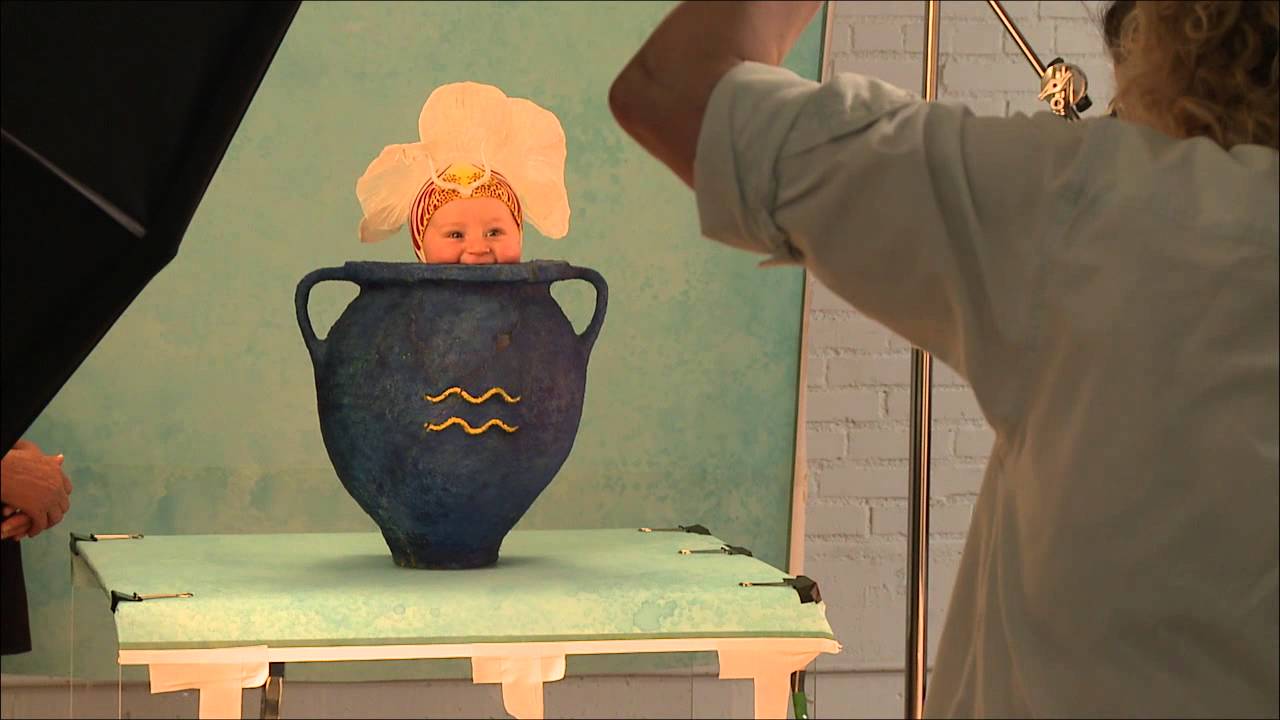
In this CreativeLive tutorial, we get rare on-set access to Anne Geddes shooting her 2016 calendar. If you know her work, you know the aesthetic: infants nestled into organic environments, lit with extraordinary softness, every image feeling simultaneously spontaneous and impossibly composed. What the tutorial reveals is the real engine behind those images. It isn’t magic. It’s a very specific way of working, and the techniques translate directly into how I think about studio workflow, even when babies aren’t involved.
Step 1: Build the Environment Before the Subject Arrives
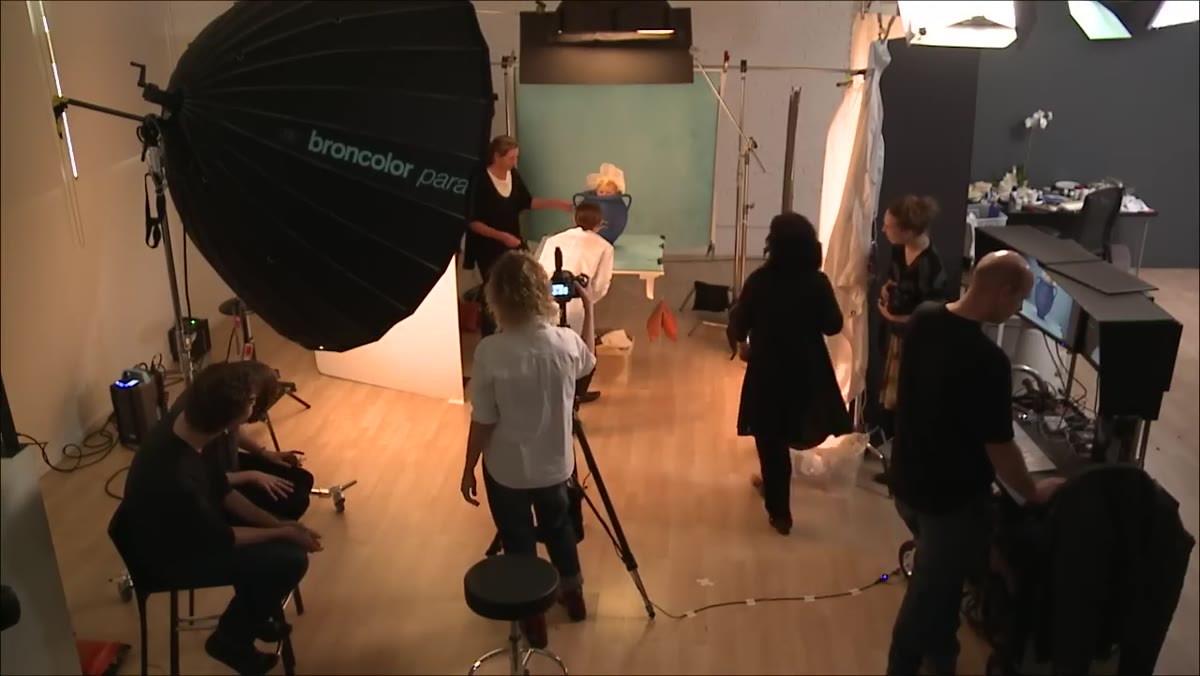
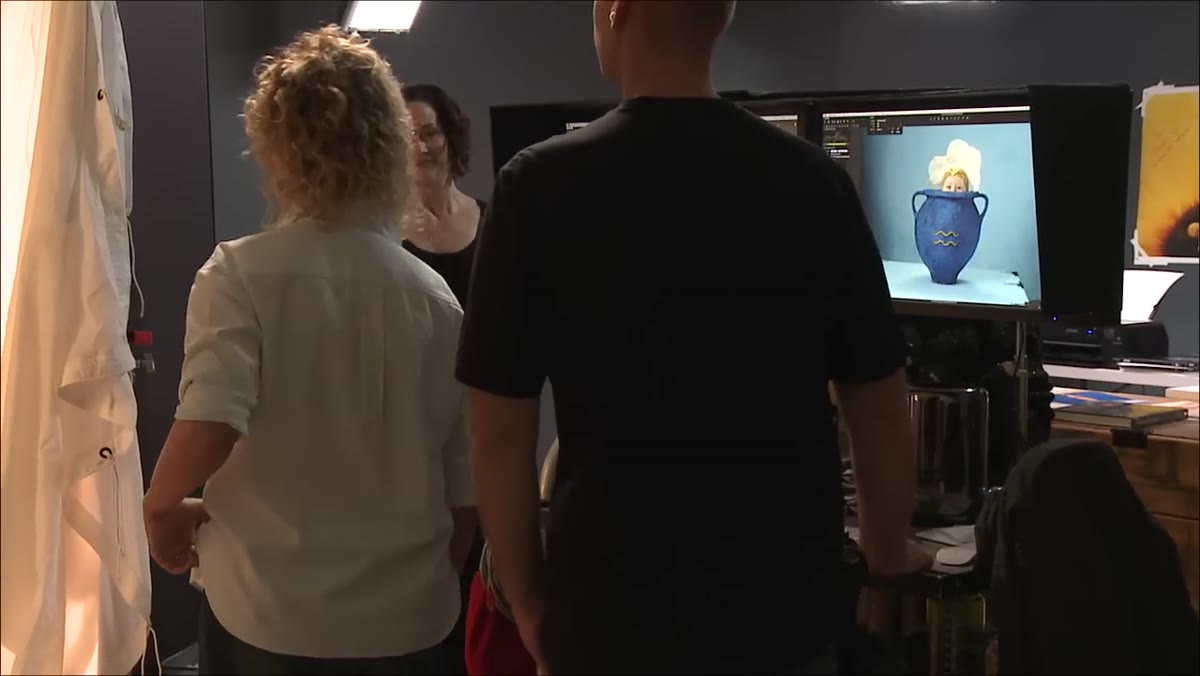
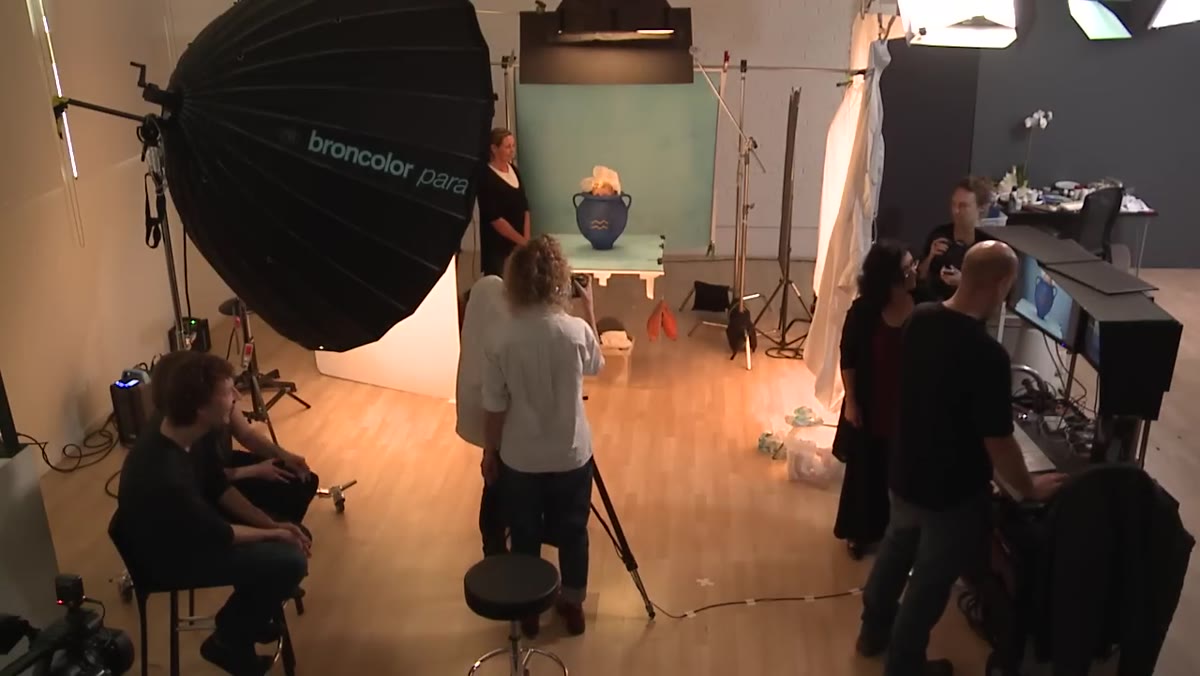 Camera crew and set already prepared before baby is introduced
Everything on a shoot like this is constructed before the talent, human or otherwise, ever enters the frame. Geddes and her team have the lighting dialed, the set dressed, and the camera positioned before the infant is brought in. This sounds obvious until you watch how many photographers waste the first twenty minutes of a shoot making adjustments with a fidgety subject already in the scene.
Camera crew and set already prepared before baby is introduced
Everything on a shoot like this is constructed before the talent, human or otherwise, ever enters the frame. Geddes and her team have the lighting dialed, the set dressed, and the camera positioned before the infant is brought in. This sounds obvious until you watch how many photographers waste the first twenty minutes of a shoot making adjustments with a fidgety subject already in the scene.
In commercial work, I call this “loading the gun before you pull the trigger.” Whether you’re shooting a product, a person, or a six-month-old who has roughly four minutes of cooperative energy available, your job during setup is to eliminate every variable you can. Lock your exposure. Test your focus point. Run a few frames on a stand-in. When the real subject arrives, your only job is to react.
Step 2: Get Low and Match the Subject’s Sightline
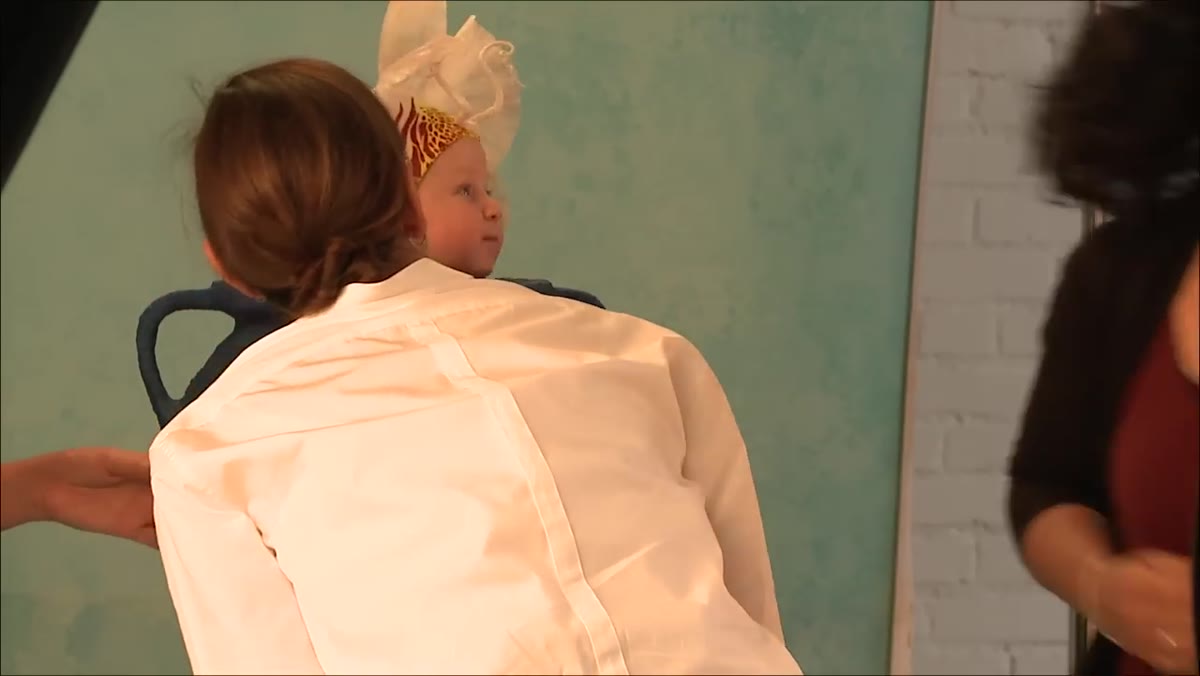
 Photographer and crew positioning themselves at the baby’s eye level
One of the most repeated instructions in this shoot is the directive to get lower. The crew is constantly adjusting position downward to meet the infant’s natural sightline. This isn’t just an aesthetic choice about camera angle. It’s a communication strategy. When you shoot from above, you’re documenting a subject. When you shoot from their level, you’re having a conversation with them.
Photographer and crew positioning themselves at the baby’s eye level
One of the most repeated instructions in this shoot is the directive to get lower. The crew is constantly adjusting position downward to meet the infant’s natural sightline. This isn’t just an aesthetic choice about camera angle. It’s a communication strategy. When you shoot from above, you’re documenting a subject. When you shoot from their level, you’re having a conversation with them.
For anyone doing portrait or lifestyle work, this is worth drilling into muscle memory. The camera angle you choose signals your relationship to the subject. Geddes’ images feel intimate because the perspective is intimate. The technical corollary is straightforward: if you’re working on a set with a low shooting position, know your hyperfocal distance, check that your image stabilization is on, and be prepared for the fact that your body position is going to make smooth operation harder. Account for that in your settings before you start.
Step 3: Use the Subject’s Name as a Focusing Tool, Not Just a Prompt
 Team calling the baby’s name to direct attention toward the camera
Watch how the team uses the infant’s name throughout the shoot. It isn’t random encouragement. The name is called at specific moments, with specific intention: to direct the baby’s gaze, to hold attention on a particular spot, or to coax a physical response like reaching or turning. It’s basically verbal lighting.
Team calling the baby’s name to direct attention toward the camera
Watch how the team uses the infant’s name throughout the shoot. It isn’t random encouragement. The name is called at specific moments, with specific intention: to direct the baby’s gaze, to hold attention on a particular spot, or to coax a physical response like reaching or turning. It’s basically verbal lighting.
This works with adult subjects too, though most photographers forget it. Calling someone’s name at the right moment just before you fire the shutter creates a micro-expression reset. The subject’s face shifts from “I’m being photographed” to “someone is speaking to me,” and that transition, if you catch it, is almost always more alive than what came before or after. Build that into your shooting rhythm rather than leaving it to chance.
Step 4: Shoot Continuously Through Movement Transitions
 Continuous shooting as baby shifts position and reaches outward
The camera doesn’t stop rolling when the infant shifts position or reaches outward. That moment of movement, the arm extending, the body rotating, is treated as an opportunity rather than a disruption. Geddes is clearly shooting through transitions, not waiting for a settled pose.
Continuous shooting as baby shifts position and reaches outward
The camera doesn’t stop rolling when the infant shifts position or reaches outward. That moment of movement, the arm extending, the body rotating, is treated as an opportunity rather than a disruption. Geddes is clearly shooting through transitions, not waiting for a settled pose.
From a technical standpoint, this means your buffer and burst rate matter. If you’re shooting a dynamic subject where the magic lives in the in-between frames, a camera that slows down or hesitates is going to cost you. More practically, it means you need to be in continuous autofocus, tracking mode active, and you need to have already decided where in the frame you want the subject to be so you’re not chasing composition while also chasing focus. Decide your frame, then let the subject move through it.
Step 5: Keep the Energy of the Room Consistent
 Crew maintaining calm, playful engagement throughout the session
What strikes me most watching this footage is how consistent the room’s energy is. Nobody rushes, nobody raises their voice in frustration, and nobody breaks the collaborative warmth of the space even when things don’t go as planned. The baby bites something, there’s a laugh, and the session continues. That emotional consistency isn’t accidental. It’s a production decision.
Crew maintaining calm, playful engagement throughout the session
What strikes me most watching this footage is how consistent the room’s energy is. Nobody rushes, nobody raises their voice in frustration, and nobody breaks the collaborative warmth of the space even when things don’t go as planned. The baby bites something, there’s a laugh, and the session continues. That emotional consistency isn’t accidental. It’s a production decision.
I’ve been on sets where the photographer’s anxiety becomes the whole room’s problem. Subjects feel it, whether they’re adults or infants, and it shows up in the frames. Geddes’ studio operates more like a skilled improv troupe than a traditional crew, responsive, accepting of what happens, building on it rather than fighting it. If you’re directing a shoot, your emotional temperature is the thermostat for everyone else in the room.
How I’d Apply This to High-Volume Studio Work
The techniques in this video look specific to fine art infant photography, but the underlying logic applies everywhere I work. The idea of building the environment first, then introducing the variable, maps directly onto how I set up batch workflows. When I’m processing a run of product shots, every adjustable layer, every smart object, every action script is loaded and tested on a sample image before the full set ever touches the pipeline. I essentially built my first serious Photoshop action system around that same principle: eliminate the variables you can control so you have full attention for the ones you can’t.
The direction technique, using names and verbal cues as precise timing tools, translates into client communication on set. I’ve started being much more intentional about when I speak during a shoot versus when I stay quiet. The silence before a frame can be as deliberate as the shutter click.
What Geddes demonstrates, more than any single technique, is that great images aren’t captured. They’re engineered through a series of small, disciplined decisions made before the camera ever fires. Every setting locked, every position considered, every variable reduced until the only thing left is the moment itself.
Watch the full tutorial on YouTube and pay particular attention to how the team responds when things go sideways. That’s where the real workflow lesson lives.
Comments (3)
The before and after really sells it. Incredible difference.
This is going in my reference folder. Incredibly useful.
Great article! I actually covered something related on my site — the landscape angle is really complementary to this.
Leave a Comment