
Most of the photographers I work with in commercial studios assume you need high-speed sync to freeze a moving subject. It’s an understandable assumption. HSS is the obvious tool, it’s what the gear manufacturers push, and it sounds technically correct. But HSS comes with a real cost: it cuts your effective flash power significantly, which means you’re fighting for exposure before you’ve even started solving the motion problem. There’s a cleaner approach, and Jay P. Morgan at The Slanted Lens lays it out clearly in his tutorial on freezing action with strobes using nothing but standard monoblocks in normal flash mode.
The tutorial uses a trampoline, a model in warrior princess costuming, and a set of Profoto Baha B4 lights to demonstrate three principles working in combination. None of the three is complicated on its own. The power is in understanding how they interact and why each one matters physically, not just technically. After watching it, I found myself rethinking assumptions I’d been carrying around since my early days doing catalog work for a Chicago sporting goods brand. Freezing motion with strobes isn’t a trick. It’s physics you can work with once you understand what’s actually happening inside the flash.
Step 1: Understand Flash Duration Before You Touch a Single Dial
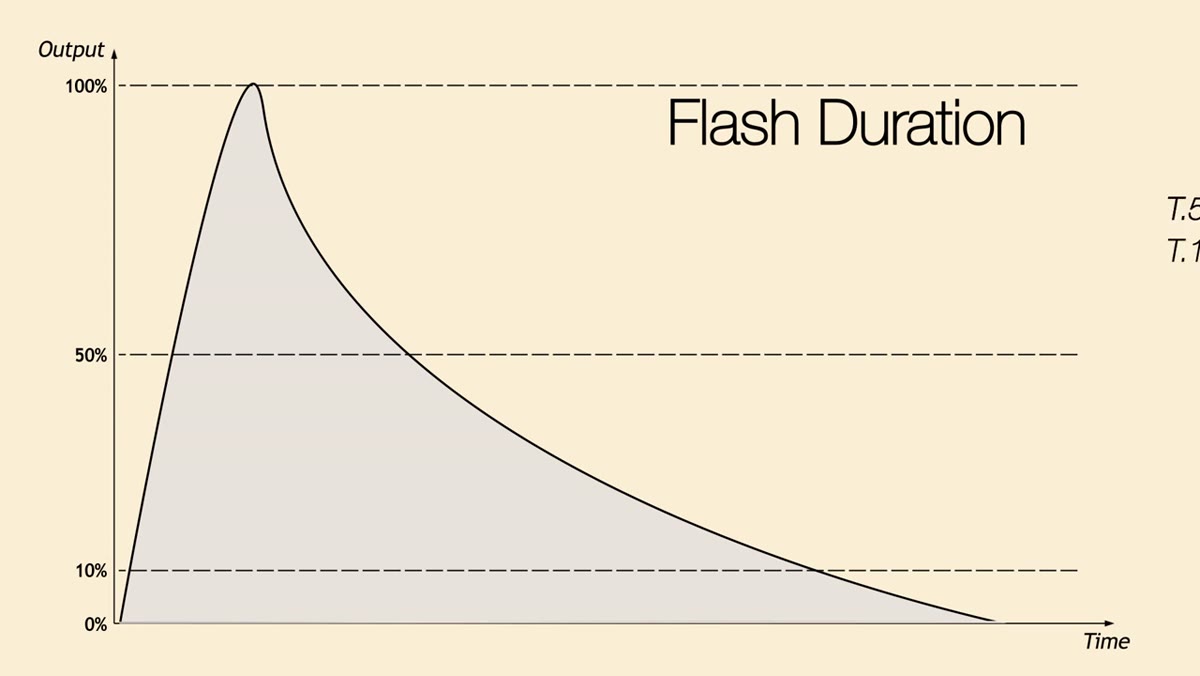
 Flash duration chart shaped like a shark fin on screen
Flash duration is not instantaneous, even though it looks that way to the human eye. Inside every strobe, the light ramps up to peak power and then falls off in a curve that, when graphed, looks roughly like a shark’s fin. That tail-end falloff is where a lot of photographers lose sharpness without realizing it.
Flash duration chart shaped like a shark fin on screen
Flash duration is not instantaneous, even though it looks that way to the human eye. Inside every strobe, the light ramps up to peak power and then falls off in a curve that, when graphed, looks roughly like a shark’s fin. That tail-end falloff is where a lot of photographers lose sharpness without realizing it.
There are two rating systems to know. T.5 measures the time the flash spends above 50% of peak power. T.1 measures from when the flash exceeds 10% power all the way back down to 10% on the other side of the curve. T.1 is the more honest number because roughly half of the light output happens in that long tail below the 50% mark, and that tail can register as motion blur on your subject even when the peak burst was fast. When you’re shopping for monoblocks and action-stopping is a priority, look for the T.1 spec, not T.5.
Step 2: Check Whether Your Monoblock Uses IGBT Technology
 Close-up of Baha B4 monoblock control panel
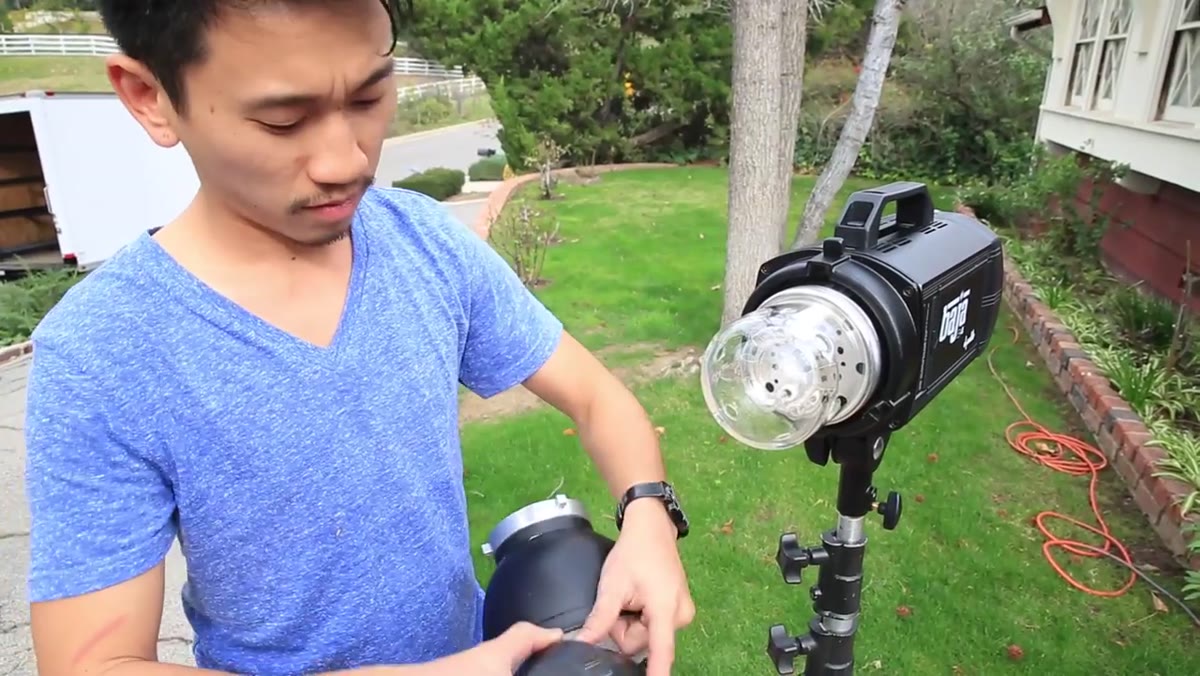
IGBT stands for Insulated Gate Bipolar Transistor, and what it does in practical terms is act like a hard cutoff switch for the flash. Instead of letting the light tail off naturally in that slow curve, IGBT-equipped strobes cut the flash short, producing a much more abrupt spike of light with a dramatically shorter duration. The Baha B4 units used in this tutorial have IGBT. Many entry-level and mid-tier monoblocks do not.
Close-up of Baha B4 monoblock control panel
IGBT stands for Insulated Gate Bipolar Transistor, and what it does in practical terms is act like a hard cutoff switch for the flash. Instead of letting the light tail off naturally in that slow curve, IGBT-equipped strobes cut the flash short, producing a much more abrupt spike of light with a dramatically shorter duration. The Baha B4 units used in this tutorial have IGBT. Many entry-level and mid-tier monoblocks do not.
This matters enormously for action work. A strobe without IGBT can have a T.1 duration long enough to register blur on a fast-moving subject even when everything else is dialed in correctly. Check your manual. If your monoblock is older or budget-oriented, this is one of the first things worth verifying before you build a shot around freezing motion.
Step 3: Dial Power Down to Shorten Flash Duration
 Power dial on strobe being reduced to 50 percent
On monoblocks equipped with IGBT, reducing power has a direct effect on flash duration: lower power equals shorter duration. The Baha B4s in this tutorial are set to approximately 50% power for this exact reason. At full power, the flash burns longer. Pull it down, and that spike gets sharper and faster.
Power dial on strobe being reduced to 50 percent
On monoblocks equipped with IGBT, reducing power has a direct effect on flash duration: lower power equals shorter duration. The Baha B4s in this tutorial are set to approximately 50% power for this exact reason. At full power, the flash burns longer. Pull it down, and that spike gets sharper and faster.
Here is the critical caveat Jay P. Morgan makes, and it is worth emphasizing because this catches people off guard. Not all monoblocks behave this way. The Paul C. Buff Einstein, for example, actually lengthens flash duration as you reduce power. Read your manual before assuming that dialing down equals faster freeze. Apply this principle only after confirming how your specific unit responds to power reduction.
Step 4: Find the Fastest Shutter Speed Your Camera Will Sync
 Camera LCD showing shutter speed being increased incrementally
Shutter speed still matters here, even though the strobe is doing most of the freezing work. The approach in the tutorial is methodical: start at 1/30, move to 1/60, and keep increasing until the frame starts to clip, meaning the black bar from the shutter curtain begins to appear at the edge of the frame. Step back one increment from that point, and you have your maximum usable sync speed.
Camera LCD showing shutter speed being increased incrementally
Shutter speed still matters here, even though the strobe is doing most of the freezing work. The approach in the tutorial is methodical: start at 1/30, move to 1/60, and keep increasing until the frame starts to clip, meaning the black bar from the shutter curtain begins to appear at the edge of the frame. Step back one increment from that point, and you have your maximum usable sync speed.
For most cameras, this lands somewhere between 1/160 and 1/250 depending on the body. It is not about using a fast shutter to freeze the subject. In a dark or controlled environment, the strobe is the primary light source, so the shutter is really just managing ambient light bleed. The faster you can push it without clipping, the more any residual ambient light is suppressed, which means the strobe’s short flash does more of the heavy lifting on its own.
Step 5: Shoot at Peak Action
 Subject at apex of trampoline jump, legs tucked
Peak action is the oldest trick in motion photography for a reason: it works. When a subject is moving upward and reaches the top of that arc before gravity pulls them back down, there is a brief moment where lateral movement is essentially zero. For a trampoline jump, that’s the apex. For a thrown ball, it’s the top of the toss. For a running stride, it’s when both feet are momentarily extended.
Subject at apex of trampoline jump, legs tucked
Peak action is the oldest trick in motion photography for a reason: it works. When a subject is moving upward and reaches the top of that arc before gravity pulls them back down, there is a brief moment where lateral movement is essentially zero. For a trampoline jump, that’s the apex. For a thrown ball, it’s the top of the toss. For a running stride, it’s when both feet are momentarily extended.
The practical benefit is obvious. A subject moving at near-zero velocity at that peak moment is far easier to freeze than the same subject mid-acceleration. Combined with a short flash duration and a reduced power setting, shooting at that peak moment stacks the odds in your favor on all three fronts simultaneously. In the tutorial, the trampoline is positioned just below the top of a low wall, so the model only needs a small jump to appear airborne, giving more predictable and repeatable peak moments for the photographer to anticipate.
Why I’d Add a Test Shot Workflow Before the Real Session
Fifteen years working in commercial studios taught me that the most expensive thing on a shoot is uncertainty. Before any action sequence, I run a short diagnostic: one shot at the intended power with a stationary subject to confirm exposure, then one shot with the subject in slow deliberate motion to check for any trailing. If the trailing shows up in that second frame, I know the flash duration is still too long and I need to go back to the settings before the model is jumping at full speed.
This takes maybe three minutes. It has saved me from discovering a blur problem at the editing stage more times than I can count. If you are also batch processing selects afterward, knowing your images are consistently sharp before you start culling means you are not building a retouching workflow around a fixable capture problem.
The core lesson here is that freezing motion with strobes is a stacking game. Flash duration, power settings, and timing are each doing a portion of the work, and each one compounds the effect of the others. Get all three aligned and you can stop action cleanly with standard monoblocks most photographers already own.
Watch the full tutorial on YouTube to see the complete lighting breakdown and the final warrior princess shots Jay P. Morgan pulls from this setup.
Comments (1)
Finally someone explains this in a way that actually makes sense.
Leave a Comment