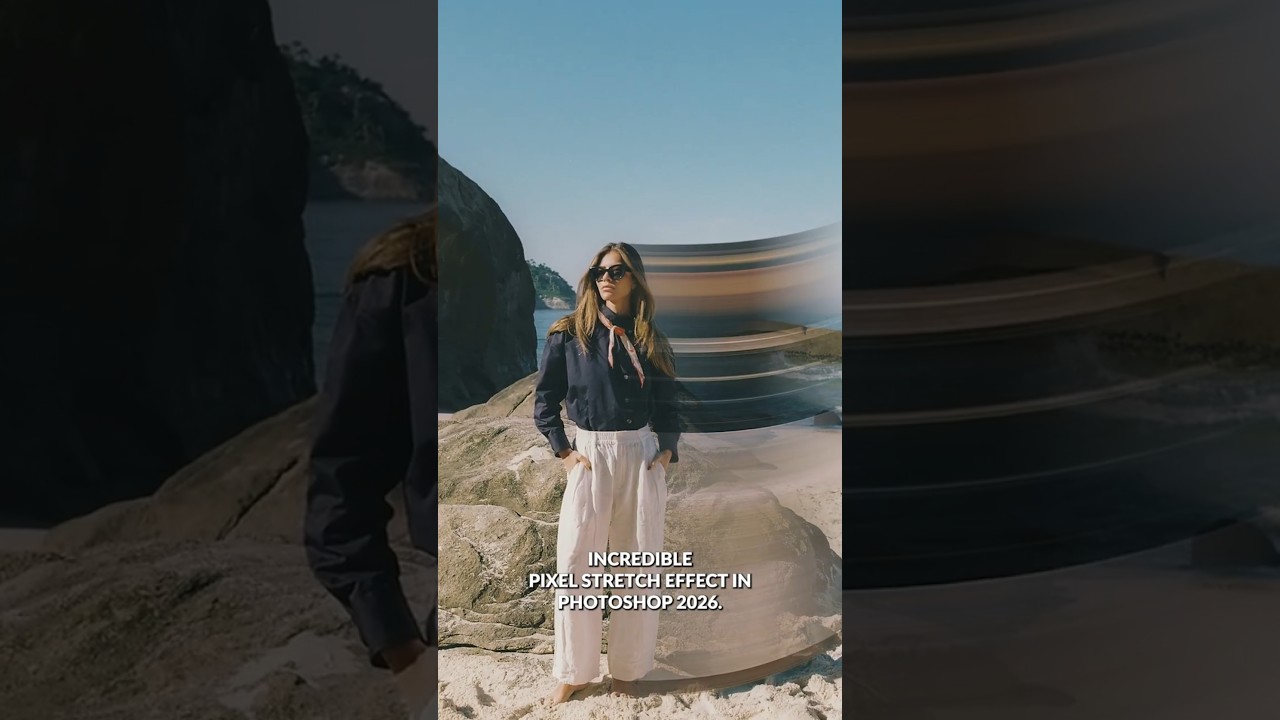
There’s a category of Photoshop effect that looks like it required hours of work but actually comes down to knowing which three tools to combine. The pixel stretch effect sits squarely in that category. I’ve been doing post-production work for ad agencies and e-commerce brands for fifteen years, and I still get a small thrill when a technique that looks this kinetic turns out to be this efficient. When a client wants energy, motion, something that reads as dynamic on a billboard or a web banner, this is exactly the kind of technique that earns its keep.
In this Aaron Nace (PHLEARN) tutorial, the effect gets broken down into a genuinely fast workflow using the single column marquee tool, the warp transformation, and a gradient mask. If you haven’t encountered the single column marquee tool before, you’re not alone. It lives under the rectangular marquee tool in the toolbar and most people scroll past it for years. That oversight ends today. Watch the full tutorial on YouTube to see the full motion of the effect before you start, then come back here and work through it step by step.
The core idea is straightforward: you isolate your subject, use a one-pixel-wide selection to sample a vertical slice of the image, stretch that slice horizontally across the frame, warp it for organic movement, then fade it with a gradient so it integrates naturally with the original photo. The result reads like a speed blur, but it’s sharper and more intentional. Let’s get into it.
Step 1: Select Your Subject
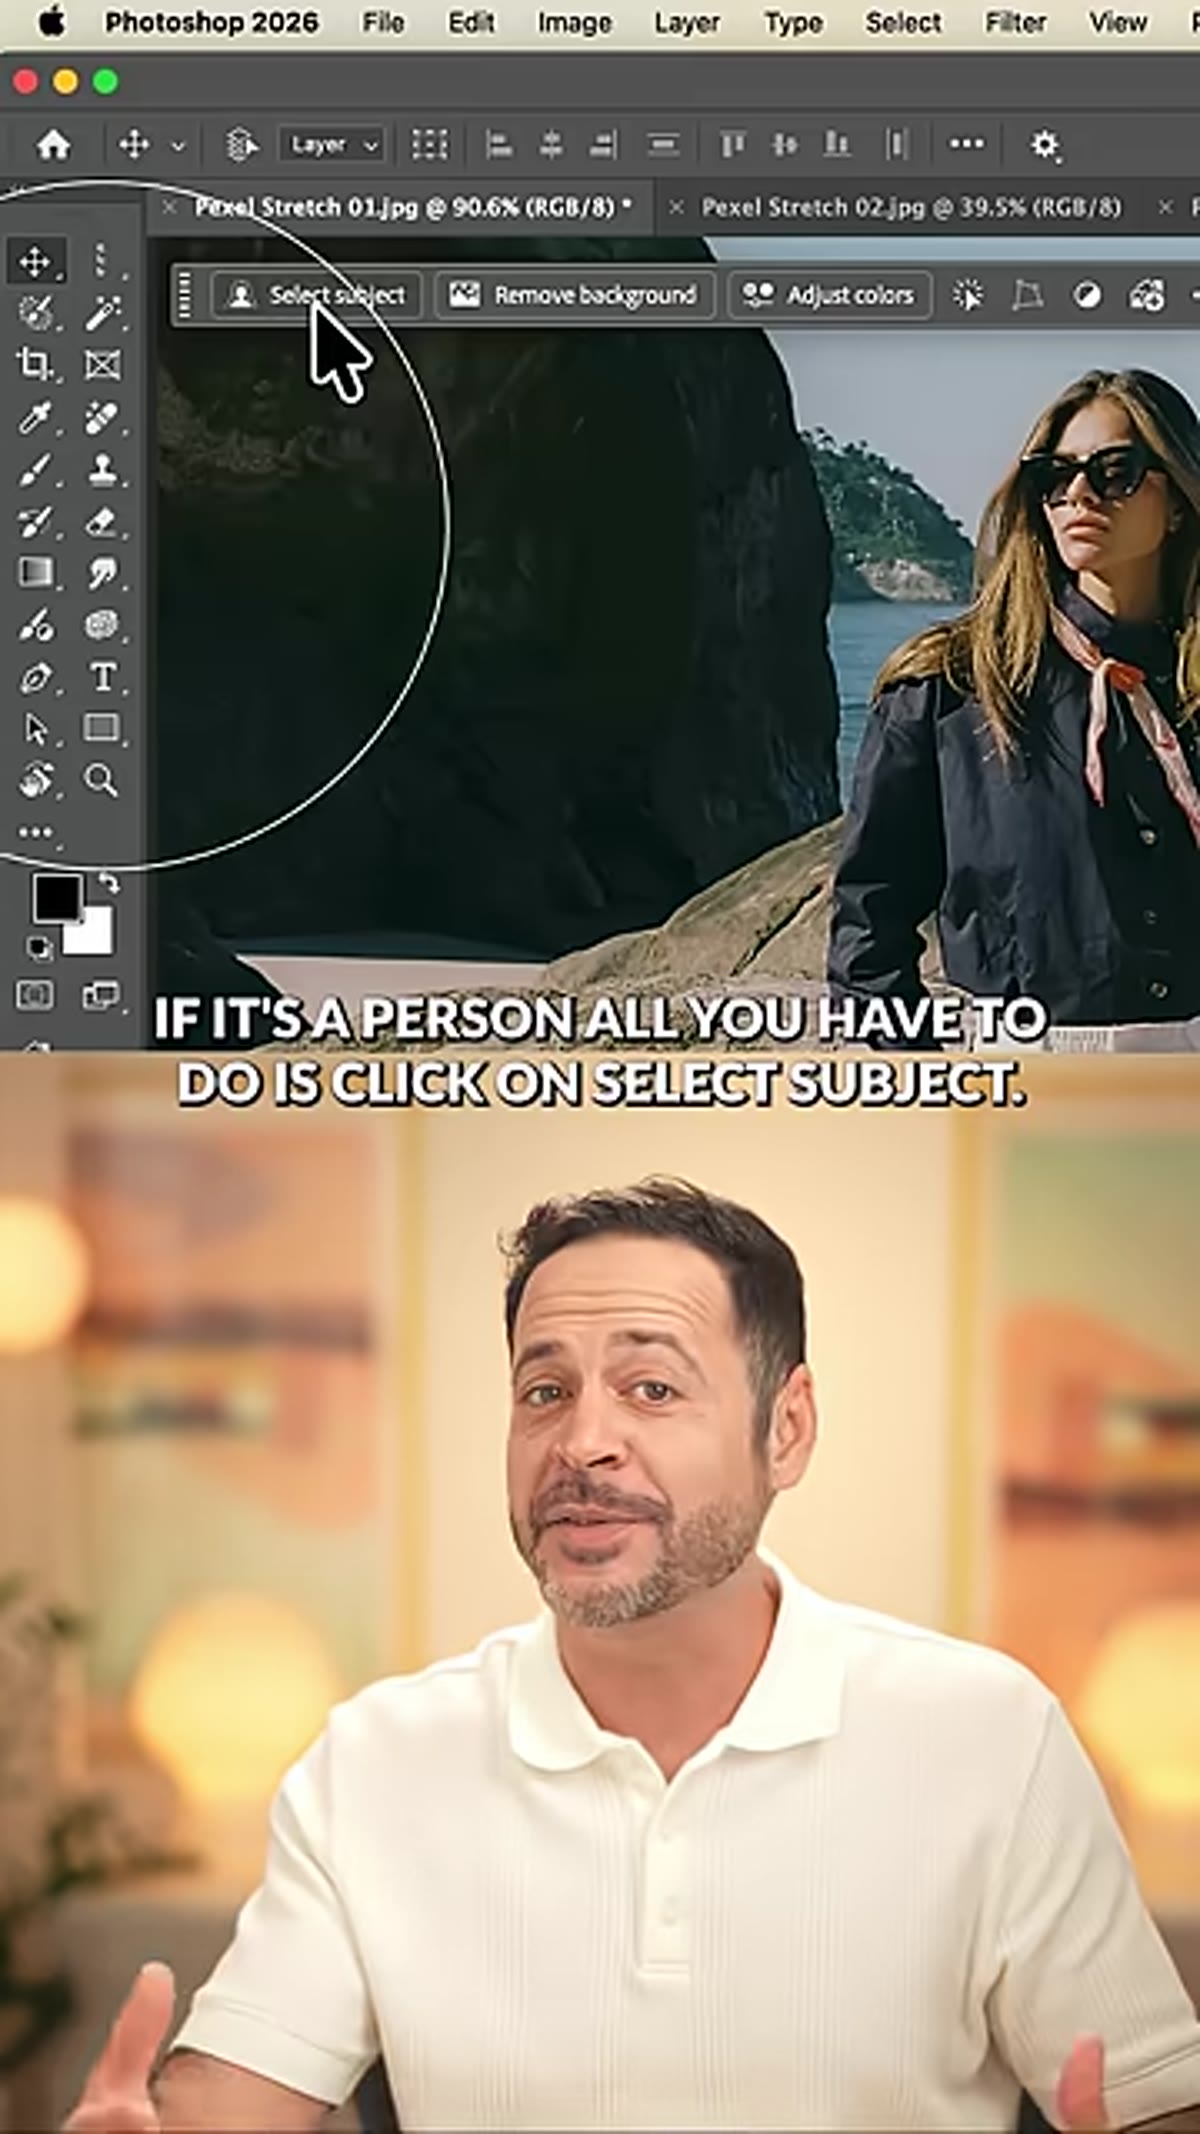 Select Subject button being clicked in Photoshop toolbar
Open your image in Photoshop. If you’re working with a person or any clearly defined foreground subject, go to Select > Subject. Photoshop’s AI-powered selection engine handles this well in most cases. For product shots or images with busy backgrounds, you may want to refine the selection using Select and Mask afterward, but for this technique a reasonably clean edge is sufficient. You don’t need a perfect cutout because the stretch effect will cover a lot of sins at the edge.
Select Subject button being clicked in Photoshop toolbar
Open your image in Photoshop. If you’re working with a person or any clearly defined foreground subject, go to Select > Subject. Photoshop’s AI-powered selection engine handles this well in most cases. For product shots or images with busy backgrounds, you may want to refine the selection using Select and Mask afterward, but for this technique a reasonably clean edge is sufficient. You don’t need a perfect cutout because the stretch effect will cover a lot of sins at the edge.
Step 2: Duplicate the Layer Twice
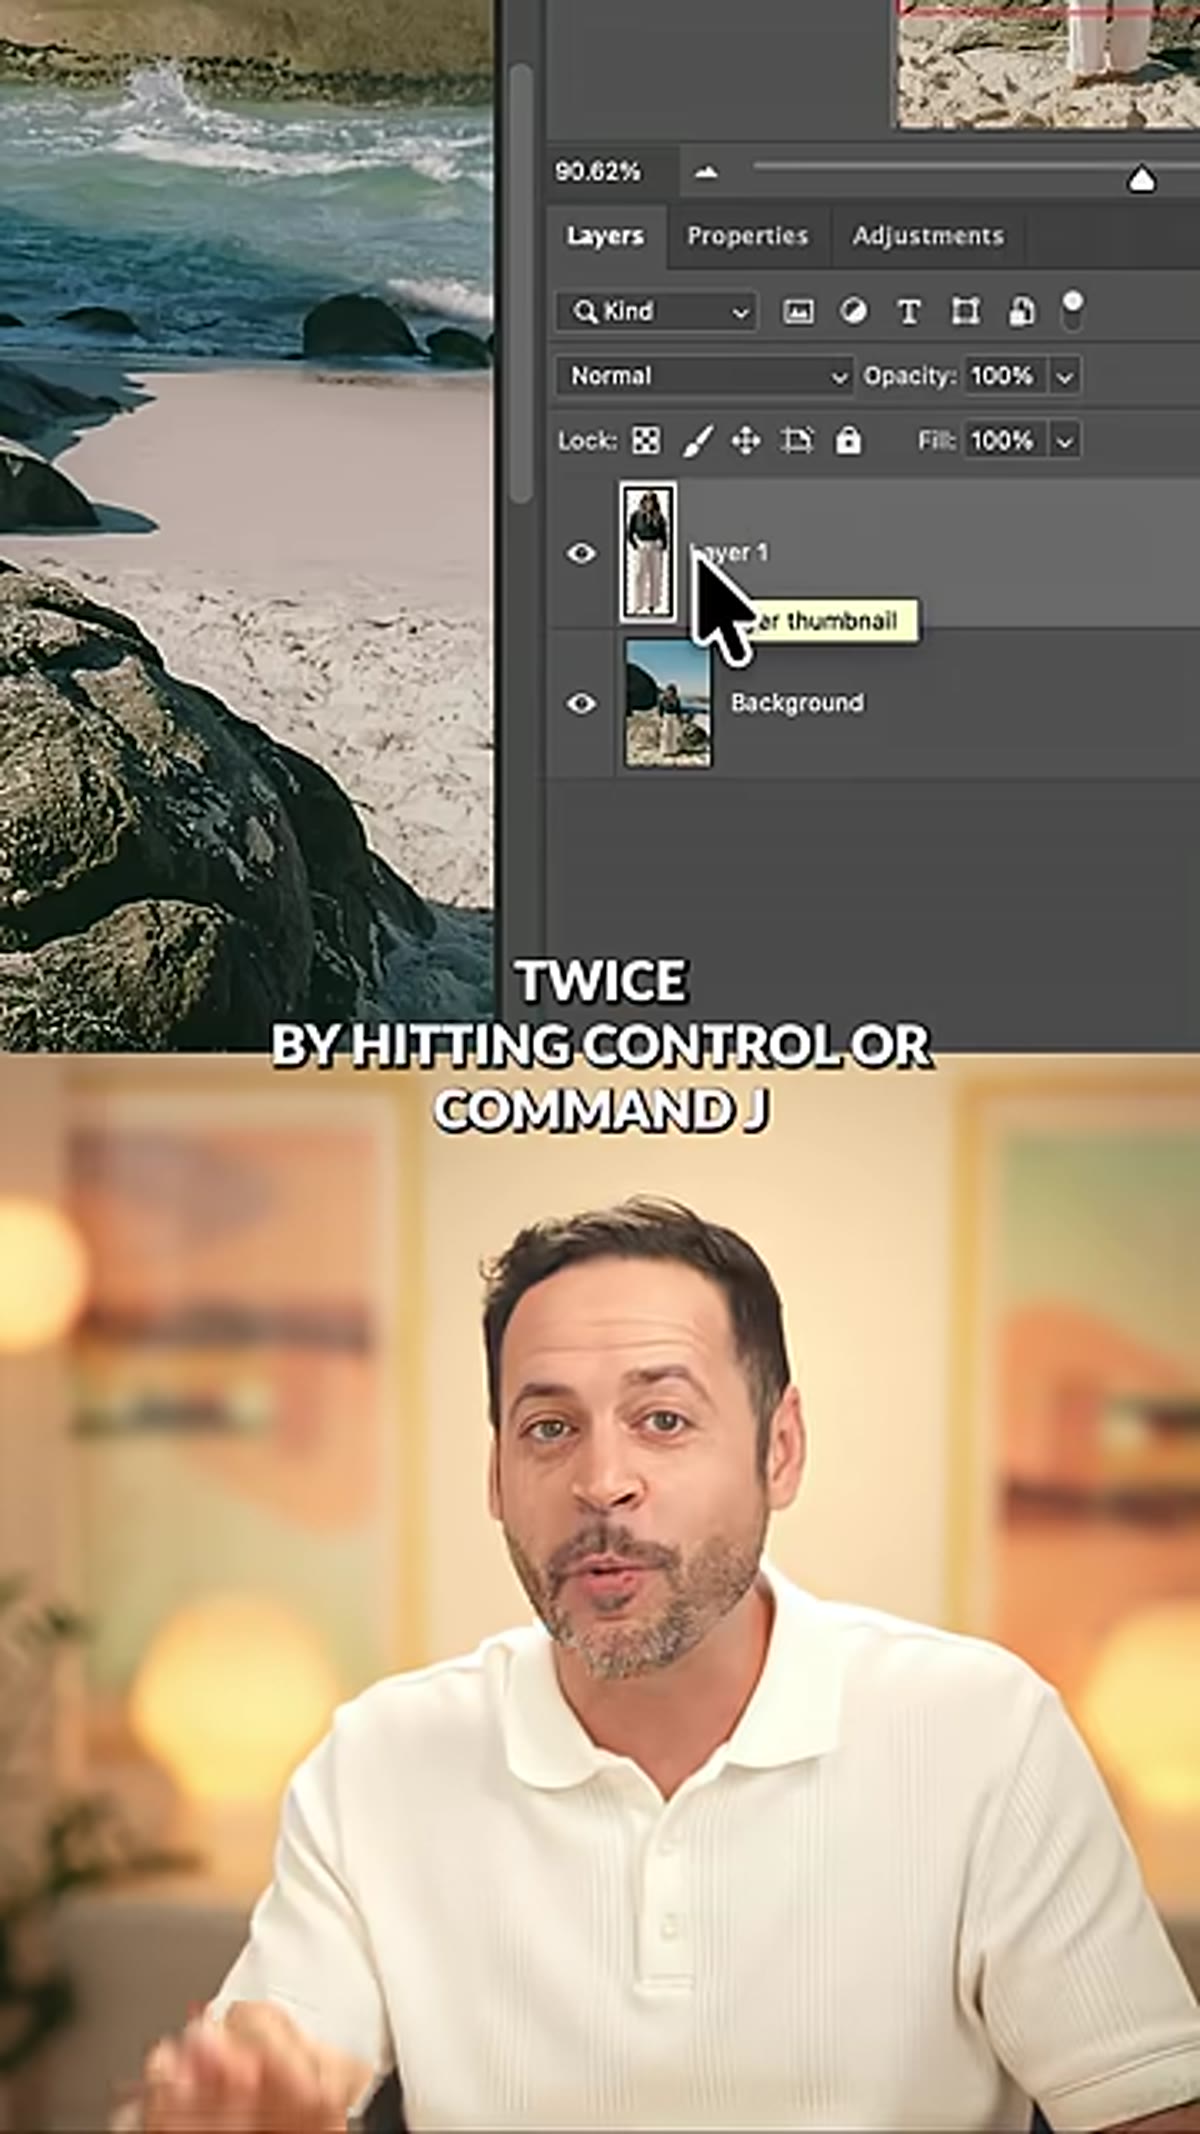 Layers panel showing three duplicate layers stacked
With your selection active, hit Control+J (Command+J on Mac) twice in quick succession. This gives you three layers in your stack: the original at the bottom, and two duplicates above it. Keep your subject selection method in mind here, because what you’re doing is preserving the original image while giving yourself a working layer for the stretch and a top layer that will sit cleanly above everything. Label them if you want to stay organized. I keep a color-coded layer system out of habit, so mine are labeled “Base,” “Stretch,” and “Subject” before I’ve even made my first move.
Layers panel showing three duplicate layers stacked
With your selection active, hit Control+J (Command+J on Mac) twice in quick succession. This gives you three layers in your stack: the original at the bottom, and two duplicates above it. Keep your subject selection method in mind here, because what you’re doing is preserving the original image while giving yourself a working layer for the stretch and a top layer that will sit cleanly above everything. Label them if you want to stay organized. I keep a color-coded layer system out of habit, so mine are labeled “Base,” “Stretch,” and “Subject” before I’ve even made my first move.
Step 3: Select the Middle Layer and Grab the Single Column Marquee Tool
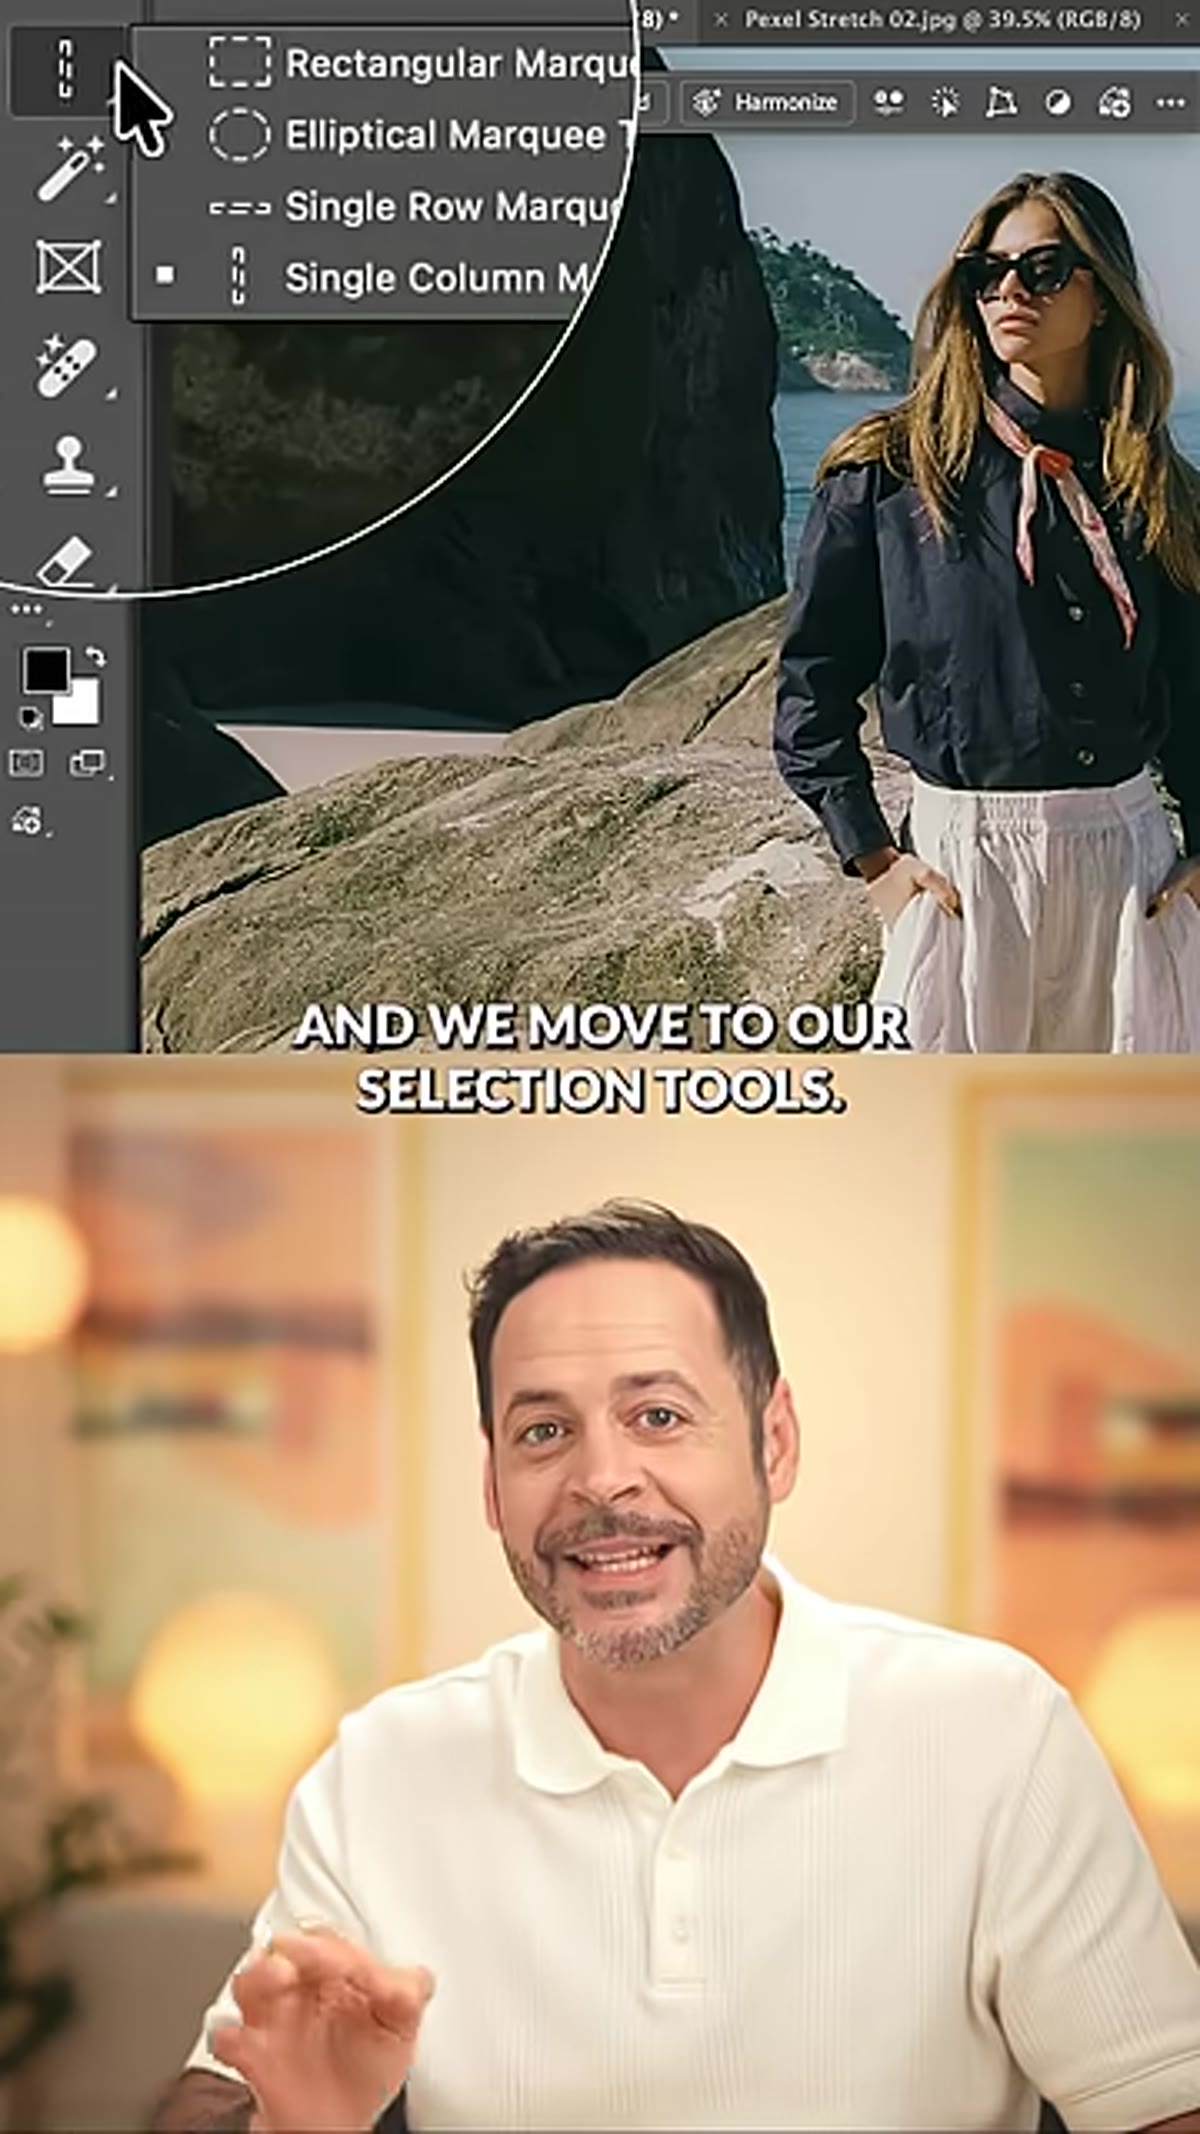 Layers panel with middle layer highlighted, marquee tool menu open
Click on the middle layer in your stack. This is the layer that will carry the pixel stretch. Now, in the toolbar, click and hold on the rectangular marquee tool to open its flyout menu. Select the Single Column Marquee Tool. This tool makes a selection exactly one pixel wide running the full height of your canvas. It’s designed for tasks that feel almost too specific to be useful, and then you find an application like this one and it makes complete sense.
Layers panel with middle layer highlighted, marquee tool menu open
Click on the middle layer in your stack. This is the layer that will carry the pixel stretch. Now, in the toolbar, click and hold on the rectangular marquee tool to open its flyout menu. Select the Single Column Marquee Tool. This tool makes a selection exactly one pixel wide running the full height of your canvas. It’s designed for tasks that feel almost too specific to be useful, and then you find an application like this one and it makes complete sense.
Step 4: Click to Place Your One-Pixel Selection
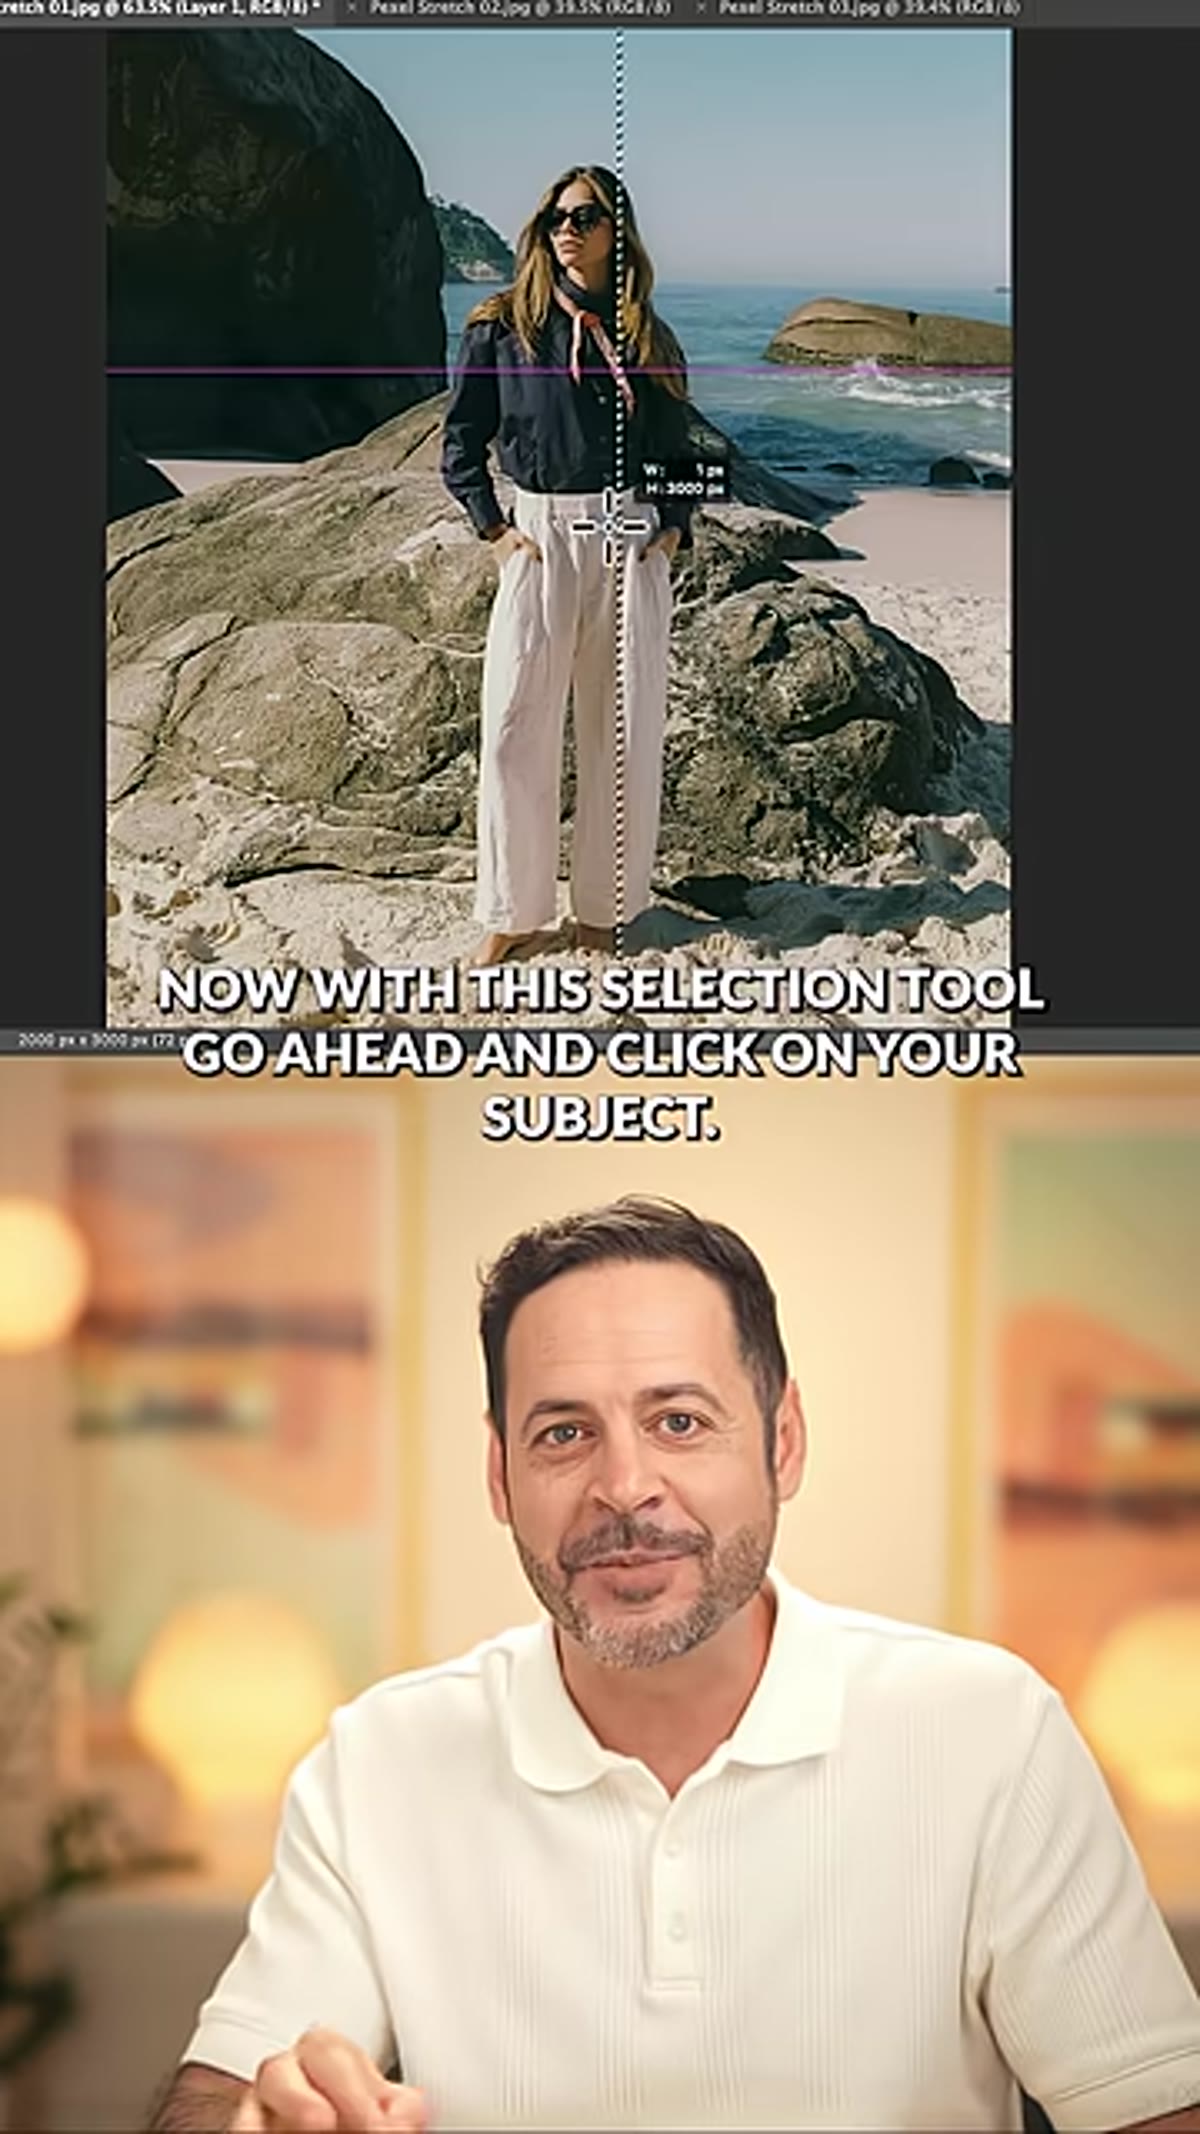 Single column marquee selection visible on subject in canvas
With the single column marquee tool active, click directly on your subject. You want to click somewhere that captures interesting color and tonal variation, typically near the edge of the subject facing the direction you want the stretch to travel. That one-pixel-wide selection is now your raw material. It looks like almost nothing on screen, just a thin vertical line, but it contains a full column of pixel data sampled from your image.
Single column marquee selection visible on subject in canvas
With the single column marquee tool active, click directly on your subject. You want to click somewhere that captures interesting color and tonal variation, typically near the edge of the subject facing the direction you want the stretch to travel. That one-pixel-wide selection is now your raw material. It looks like almost nothing on screen, just a thin vertical line, but it contains a full column of pixel data sampled from your image.
Step 5: Transform and Stretch the Selection
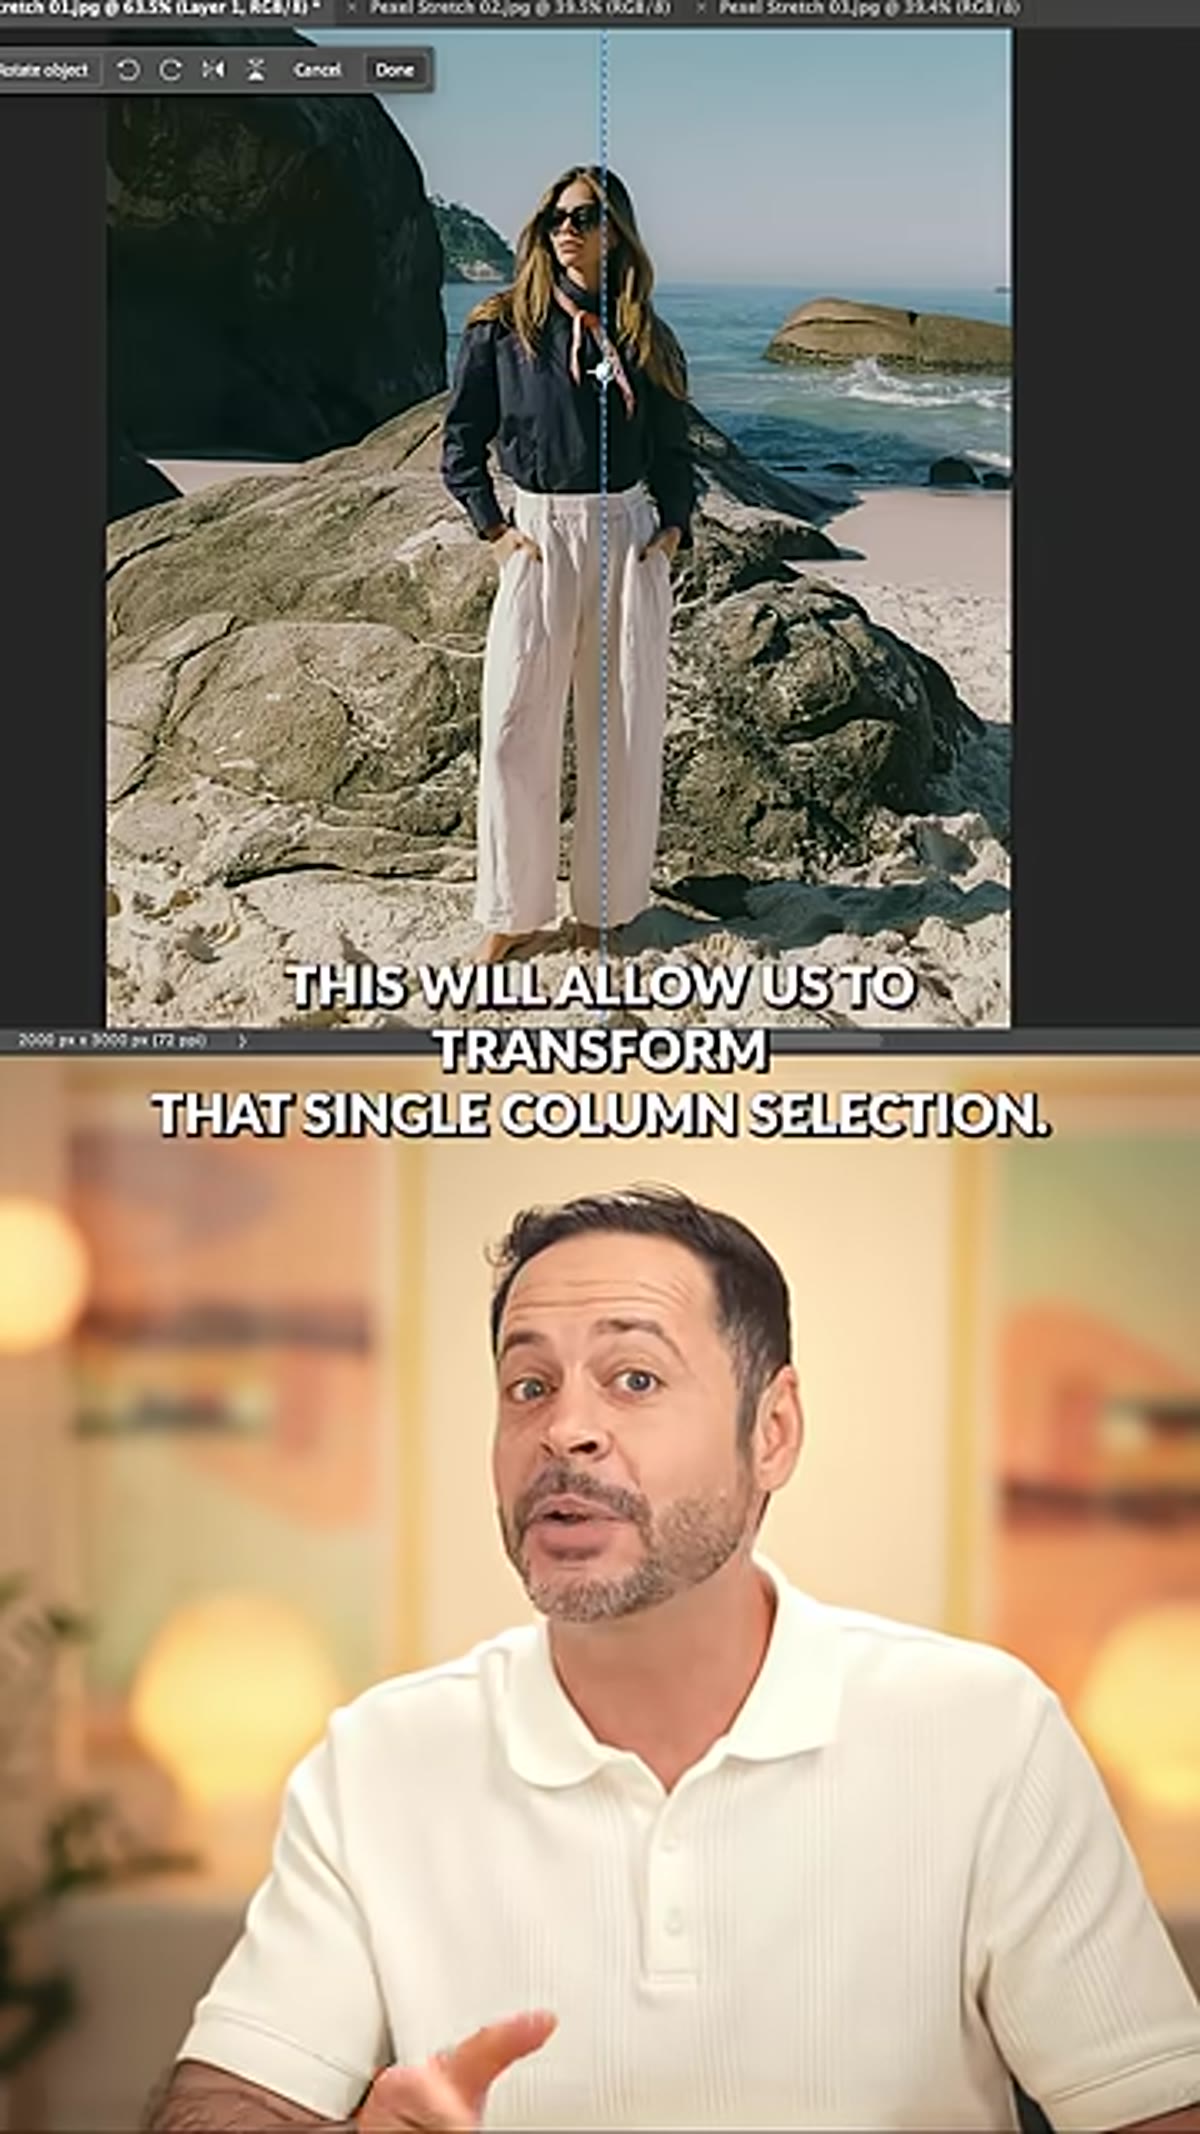 Transform handles visible on single column selection layer
Hit Control+T (Command+T) to enter Free Transform mode. Here’s the key move: hold Control (Command on Mac) and drag the side handle of the transform box horizontally all the way to the edge of your canvas. You’re stretching that single pixel column into a full-width band of color. The result is a smeared, streaked version of your subject’s color data running across the frame. It looks raw at this stage, almost like a printing error, and that’s exactly right.
Transform handles visible on single column selection layer
Hit Control+T (Command+T) to enter Free Transform mode. Here’s the key move: hold Control (Command on Mac) and drag the side handle of the transform box horizontally all the way to the edge of your canvas. You’re stretching that single pixel column into a full-width band of color. The result is a smeared, streaked version of your subject’s color data running across the frame. It looks raw at this stage, almost like a printing error, and that’s exactly right.
Step 6: Apply Warp to Add Fluid Movement
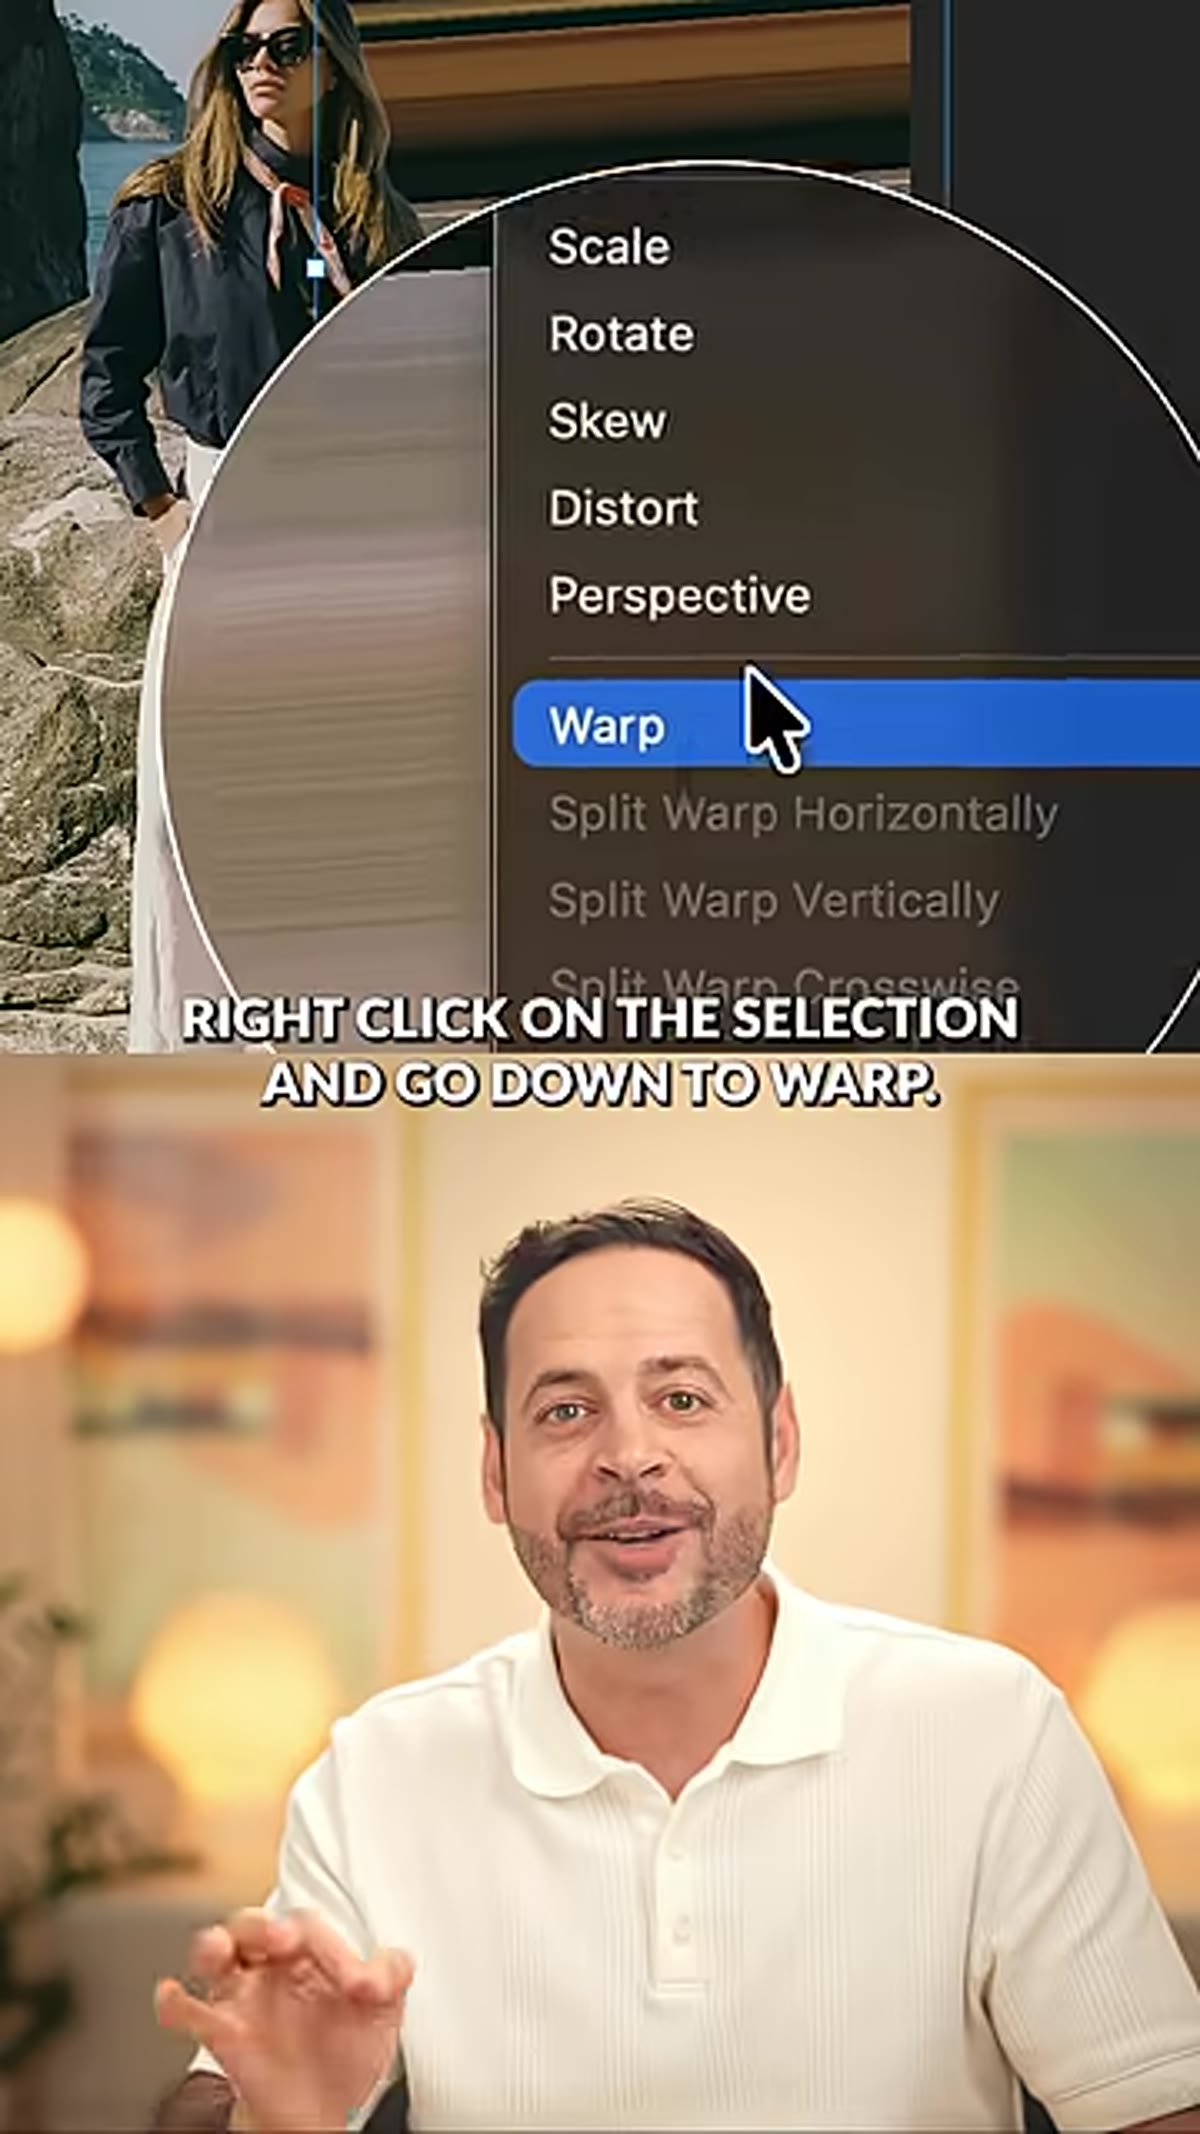 Warp grid overlay on stretched pixel layer in canvas
While still in the transform mode, right-click on the canvas and select Warp from the context menu. You’ll see a grid appear over your stretched layer. Click and drag points on this grid to introduce curves and organic movement into the streak. You’re not going for anything precise here. The goal is to make it feel like the pixels are actually moving, pulled by some kind of force. A gentle S-curve or a wave that echoes your subject’s body line tends to read well. When you’re satisfied, press Enter to commit the transformation.
Warp grid overlay on stretched pixel layer in canvas
While still in the transform mode, right-click on the canvas and select Warp from the context menu. You’ll see a grid appear over your stretched layer. Click and drag points on this grid to introduce curves and organic movement into the streak. You’re not going for anything precise here. The goal is to make it feel like the pixels are actually moving, pulled by some kind of force. A gentle S-curve or a wave that echoes your subject’s body line tends to read well. When you’re satisfied, press Enter to commit the transformation.
Step 7: Add a Layer Mask and Fade with a Gradient
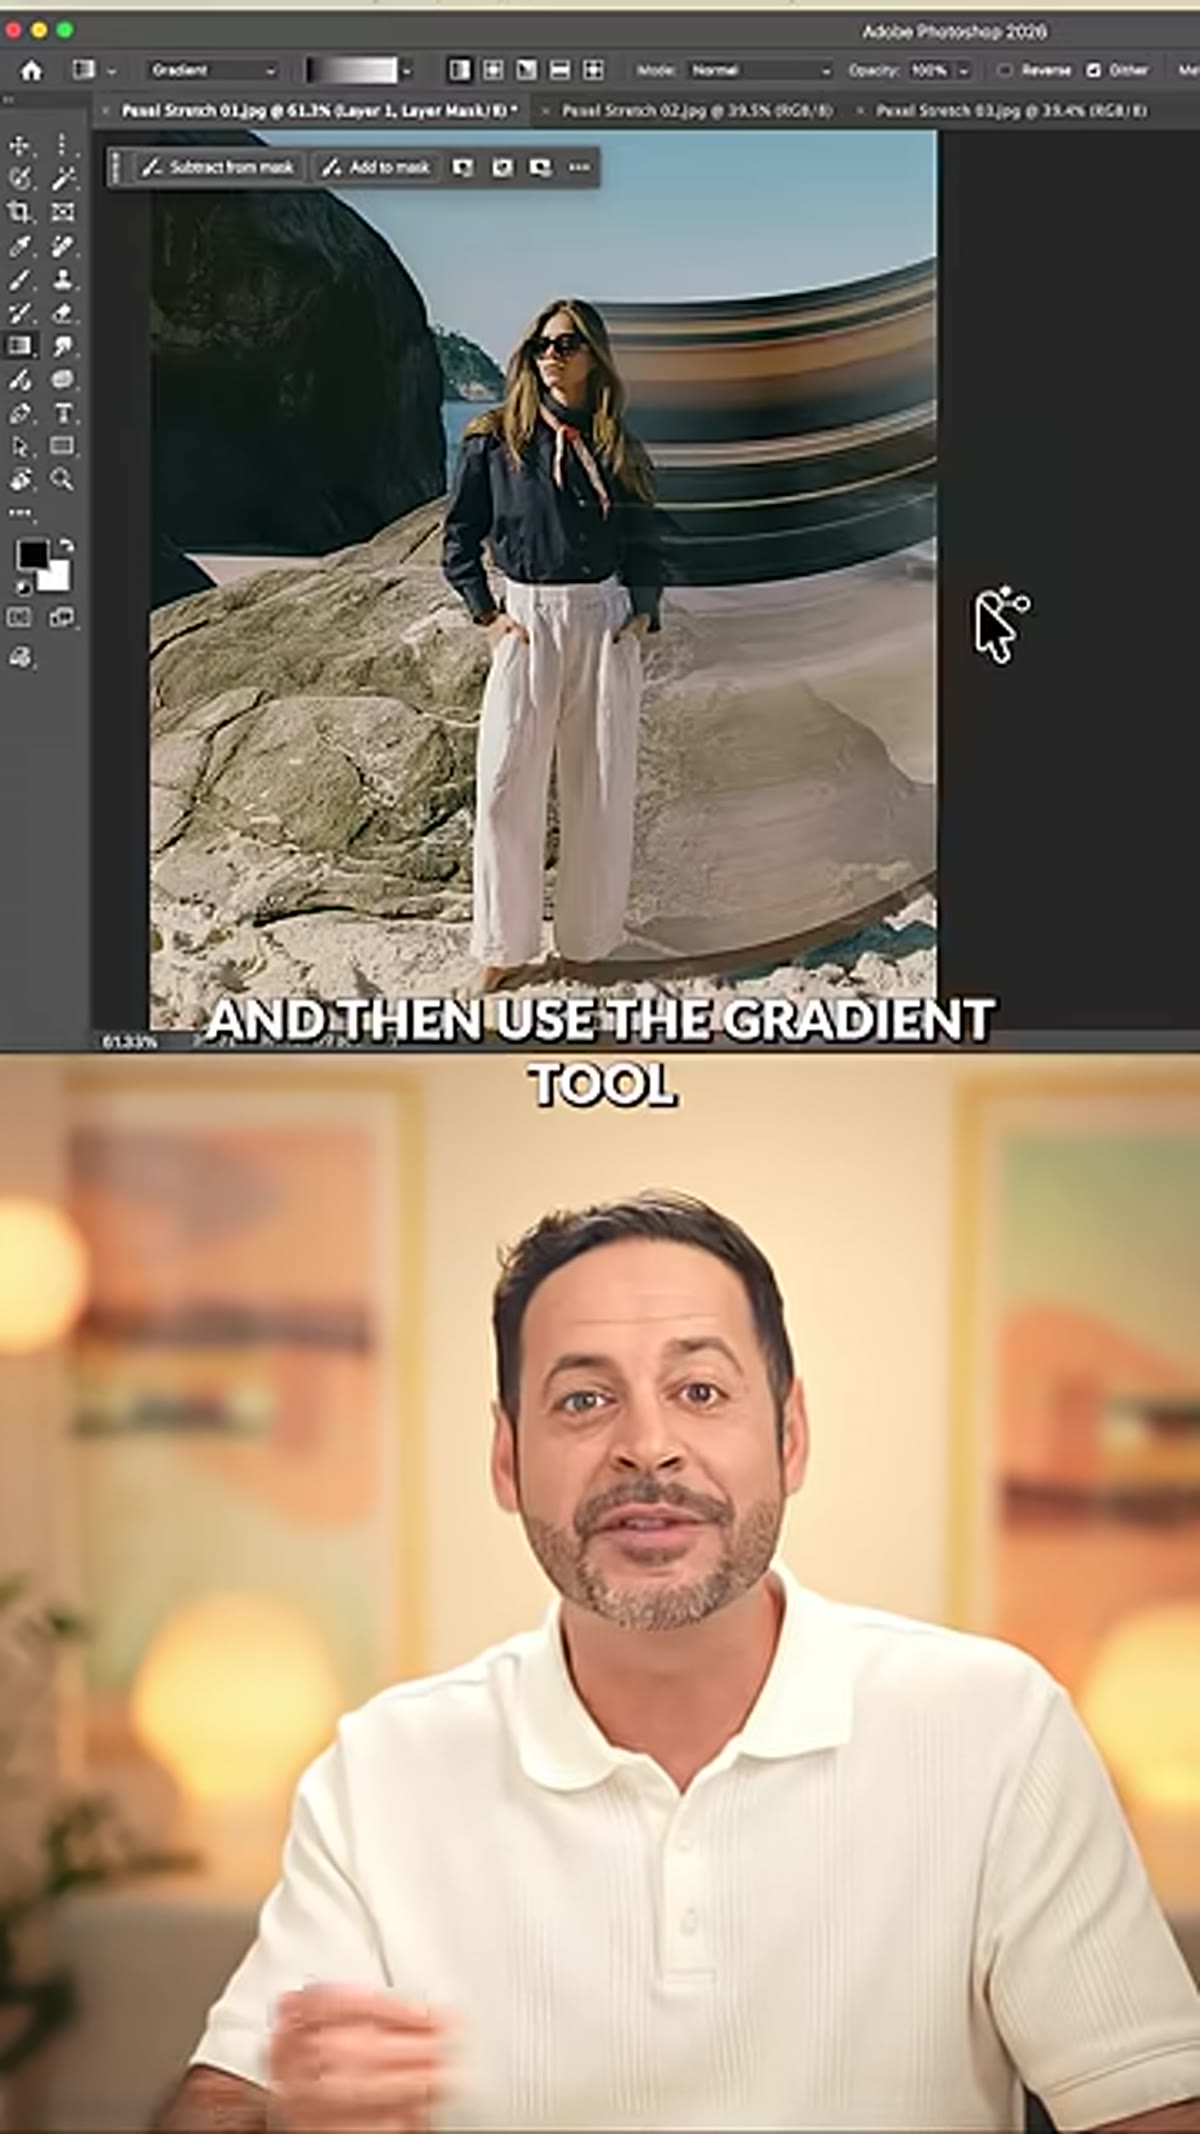 Layer mask with gradient applied, stretch fading toward edge
With the stretch layer still selected, click the Add Layer Mask button at the bottom of the Layers panel. Select the Gradient Tool, make sure you’re working with a black-to-white linear gradient, and drag from the point where you want the stretch to fully disappear back toward your subject. The stretch will fade from fully visible to fully transparent, which is what makes the whole effect feel integrated rather than pasted on. The direction and length of your gradient drag controls how abrupt or gradual the fade is. Shorter drag equals a harder edge. Longer drag gives you something softer and more atmospheric.
Layer mask with gradient applied, stretch fading toward edge
With the stretch layer still selected, click the Add Layer Mask button at the bottom of the Layers panel. Select the Gradient Tool, make sure you’re working with a black-to-white linear gradient, and drag from the point where you want the stretch to fully disappear back toward your subject. The stretch will fade from fully visible to fully transparent, which is what makes the whole effect feel integrated rather than pasted on. The direction and length of your gradient drag controls how abrupt or gradual the fade is. Shorter drag equals a harder edge. Longer drag gives you something softer and more atmospheric.
A Note on Automating This for Repeat Use
I’ll be honest: the first time I ran through this technique I immediately started thinking about how to turn it into an action. The step sequence is consistent enough that most of it can be recorded, with the exception of the warp step, which requires manual input. What I’ve started doing is recording an action that handles the selection, duplication, column selection, and masking setup, then pausing at the warp stage so I can adjust by hand. It adds maybe twenty seconds of manual work per image while eliminating all the repetitive setup. If you’re running this effect across a series of campaign images, that kind of partial automation adds up fast.
The single most important thing this tutorial taught me is that the single column marquee tool is not a niche curiosity. It’s a precise sampling instrument that, combined with Free Transform and Warp, produces an effect that would take three times as long to fake any other way. Watch the full tutorial on YouTube to see Aaron walk through it in real time, and check out the extended version on PHLEARN if you want sample files to practice with.
Comments (1)
This is going in my reference folder. Incredibly useful.
Leave a Comment