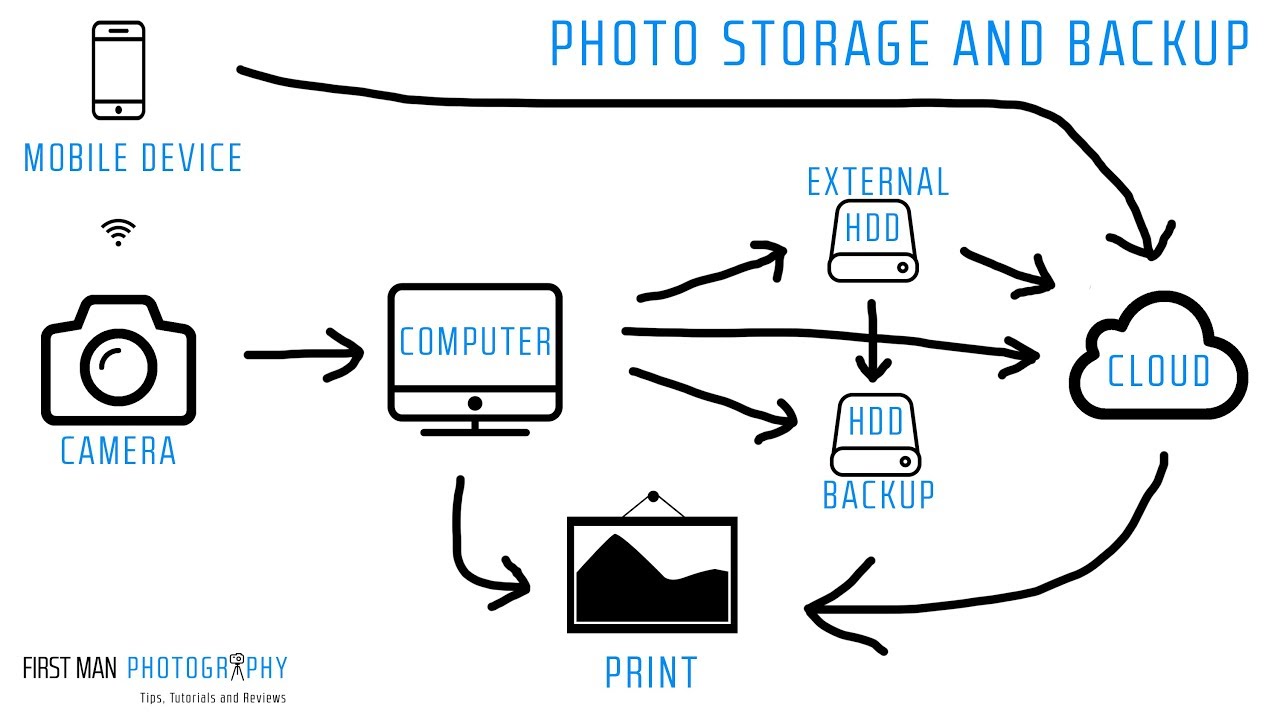
I have backup drives for my backup drives. That’s not a joke. After 15 years in commercial photography studios and now running my own post-production consultancy, I’ve watched enough drives fail, cards corrupt, and laptops get stolen that redundancy is basically a personality trait at this point. So when I say the topic of photo and video backup genuinely keeps me up at night, I mean it. Even with all my systems in place, I still catch myself getting lazy when a deadline is looming and the “I’ll back that up later” voice gets louder than it should.
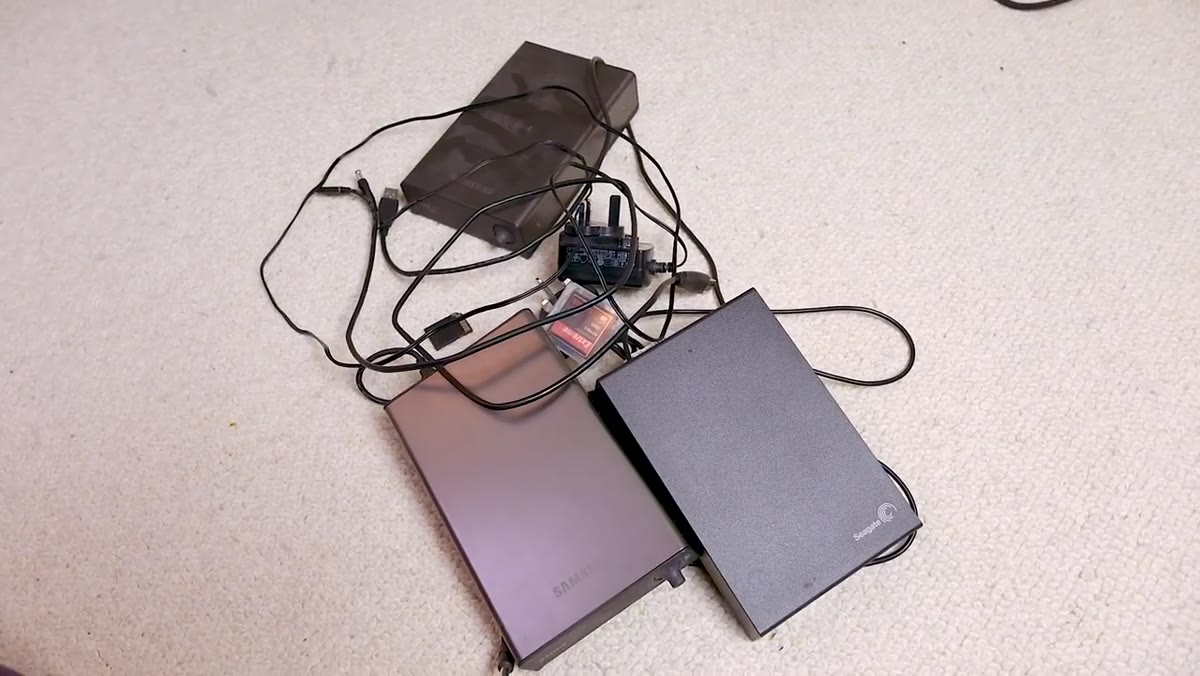
That’s exactly why this tutorial from Adam at First Man Photography landed so well for me. In this First Man Photography tutorial on backup workflows, Adam walks through his complete system for protecting photos, videos, and digital work from the field all the way through long-term archiving. What I appreciate is that he’s honest about the fact that he let his own system slip when he got busy, which is the exact moment most photographers are vulnerable. The solution isn’t just buying more hardware. It’s building a workflow that creates redundancy at every stage so a single failure never becomes a catastrophe.
Here’s how his system breaks down, step by step, with my own notes layered in from hard experience.
Step 1: Create Two Copies the Moment You Finish Shooting
 Single SD card in a Canon 800D showing single-point vulnerability
The rule Adam builds everything on is simple: never have only one copy of your work. Cards fail. Hard drives fail. Computers fail. Any single point of storage is a single point of failure. His first action after any shoot is to get the footage off the camera and onto a second device as fast as possible. For most shooting situations that means dumping to a laptop or a portable SSD immediately, so you have the original card and a second copy on a drive. Only then does he start to relax even slightly.
Single SD card in a Canon 800D showing single-point vulnerability
The rule Adam builds everything on is simple: never have only one copy of your work. Cards fail. Hard drives fail. Computers fail. Any single point of storage is a single point of failure. His first action after any shoot is to get the footage off the camera and onto a second device as fast as possible. For most shooting situations that means dumping to a laptop or a portable SSD immediately, so you have the original card and a second copy on a drive. Only then does he start to relax even slightly.
For my product photography clients, I take this a step further. I travel to shoots with a dedicated portable SSD that’s used only as an immediate dump drive, nothing else lives on it. The card stays in the camera until I’ve confirmed the copy is complete and readable. Those two physical copies exist before I do anything else.
Step 2: Use a Fast Portable SSD for Your On-Location Copy
 500GB portable SSD drive held up next to a laptop
Adam recommends a 500GB portable SSD as a travel companion, and the reasoning is practical: modern laptops, especially the thin ones creative professionals tend to carry, often have surprisingly limited internal storage. A portable SSD is small enough to fit in a jacket pocket but fast enough to handle large video files without the kind of lag you get from older spinning drives.
500GB portable SSD drive held up next to a laptop
Adam recommends a 500GB portable SSD as a travel companion, and the reasoning is practical: modern laptops, especially the thin ones creative professionals tend to carry, often have surprisingly limited internal storage. A portable SSD is small enough to fit in a jacket pocket but fast enough to handle large video files without the kind of lag you get from older spinning drives.
The key word here is “fast.” When you’re editing on location or in a hotel room and working directly off a drive, read and write speeds matter more than you’d think. A slow drive turns every scrub through 4K footage into a frustrating exercise. An SSD in the 400-500 MB/s range keeps you moving. This is the drive that bridges the gap between raw capture and getting home to your main workstation.
Step 3: Edit from the Fast Drive Before Archiving
 Laptop with footage being reviewed and edited on screen
Once the data is safely on the portable SSD, Adam uses that as his working drive to begin editing. This approach is smart because it lets you triage the footage while it’s still fresh, identify what’s worth keeping, and even deliver finals to clients or upload to platforms before you’ve fully sorted your archive. By the time a video or image is exported and uploaded, you’ve effectively created yet another copy out in the world.
Laptop with footage being reviewed and edited on screen
Once the data is safely on the portable SSD, Adam uses that as his working drive to begin editing. This approach is smart because it lets you triage the footage while it’s still fresh, identify what’s worth keeping, and even deliver finals to clients or upload to platforms before you’ve fully sorted your archive. By the time a video or image is exported and uploaded, you’ve effectively created yet another copy out in the world.
One thing I’ll add: establish a clear folder naming convention before you ever start editing on location. I use a date-first format (YYYYMMDD followed by client or project name) so that every folder sorts chronologically by default. I’ve seen too many “final_v3_REAL_final” folder disasters to leave naming to chance. A good naming system costs nothing and saves significant time when you’re hunting for footage six months later.
Step 4: Archive to a RAID Array for Long-Term Storage
 Drobo 5D3 unit with multiple drives installed on a desk
The part of Adam’s workflow that got my attention most was his upgrade from a single 5TB spinning drive to a Drobo 5D3 running in a RAID 5 configuration. A single large drive is fine for storage, but it has two problems: if it fails you lose everything on it, and if you’re working from it directly, a single spinning disk is slower than you’d want for re-editing archival footage.
Drobo 5D3 unit with multiple drives installed on a desk
The part of Adam’s workflow that got my attention most was his upgrade from a single 5TB spinning drive to a Drobo 5D3 running in a RAID 5 configuration. A single large drive is fine for storage, but it has two problems: if it fails you lose everything on it, and if you’re working from it directly, a single spinning disk is slower than you’d want for re-editing archival footage.
RAID 5 solves both. Multiple drives share the read and write tasks, which increases speed, and the data is spread across drives in a way that allows one drive to fail completely without losing anything. The more drives you add, the more speed and capacity you gain. Adam mentions having three drives in his Drobo at the time of the video, with plans to expand. For anyone doing serious work, a NAS or RAID enclosure isn’t a luxury. It’s the foundation of a real archive.
Step 5: Keep the Memory Cards Until the Archive Is Confirmed
 Memory card still in camera alongside external SSD on a table
This is a step Adam implies but I want to make explicit because it’s the one most photographers skip. Don’t format your memory cards until you have confirmed that your archived copy is intact. That means not just confirming the files transferred, but actually opening a few, spot-checking that they’re readable, and verifying the file sizes match. Only after that verification should you wipe the card for reuse.
Memory card still in camera alongside external SSD on a table
This is a step Adam implies but I want to make explicit because it’s the one most photographers skip. Don’t format your memory cards until you have confirmed that your archived copy is intact. That means not just confirming the files transferred, but actually opening a few, spot-checking that they’re readable, and verifying the file sizes match. Only after that verification should you wipe the card for reuse.
Cards are your last line of defense before the archive is locked in. Treat them that way.
My Own Addition: Offsite and Cloud as the Final Layer
Adam’s system covers the immediate and local archive layers extremely well. Where I’d extend it is with an offsite component. For my client deliverables and final edited files, I maintain a cloud backup using a service with versioning support, so if a file gets overwritten or corrupted I can roll back. For the raw files, which are too large to cloud-backup economically in full, I keep a second RAID drive at a separate physical location, rotated every few weeks.
The goal is that no single event, whether a fire, theft, or drive failure, can wipe out your work entirely. If all your backups live in the same room, they’re really just one backup.
The single most important idea in Adam’s whole tutorial is this: backup isn’t a destination, it’s a habit you build into every stage of the workflow. Waiting until the project is “done” to think about backup is exactly when you’re most exposed. Get two copies before you edit, archive before you format, and verify before you move on.
Watch the full tutorial on YouTube to see Adam walk through his setup and gear choices firsthand. It’s worth 10 minutes of your time before your next shoot.
Comments (4)
Finally someone explains this in a way that actually makes sense.
Never thought of approaching it this way. Really creative.
Just subscribed. If the rest of your content is this good, I'm in.
Quality content like this is rare. Keep it up.
Leave a Comment