New tools in Photoshop are genuinely rare. Adobe spends most of its energy refining what already exists, which is usually the right call. So when something truly new lands in the beta, I pay attention. The Adjustment Brush tool is one of those features that immediately made me think about how many extra steps I take every single time I want to apply a localized adjustment to a subject. Right now, my standard move is: create an adjustment layer, open Select Subject, load the selection as a mask, then tweak. It works. But it’s four steps before I’ve even touched a slider.
In this Aaron Nace (PHLEARN) tutorial, he walks through the Adjustment Brush tool available in the Photoshop beta and shows exactly how it collapses that process. Watch the full tutorial on YouTube before or after reading through the breakdown below. Aaron covers three practical examples including brightness and contrast, hue and saturation for hair color changes, and exposure adjustments to separate a subject from a background. I’m going to walk you through the core workflow and add a note at the end about where I’d take it further for production use.
Step 1: Access the Adjustment Brush Tool in the Beta
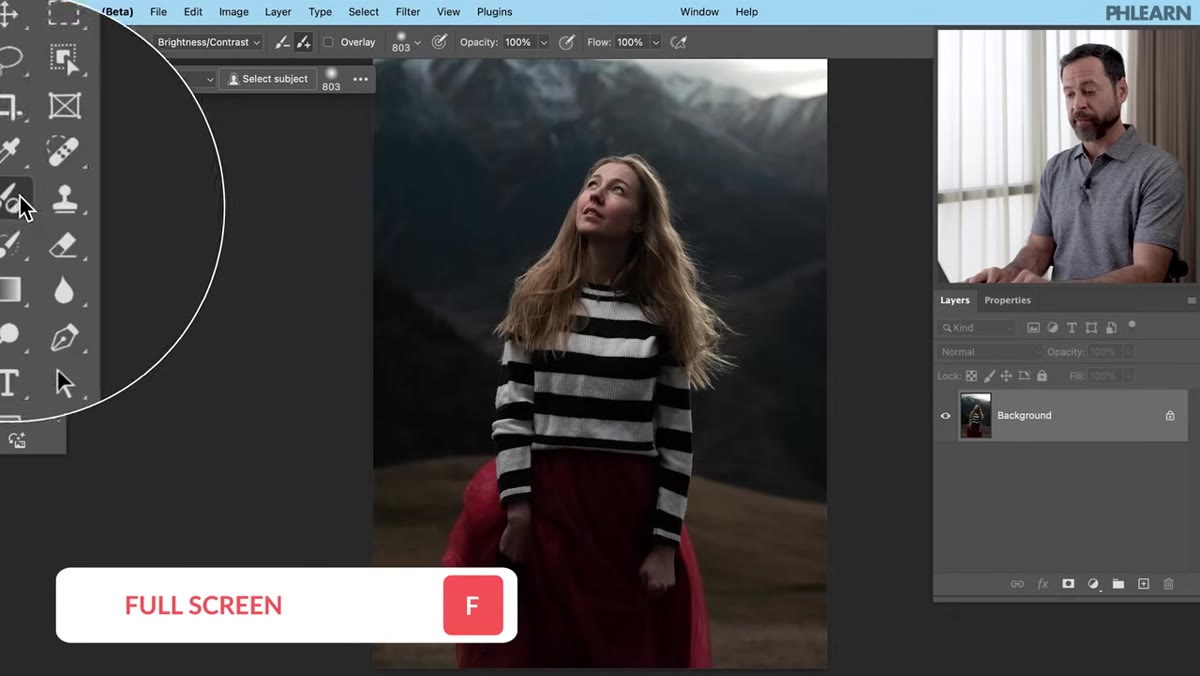 Adjustment Brush Tool location shown in the Photoshop toolbar
First things first: this tool is only available in the Photoshop beta, not the stable release. If you’re a Creative Cloud subscriber, you already have access. Open the Creative Cloud desktop app, find Photoshop (Beta) under the Beta Apps section, and install it. Your existing files and presets carry over fine.
Adjustment Brush Tool location shown in the Photoshop toolbar
First things first: this tool is only available in the Photoshop beta, not the stable release. If you’re a Creative Cloud subscriber, you already have access. Open the Creative Cloud desktop app, find Photoshop (Beta) under the Beta Apps section, and install it. Your existing files and presets carry over fine.
Once you’re inside the beta, find the Adjustment Brush tool in the toolbar. It lives just below the standard Brush tool. You can hit B to jump to the Brush tool, then look directly beneath it. It also sits near the Eyedropper tool in the panel. The icon is distinct enough that you won’t confuse it once you’ve seen it.
Step 2: Choose Your Adjustment Type from the Contextual Task Bar
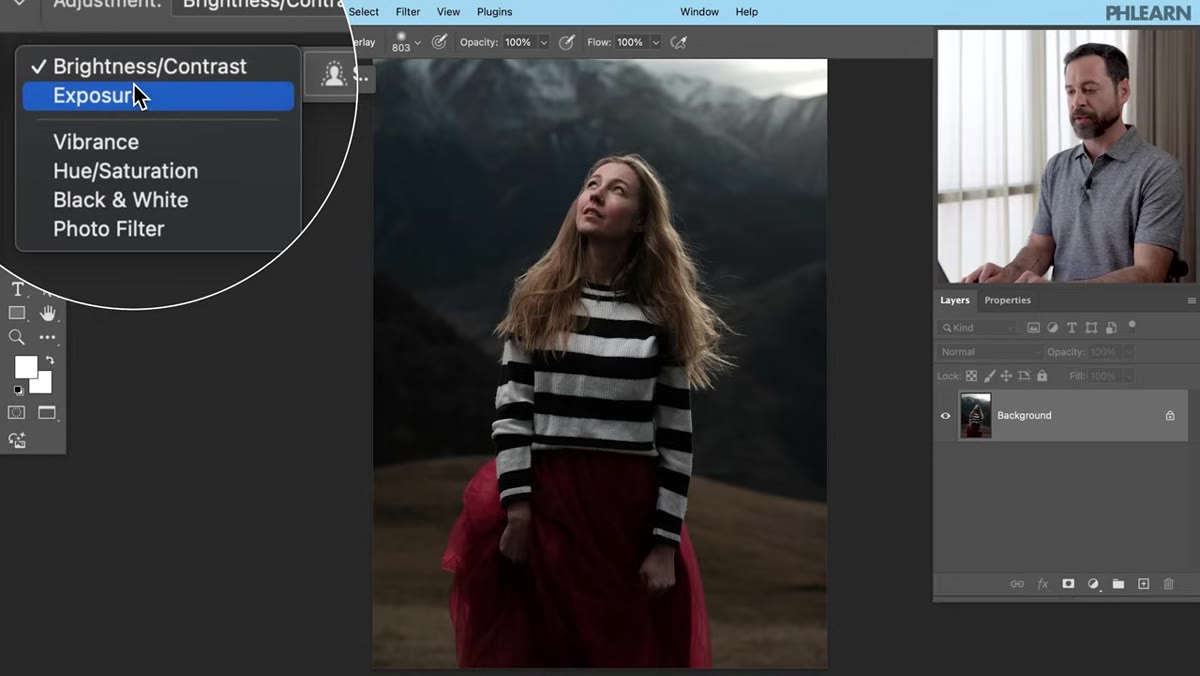 Contextual task bar showing adjustment type options at top of screen
With the Adjustment Brush selected, look at the top of your screen. The contextual task bar gives you a dropdown to choose which type of adjustment you want to apply. Your current options include Brightness and Contrast, Exposure, Vibrance, Hue and Saturation, Black and White, and Photo Filter. This selection determines what kind of adjustment layer gets created automatically.
Contextual task bar showing adjustment type options at top of screen
With the Adjustment Brush selected, look at the top of your screen. The contextual task bar gives you a dropdown to choose which type of adjustment you want to apply. Your current options include Brightness and Contrast, Exposure, Vibrance, Hue and Saturation, Black and White, and Photo Filter. This selection determines what kind of adjustment layer gets created automatically.
For a portrait retouching scenario, start with Brightness and Contrast. For product shots where you need to shift a color - say, a piece of clothing or a product finish - Hue and Saturation is the one you’ll reach for. The selection you make here becomes the adjustment layer type, so think of this step as choosing your layer before you’ve drawn anything.
Step 3: Use Select Subject to Instantly Mask Your Adjustment
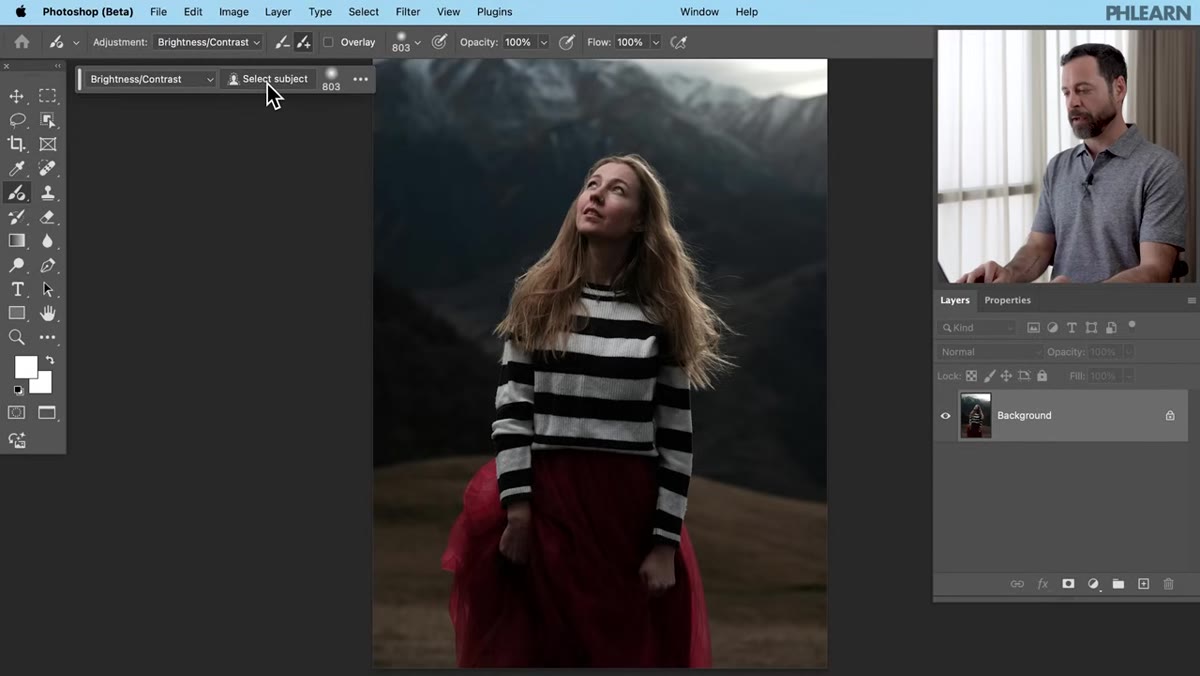 Select Subject button clicked, subject automatically selected with adjustment applied
This is the part that genuinely impressed me. Once you have your adjustment type chosen, the contextual task bar also shows a “Select Subject” button. Click it, and Photoshop runs its subject detection and simultaneously creates a masked adjustment layer - all in one action. No loading selections, no painting masks from scratch.
Select Subject button clicked, subject automatically selected with adjustment applied
This is the part that genuinely impressed me. Once you have your adjustment type chosen, the contextual task bar also shows a “Select Subject” button. Click it, and Photoshop runs its subject detection and simultaneously creates a masked adjustment layer - all in one action. No loading selections, no painting masks from scratch.
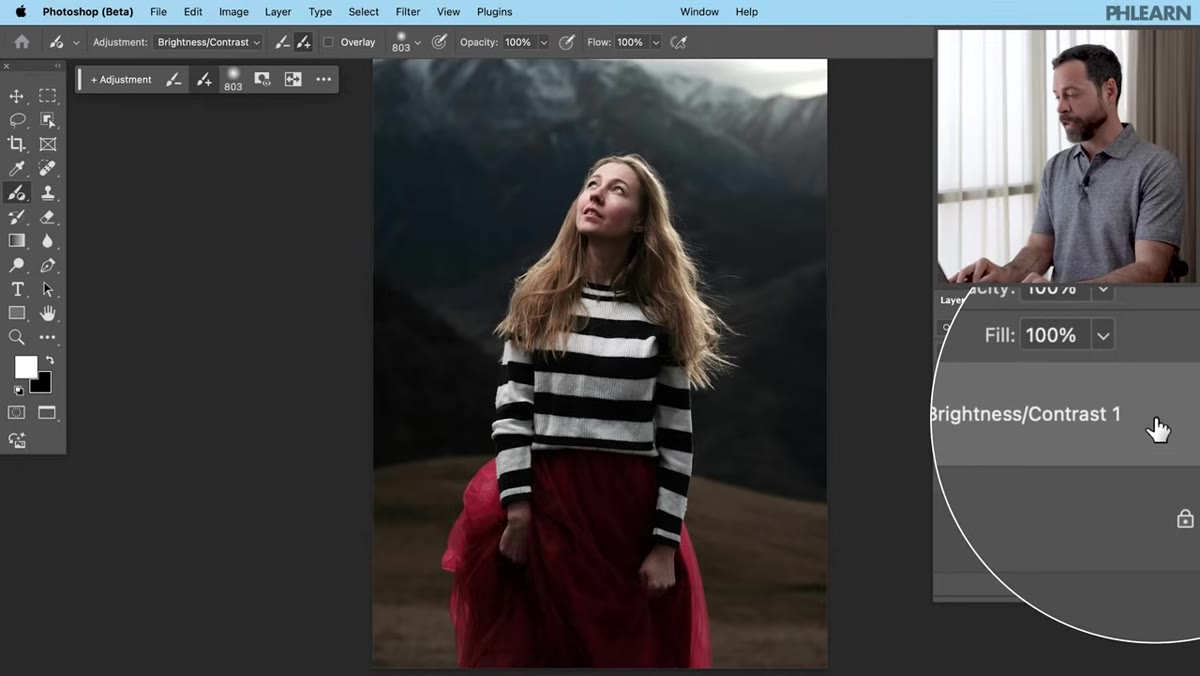
The result in the Layers panel is a standard Brightness and Contrast adjustment layer with a mask already applied based on the subject selection. If you’ve been using adjustment layers for years, nothing about the layer itself will look foreign. It’s the speed of getting there that’s different. Aaron notes that the default settings apply a contrast bump of 50, which reads as heavy on most images. The recommendation is to zero that out and set your own values from scratch.
Step 4: Adjust the Sliders in the Properties Panel
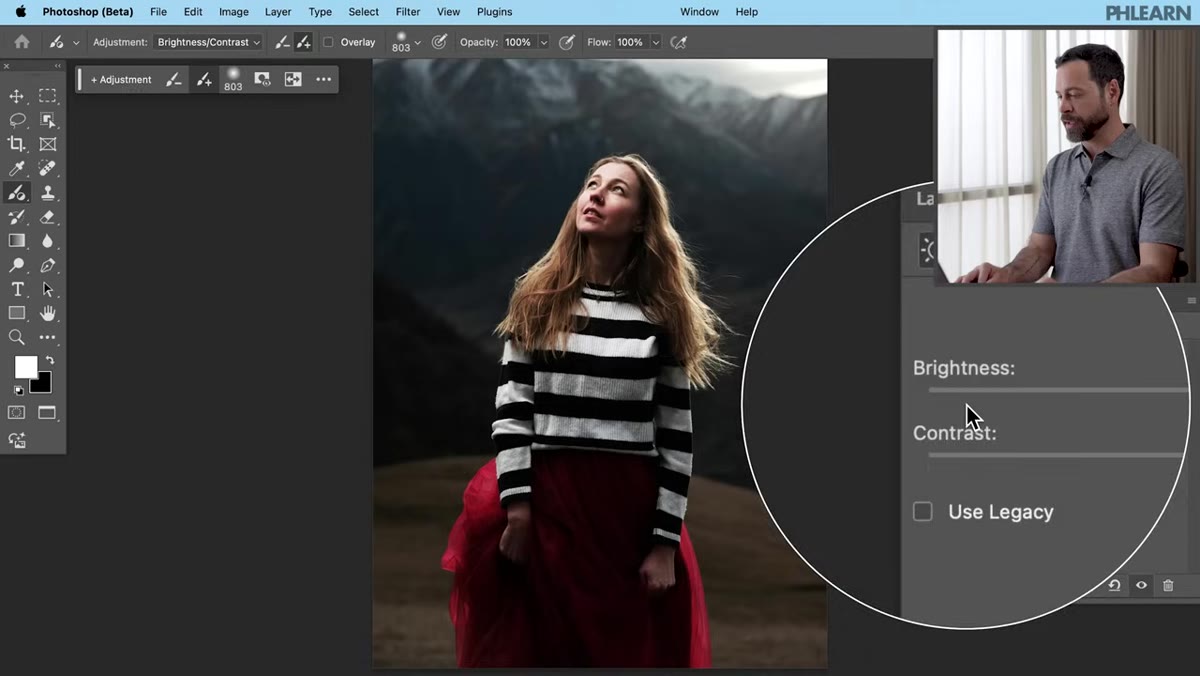 Properties panel open showing Brightness and Contrast sliders for the adjustment layer
The Properties panel opens automatically when the adjustment layer is created. From here you work exactly as you would with any adjustment layer. For a brightness lift on a portrait subject, pull the Brightness slider up until the subject separates cleanly from a darker background without losing detail in the skin highlights. Go slow - a little goes a long way on faces.
Properties panel open showing Brightness and Contrast sliders for the adjustment layer
The Properties panel opens automatically when the adjustment layer is created. From here you work exactly as you would with any adjustment layer. For a brightness lift on a portrait subject, pull the Brightness slider up until the subject separates cleanly from a darker background without losing detail in the skin highlights. Go slow - a little goes a long way on faces.
The important thing to understand here is that this adjustment is non-destructive and fully editable. You can come back to this layer at any point, click the adjustment thumbnail, and change the values. The mask is also fully paintable. If the subject selection missed an area or grabbed something it shouldn’t have, grab a regular brush, set foreground to black or white, and paint directly on the mask.
Step 5: Paint Additional Areas with the Add and Subtract Brushes
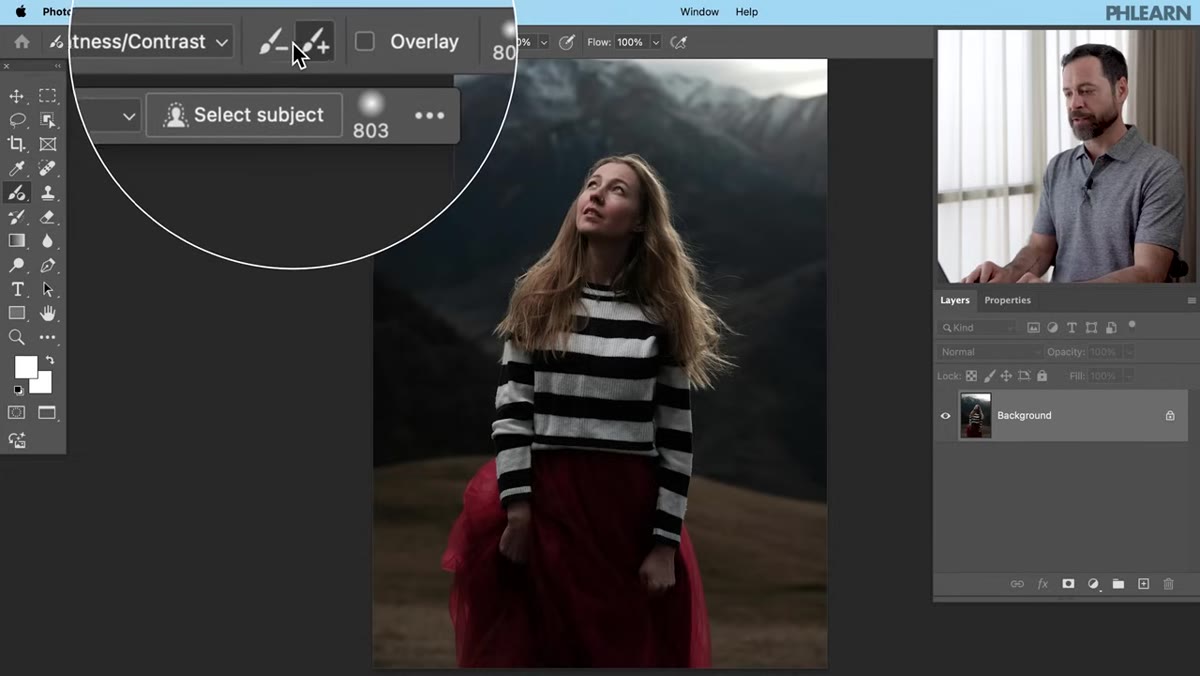 Add and subtract brush controls shown in the tool options bar
The Adjustment Brush tool also lets you paint adjustments by hand, without using Select Subject at all. In the options bar at the top, you’ll see controls to add to or subtract from the affected area. This works similarly to painting on a layer mask, except the tool is handling the mask logic in the background as you paint.
Add and subtract brush controls shown in the tool options bar
The Adjustment Brush tool also lets you paint adjustments by hand, without using Select Subject at all. In the options bar at the top, you’ll see controls to add to or subtract from the affected area. This works similarly to painting on a layer mask, except the tool is handling the mask logic in the background as you paint.
For situations where Select Subject gives you a rough edge around hair or complex backgrounds, switch to the manual brush mode and refine. Use a soft brush at lower opacity to feather adjustments into the background gradually rather than cutting hard edges into your painted area.
Step 6: Apply the Blend If Technique to Protect Highlights
 Layer Style dialog open showing Blend If sliders for highlight protection
This is where Aaron takes the tutorial beyond a surface-level demo, and it’s the most valuable part for production work. A straight Brightness adjustment lifts everything - shadows and highlights together. That means brightening a subject’s face can blow out already-bright skin tones. To fix this, double-click on the gray area to the right of the adjustment layer thumbnail to open Layer Style, then navigate to Blending Options and find the Blend If section.
Layer Style dialog open showing Blend If sliders for highlight protection
This is where Aaron takes the tutorial beyond a surface-level demo, and it’s the most valuable part for production work. A straight Brightness adjustment lifts everything - shadows and highlights together. That means brightening a subject’s face can blow out already-bright skin tones. To fix this, double-click on the gray area to the right of the adjustment layer thumbnail to open Layer Style, then navigate to Blending Options and find the Blend If section.
The “This Layer” sliders let you restrict where the adjustment is visible based on tone. Hold Alt (or Option on Mac) and drag the right-side white triangle on the “This Layer” bar to split it. Drag the left half of that split point toward the middle. This tells Photoshop to fade the adjustment out in the highlight range, protecting your brightest tones while still lifting the midtones and shadows. The split creates a smooth transition rather than a hard cutoff. It is one of those techniques that changes the quality of your results immediately.
How I’d Extend This in a Production Context
For anyone doing volume retouching - e-commerce batches, editorial runs, client delivery sets - the Adjustment Brush is a useful addition but it doesn’t replace recorded actions or batch processing. What it does do is shorten the setup time for a single image considerably. My actual plan is to use it to build the initial masked adjustment layer quickly, then add the Blend If protection step, and record that combined result as an action that can be triggered later on similar shots.
The Select Subject accuracy will vary with image complexity, just as it does everywhere else in Photoshop. Straightforward portraits with clean backgrounds work beautifully. Busy commercial shots with lots of overlapping elements may still need manual mask cleanup. Factor that in before deciding how much of your workflow to hand off to this step.
The core takeaway here is that the Adjustment Brush compresses a four-step process into one click. For photographers and retouchers who live inside Photoshop all day, that kind of friction reduction compounds fast. The Blend If addition Aaron demonstrates is what elevates the result from serviceable to professional, and it’s worth practicing until it’s automatic.
Watch the full tutorial on YouTube to see Aaron walk through all three example images, including the hue and saturation hair color change and the exposure adjustment for background separation.
Comments (2)
This is going in my reference folder. Incredibly useful.
I keep coming back to this article. It's that useful.
Leave a Comment