I have a rule in my consultancy: if I’m doing the same thing more than three times, I build a system for it. That rule applies to Lightroom just as much as it does to Photoshop batch processing. Presets are one of the fastest ways to compress your editing time without sacrificing style consistency, but most preset packs fall apart the moment a photo doesn’t match the exact lighting conditions of the demo shot. So when I came across Watch the full tutorial on YouTube from Mango Street, I paid close attention, because they led with something most preset sellers skip entirely: showing each preset applied to genuinely varied source material.
What Mango Street does well here is demonstrate that one-click editing is not actually one-click editing if you ignore exposure and white balance. Their 2018 preset pack is built around six presets covering portraits, warm golden-hour looks, moody shadows, landscapes, and two distinct black-and-white styles. The walkthrough is honest about what you need to do before you click apply, and that honesty is what makes this useful for anyone editing client work rather than just their own curated portfolio shots.
The underlying workflow is simple enough to internalize and adapt. Here is how it breaks down, step by step.
Step 1: Apply a Profile Correction Before Anything Else
 Applying lens profile correction in Lightroom develop panel
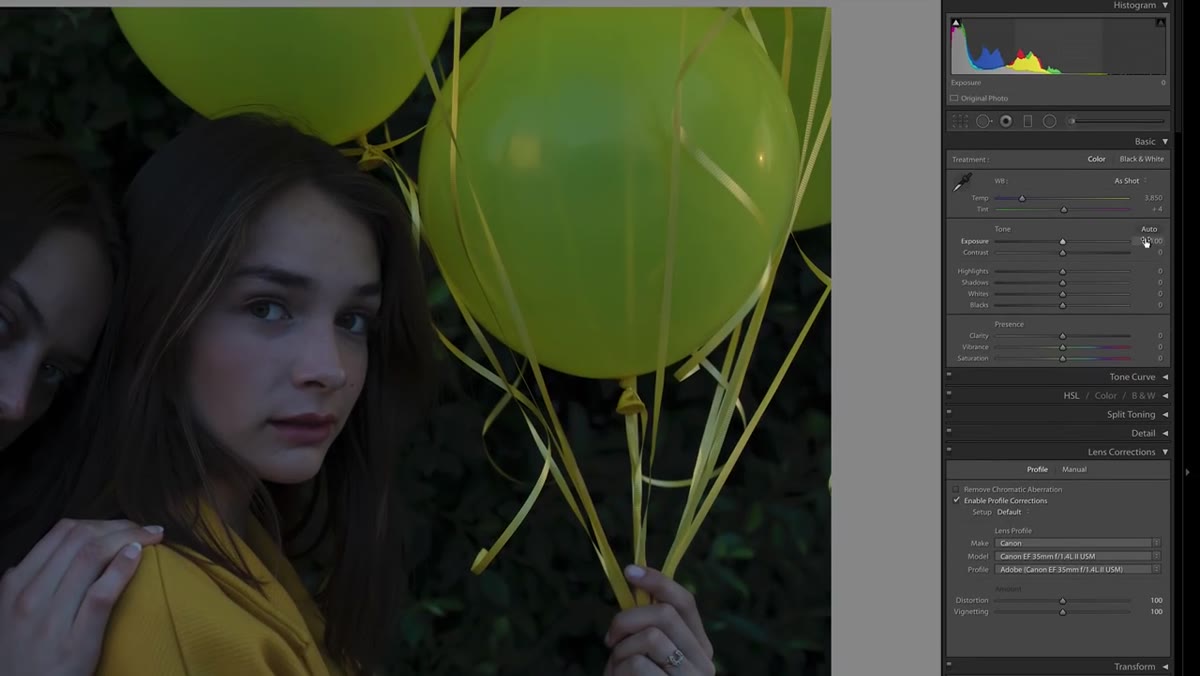
Before touching any preset, Mango Street applies a lens profile correction on every single image. This is non-negotiable if you are shooting with a wide-angle or kit lens, because distortion and vignetting baked in by the lens will interact badly with a preset’s own vignetting or contrast curve. In Lightroom’s Lens Corrections panel, check “Enable Profile Corrections” and let it pull your camera-lens combination automatically. If it does not detect your lens, select it manually from the dropdown.
Applying lens profile correction in Lightroom develop panel
Before touching any preset, Mango Street applies a lens profile correction on every single image. This is non-negotiable if you are shooting with a wide-angle or kit lens, because distortion and vignetting baked in by the lens will interact badly with a preset’s own vignetting or contrast curve. In Lightroom’s Lens Corrections panel, check “Enable Profile Corrections” and let it pull your camera-lens combination automatically. If it does not detect your lens, select it manually from the dropdown.
This step also means the preset is working with clean, neutral source data rather than a distorted starting point. Think of it as leveling the floor before you lay tile.
Step 2: Dial In Exposure and White Balance First
 Adjusting exposure slider and white balance temperature in develop module
Every preset in this pack is designed to work on correctly exposed, properly white-balanced images. Mango Street is explicit about this, and it is the most important thing to take away from the tutorial. For the portrait example, they push exposure up noticeably and set color temperature around 5900K with a slight magenta tint shift. These are not arbitrary numbers, they are what it takes to get that specific image to a neutral starting point.
Adjusting exposure slider and white balance temperature in develop module
Every preset in this pack is designed to work on correctly exposed, properly white-balanced images. Mango Street is explicit about this, and it is the most important thing to take away from the tutorial. For the portrait example, they push exposure up noticeably and set color temperature around 5900K with a slight magenta tint shift. These are not arbitrary numbers, they are what it takes to get that specific image to a neutral starting point.
Your numbers will be different. The principle is the same: get the image looking natural and correct before you hand it to a preset. One-click presets are multipliers. If your base image is green-tinted and underexposed, the preset multiplies that problem, it does not fix it.
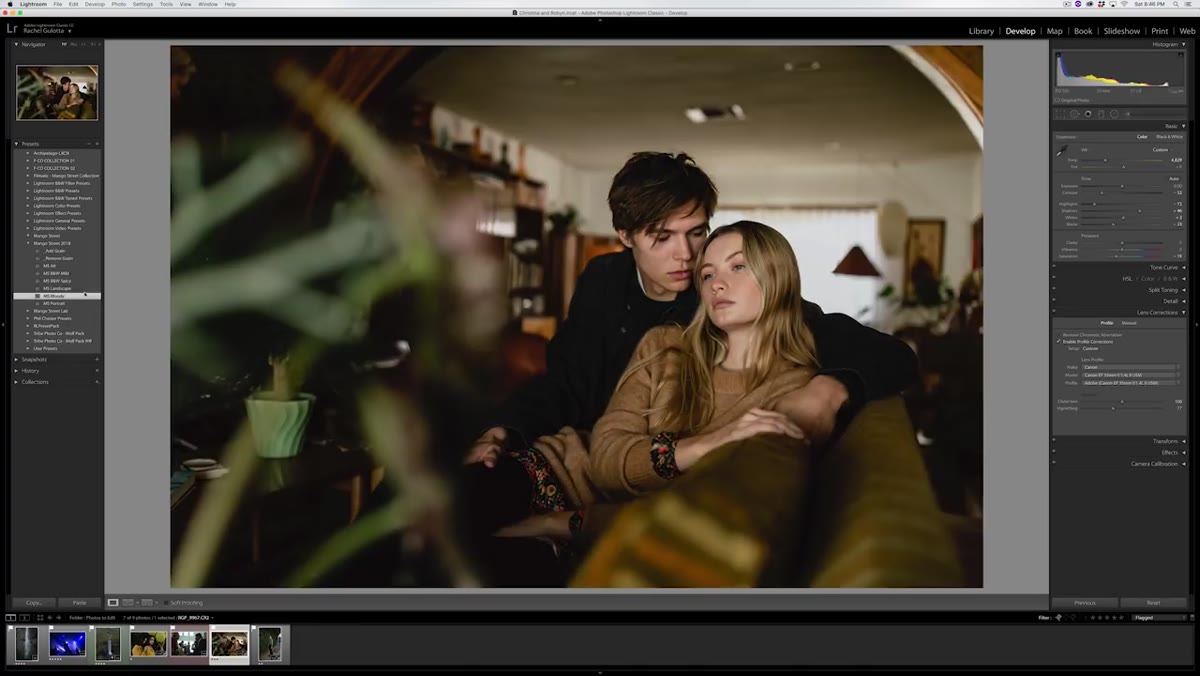
Step 3: Apply the MS Portrait Preset for Skin Tone Work
 Portrait preset applied to image showing skin tone result
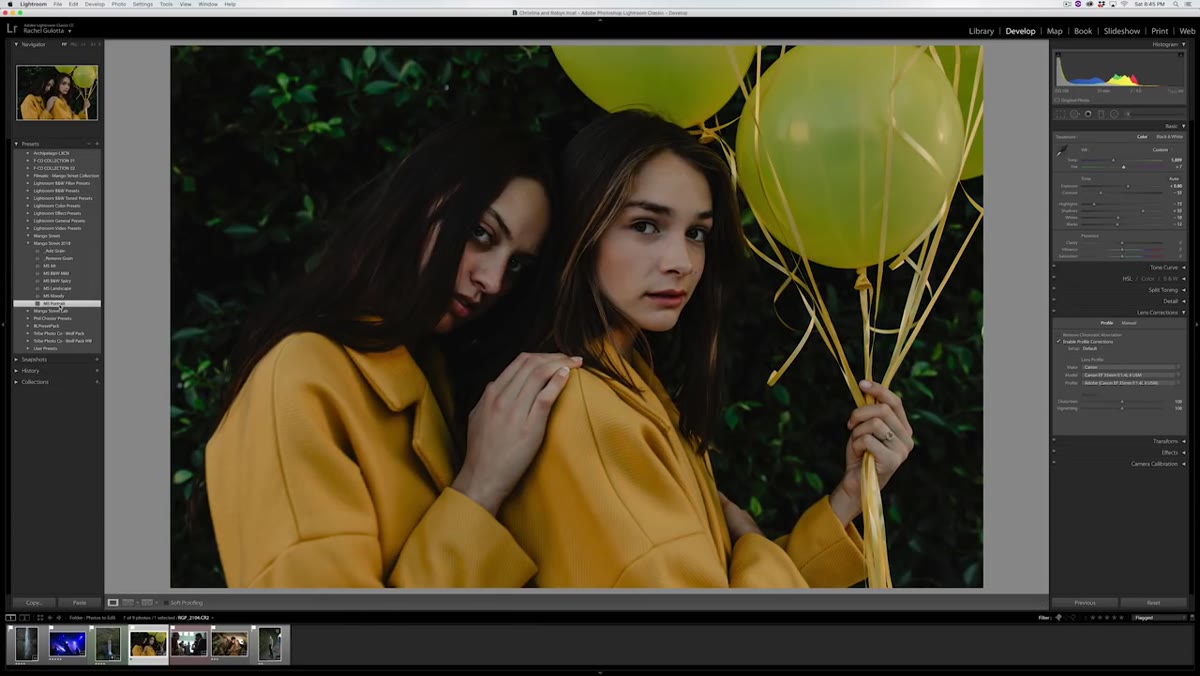
The MS Portrait preset is positioned as the workhorse of the pack, and Mango Street specifically calls out its strength with skin tones. Once you have exposure and white balance set, a single click applies their tone curve, color grading, and HSL adjustments together. On a well-prepared image, this can genuinely be a one-step finish.
Portrait preset applied to image showing skin tone result
The MS Portrait preset is positioned as the workhorse of the pack, and Mango Street specifically calls out its strength with skin tones. Once you have exposure and white balance set, a single click applies their tone curve, color grading, and HSL adjustments together. On a well-prepared image, this can genuinely be a one-step finish.
If skin tones are your primary challenge in portrait work, pay attention to how this preset handles the orange and red channels. Most portrait presets either blow out warmth or make skin look desaturated and flat. A good portrait preset finds the middle ground, and seeing it demonstrated on real faces rather than stock photos makes it much easier to judge whether it fits your style.
Step 4: Use the MS Alta Preset for Golden-Hour and Sunny Outdoor Shots
 Alta preset applied showing warmer shadows and richer greens
The Alta preset adds warmth specifically in the shadows and midtones and pushes greens darker and more saturated. This is a deliberate choice for bright daylight or sunrise/sunset shooting, where you want richness rather than a flat, overexposed look. Mango Street reduces vignetting slightly on their example image before applying, which is worth noting because the preset likely has its own vignette built in.
Alta preset applied showing warmer shadows and richer greens
The Alta preset adds warmth specifically in the shadows and midtones and pushes greens darker and more saturated. This is a deliberate choice for bright daylight or sunrise/sunset shooting, where you want richness rather than a flat, overexposed look. Mango Street reduces vignetting slightly on their example image before applying, which is worth noting because the preset likely has its own vignette built in.
The green shift here is meaningful. If you are shooting in parks, forests, or anywhere with foliage, this preset does more heavy lifting than the Portrait preset would in the same environment.
Step 5: Use the MS Moody Preset for Cooler, Lower-Key Images
 Moody preset applied to cooler toned portrait
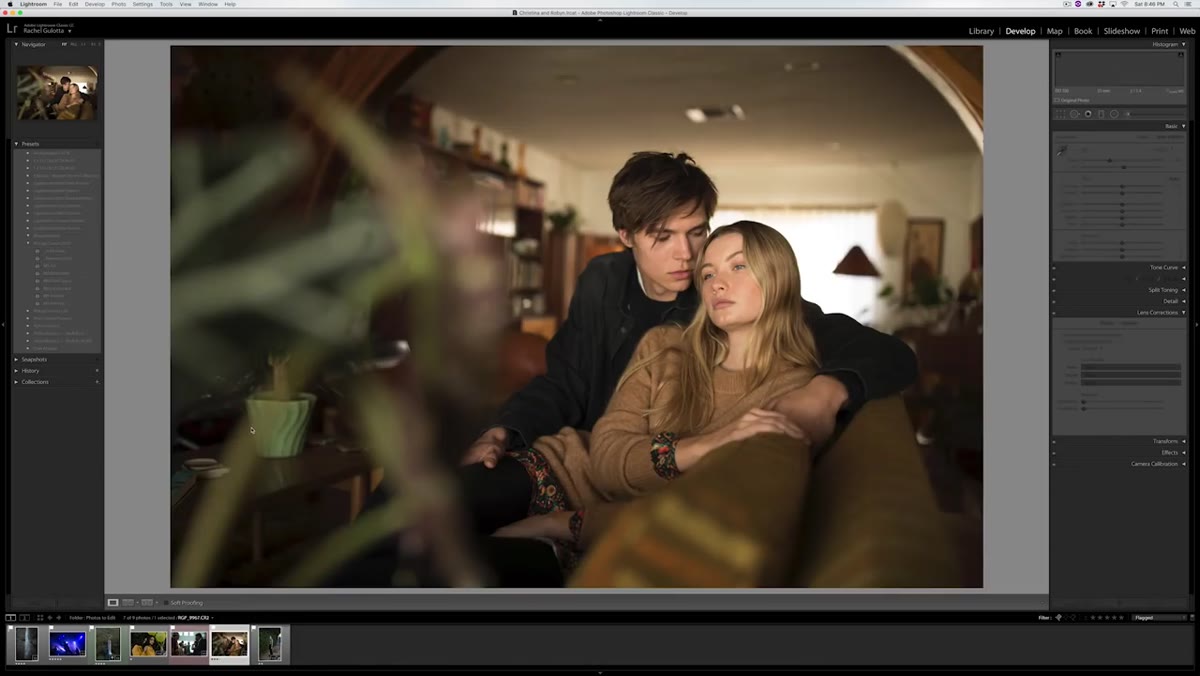
The Moody preset is a darker, lower-contrast interpretation of the main preset style. Mango Street cools the white balance significantly on their example, dropping it well below daylight temperature, before applying the preset. The combination produces a desaturated, shadow-heavy result that works well for editorial or fashion work where drama matters more than warmth.
Moody preset applied to cooler toned portrait
The Moody preset is a darker, lower-contrast interpretation of the main preset style. Mango Street cools the white balance significantly on their example, dropping it well below daylight temperature, before applying the preset. The combination produces a desaturated, shadow-heavy result that works well for editorial or fashion work where drama matters more than warmth.
If you find yourself constantly fighting to add moodiness in post, this preset gives you a reliable starting point. Just be aware that cooling your white balance before application is part of the formula, not an afterthought.
Step 6: Apply the Landscape Preset for Outdoor Scenes With or Without People
 Landscape preset applied showing enhanced blue and green tones
The Landscape preset adds contrast and emphasizes blue and green tones, which addresses a real problem: portraits and landscapes need different things from a color grade, and most general presets compromise poorly on both. Mango Street raises exposure on their darker example shot before applying, and they also show the preset working on an image that includes a human subject in a wide environmental frame.
Landscape preset applied showing enhanced blue and green tones
The Landscape preset adds contrast and emphasizes blue and green tones, which addresses a real problem: portraits and landscapes need different things from a color grade, and most general presets compromise poorly on both. Mango Street raises exposure on their darker example shot before applying, and they also show the preset working on an image that includes a human subject in a wide environmental frame.
This is a practical detail. If you are shooting environmental portraits, lifestyle content, or travel photography, you often need a preset that serves both the sky and the person in the frame. The Landscape preset is tuned for that specific balance.
Step 7: Choose Between Two Black-and-White Presets Based on Contrast Intent
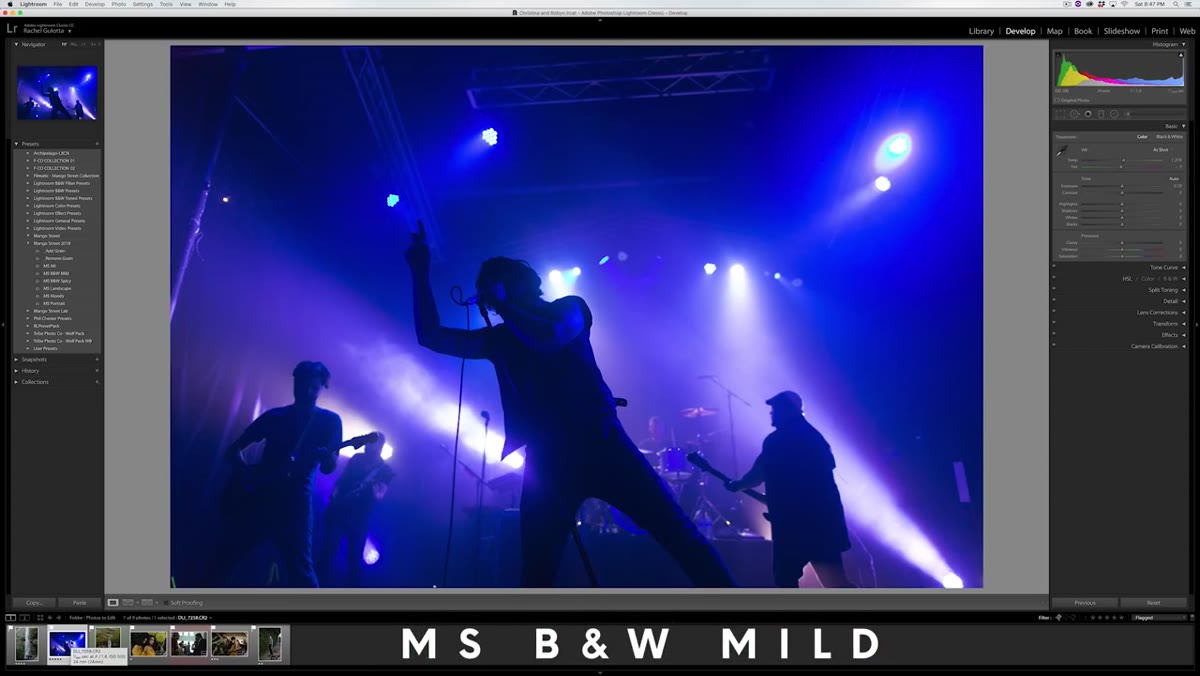 Black and white mild preset showing grain and reduced white point
The pack includes two B&W options with meaningfully different characters. The Mild preset lowers the white point on the tone curve and adds grain for a gritty, film-adjacent look. Mango Street includes a quick toggle to remove or add the grain, which is a thoughtful detail for clients who want the look without texture. The Spicy preset runs higher contrast and applies additional adjustments that make subjects stand out from backgrounds more aggressively.
Black and white mild preset showing grain and reduced white point
The pack includes two B&W options with meaningfully different characters. The Mild preset lowers the white point on the tone curve and adds grain for a gritty, film-adjacent look. Mango Street includes a quick toggle to remove or add the grain, which is a thoughtful detail for clients who want the look without texture. The Spicy preset runs higher contrast and applies additional adjustments that make subjects stand out from backgrounds more aggressively.
The practical test for which to use is simple: emotional, intimate, or documentary shots tend to suit the Mild preset. High-contrast fashion or drama-forward portraits usually want the Spicy version.
What I Would Add From My Own Workflow
I track time savings obsessively, so when I evaluate any preset pack, I am asking whether it actually holds up when you batch it across 50 or 100 shots from the same session. The Mango Street approach of standardizing white balance and exposure before applying a preset is not just good advice for single images. It is the argument for building a two-step process: run auto-sync on exposure and WB across a culled selection, then batch-apply the preset. That combination is where the real time compression happens. A preset that needs constant per-image adjustment after application is not saving you much.
One additional note: Lightroom’s “Previous” button can replicate what presets do if you are working sequentially through a consistent shoot. But presets beat that approach the moment your lighting changes between setups. Having named presets for different scenarios means you can switch contexts without reconfiguring anything.
The single most important takeaway from this tutorial is that presets do not replace judgment about exposure and color temperature, they reward it. Get those two variables right before you click apply, and a good preset does the rest. Get them wrong, and no preset saves the image.
Watch the full tutorial on YouTube to see each preset demonstrated on real images and to get the link to the pack itself.
Comments
Leave a Comment