
There’s a category of client request that used to slow me down more than it should have: “Make it feel like it has weight.” Usually this comes from an art director staring at a perfectly sharp texture image that looks, despite being beautiful, completely flat on screen. No shadows cutting across the surface. No sense that light is raking across the grain or the cracks. Just a photo sitting there looking like a photo. I spent years solving this with layer tricks and hand-painted shadows, and it worked well enough. Then I started paying closer attention to what Photoshop’s 3D environment can actually do when you use it specifically for lighting control rather than geometry.
In this KelbyOne tutorial, host Paul Tate (with Pete Collins) walks through a technique that reframes how you think about Photoshop’s 3D tools entirely. The idea is not to build a complex 3D scene. It is to use a 3D postcard as a lighting stage, strip out the default illumination, and replace it with a single dramatic spotlight that carves depth into a texture through a bump map. The example they use is cracked cement, which is perfect because it shows immediately how much information is hiding in a flat image that standard 2D layer work never fully extracts. Watch the full tutorial on YouTube before or after reading this breakdown.
Step 1: Convert Your Texture Layer to a 3D Postcard
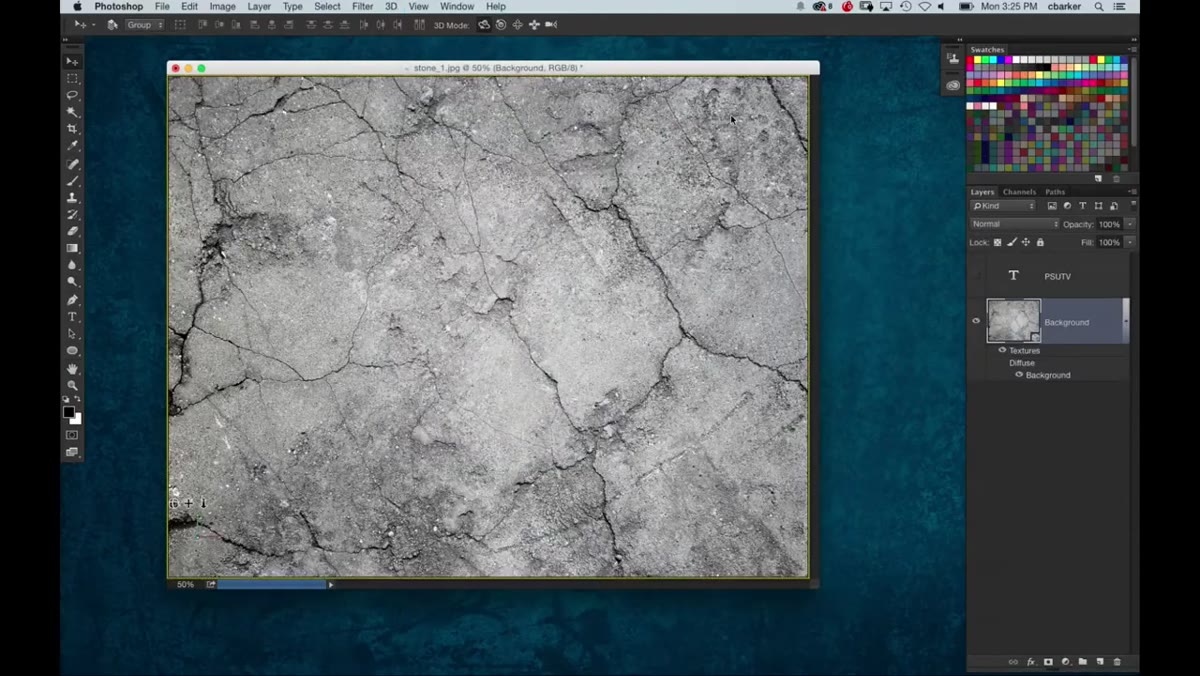 Texture layer being converted to 3D postcard in menu
Open your texture image as a flat layer. Go to 3D > New Mesh from Layer > Postcard. This is the key choice here. You are not extruding anything or building geometry. The postcard option keeps the image completely flat in 3D space, which is exactly what you want. You just need the object to exist inside Photoshop’s 3D environment so you can point real 3D lights at it. Once converted, the image looks identical to how it did before, which confirms you did it right.
Texture layer being converted to 3D postcard in menu
Open your texture image as a flat layer. Go to 3D > New Mesh from Layer > Postcard. This is the key choice here. You are not extruding anything or building geometry. The postcard option keeps the image completely flat in 3D space, which is exactly what you want. You just need the object to exist inside Photoshop’s 3D environment so you can point real 3D lights at it. Once converted, the image looks identical to how it did before, which confirms you did it right.
Step 2: Kill the Default Environment Light
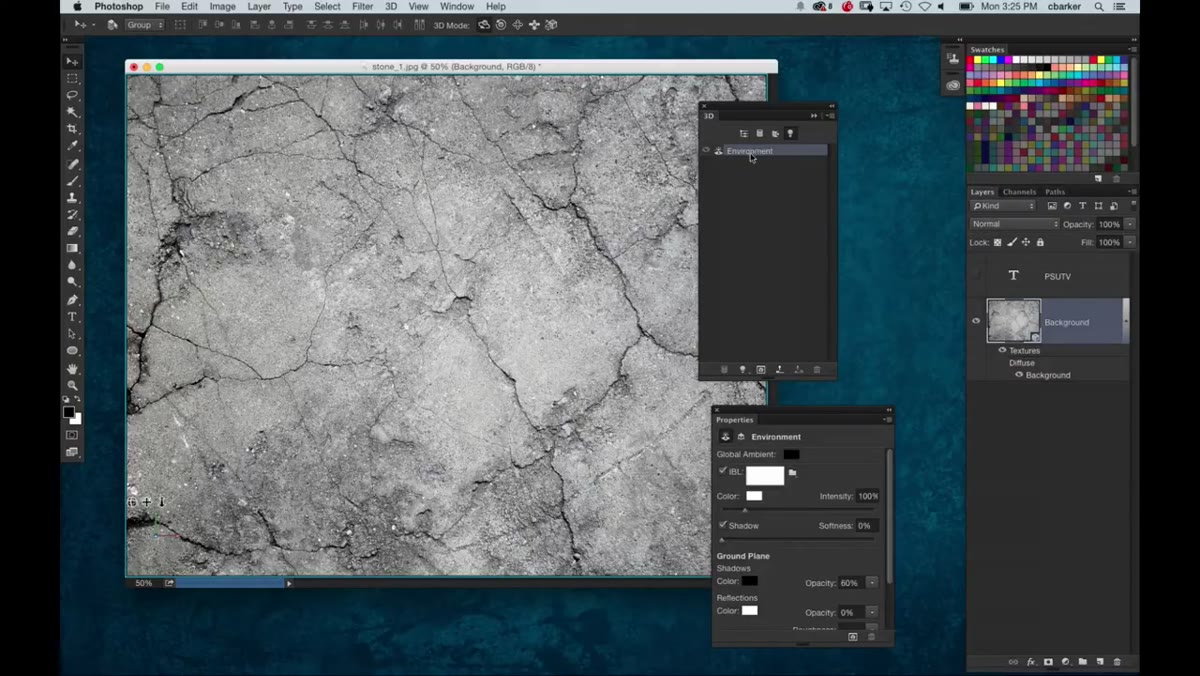 Environment properties panel with image-based light turned off
This is the step most people skip, and it ruins the effect. By default, Photoshop applies a white image-based light to every 3D environment. Open the 3D panel, select the Environment option, and locate the IBL (image-based light) setting in the Properties panel. Turn it off. Your canvas will go black. That is correct. You have just cleared the stage. Also select your scene’s background object and drag the Ambient color down to black as well. You want zero residual light in the scene before you introduce your own source. Think of it like pulling the curtains in a studio before you position a strobe.
Environment properties panel with image-based light turned off
This is the step most people skip, and it ruins the effect. By default, Photoshop applies a white image-based light to every 3D environment. Open the 3D panel, select the Environment option, and locate the IBL (image-based light) setting in the Properties panel. Turn it off. Your canvas will go black. That is correct. You have just cleared the stage. Also select your scene’s background object and drag the Ambient color down to black as well. You want zero residual light in the scene before you introduce your own source. Think of it like pulling the curtains in a studio before you position a strobe.
Step 3: Add a New Spotlight
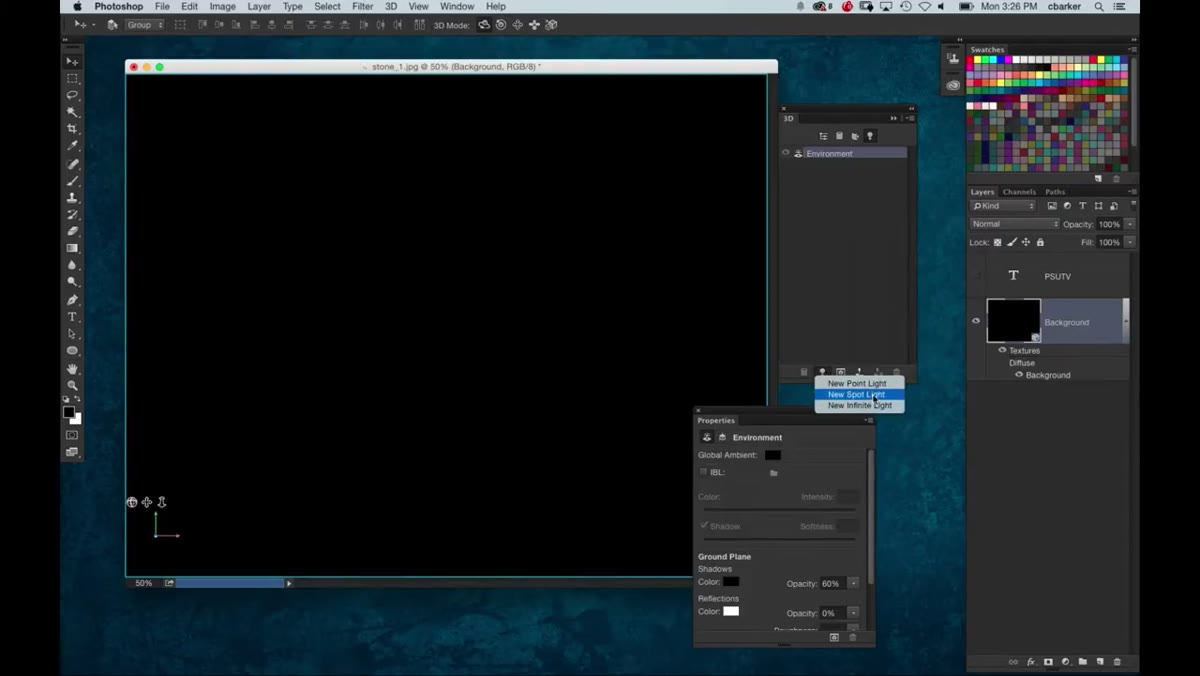 New spotlight appearing on the dark texture surface
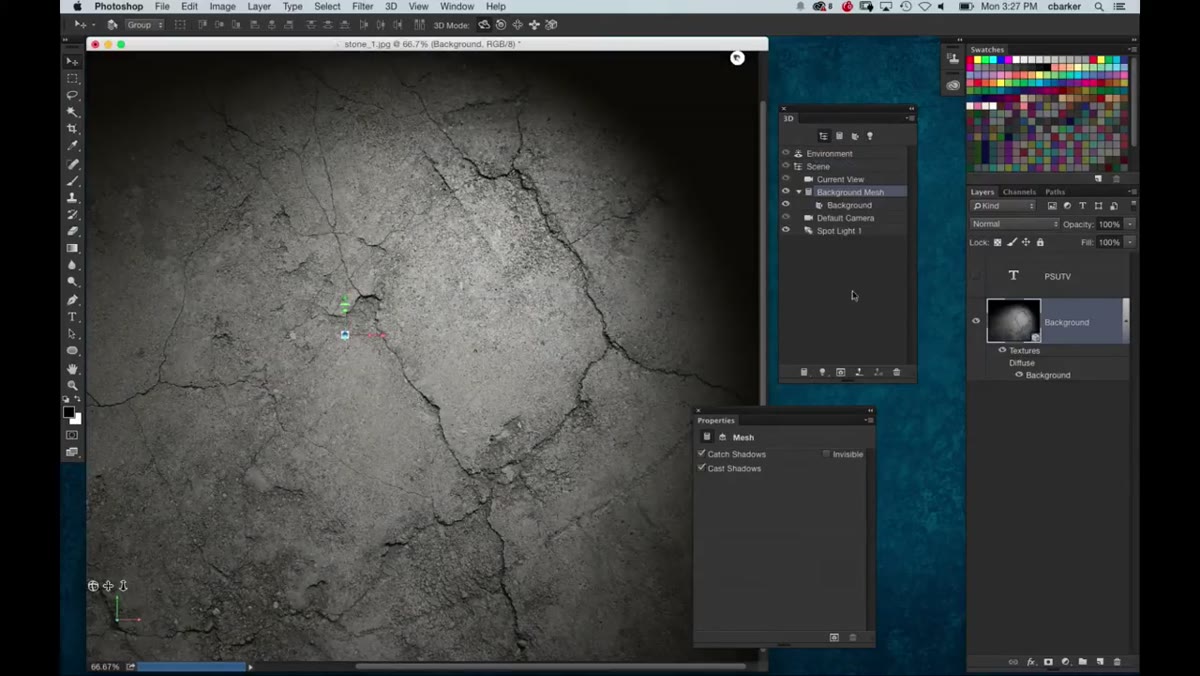
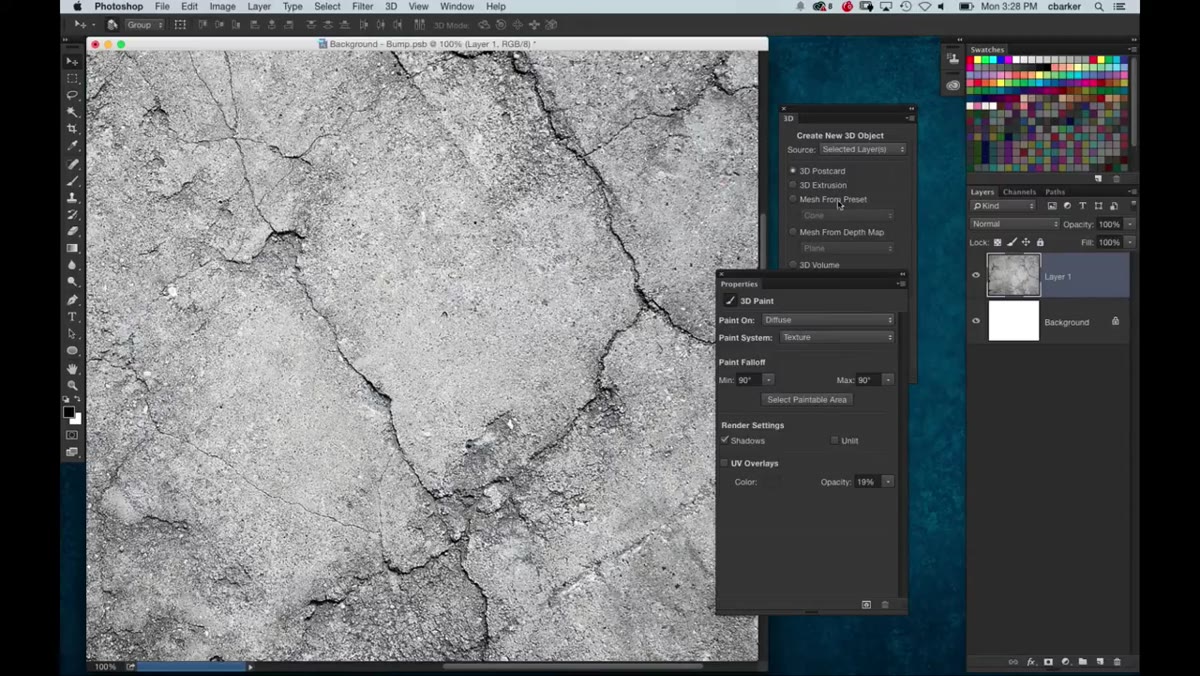
With your lights section selected in the 3D panel, use the panel menu to add a new Infinite Light or, better for this technique, a Spotlight. A spotlight gives you a cone of light you can aim and focus, which lets you create the kind of dramatic raking light that makes texture pop. Once added, you will immediately see the texture come alive with directional shadows. Drag the light handle to position the source at a low, oblique angle to the surface rather than straight on. The more shallow the angle, the more the surface texture will read as three-dimensional.
New spotlight appearing on the dark texture surface
With your lights section selected in the 3D panel, use the panel menu to add a new Infinite Light or, better for this technique, a Spotlight. A spotlight gives you a cone of light you can aim and focus, which lets you create the kind of dramatic raking light that makes texture pop. Once added, you will immediately see the texture come alive with directional shadows. Drag the light handle to position the source at a low, oblique angle to the surface rather than straight on. The more shallow the angle, the more the surface texture will read as three-dimensional.
Step 4: Apply a Bump Map Using the Texture’s Own Data
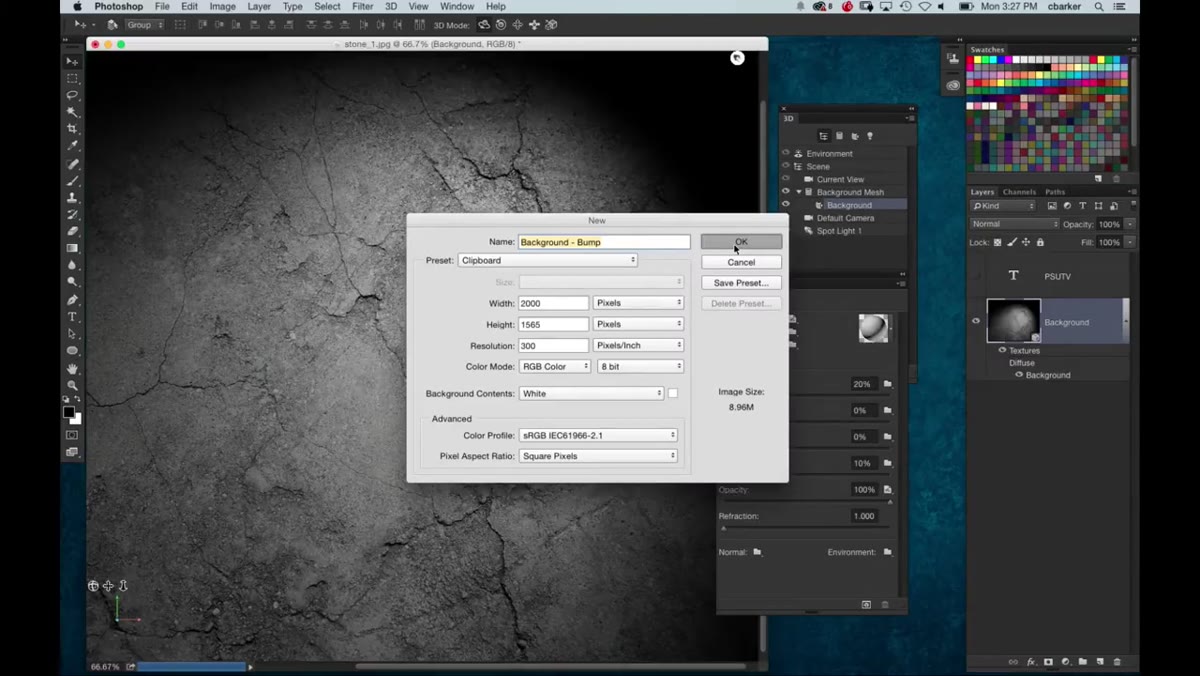
 Bump map channel being added in 3D material properties
This is where the technique gets genuinely useful for production work. Select the mesh object in your 3D panel, then open the Properties panel and navigate to the material settings. You will see a series of texture channels including Bump. Click the folder icon next to Bump and choose to load a texture. Here is the move: load the same cracked cement image you are already using as the diffuse texture. Photoshop will read the luminance values of that image and interpret them as physical height. Light areas read as raised, dark areas read as recessed. This creates the illusion of real surface depth without any actual geometry. Increase the Bump value until the cracks look like they genuinely cut into the surface.
Bump map channel being added in 3D material properties
This is where the technique gets genuinely useful for production work. Select the mesh object in your 3D panel, then open the Properties panel and navigate to the material settings. You will see a series of texture channels including Bump. Click the folder icon next to Bump and choose to load a texture. Here is the move: load the same cracked cement image you are already using as the diffuse texture. Photoshop will read the luminance values of that image and interpret them as physical height. Light areas read as raised, dark areas read as recessed. This creates the illusion of real surface depth without any actual geometry. Increase the Bump value until the cracks look like they genuinely cut into the surface.
Step 5: Adjust Spotlight Properties for the Right Drama
 Spotlight hotspot and falloff sliders being adjusted in Properties
Back in the 3D panel, select your spotlight and open Properties. You have control over intensity, hotspot angle, and cone falloff. For a gritty texture like cement, pull the hotspot tight and let the falloff soften toward the edges. This pools the light at the center of the composition and lets the edges go naturally dark, which reads as atmospheric rather than vignetted. Adjust intensity carefully. Too high and you blow out the highlight areas of the bump and lose the crack detail. Aim for a reading where the deepest recesses are close to pure black and the raised surfaces hold detail.
Spotlight hotspot and falloff sliders being adjusted in Properties
Back in the 3D panel, select your spotlight and open Properties. You have control over intensity, hotspot angle, and cone falloff. For a gritty texture like cement, pull the hotspot tight and let the falloff soften toward the edges. This pools the light at the center of the composition and lets the edges go naturally dark, which reads as atmospheric rather than vignetted. Adjust intensity carefully. Too high and you blow out the highlight areas of the bump and lose the crack detail. Aim for a reading where the deepest recesses are close to pure black and the raised surfaces hold detail.
Step 6: Reposition the Mesh in 3D Space for Compositional Control
 3D postcard being rotated and repositioned in scene view
Because this is a genuine 3D object, you can rotate and tilt the postcard within the scene without the texture distorting in the way a transformed 2D layer would. Use the 3D axis controls to tilt the surface slightly toward or away from the viewer. Even a small rotation changes how the spotlight rakes across the surface and can dramatically shift the mood. This is especially useful if you are placing this textured card behind a subject, because you can angle the surface to direct the viewer’s eye without touching the composition of any other layer.
3D postcard being rotated and repositioned in scene view
Because this is a genuine 3D object, you can rotate and tilt the postcard within the scene without the texture distorting in the way a transformed 2D layer would. Use the 3D axis controls to tilt the surface slightly toward or away from the viewer. Even a small rotation changes how the spotlight rakes across the surface and can dramatically shift the mood. This is especially useful if you are placing this textured card behind a subject, because you can angle the surface to direct the viewer’s eye without touching the composition of any other layer.
What I Do Differently After Working With This Technique
The tutorial uses a single spotlight, which is exactly the right starting point. In practice I often add a second, much weaker light positioned almost opposite the key light and set to a slightly warm or cool tone. This fills the deep shadow areas just enough to keep detail without killing the drama, which matters when the final output is print and you need shadow detail to survive the press. I also save the configured 3D scene as a separate PSD template with the lights locked in. That way, any texture I drop into the diffuse slot and duplicate into the bump slot inherits the same lighting setup instantly. Given that I built my first Photoshop action at 26 and have been systematizing repetitive work ever since, having a pre-lit 3D stage sitting on my drive ready to go is exactly the kind of thing that turns a 45-minute setup into a 4-minute swap.
One honest caveat: Photoshop’s 3D renderer is slow compared to dedicated tools. If you need to iterate quickly on complex scenes, render times will test your patience. For static texture treatments going into composites or print layouts, this workflow is excellent. For anything animated or highly iterative, you would want a different pipeline.
The core insight from this tutorial is simple and transferable: the 3D environment is not just for building objects. It is a controllable lighting studio you can point at anything. Strip the default light, bring in one directional source, give the surface a bump map that matches its own diffuse texture, and flat photography starts behaving like something that exists in space.
Watch the full tutorial on YouTube to see Paul work through this in real time, including the brush downloading workflow from CC Market that rounds out the episode.
Comments (4)
Simple but effective. Sometimes that's all you need.
Solid advice. Especially the part about taking your time with it.
Never thought of approaching it this way. Really creative.
Really solid breakdown. This pairs perfectly with the lighting work I've been writing about.
Leave a Comment