Most of my work happens in controlled environments. Studio strobe, predictable ambient, a shot list I’ve approved twice before anyone picks up a camera. But commercial clients don’t always want that look, and when they need something with energy, movement, and a real sense of place, you’re suddenly shooting outside in the middle of the day with the sun doing whatever it wants. That’s the problem this tutorial cuts straight to the heart of.
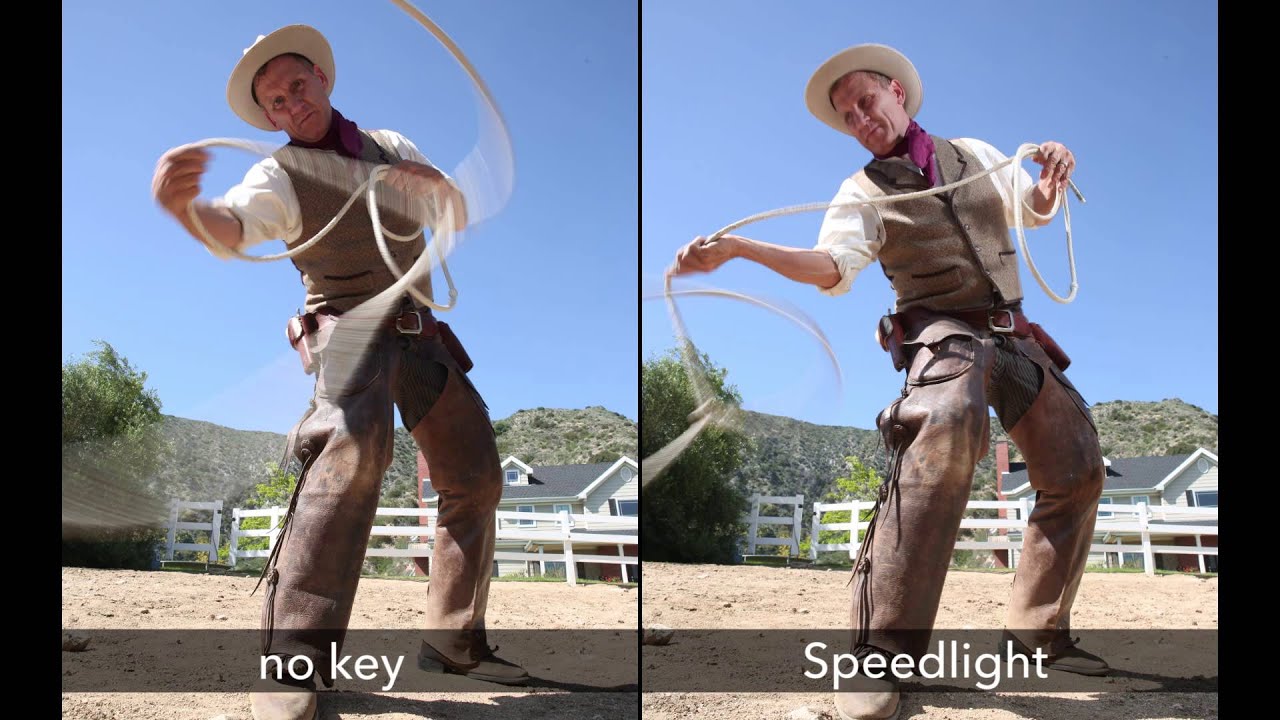
In this The Slanted Lens tutorial, photographer Jay P. Morgan shoots publicity photos for trick roper Will Roberts in direct sunlight. The goals seem contradictory at first: freeze a moving rope for some frames, intentionally blur it for others, and keep the subject’s face well-lit throughout all of it. If you’ve ever tried to manage flash sync speeds against harsh midday sun while also thinking about motion, you know this is genuinely tricky territory. Watch the full tutorial on YouTube
What makes this tutorial worth your time is that it doesn’t just show you the pretty results. It walks through the actual decision-making process, and that decision-making transfers directly to any action or movement-based shoot you’re running outside. Here’s how it breaks down.
Step 1: Turn the Sun Into a Rim Light
 Sun positioned as rim light behind the subject
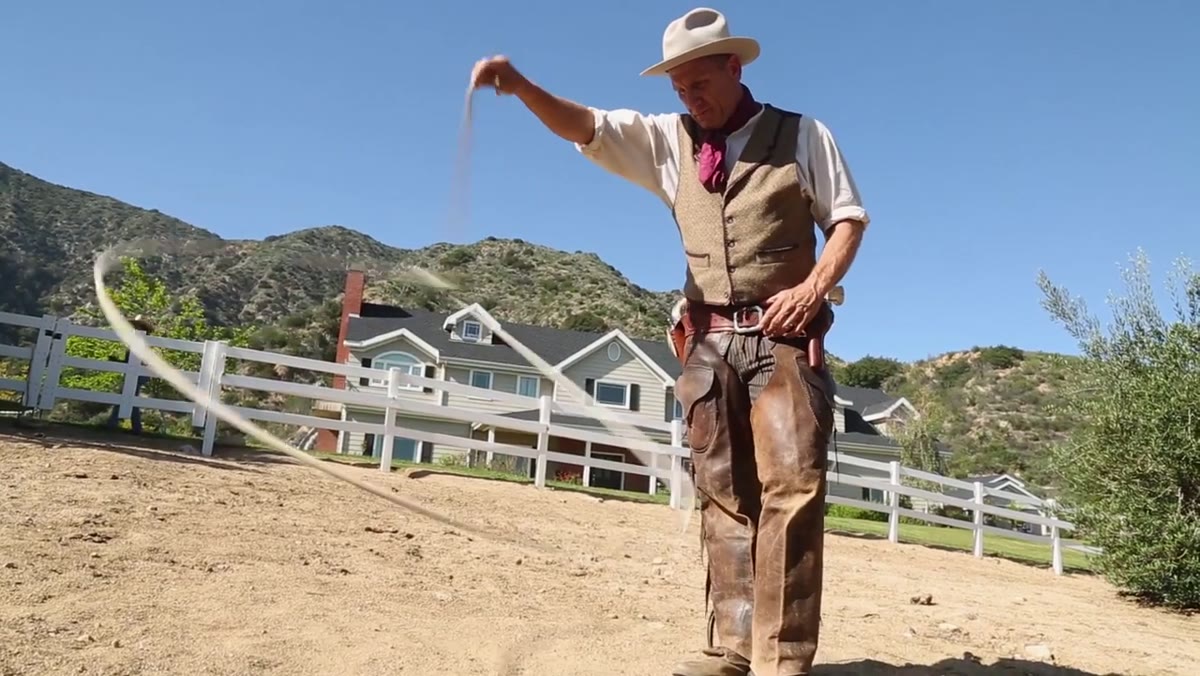
The first and most important decision in this shoot has nothing to do with flash. Rather than fighting direct sunlight from the front or scrambling for shade, Morgan positions the sun behind and slightly to camera-left of the subject. This converts a lighting problem into a lighting asset. The sun becomes a natural rim light that separates the subject from the background and adds definition to his silhouette.
Sun positioned as rim light behind the subject
The first and most important decision in this shoot has nothing to do with flash. Rather than fighting direct sunlight from the front or scrambling for shade, Morgan positions the sun behind and slightly to camera-left of the subject. This converts a lighting problem into a lighting asset. The sun becomes a natural rim light that separates the subject from the background and adds definition to his silhouette.
The secondary benefit is significant: exposing correctly for that rim light also darkens and saturates the sky behind him, pushing it toward a deep blue. You’re not just managing the sun, you’re actively using it to build a more compelling background.
Step 2: Get Low to Simplify the Background
 Camera positioned low, subject against blue sky background
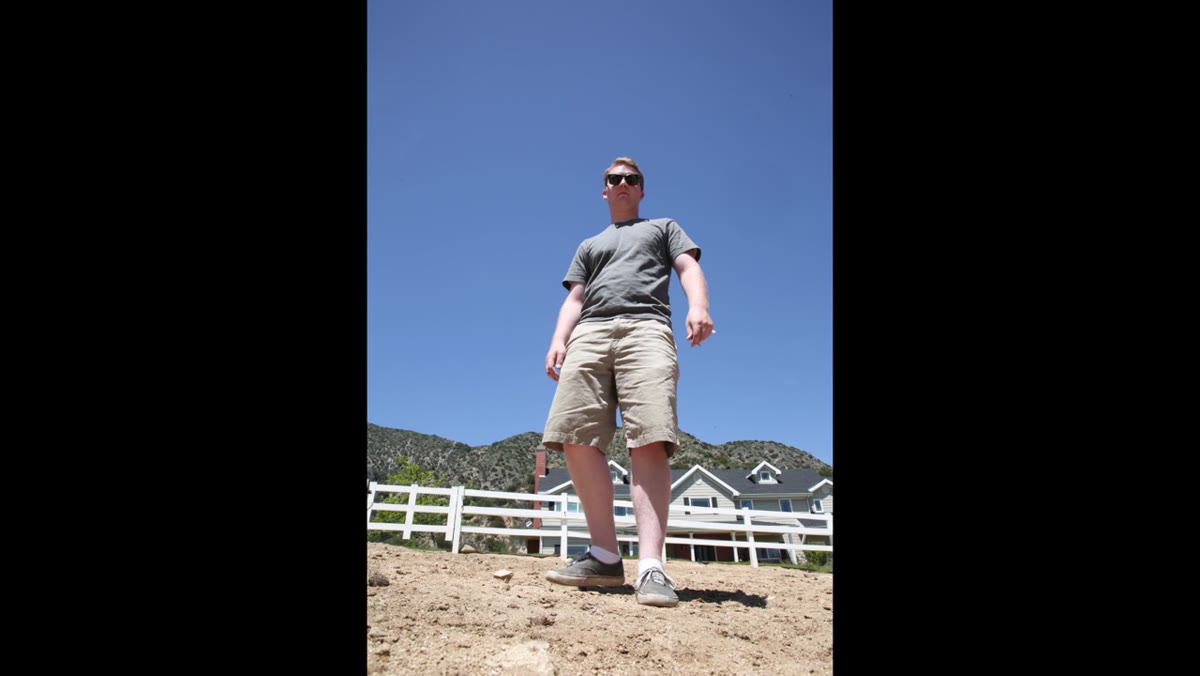
With the sun repositioned, there’s still a ranch house and fence competing for visual space in the frame. The solution isn’t to move the subject or reframe horizontally. Instead, Morgan drops the camera low so the subject is silhouetted against the sky rather than the cluttered environment behind him.
Camera positioned low, subject against blue sky background
With the sun repositioned, there’s still a ranch house and fence competing for visual space in the frame. The solution isn’t to move the subject or reframe horizontally. Instead, Morgan drops the camera low so the subject is silhouetted against the sky rather than the cluttered environment behind him.
This is a simple compositional move that pays dividends in post. A clean, consistent background means less masking, less retouching, and faster batch processing if you’re delivering a set of images. The less work the background requires, the more time you have for the images that actually need attention.
Step 3: Choose a Wide Angle for Drama
 Wide angle lens framing showing dramatic perspective
Morgan shoots on a Tamron 24-70mm lens but pulls it to 24mm for this setup. At wide angles, the sense of depth and action in a frame is amplified. For a subject who performs, that compression works against you. The wider perspective makes the rope appear to travel further, the movement feels bigger, and the overall image reads as more dynamic.
Wide angle lens framing showing dramatic perspective
Morgan shoots on a Tamron 24-70mm lens but pulls it to 24mm for this setup. At wide angles, the sense of depth and action in a frame is amplified. For a subject who performs, that compression works against you. The wider perspective makes the rope appear to travel further, the movement feels bigger, and the overall image reads as more dynamic.
If you’re shooting any kind of action or performance content, consider pulling wider than your instinct tells you. The slightly exaggerated perspective at 24mm can do more to communicate energy than any post-processing technique I’ve found.
Step 4: Use Speedlites to Unlock Higher Sync Speeds
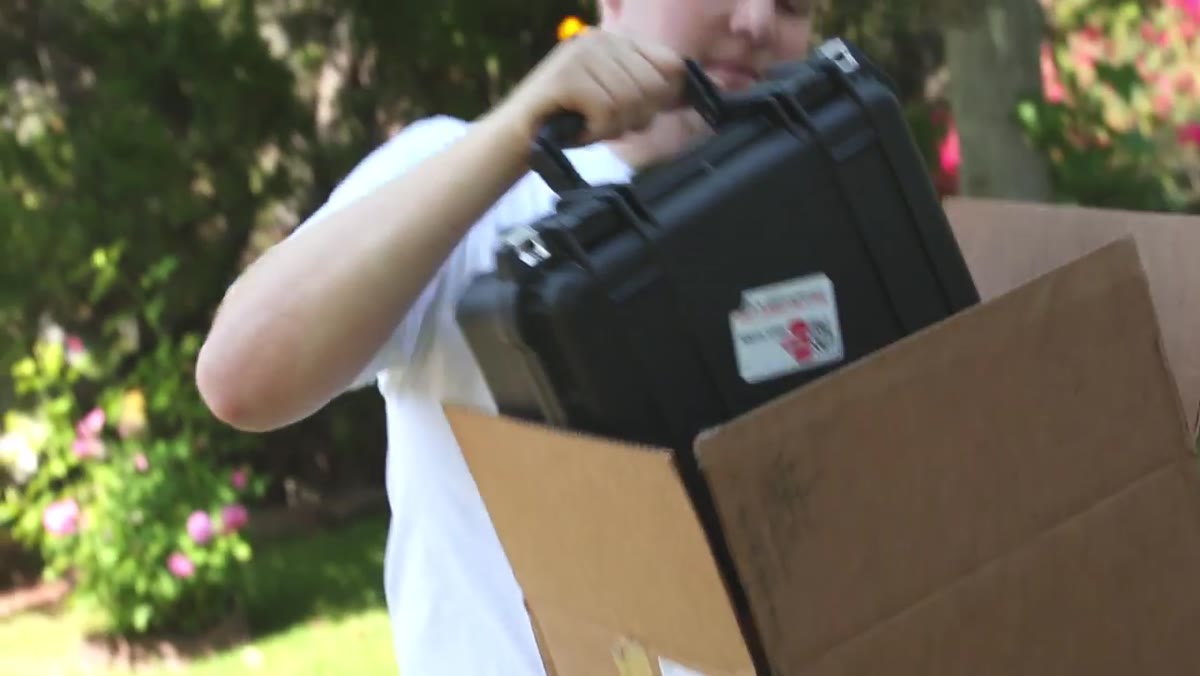 Speedlite setup with Photoflex octodome on location
This is where the technical core of the tutorial lives. Most studio strobes sync at around 1/160th or 1/200th of a second at best, and many start to show shutter curtain shadow well before that. Speedlites, by contrast, can sync reliably at 1/200th of a second, which is exactly the shutter speed needed to freeze a moving rope in daylight.
Speedlite setup with Photoflex octodome on location
This is where the technical core of the tutorial lives. Most studio strobes sync at around 1/160th or 1/200th of a second at best, and many start to show shutter curtain shadow well before that. Speedlites, by contrast, can sync reliably at 1/200th of a second, which is exactly the shutter speed needed to freeze a moving rope in daylight.
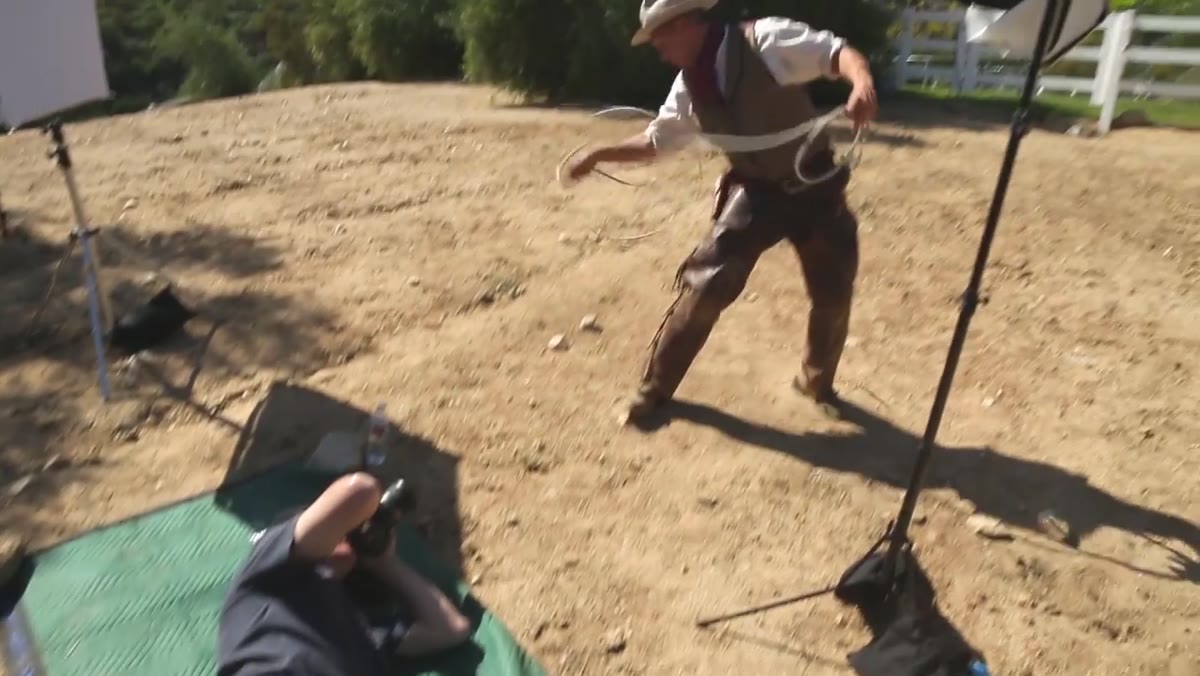
Morgan mounts two Speedlites into a Photoflex Portable Speedlite Kit, which includes octodome modifiers. The octodomes soften the light considerably, moving it away from a harsh direct flash look toward something much closer to window light. One Speedlite serves as the key light, placed in front of and slightly to the side of the subject’s face. Running the unit at 1/4 power gives the correct exposure at f/6.3 and 1/200th of a second.
Step 5: Freeze the Rope at 1/200th of a Second
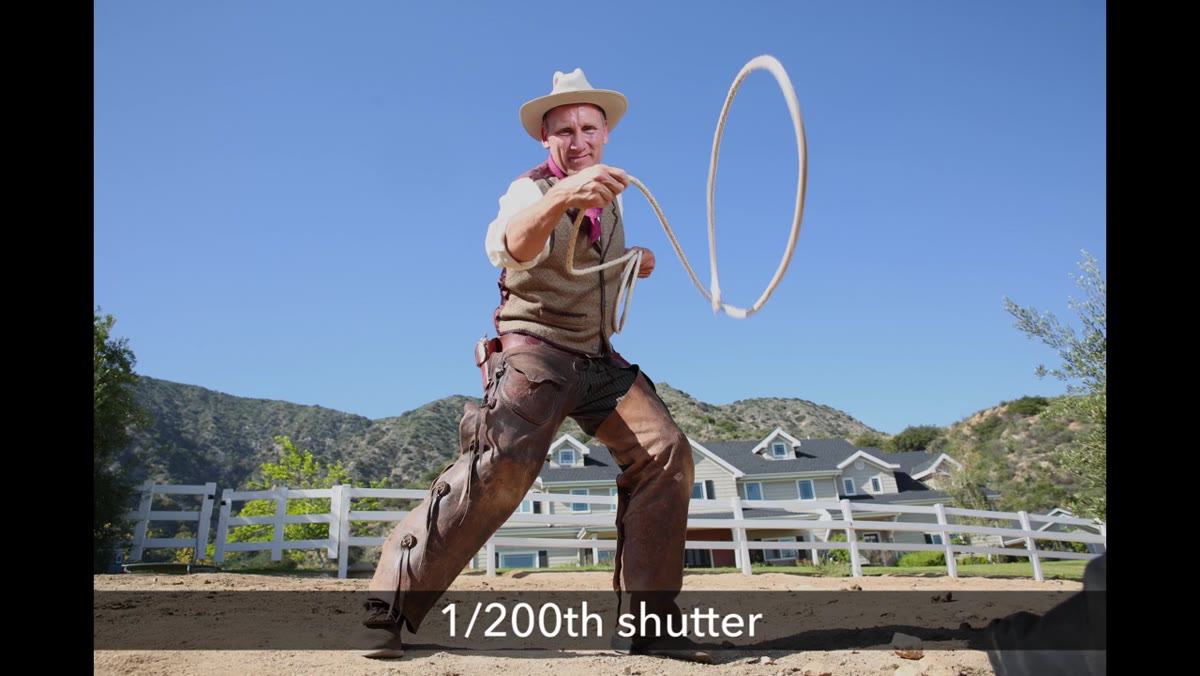
 Camera settings showing 1/200th shutter speed for frozen rope
With the key light dialed in and the sun acting as rim light, the camera settings for the frozen rope frames are 1/200th of a second, f/6.3, and whatever ISO gets you to the right exposure for the scene. At this shutter speed, a fast-moving rope stops cleanly in the frame. The Speedlite at 1/4 power provides enough output to balance with the ambient without overpowering the natural feel of the image.
Camera settings showing 1/200th shutter speed for frozen rope
With the key light dialed in and the sun acting as rim light, the camera settings for the frozen rope frames are 1/200th of a second, f/6.3, and whatever ISO gets you to the right exposure for the scene. At this shutter speed, a fast-moving rope stops cleanly in the frame. The Speedlite at 1/4 power provides enough output to balance with the ambient without overpowering the natural feel of the image.
The key insight here is that Speedlites aren’t just a convenience. They’re a technical solution to a sync speed problem that studio strobes cannot solve in the field without high-speed sync systems that add cost and complexity.
Step 6: Blur the Rope by Dropping to 1/50th of a Second
 Shutter speed adjusted to 1/50th for motion blur effect
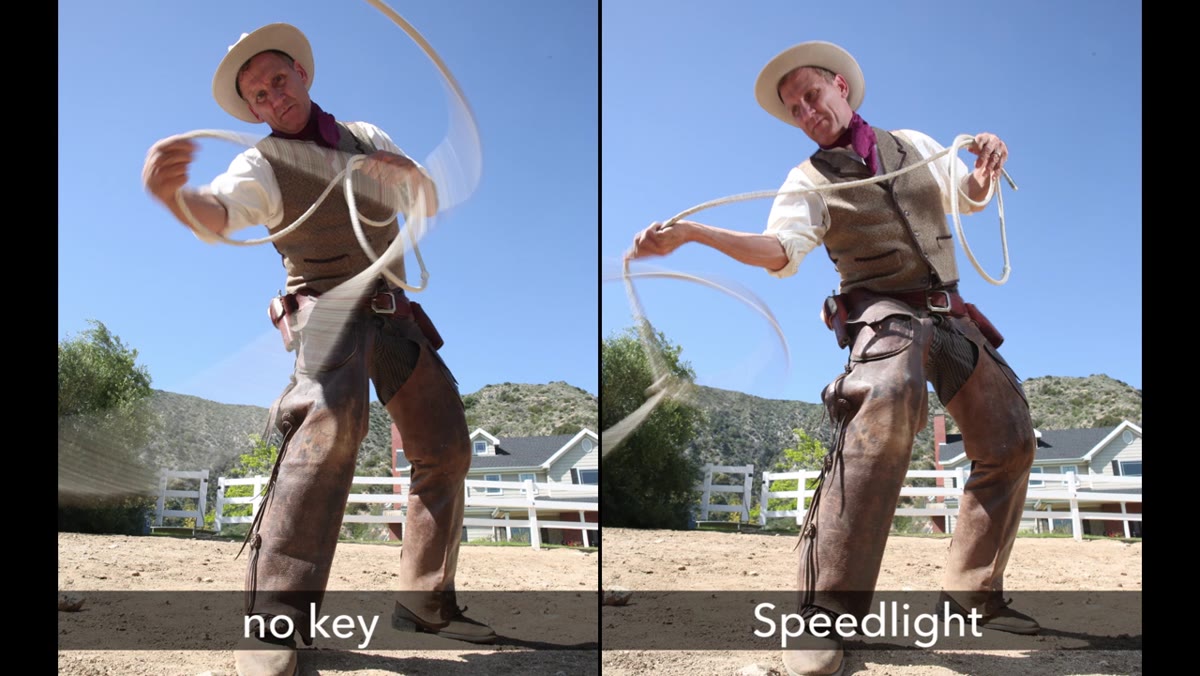
To capture the blurred rope shots, Morgan slows the shutter to 1/50th of a second and dials the Speedlite up to full power to compensate for the extra ambient light entering the longer exposure. The result is a rope that streaks through the frame, communicating movement rather than stopping it.
Shutter speed adjusted to 1/50th for motion blur effect
To capture the blurred rope shots, Morgan slows the shutter to 1/50th of a second and dials the Speedlite up to full power to compensate for the extra ambient light entering the longer exposure. The result is a rope that streaks through the frame, communicating movement rather than stopping it.
Two settings changes, two completely different images. The lighting setup doesn’t move. The subject doesn’t move. Only the shutter speed and flash power shift. That flexibility within a single setup is worth building into any location workflow where motion is part of the story.
What I’d Add From My Own Experience
The part of this tutorial that resonates with me most is the background simplification move in Step 2. Getting low to put the subject against sky rather than clutter is the kind of decision that saves significant time in post. When I’m shooting campaigns with high image counts, inconsistent or complicated backgrounds are the biggest multiplier on retouching time. Anything you can solve on set means your actions and batch processes run cleaner afterward.
I’d also suggest building out two saved camera presets for exactly the scenario Morgan demonstrates here: one locked to 1/200th with your flash power at 1/4 for freeze frames, and one at 1/50th with full power for blur frames. On a fast shoot, you don’t want to be doing mental math on flash compensation mid-action sequence. Presets let you toggle between the two looks in seconds and keep your focus on the subject.
The single most important idea here is that your equipment choices have real consequences for what’s technically possible on location. Speedlites aren’t just budget strobes. They’re a specific tool that solves a specific sync speed problem that larger studio flash units can’t address without additional hardware. Choosing the right light source before you ever leave for the shoot is what makes the difference between images that look like they fought the conditions and images that look like they owned them.
Watch the full tutorial on YouTube
Comments (2)
Never thought of approaching it this way. Really creative.
This saved me so much time on my last edit. Wish I'd found this sooner.
Leave a Comment