Every December I end up with the same backlog: family portrait clients who want calendar prints, and a print module setup that needs to be rebuilt from scratch because I never saved a proper template the previous year. It’s one of those small inefficiencies that compounds badly when you’re trying to close out a busy fourth quarter. This year I finally stopped reinventing the wheel, thanks to a free resource I came across in this Matt Kloskowski tutorial. Watch the full tutorial on YouTube
Ed Weaver, a designer Matt connected with years ago through the photography community, releases free Lightroom calendar templates each year around the holidays. What makes these genuinely useful, rather than just a novelty freebie, is the two-part approach. Ed provides both the pre-designed calendar graphics as high-resolution JPEGs and the actual Lightroom print module templates that already have everything positioned and sized for standard paper formats. You are not building a layout. You are dropping your photo into one that already works. For anyone running a small portrait or commercial operation, that distinction matters.
The workflow Matt walks through is clean and fast. Here is how to move through it yourself.
Step 1: Download the Files and Understand What You’re Working With
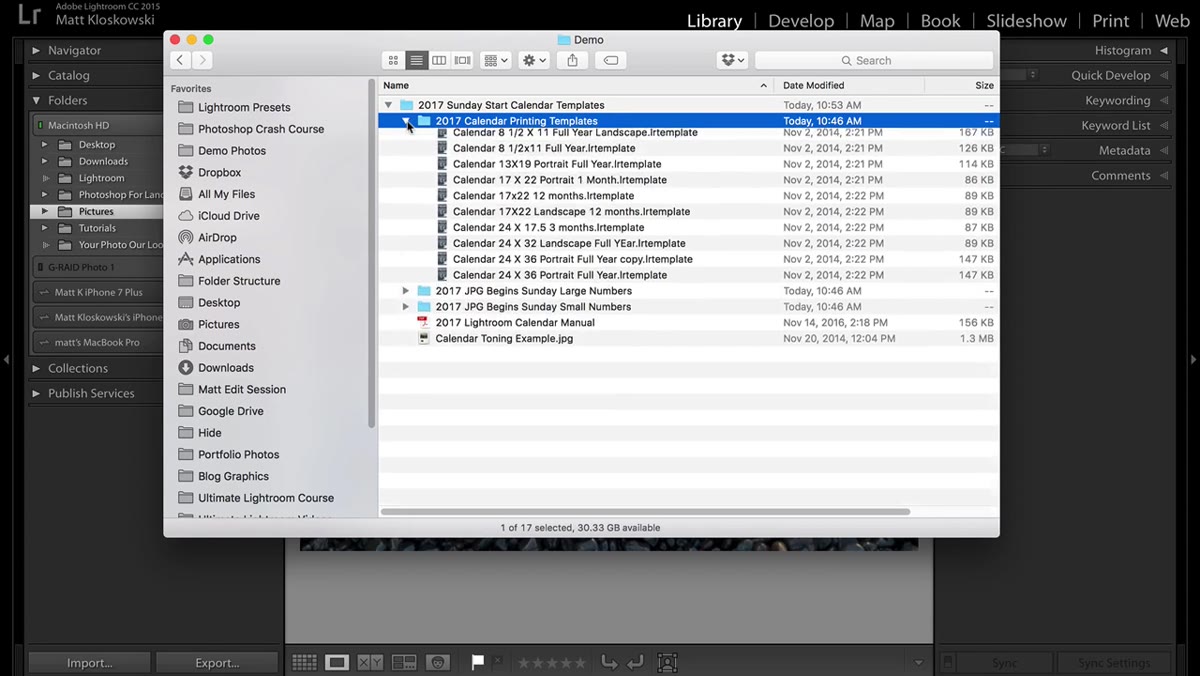
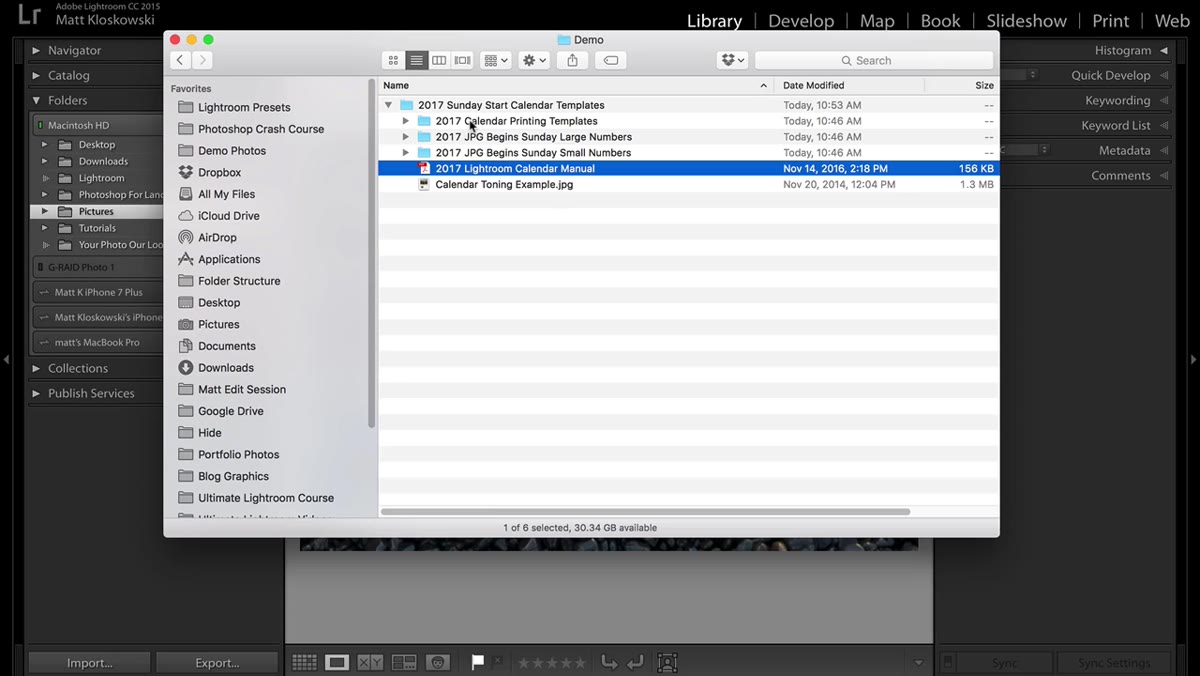
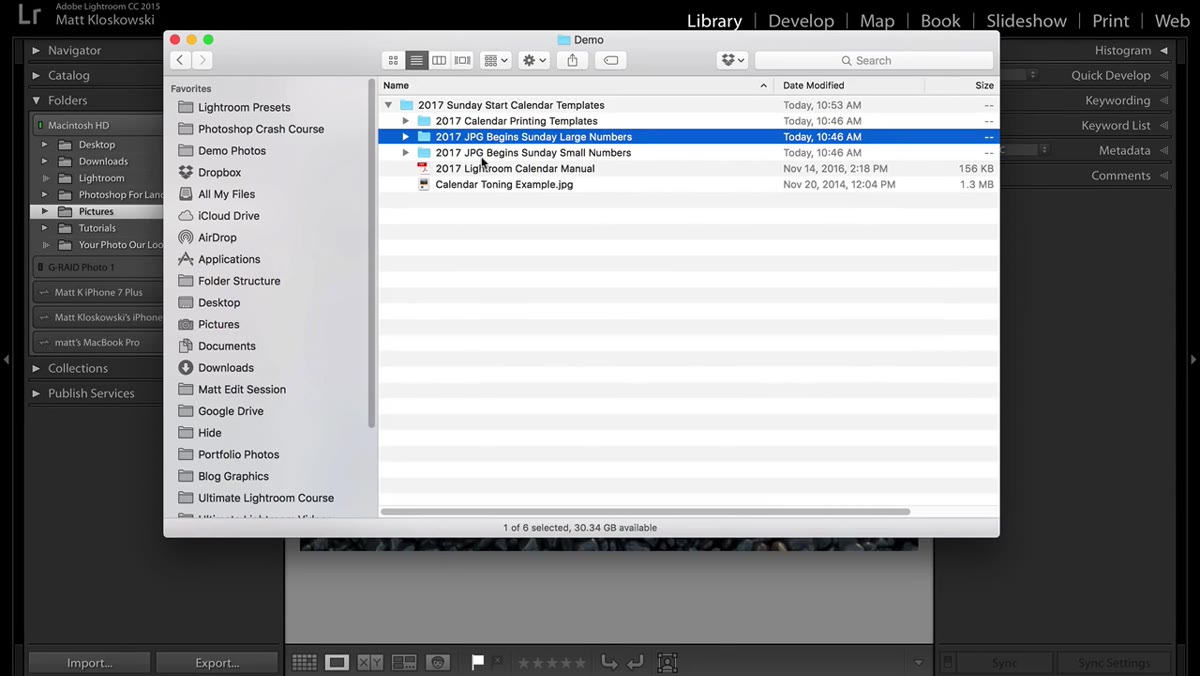 Three folders from Ed Weaver’s download shown in Finder
Before you touch Lightroom, open the downloaded and unzipped folder and orient yourself. There are two functional components inside, even if the folder structure shows three directories. The first is a set of pre-built Lightroom print templates. These are the layout files that Lightroom’s print module will reference to position your photo and calendar graphic on the page. The second component is the actual calendar graphics themselves, delivered as high-resolution JPEGs that Lightroom can import and treat like any other image in your catalog. Ed also includes a manual, which is worth a quick skim before you start.
Three folders from Ed Weaver’s download shown in Finder
Before you touch Lightroom, open the downloaded and unzipped folder and orient yourself. There are two functional components inside, even if the folder structure shows three directories. The first is a set of pre-built Lightroom print templates. These are the layout files that Lightroom’s print module will reference to position your photo and calendar graphic on the page. The second component is the actual calendar graphics themselves, delivered as high-resolution JPEGs that Lightroom can import and treat like any other image in your catalog. Ed also includes a manual, which is worth a quick skim before you start.
Knowing the separation between these two parts prevents confusion when you’re working through the install. The templates go into Lightroom one way. The calendar image files go in another way entirely.
Step 2: Import the Calendar Graphic Files into Lightroom
 Lightroom Import dialog with subfolder checkbox visible
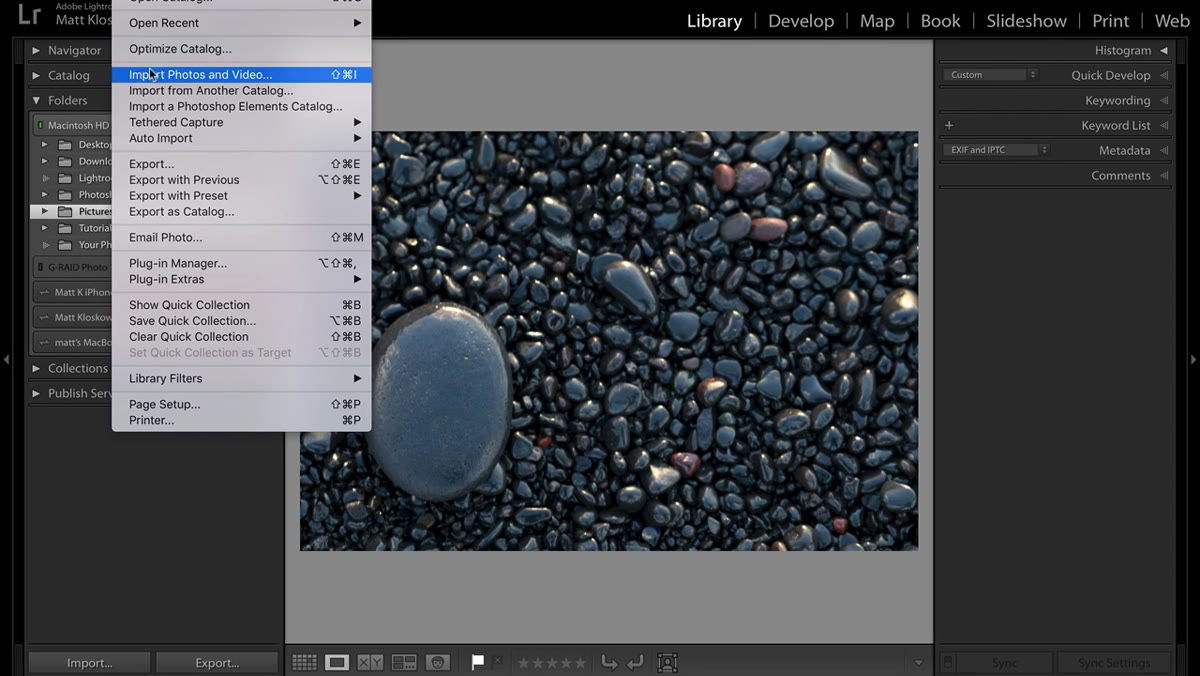
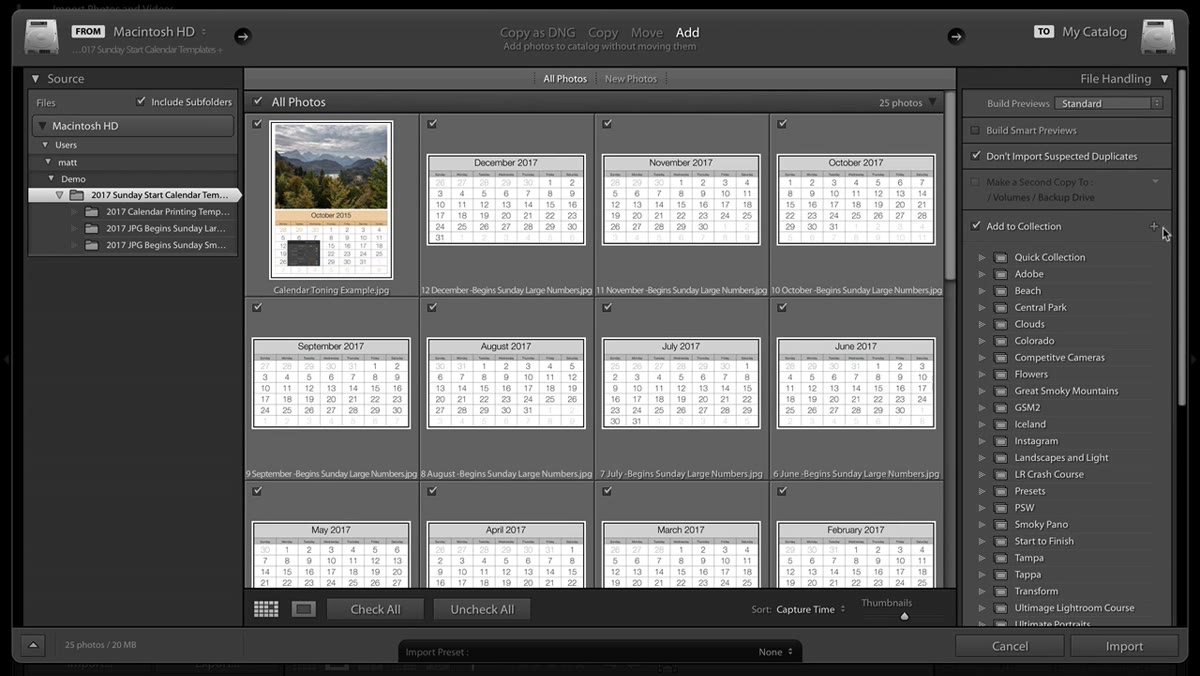
Open Lightroom and go to File, then Import. Navigate to the top-level folder of the unzipped download. You do not need to dig into subdirectories manually. Lightroom will only pull in file types it recognizes, so even if non-JPEG files exist in the folder, they will be ignored during import. The key checkbox to enable here is “Include Subfolders,” since the calendar JPEG files are organized inside subdirectories by size or variant. Without that checkbox checked, you will only pull in part of the collection.
Lightroom Import dialog with subfolder checkbox visible
Open Lightroom and go to File, then Import. Navigate to the top-level folder of the unzipped download. You do not need to dig into subdirectories manually. Lightroom will only pull in file types it recognizes, so even if non-JPEG files exist in the folder, they will be ignored during import. The key checkbox to enable here is “Include Subfolders,” since the calendar JPEG files are organized inside subdirectories by size or variant. Without that checkbox checked, you will only pull in part of the collection.
Ed provides two size variants of the calendar graphics, small numbers and large numbers, which gives you flexibility depending on your print size and layout preference. Both sets come in during the import if subfolders are included.
Step 3: Create a Dedicated Collection for the Calendar Images
 Lightroom collection creation dialog with name being typed
During import, before you click the final import button, use the “Add to Collection” option to create a new collection specifically for these calendar files. Matt names his something like “2017 Calendar Templates” and puts the year at the front so it sorts predictably in the collections panel. This step becomes especially important if you are using Lightroom CC, where your catalog can sync across devices and a loose folder of calendar images could get messy fast.
Lightroom collection creation dialog with name being typed
During import, before you click the final import button, use the “Add to Collection” option to create a new collection specifically for these calendar files. Matt names his something like “2017 Calendar Templates” and puts the year at the front so it sorts predictably in the collections panel. This step becomes especially important if you are using Lightroom CC, where your catalog can sync across devices and a loose folder of calendar images could get messy fast.
The collection approach also means you can navigate directly to these graphics from anywhere in Lightroom without hunting through your folder structure. When you are working in the print module and need to grab a specific month, having them organized in a named collection is the difference between a smooth workflow and a frustrating one. I personally label collections with color codes too, but that is probably overkill for most people.
Step 4: Install the Print Module Templates into Lightroom
 Print module template panel showing Ed Weaver template folder
The print templates are installed separately from the image import. In Lightroom, navigate to the Print module. In the Template Browser panel on the left side, right-click or use the panel menu to import templates. Point Lightroom to the folder containing Ed’s print templates. Once imported, they will appear in your Template Browser as a named group, ready to use.
Print module template panel showing Ed Weaver template folder
The print templates are installed separately from the image import. In Lightroom, navigate to the Print module. In the Template Browser panel on the left side, right-click or use the panel menu to import templates. Point Lightroom to the folder containing Ed’s print templates. Once imported, they will appear in your Template Browser as a named group, ready to use.
These templates are built for common paper sizes and include multiple layout options. If you want a single large photo with one calendar month beneath it, that layout exists. If you want a grid showing three months or a full twelve-month spread for a larger print, those are in there too. The hard layout work is already done, and it scales properly to print sizes without degrading quality because the calendar graphics were built at high resolution.
Step 5: Build Your Calendar Page in the Print Module
 Finished calendar layout example showing photo above calendar grid
With templates installed and calendar images imported, the actual assembly is drag-and-drop. Select your hero photo from your catalog, then navigate to the Print module and click the appropriate template in the Template Browser. The layout populates with placeholder cells. You drag your photo into the image cell and drag the corresponding calendar graphic JPEG into the calendar graphic cell. Lightroom handles the positioning and scaling based on the template’s built-in settings.
Finished calendar layout example showing photo above calendar grid
With templates installed and calendar images imported, the actual assembly is drag-and-drop. Select your hero photo from your catalog, then navigate to the Print module and click the appropriate template in the Template Browser. The layout populates with placeholder cells. You drag your photo into the image cell and drag the corresponding calendar graphic JPEG into the calendar graphic cell. Lightroom handles the positioning and scaling based on the template’s built-in settings.
Because Ed designed the templates to accommodate the different layout variations, you are not adjusting margins or repositioning elements manually. The only decision you make is which photo goes with which month, and whether you want the large or small number style for the calendar graphic itself.
One Workflow Extension Worth Adding
After going through this process with a handful of client calendar orders this season, I added one step that Matt does not mention in the tutorial. I create a simple virtual copy of each hero image and apply a consistent develop preset before sending anything to the print module. Calendar prints often get ordered by clients who want a slightly warmer, more finished look than the editorial-style edit I might use for web delivery. Having a saved develop preset that nudges white balance and adds a touch of clarity means every month in a twelve-page calendar reads consistently when printed, even if the original shots were captured under different lighting conditions. It takes about three minutes per project and eliminates a round of client revision requests.
The broader point is that Ed’s templates handle the structural problem, the layout geometry and sizing, and your develop workflow handles the aesthetic consistency. Keep those two concerns separate and the whole process stays fast.
The single most important thing to take away from this tutorial is the two-part mental model: calendar graphics are catalog assets, and print templates are module presets. They install differently, they live in different places inside Lightroom, and understanding that distinction means you can troubleshoot or update either component independently next year. The download is free, the setup takes under fifteen minutes, and the output looks genuinely professional. Watch the full tutorial on YouTube to see Matt walk through the complete process with the actual interface visible.
Comments
Leave a Comment