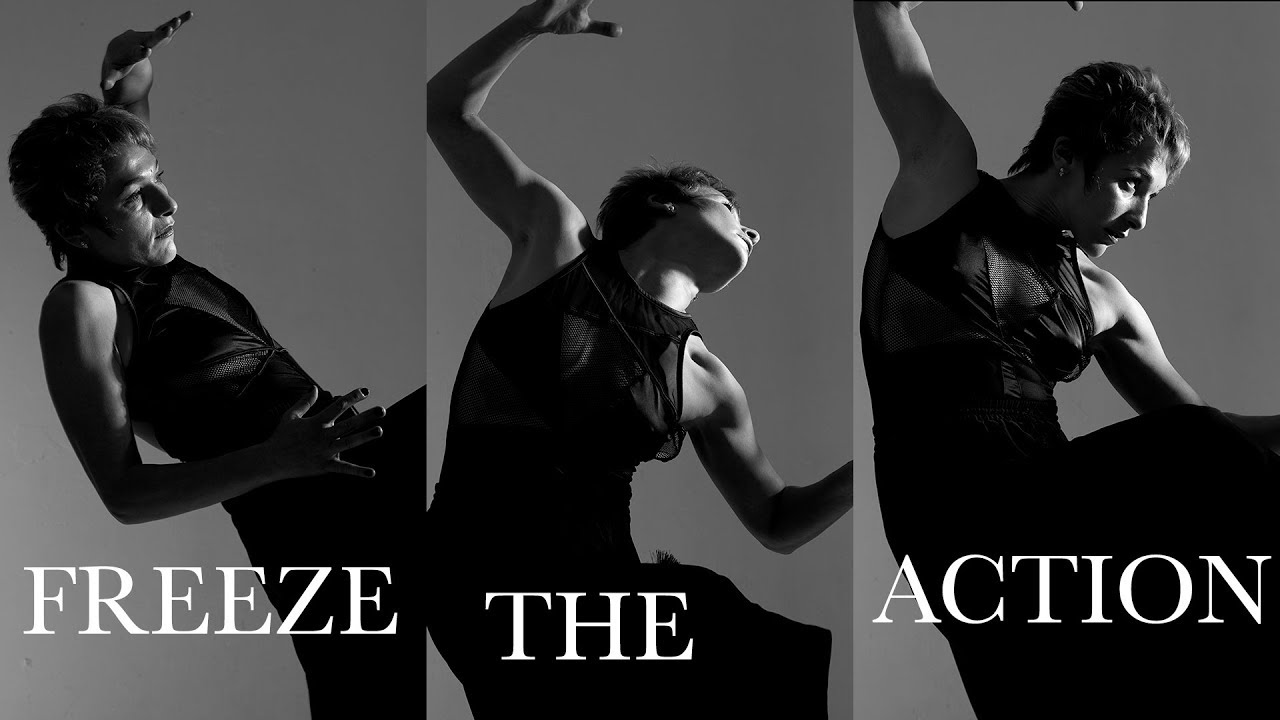
Most of the lighting problems I see photographers struggle with are not about having the wrong gear. They are about not recognizing what the light is already doing and then deciding how to control it. I spent years in commercial studios watching photographers fight the available light when they should have been augmenting it. In this Daniel Norton Photographer tutorial, Watch the full tutorial on YouTube, Daniel walks through a setup that does exactly that: he spots natural window light coming into his studio, decides it looks like sunlight, and then uses a strobe to replicate and amplify that quality at a power level that actually freezes motion. The result is a high-contrast, dramatically lit black-and-white portrait series with real shape and movement baked in.
What I find genuinely useful here is the reasoning behind each decision. Daniel is not just showing you a pretty outcome. He is explaining why flash beats ambient for this kind of work, how a simple grip tool called a cookie changes the character of hard light, and why black and white is not just an aesthetic choice but a technical one that gives you more latitude when you are pushing exposure. If you shoot in studio environments or you are doing anything with movement and drama, this workflow is worth understanding down to the settings level.
Step 1: Identify the Quality of Your Ambient Light First
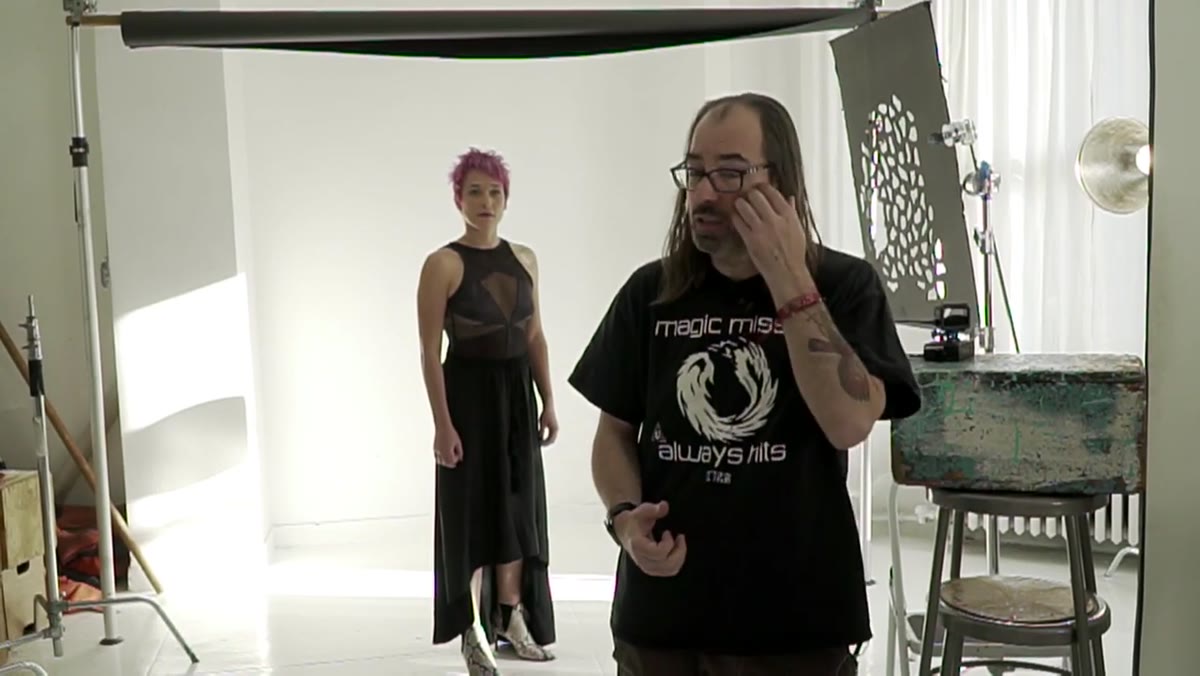
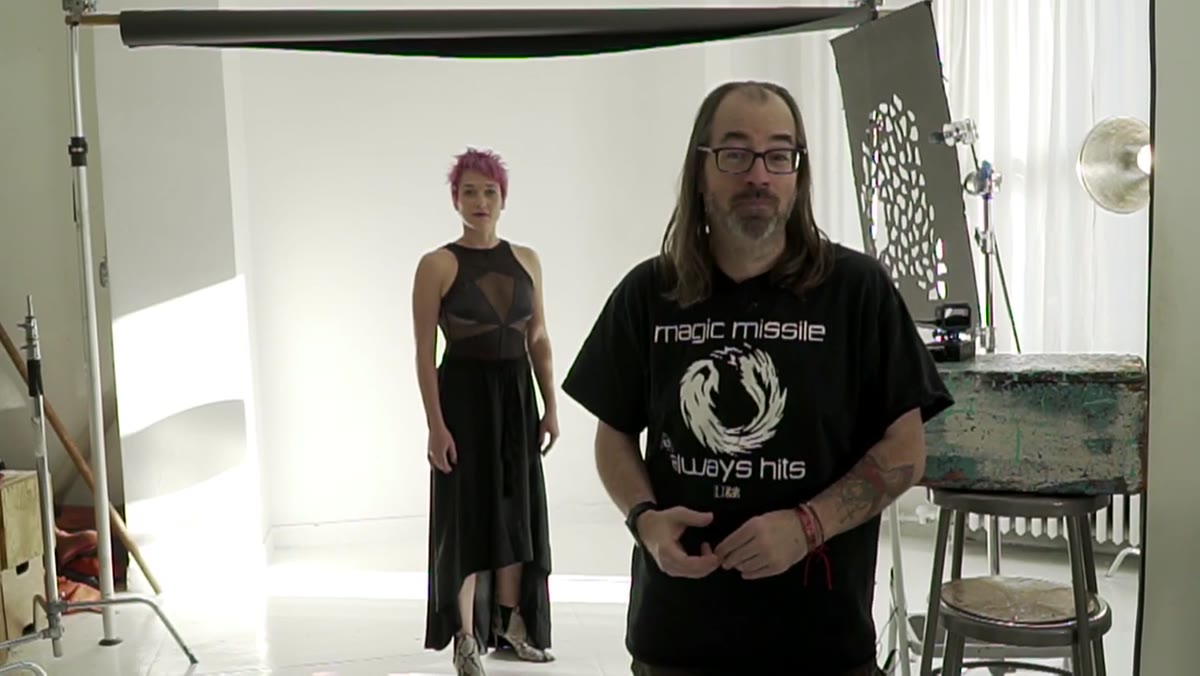 Studio window light falling across background wall
Before Daniel touches a strobe, he looks at the window. The light coming through has a hard, directional quality that reminds him of sun cutting through a frame. That observation becomes the design brief for the entire shoot. The lesson here is that your ambient light is not a problem to eliminate. It is a reference point. Look at what the natural light is doing to your subject and your background, then decide whether you want to match it, contrast it, or simply overpower it.
Studio window light falling across background wall
Before Daniel touches a strobe, he looks at the window. The light coming through has a hard, directional quality that reminds him of sun cutting through a frame. That observation becomes the design brief for the entire shoot. The lesson here is that your ambient light is not a problem to eliminate. It is a reference point. Look at what the natural light is doing to your subject and your background, then decide whether you want to match it, contrast it, or simply overpower it.
In this case, Daniel decides to overpower and replicate. The window alone does not give him enough output to freeze motion reliably without pushing his ISO in ways that would compromise the image quality he wants.
Step 2: Set Up a Profoto Magnum Reflector to Replicate Direct Sunlight
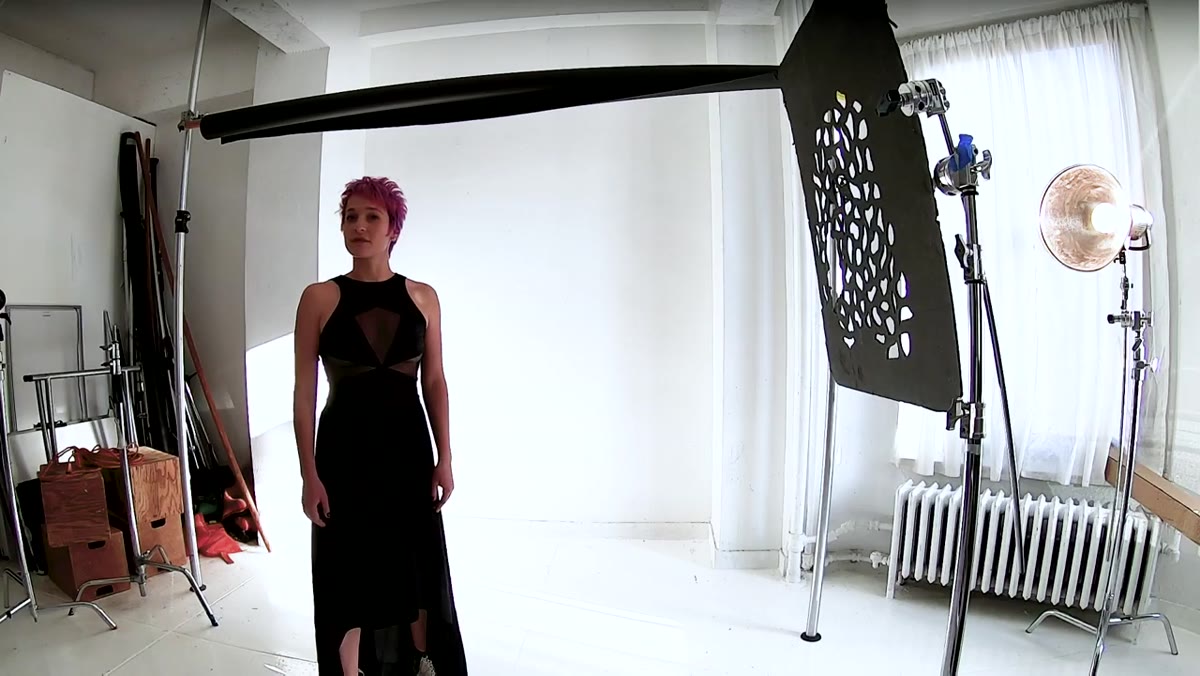
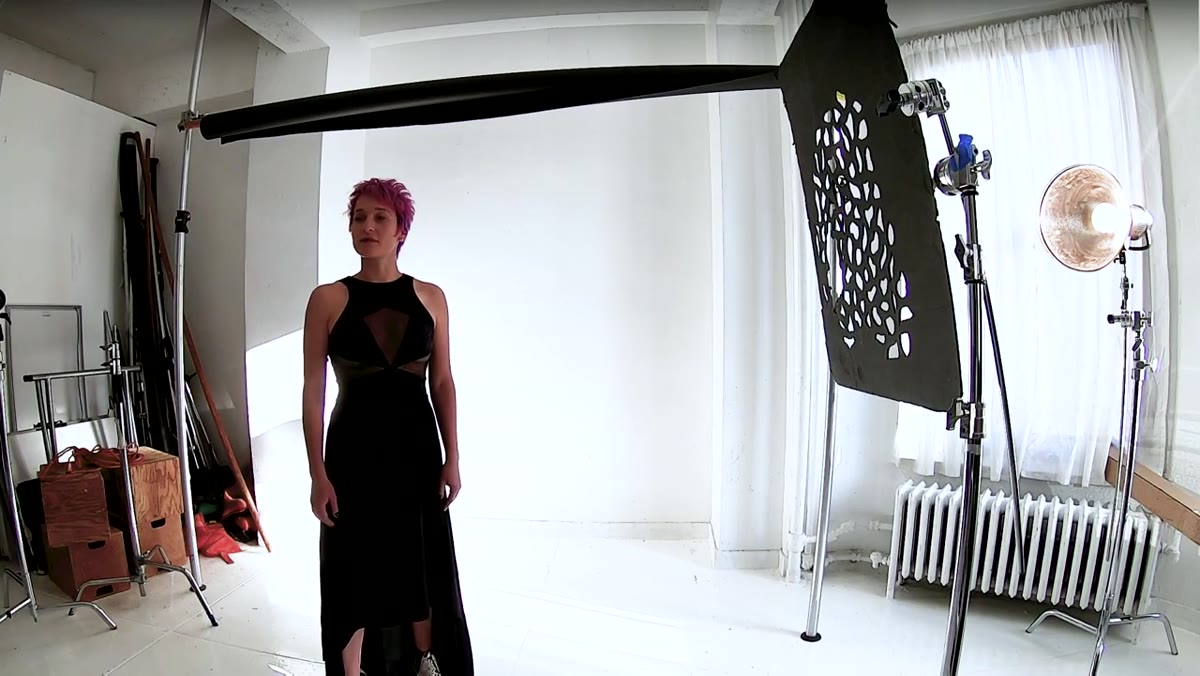 Profoto Magnum reflector mounted on strobe behind subject
The Magnum reflector is a large, deep specular reflector that throws a concentrated, hard beam of light. Daniel positions this behind and to the side of his subject, blasting it forward through the scene in a way that mimics how sunlight might cut through a window or doorway. This is not a subtle modifier. It produces hard-edged shadows and hot specular highlights, which is exactly what you want if you are going for a graphic, high-contrast look.
Profoto Magnum reflector mounted on strobe behind subject
The Magnum reflector is a large, deep specular reflector that throws a concentrated, hard beam of light. Daniel positions this behind and to the side of his subject, blasting it forward through the scene in a way that mimics how sunlight might cut through a window or doorway. This is not a subtle modifier. It produces hard-edged shadows and hot specular highlights, which is exactly what you want if you are going for a graphic, high-contrast look.
If you do not own a Magnum, a standard 7-inch silver reflector will get you close. The key is keeping the modifier small and the light source far enough back that it reads as directional and single-source. Do not soften it. The hardness is the point.
Step 3: Break Up the Light with a Cookie
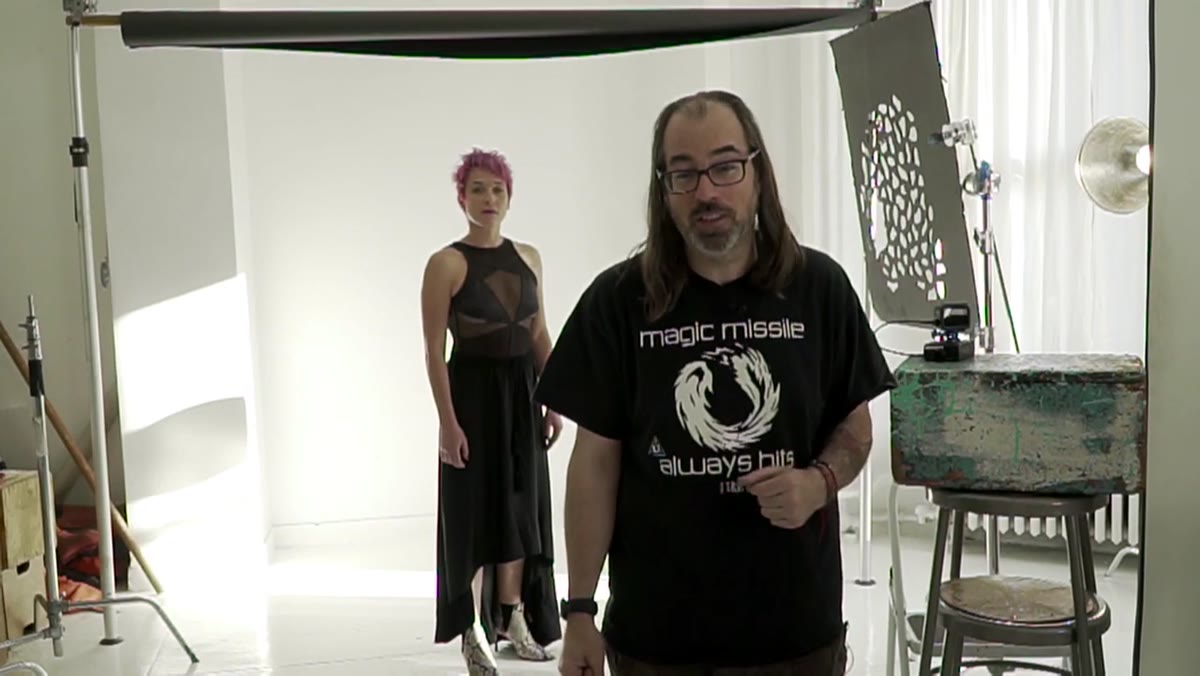 Cookie placed in front of strobe to fragment beam
A cookie is a cutout panel, usually made from wood or foamcore, with irregular shapes cut into it. Placing one in front of your light source breaks the beam into fragments, casting shadow patterns that add visual texture and make the light feel less artificial. Daniel uses it here because a single hard beam straight from the Magnum reads as clean but almost too simple. The cookie introduces the kind of randomness you actually see when light comes through leaves, blinds, or architectural elements.
Cookie placed in front of strobe to fragment beam
A cookie is a cutout panel, usually made from wood or foamcore, with irregular shapes cut into it. Placing one in front of your light source breaks the beam into fragments, casting shadow patterns that add visual texture and make the light feel less artificial. Daniel uses it here because a single hard beam straight from the Magnum reads as clean but almost too simple. The cookie introduces the kind of randomness you actually see when light comes through leaves, blinds, or architectural elements.
Position the cookie so it is close enough to the light source to cast softer-edged shadow breaks rather than sharp geometric cutouts. Feather it slightly off-axis if you want the shadow patterns to be subtle. Daniel notes that the feathering also allows some of the light to fall off toward the background, pushing it slightly gray instead of blown out.
Step 4: Dial In Exposure to Black Out the Ambient
 Camera settings discussion, f/8 at 1/250s
Daniel shoots at f/8 and 1/250 of a second. At that combination, with his studio’s ambient light, the frame is essentially black when the strobe is off. That is the target. You want your shutter speed and aperture set so that the only thing exposing your sensor is the flash. This is what gives you motion-freezing capability: the flash duration, which on most monolights and pack systems is somewhere between 1/1000 and 1/10000 of a second, becomes your effective shutter speed.
Camera settings discussion, f/8 at 1/250s
Daniel shoots at f/8 and 1/250 of a second. At that combination, with his studio’s ambient light, the frame is essentially black when the strobe is off. That is the target. You want your shutter speed and aperture set so that the only thing exposing your sensor is the flash. This is what gives you motion-freezing capability: the flash duration, which on most monolights and pack systems is somewhere between 1/1000 and 1/10000 of a second, becomes your effective shutter speed.
Test this before your subject walks in. Fire a frame with the strobe off. If you see detail in that frame, close down your aperture or bump your shutter speed until the frame goes black. Then turn the strobe on and adjust its power until you hit your target exposure. Do not compromise on the dark ambient frame. That is your foundation.
Step 5: Shoot for Shape and Form, Not Perfection
 Review of motion frames on camera, variety of poses
Daniel and his subject work through multiple takes where she moves, stops, and he fires at the peak of her action. He is not chasing a technically perfect beauty shot. He is chasing shape, silhouette, and the way hard light carves different parts of the body depending on where the subject stops. Some frames lose detail in the highlights. Some parts of the frame go fully black. He explicitly says he is not worried about that because the style of the shot accounts for it.
Review of motion frames on camera, variety of poses
Daniel and his subject work through multiple takes where she moves, stops, and he fires at the peak of her action. He is not chasing a technically perfect beauty shot. He is chasing shape, silhouette, and the way hard light carves different parts of the body depending on where the subject stops. Some frames lose detail in the highlights. Some parts of the frame go fully black. He explicitly says he is not worried about that because the style of the shot accounts for it.
This is an important mental shift. When you are working in a graphic, high-contrast mode, especially with a black-and-white conversion, you give yourself permission to let highlights clip and shadows block up. The exposure latitude you have in black and white, and especially in a RAW file processed with a B&W profile, is more forgiving than you might expect.
Step 6: Apply a Black-and-White Profile in Capture One at Capture Time
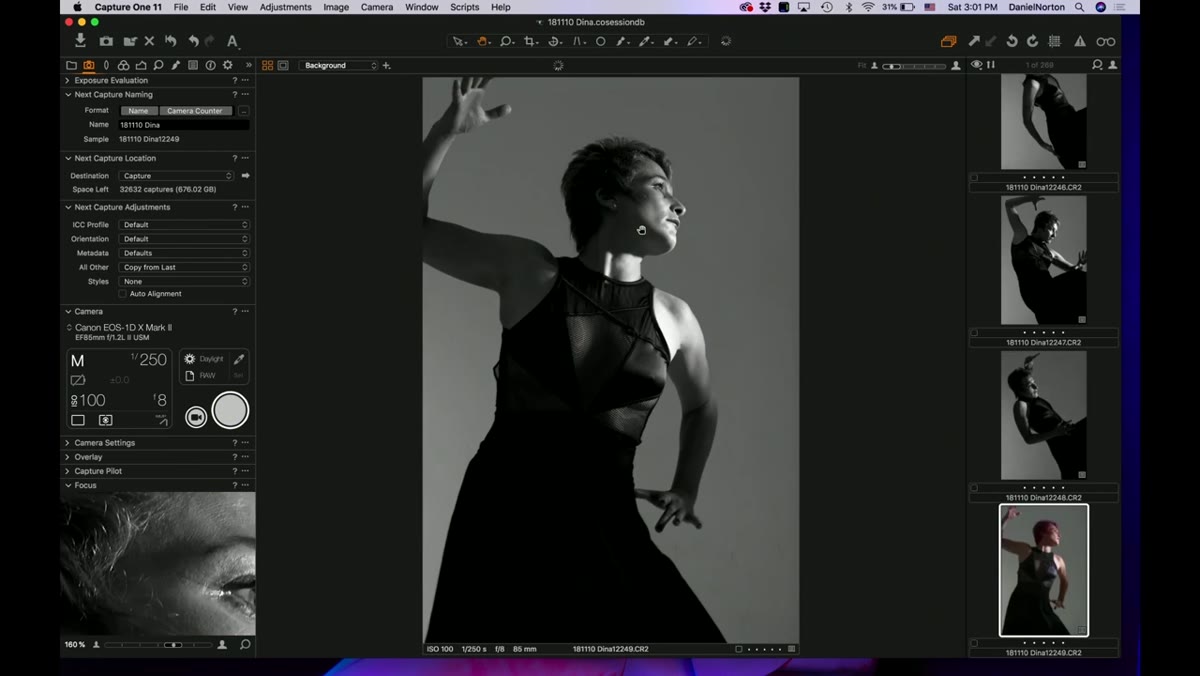
 Capture One interface with black and white profile active
Daniel applies a black-and-white profile directly in Capture One while tethering, so he is reviewing the images in B&W as he shoots. This is not just aesthetic preference. Seeing in monochrome while you work helps you evaluate the light in terms of luminosity and contrast rather than getting distracted by color accuracy. Skin tones, dress color, background hue - none of that matters when you are designing around shadow and highlight.
Capture One interface with black and white profile active
Daniel applies a black-and-white profile directly in Capture One while tethering, so he is reviewing the images in B&W as he shoots. This is not just aesthetic preference. Seeing in monochrome while you work helps you evaluate the light in terms of luminosity and contrast rather than getting distracted by color accuracy. Skin tones, dress color, background hue - none of that matters when you are designing around shadow and highlight.
If you are shooting tethered, set your preview profile before you start. If you are shooting to card, apply a B&W simulation in your camera’s picture profile or just train yourself to squint at the LCD and mentally strip the color. The habit of evaluating light in terms of tonal value rather than color will improve your lighting decisions across every genre you shoot.
What I Would Add: Build This Into a Batch Processing Action
The shooting workflow Daniel demonstrates is tight, but the post-production side of this style is also very repeatable. Once you land on a black-and-white conversion with the contrast curve, the grain structure, and the highlight roll-off you want, save it as a preset or an action. I have a Photoshop action that handles the tonal curve, a dodge pass on the specular highlights, and a vignette burn, all in about four seconds. For a session like this where you are pulling selects from 40 or 50 motion frames, that kind of batch processing infrastructure matters. The creative work is in the lighting and the directing. The processing should get out of the way.
The single most important idea in this tutorial is that flash duration, not shutter speed, freezes motion. Once that clicks, your whole approach to shooting moving subjects in the studio changes. You stop worrying about whether 1/250 is fast enough and start thinking about flash duration specs and power levels instead.
Watch the full tutorial on YouTube to see Daniel work through the live session, including how he coaches the subject through the motion and evaluates frames in real time.
Comments (4)
Never thought of approaching it this way. Really creative.
I tried this on a client project yesterday and the results were way better than expected.
This is going in my reference folder. Incredibly useful.
Well explained. I think my audience would really benefit from this — mind if I link to it?
Leave a Comment