Stock photo hunting has always been one of those invisible time thieves in my workflow. You’re deep in a comp, you need a hero image, and suddenly you’ve got six browser tabs open, three watermarked downloads cluttering your desktop, and you’ve completely lost your train of thought on the actual design work. Over the years I’ve built systems to compress almost every repetitive task in Photoshop down to keystrokes and actions, but the stock image sourcing step always seemed immune to optimization. You either had the image or you were leaving the application to find it.
That changed when I came across this CreativeLive tutorial with Lesa Snider, part of her Adobe Photoshop CS6 Intensive series. Watch the full tutorial on YouTube. She walks through the iStock Adobe plugin, a free tool that embeds the iStock search and comp workflow directly inside Photoshop and InDesign. The concept sounds simple, but for anyone doing client comps where image selection is still fluid, this changes the shape of a working session considerably.
Here’s how the whole thing works, step by step.
Step 1: Download and Install the Free Plugin
 The iStock plugin downloads page showing the Adobe plugin option
The plugin is free. In the tutorial Lesa points to a direct URL that routes to iStock’s downloads page, where the plugin is listed as the iStock Adobe Plugin. It’s compatible with CS5 and CS6, and while she hadn’t tested CS4, she notes it would likely work there too. Download it, run the installer, then fully quit Photoshop and relaunch it. This isn’t optional. Photoshop needs a clean restart to register new extensions, and skipping that step will leave you hunting through menus for a panel that isn’t there yet.
The iStock plugin downloads page showing the Adobe plugin option
The plugin is free. In the tutorial Lesa points to a direct URL that routes to iStock’s downloads page, where the plugin is listed as the iStock Adobe Plugin. It’s compatible with CS5 and CS6, and while she hadn’t tested CS4, she notes it would likely work there too. Download it, run the installer, then fully quit Photoshop and relaunch it. This isn’t optional. Photoshop needs a clean restart to register new extensions, and skipping that step will leave you hunting through menus for a panel that isn’t there yet.
Step 2: Open the iStock Panel from the Extensions Menu
 Window menu open with Extensions submenu showing iStock Photo
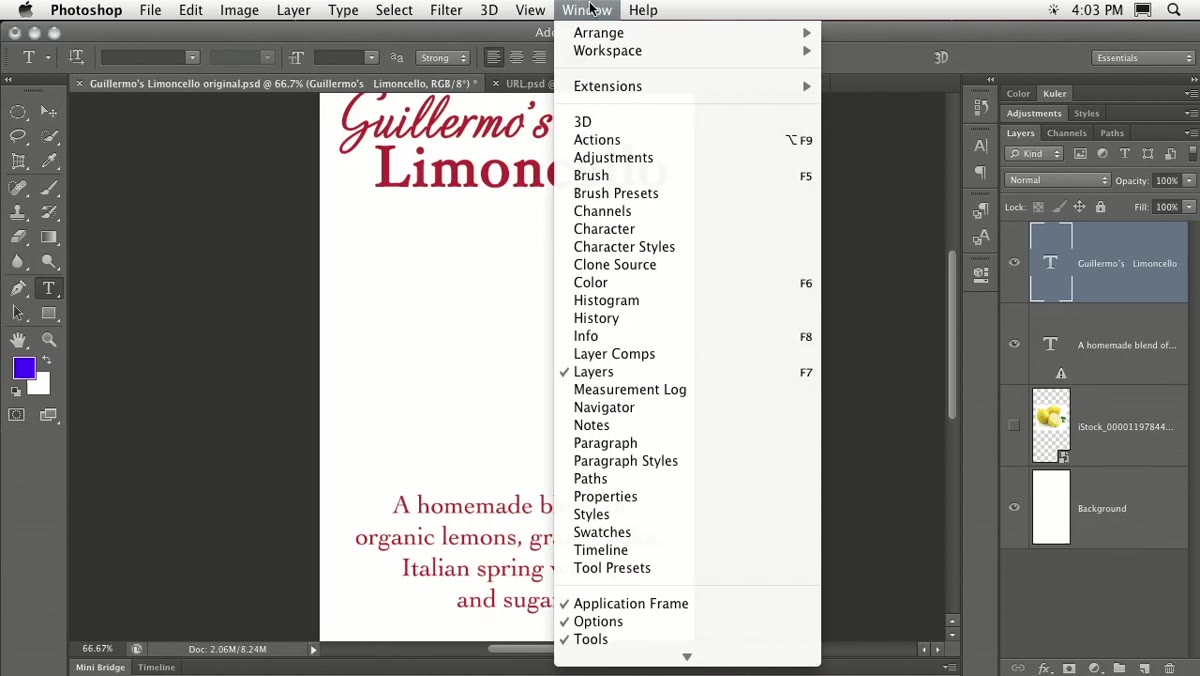
Once Photoshop is back up, navigate to Window, then Extensions, then iStock Photo. This opens a compact panel that sits inside your workspace like any other panel. You can dock it, float it, or tuck it into a panel group depending on how you like to work. I’d suggest keeping it accessible during any session where your image selection isn’t locked yet. It takes up a small footprint and having it visible means you won’t interrupt your flow to go hunting for it later.
Window menu open with Extensions submenu showing iStock Photo
Once Photoshop is back up, navigate to Window, then Extensions, then iStock Photo. This opens a compact panel that sits inside your workspace like any other panel. You can dock it, float it, or tuck it into a panel group depending on how you like to work. I’d suggest keeping it accessible during any session where your image selection isn’t locked yet. It takes up a small footprint and having it visible means you won’t interrupt your flow to go hunting for it later.
Step 3: Sign In to Your iStock Account
 iStock panel showing the sign-in interface inside Photoshop
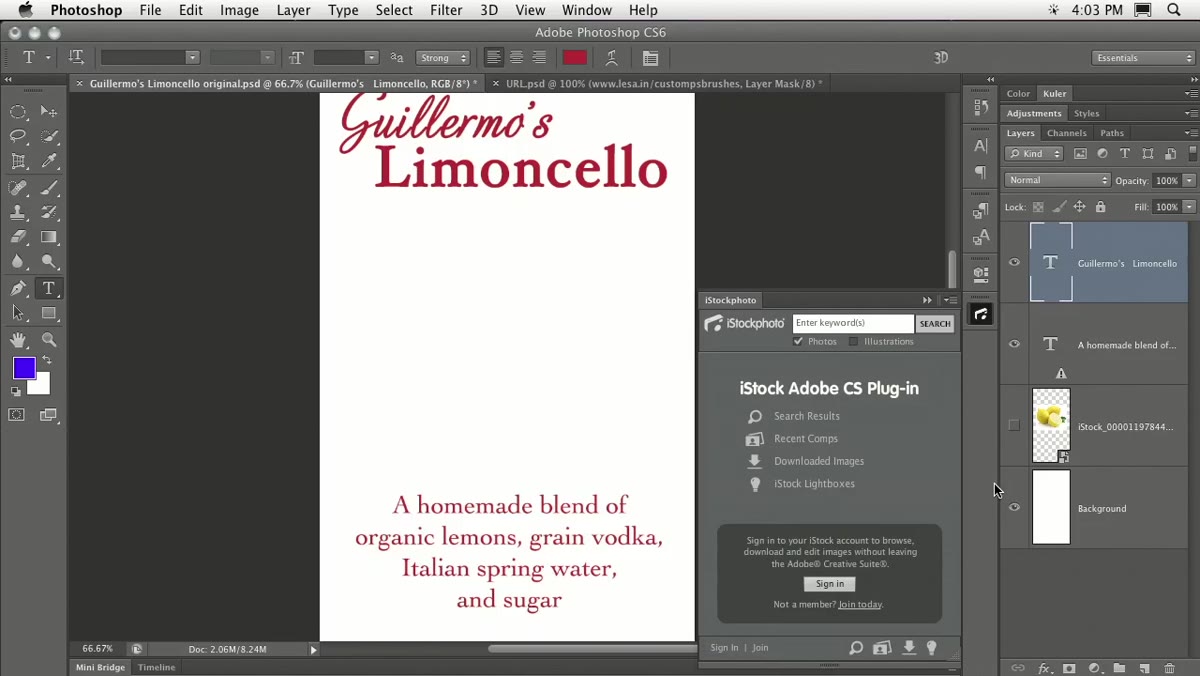
The panel prompts you to sign in before you can do anything useful. You need an existing iStock account, so if you don’t have one, set that up on their website first. Once logged in, the panel displays a message indicating how many comps you’ve recently downloaded. On a fresh login that number will be zero, but as you work through a project it becomes a useful reference for images you’ve already been testing. Think of it as a lightweight mood board history inside the tool itself.
iStock panel showing the sign-in interface inside Photoshop
The panel prompts you to sign in before you can do anything useful. You need an existing iStock account, so if you don’t have one, set that up on their website first. Once logged in, the panel displays a message indicating how many comps you’ve recently downloaded. On a fresh login that number will be zero, but as you work through a project it becomes a useful reference for images you’ve already been testing. Think of it as a lightweight mood board history inside the tool itself.
Step 4: Search the Image Database with Descriptive Keywords
 Search field showing “lemons on white background” typed in the plugin
With the Photos toggle enabled in the panel, type your search terms into the search field and hit the search button. The plugin queries the iStock database and returns results directly inside the panel. The more specific your keywords, the more useful the results. Lesa demonstrates this by searching for “lemons on white background” rather than just “lemons,” and the distinction matters. If you know the creative constraints already, bake them into the search rather than scrolling through hundreds of results that don’t fit. Scroll down through the results to browse, and if you reach the bottom, there’s a “load more” option that pulls in the next batch. Connection speed affects how quickly that loads.
Search field showing “lemons on white background” typed in the plugin
With the Photos toggle enabled in the panel, type your search terms into the search field and hit the search button. The plugin queries the iStock database and returns results directly inside the panel. The more specific your keywords, the more useful the results. Lesa demonstrates this by searching for “lemons on white background” rather than just “lemons,” and the distinction matters. If you know the creative constraints already, bake them into the search rather than scrolling through hundreds of results that don’t fit. Scroll down through the results to browse, and if you reach the bottom, there’s a “load more” option that pulls in the next batch. Connection speed affects how quickly that loads.
Step 5: Insert a Comp Layer to Test the Image in Your Design
 A low-resolution comp image appearing as a new layer in the Layers panel
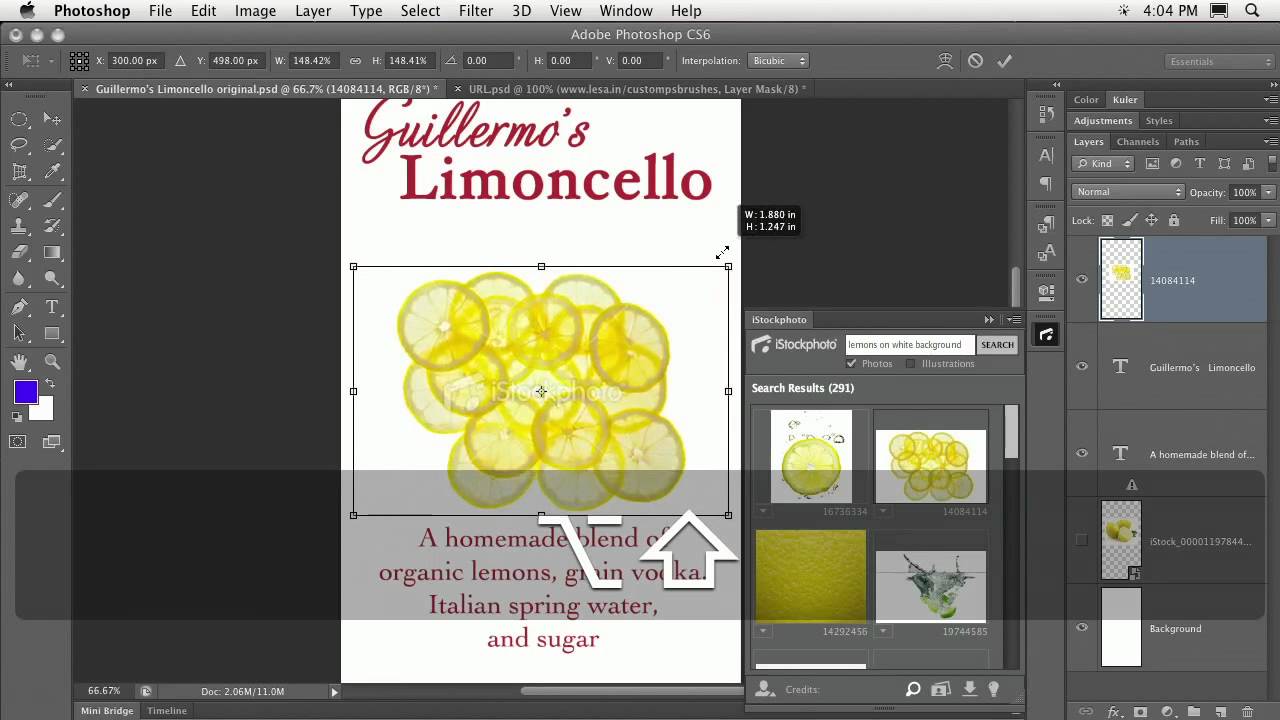
Click any thumbnail in the results and choose “Insert Comp” from the menu that appears. The plugin drops a low-resolution version of the image directly into your Photoshop document as a new layer. That layer is labeled with the image’s ID number, which makes it straightforward to track down later when you’re ready to license it. The comp is small and deliberately low quality. It isn’t meant for final output. It’s meant to let you make a layout decision without spending money on an image that might not work.
A low-resolution comp image appearing as a new layer in the Layers panel
Click any thumbnail in the results and choose “Insert Comp” from the menu that appears. The plugin drops a low-resolution version of the image directly into your Photoshop document as a new layer. That layer is labeled with the image’s ID number, which makes it straightforward to track down later when you’re ready to license it. The comp is small and deliberately low quality. It isn’t meant for final output. It’s meant to let you make a layout decision without spending money on an image that might not work.
Once the comp is in your layers panel, use Free Transform (Command+T on Mac, Ctrl+T on Windows) to scale and position it within your design. You get an honest read on whether the composition, color palette, and subject matter are working before any money changes hands.
Step 6: Test Multiple Comps Side by Side
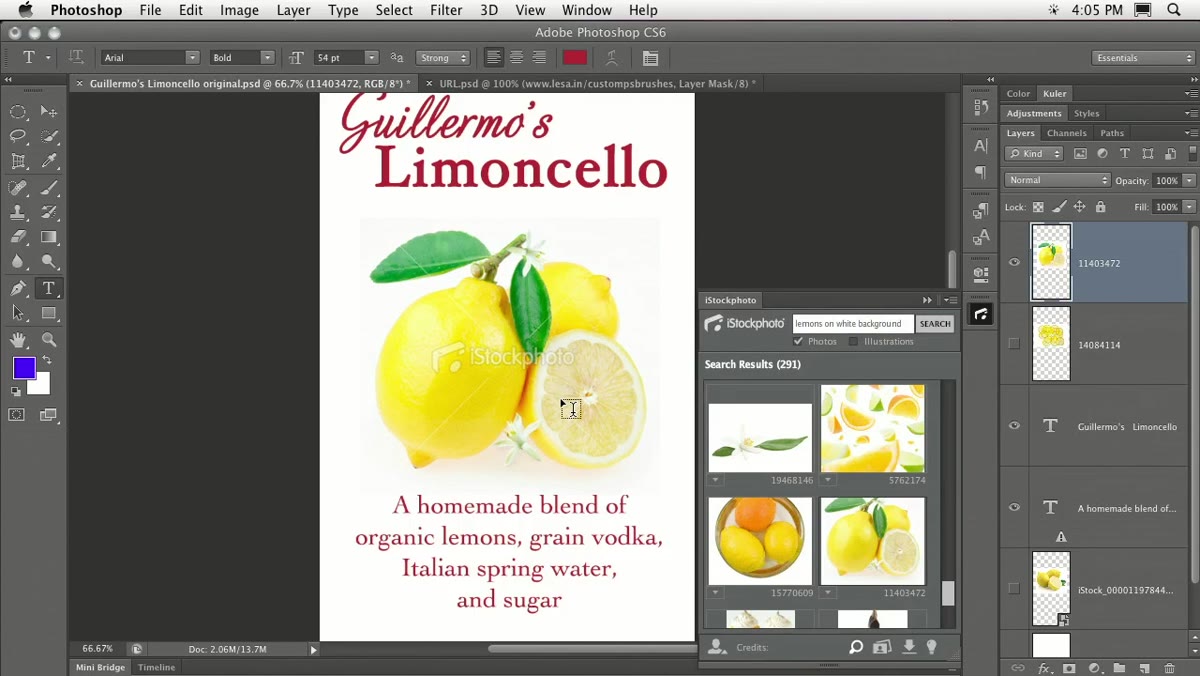
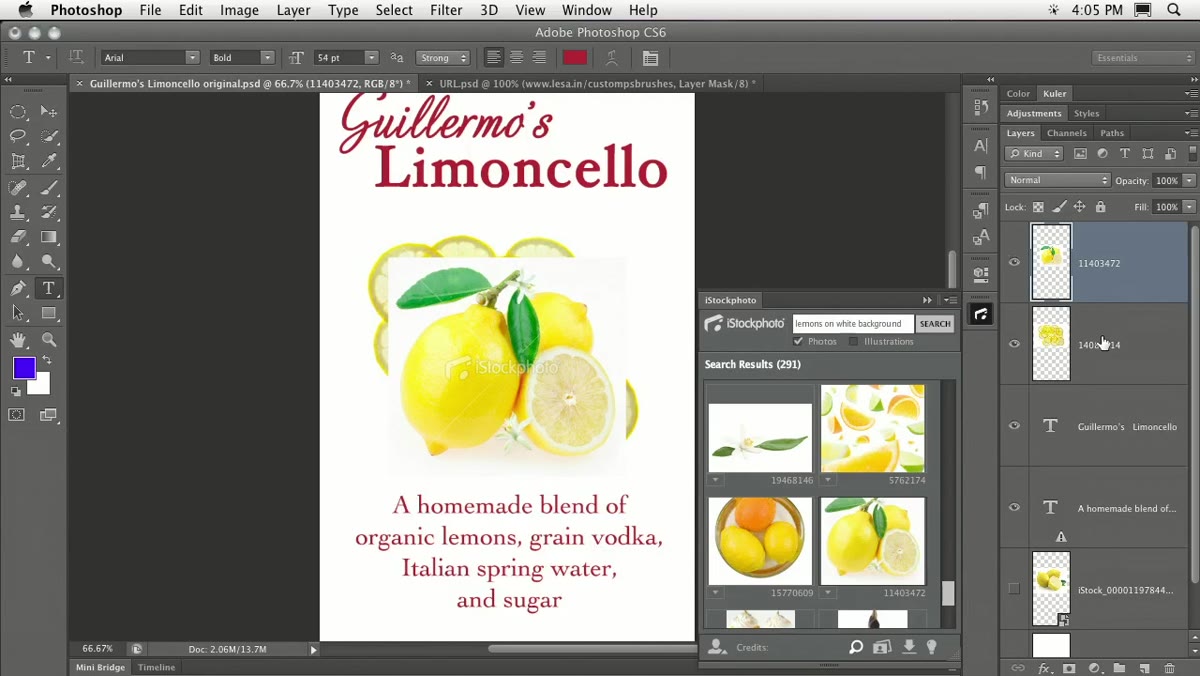 Two comp layers in the Layers panel with visibility toggles being used
You aren’t limited to one comp at a time. Insert as many as you want from the search results, each landing as its own named layer. Toggle visibility on and off to compare them in context. This is genuinely useful when you’re presenting options to a client or art director, because the conversation can happen inside the actual design rather than on a separate mood board document. Lesa’s example shows two lemon images being tested this way on a limoncello label layout. Save the file as a Photoshop document at this stage so all the comp layers are preserved.
Two comp layers in the Layers panel with visibility toggles being used
You aren’t limited to one comp at a time. Insert as many as you want from the search results, each landing as its own named layer. Toggle visibility on and off to compare them in context. This is genuinely useful when you’re presenting options to a client or art director, because the conversation can happen inside the actual design rather than on a separate mood board document. Lesa’s example shows two lemon images being tested this way on a limoncello label layout. Save the file as a Photoshop document at this stage so all the comp layers are preserved.
Step 7: Purchase and Replace When Approved
 Plugin panel showing recently downloaded comps after logging back in
Once a client or art director signs off on an image, open the plugin again. The panel remembers your recent comps and displays them when you log back in, so you don’t need to re-run the search. From there you can move directly into purchasing the full-resolution licensed version. The ID number on the layer makes it easy to match your approved comp to the correct listing in the purchase flow.
Plugin panel showing recently downloaded comps after logging back in
Once a client or art director signs off on an image, open the plugin again. The panel remembers your recent comps and displays them when you log back in, so you don’t need to re-run the search. From there you can move directly into purchasing the full-resolution licensed version. The ID number on the layer makes it easy to match your approved comp to the correct listing in the purchase flow.
How I’d Extend This in a Real Production Workflow
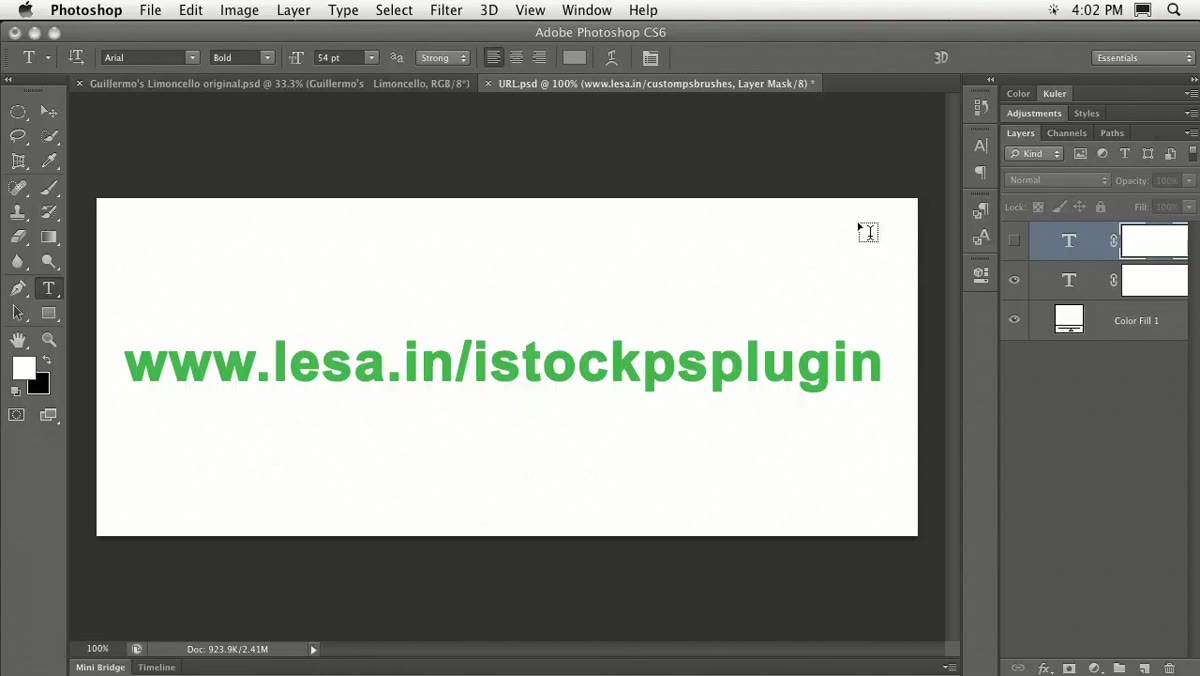
The comp-to-approval loop Lesa describes is solid for design work where image selection is part of the deliverable. Where I’d push it further is in the documentation step. When I’m running multiple client projects in parallel, I keep a reference sheet per project that logs comp IDs alongside the design version they appeared in. It’s a small habit, but when a client comes back three weeks later and says “the one with the lemons on the white background,” you want to know exactly which of the twelve lemon images you tested was the one they approved. The plugin preserves recent comps in the panel, but that history isn’t permanent. Your external record is.
If you’re doing high-volume e-commerce work where the same search terms come up repeatedly across product categories, it’s also worth keeping a saved list of search strings that reliably return usable results. Saves the trial-and-error round on every new project.
The core takeaway here is simple: every context switch costs time. Keeping image sourcing inside Photoshop instead of bouncing between browser tabs and the application is a genuine efficiency gain, especially during the comp and approval phase when nothing is final. The plugin is free, the install takes minutes, and the workflow maps cleanly onto how most design projects actually move.
Watch the full tutorial on YouTube to see Lesa walk through the complete plugin workflow alongside her Photoshop CS6 Intensive content.
Comments (4)
Solid advice. Especially the part about taking your time with it.
Shared this with my photography group. Everyone loved it.
Solid advice. Especially the part about taking your time with it.
This should be required reading for anyone starting out.
Leave a Comment