I track time the way some people track calories. Right now my spreadsheet shows 2,400-plus hours saved through automated workflows across Photoshop alone. So when I watch a tutorial from someone who’s clearly put in the same obsessive thinking about shaving minutes off repetitive tasks, I pay close attention. Watch the full tutorial on YouTube – it’s from Mango Street, and the creator brings 12 years of Premiere Pro experience to a tight rundown of six plugins that genuinely move the needle.
The reason this matters to me, even though my primary tool is Photoshop: I work with ad agencies and e-commerce clients who increasingly need video deliverables alongside their still assets. That means I’m either editing video myself or collaborating with editors who need to match my pace. Sloppy, slow video workflows create bottlenecks that cost everyone money. These six plugins address that directly, and the logic behind them transfers to any production environment where speed and repeatability are non-negotiable.
Step 1: Install Excalibur and Set Up Your First Quick Command
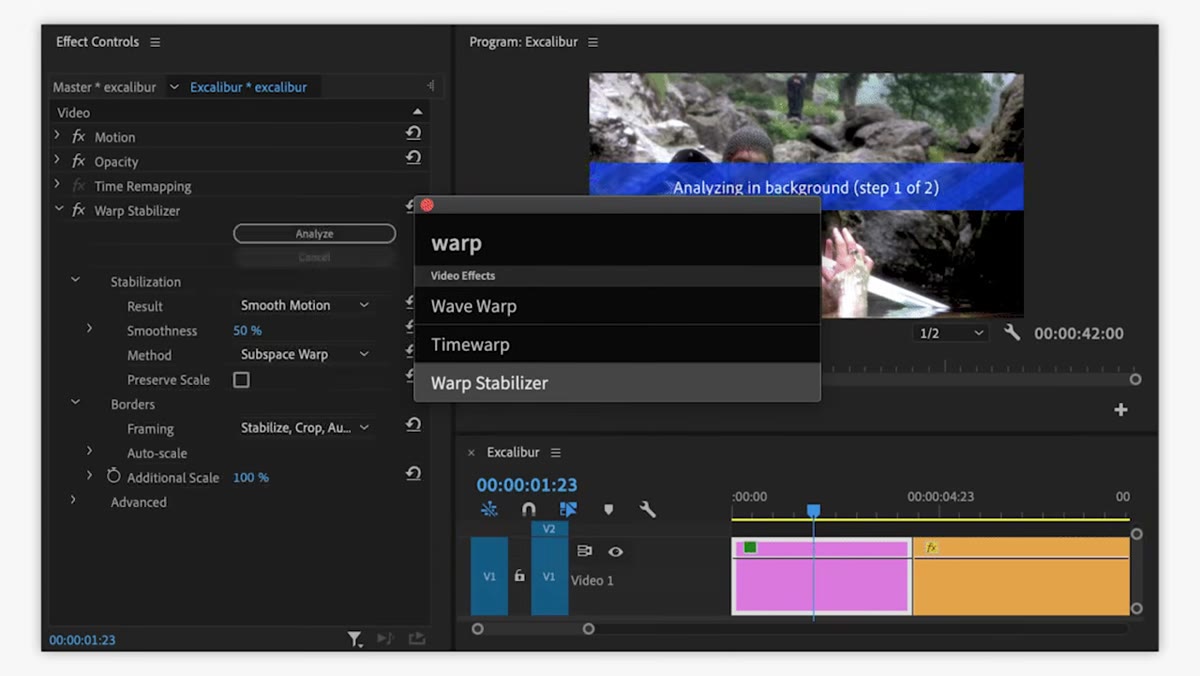 Excalibur search bar overlaid on Premiere Pro timeline
Excalibur is the starting point, and it earns the top slot. Think of it as a command palette for Premiere – similar to how FX Console works in After Effects. You trigger it with a keyboard shortcut, type what you want, and apply effects, presets, or transitions without touching your mouse. That alone would be useful. But the real power is in custom commands.
Excalibur search bar overlaid on Premiere Pro timeline
Excalibur is the starting point, and it earns the top slot. Think of it as a command palette for Premiere – similar to how FX Console works in After Effects. You trigger it with a keyboard shortcut, type what you want, and apply effects, presets, or transitions without touching your mouse. That alone would be useful. But the real power is in custom commands.
The tutorial demonstrates a pasting workflow that normally requires you to enable your target track and disable everything else first. With Excalibur, you type “paste,” select your target track from a submenu, and you’re done. Better yet, you can create a custom command that skips the submenu entirely and always pastes to the highest enabled track. Build it once, use it forever. That’s the same logic behind every Photoshop action I’ve ever built.
Step 2: Use Excalibur’s Custom Commands for Volume Automation
 Custom command sequence for volume keyframe automation
This is where the tutorial gets interesting for anyone who has ever drawn volume automation by hand using the pen tool. The creator built a custom command that strings together a full dip-and-return automation sequence: add a keyframe at the current position, jump forward 20 frames, drop the volume 20 dB, jump another 60 frames, add a keyframe, move ahead 20 more frames, then bring the volume back up 20 dB.
Custom command sequence for volume keyframe automation
This is where the tutorial gets interesting for anyone who has ever drawn volume automation by hand using the pen tool. The creator built a custom command that strings together a full dip-and-return automation sequence: add a keyframe at the current position, jump forward 20 frames, drop the volume 20 dB, jump another 60 frames, add a keyframe, move ahead 20 more frames, then bring the volume back up 20 dB.
Once that command runs, you grab the last two keyframes, hold Shift, and slide them to match the actual length of your audio dip. The repetitive scaffolding is automated. You only make the one judgment call that requires your brain. If you work with dialogue, music beds, or any kind of sound design, this command alone justifies the plugin.
Step 3: Try the Solo Feature for Track Management
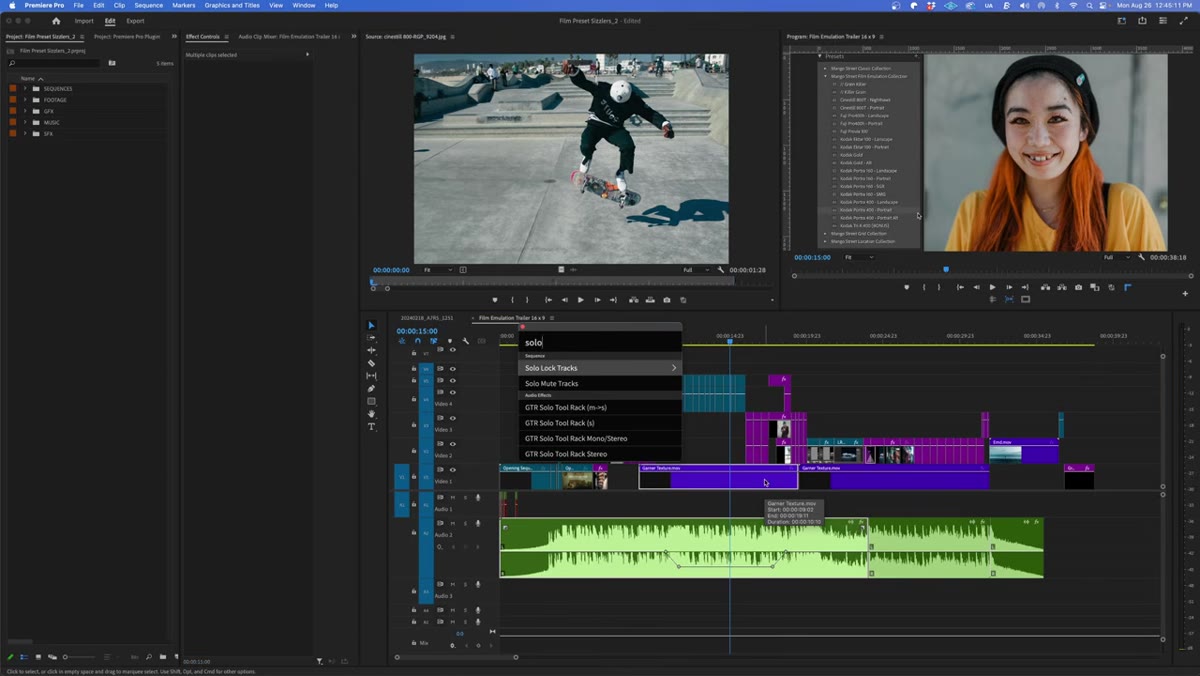 Excalibur solo command applied to selected video and audio tracks
Track management in Premiere gets unwieldy fast on complex timelines. Excalibur’s solo feature lets you highlight the specific video and audio tracks you want to focus on, type “solo,” and everything else drops away. To reverse it, type “solo” again and choose unsolo.
Excalibur solo command applied to selected video and audio tracks
Track management in Premiere gets unwieldy fast on complex timelines. Excalibur’s solo feature lets you highlight the specific video and audio tracks you want to focus on, type “solo,” and everything else drops away. To reverse it, type “solo” again and choose unsolo.
This replaces the tedious process of clicking the visibility toggle on every individual track. On a timeline with a dozen tracks – which is not unusual in a commercial edit – that’s a lot of clicking eliminated. Pair this with the paste command from Step 1 and you start to see how Excalibur compounds its own value the more complex your project becomes.
Step 4: Add Animation Templates with Premiere Composer
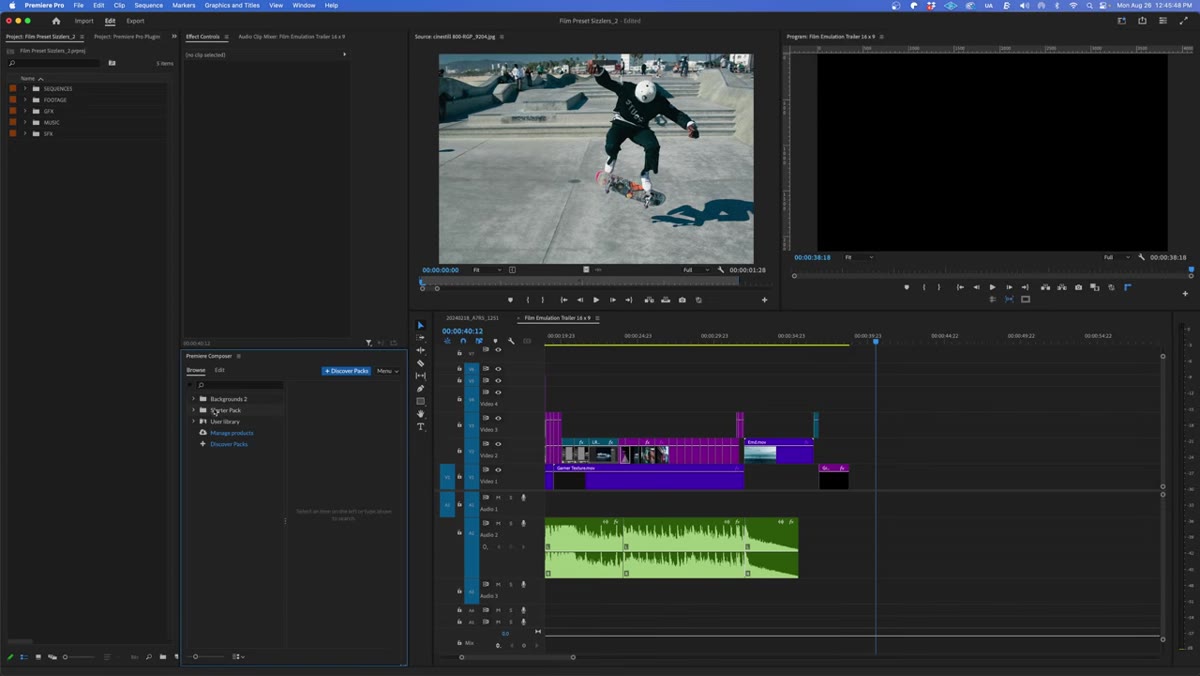 Premiere Composer panel showing animated background templates
Mr. Horse’s Premiere Composer handles the motion graphics layer of the workflow. The plugin gives you a browsable library of animated backgrounds, text presets, transitions, sound effects, and shapes, all draggable directly onto your timeline. Colors and fonts are customizable inside the panel.
Premiere Composer panel showing animated background templates
Mr. Horse’s Premiere Composer handles the motion graphics layer of the workflow. The plugin gives you a browsable library of animated backgrounds, text presets, transitions, sound effects, and shapes, all draggable directly onto your timeline. Colors and fonts are customizable inside the panel.
The free starter pack includes text presets and transitions, which is a legitimate starting point for anyone who doesn’t need the full library. The paid tier has moved to a subscription model, which the tutorial is honest about being a downside. My take: evaluate the free pack first and only subscribe if the paid assets are filling a specific gap in your work.
Step 5: Build Photo Collages Instantly with Shortcake
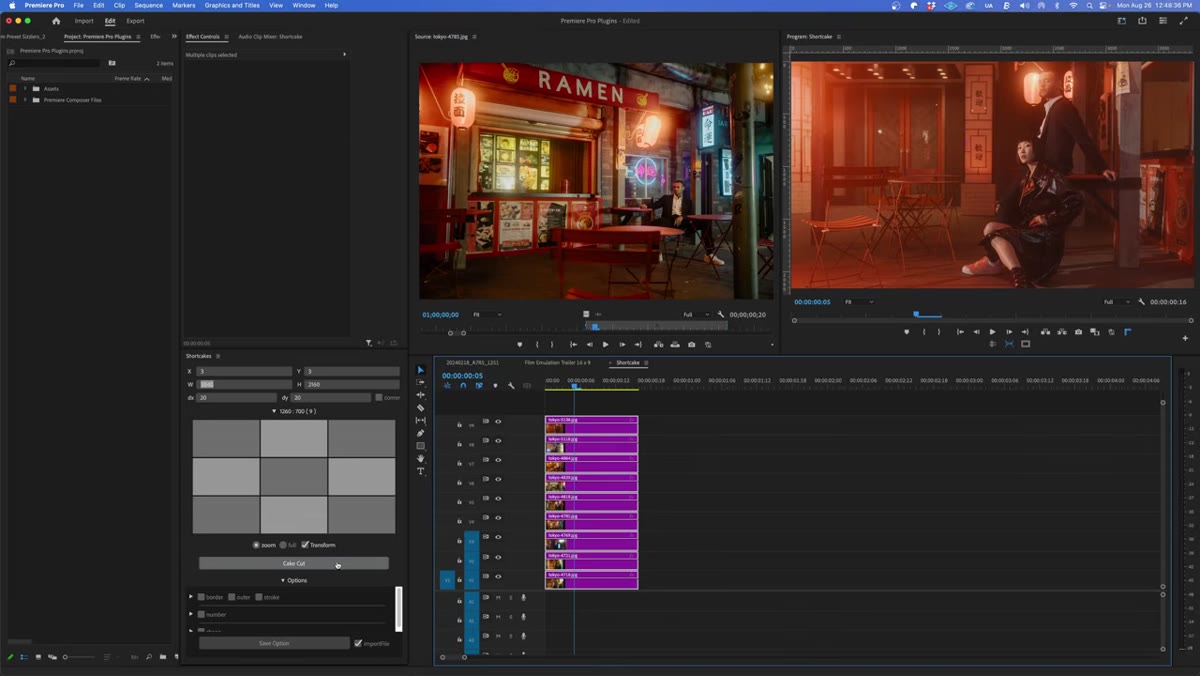 Shortcake grid applied to nine photos on the timeline
Collage layouts in Premiere are painful without a dedicated tool. Shortcake solves this cleanly. Drop your photos onto the timeline, select all the clips, choose your grid dimensions – the tutorial uses a 3x3 for nine photos – and hit the “cake cut” button. The plugin arranges everything automatically.
Shortcake grid applied to nine photos on the timeline
Collage layouts in Premiere are painful without a dedicated tool. Shortcake solves this cleanly. Drop your photos onto the timeline, select all the clips, choose your grid dimensions – the tutorial uses a 3x3 for nine photos – and hit the “cake cut” button. The plugin arranges everything automatically.
You can display the full aspect ratio of each photo or crop everything to a uniform grid. If you want to reorder the layout, swap the clips on the track and recut. It’s not the most feature-rich plugin on this list – the tutorial mentions wanting animated entrances and exits as a future feature – but for static collages it’s a significant time save compared to manually positioning and scaling each clip.
Step 6: Generate Styled Captions with Captioner
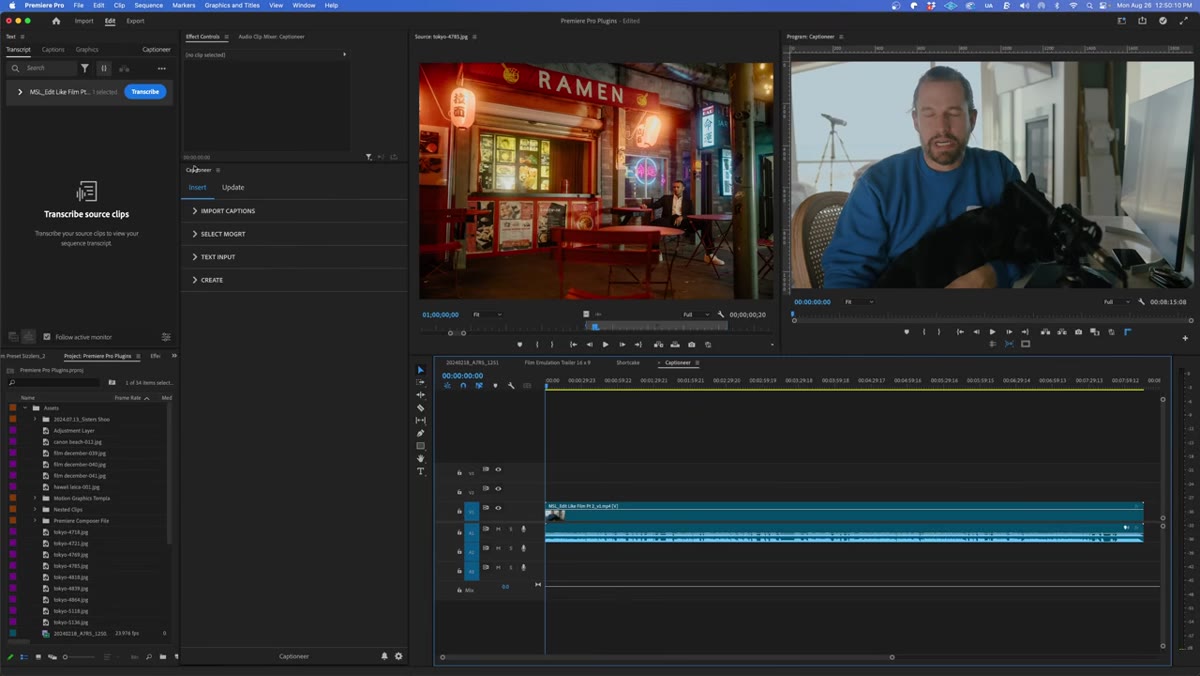 Captioner panel importing transcript from Premiere’s subtitle track
Captioner works in combination with Premiere’s built-in auto-transcribe function. Start by running the transcription in Premiere’s text panel, then manually correct any errors in the generated transcript. Once the text is clean, use Premiere’s caption creation tool to set your maximum subtitle length, display duration, and whether you want single or double lines.
Captioner panel importing transcript from Premiere’s subtitle track
Captioner works in combination with Premiere’s built-in auto-transcribe function. Start by running the transcription in Premiere’s text panel, then manually correct any errors in the generated transcript. Once the text is clean, use Premiere’s caption creation tool to set your maximum subtitle length, display duration, and whether you want single or double lines.
After Premiere generates the subtitle track, hide that layer and import the captions into Captioner’s panel. From there you choose from ten built-in subtitle style templates, or bring in any Motion Graphics Template you already have. Captioner then generates the styled caption clips on your timeline. Final styling adjustments happen in the Essential Graphics panel on any individual clip. For client deliverables that require accessibility compliance or social media captions, this workflow cuts a process that used to take an hour down to minutes.
How I’d Apply This Logic to Still-Image Workflows
The through-line across every plugin in this tutorial is the same principle I applied when I built my first Photoshop action at 26 and stopped manually repeating tasks: identify the decision points in your workflow, automate everything around them, and protect your attention for the judgment calls only you can make.
Excalibur’s custom commands are essentially Photoshop actions for Premiere. Shortcake is a batch processor for layout. Captioner is a smart export preset for text. If you’re coming to video editing from a photo retouching background, you already understand this thinking – you just need to find the right tools on the video side. The plugins in this tutorial are a solid place to start.
The single most important thing this tutorial reinforced for me: every minute you spend building a reusable workflow pays compound interest. The volume automation command probably took the creator 20 minutes to set up once. At the pace a working editor moves, it’s saved him days since then. Start with Excalibur’s free trial, build one custom command this week, and track how often you use it. The answer will tell you everything you need to know about whether to go deeper.
Watch the full tutorial on YouTube to see all six plugins demonstrated in context, including the live timeline examples that show the before-and-after speed difference most clearly.
Comments
Leave a Comment